Forum sponsored by:

Stuart 10H and 10V build thread
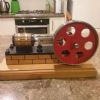
Stuart 10H and 10V stationary steam engine build
| David Clark 1 | 15/11/2015 20:16:30 |
 3357 forum posts 112 photos 10 articles | Hi There I have a Warco WM180 lathe and a Warco WM14 milling machine. Also available are a Warco bandsaw, a Clarke variable speed pillar drill, a bench grinder, a Clarke vertical linisher/ disc sander, a power scroll saw, an engraving machine and an Oldak production tapper. The engines will be made using the Warco lathe and mill and the vertical drilling machine. Photos of the machines will be added as we go through the series. You may comment as you wish, I have a thick skin having been editor of both ME and MEW for many years. You are welome to copy the posts and photos for personal use only.
The 10V casting set is on the left and the 10H set is on the right. First I have to clean off any flash and remove the casting feeds on both engine bases and bedplates.
Andy at Stuart Models has kindly given me permission to include copies of the 3D exploded diagrams of both the 10V and 10H engines. I have no connection with Stuart Models other than being a satisfied user. STUART MODELS Tel: 01308 456 859 Email sales (at) stuartmodels.co.uk
Exploded 3D view of 10V vertical engine above.
Exploded 3D view of 10H horizontal engine above. If you click on the drawings they should enlarge to enable easy reading. I will use Stuart's part numbers if I need to refer to parts.. Edited By JasonB on 17/11/2015 19:24:46 |
| herbert punter | 15/11/2015 20:59:39 |
| 128 forum posts 1 photos | Looking forward to following this build, I have a Stuart 7V to put together when I get the workshop sorted so I expect to pick up plenty of good info from this. Bert |
| V8Eng | 15/11/2015 21:31:39 |
| 1826 forum posts 1 photos | I am looking forward to following this thread, I have an ancient 10H Kit hiding somewhere, it might actually get started one day! |
| mechman48 | 15/11/2015 21:32:47 |
 2947 forum posts 468 photos | Ooooh goody; I have a 10V, an S50, & a Progress set of castings to get started on, probably in the new year now. Looking forward to tips, methodology & info' from your build eagerly. George. |
| ChrisH | 15/11/2015 21:40:55 |
| 1023 forum posts 30 photos | I am also looking forward to this thread. I have a sleeve valve aero engine, a 3 cylinder poppet valve aero engine and a steam feed pump all in part build and help and inspiration in "how-to" methods of machining and work holding from your build will be much appreciated. Chris |
| David Clark 1 | 16/11/2015 08:33:24 |
3357 forum posts 112 photos 10 articles | Thank You all for your kind comments. I have an S50 somewhere and will also do the Stuart oscillator and Progress further down the line. |
| Neil Wyatt | 16/11/2015 09:02:29 |
 19226 forum posts 749 photos 86 articles | Good on you David, I look forwards to following progress. Neil |
| Mike Bondarczuk | 16/11/2015 09:13:30 |
| 91 forum posts 6 photos | Hi David, Really looking forward to seeing your build thread as I have started a 10H as well as an S50 and stopped as due to inexperience have gone back to building a few engines from stock material. However, will be watching with great interest to both builds and no doubt asking questions when faced with uncertainties on my own builds, which I am documenting but not yet publishing and I don t want to hijack this very promising threads of yours. Mike |
| Nick_G | 16/11/2015 09:19:07 |
 1808 forum posts 744 photos | . I shall follow with interest.
Nick |
| David Clark 1 | 16/11/2015 09:44:35 |
3357 forum posts 112 photos 10 articles | Hi Mike bondarczuk Feel free to ask questions even if I have not covered a particular component. I have machined Stuart components before. |
| David Clark 1 | 16/11/2015 10:38:35 |
3357 forum posts 112 photos 10 articles | The 3D Exploaded views have been moved to the first post to make it easier to find them when refering back to part numbers J Edited By JasonB on 17/11/2015 19:26:09 |
| David Clark 1 | 18/11/2015 20:19:23 |
3357 forum posts 112 photos 10 articles | When refering to the Stuart exploded views, I will use the Stuart part Nos suffixed by either V for vertical or H for horizontal.
The photo above shows the 10H box bed part No 29H and the main casting 11H. There is a fair bit of flash to remove but this does not take very long.
The photo above shows the 10V box bed part No 30V and the bedplate part No 29V. There is some flash to be trimmed off as well as a casting lug to file off.
The photo above shows the main trunk guide part No 11V. This is a separate part in the vertical engine but is an integral part of the main bed casting in the 10H. Note the two large casting lugs that will need filing off later.
Three missing "V" suffix added by JasonB Edited By JasonB on 18/11/2015 20:47:01 |
| David Clark 1 | 18/11/2015 20:31:05 |
3357 forum posts 112 photos 10 articles | Cleaning up the 10V box bed.
I held the 10V box bed in the vice to file off the lug and true the bottom up. I used some cardboard in the vice to protect the casting. A better bet would be some aluminum angle soft jaws which I will get at the weekend. I completely removed the lug and filed the base fairly flat.
I used a flat file on the base and sides of the casting and a round file on the sides of the mounting lugs,
After filing the base flat I coated the lower face with black permanent marker. (A sharpie marker pen.)
Then I rubbed the base on a piece of wet and dry paper to remove the marker pen from the high spots. Repeat this sequence, lightly filing away the shiny high spots, until the base is completely flat. You could rub the top surface down flat and end mill the underside instead if you wish but it does not take long to rub the bottom face completely flat. Edited By David Clark 1 on 18/11/2015 20:32:16 |
| Bruce Edney | 18/11/2015 20:48:16 |
 167 forum posts 53 photos | Looking forward to this David as I have a 10D rebuild to do at some point. Cylinder machining was rough as with screw holes breaking through the sides. 2 new castings arrived a couple of weeks ago but still to find time to even look at them. Bruce |
| JasonB | 19/11/2015 07:41:48 |
 25215 forum posts 3105 photos 1 articles | I have deleted several posts. It is worth remembering that beginners may never have been taught how to use a file as metal working is not taught in schools, one only needs to read Brian John's posts to see how little some beginners know. As this is not the magazine and you are not paying to look at it there is no problem with David using as many photos as he likes. Now back to the build, considered comments still welcome.
Edited By JasonB on 19/11/2015 08:14:21 |
| Howi | 19/11/2015 08:43:56 |
 442 forum posts 19 photos | Well done JasonB, beginners need to be encouraged, we can do without the negative comments. The 10V/10H build may well be a simple build for many, others like me need all the help we can get. Very brave of you Dave, keep the thread going, I for one will learn a great deal. Howard |
| David Clark 1 | 19/11/2015 09:10:54 |
3357 forum posts 112 photos 10 articles | Filing is not difficult. With the base above, just file off the lug and then file the base flat. To file flat try and file the base hollow using the flat face of a file. It is difficult if not impossible to file hollow so the result will be a flat surface possibly with a bow. That is where the felt tip and wet and dry come in. By coating the casting's edge and then rubbing on the wet and dry paper the high spots will show as shiny bits while the low spots will retain the marker pen. Keep lightly removing the high spots, recoating and rubbing on the wet and dry paper. Eventually you will have a flat casting. I will cover milling the 10H base casting later on. I will use whatever photos that are needed to show the individual operations, the quantity will reduce as we go through the build. Edited By David Clark 1 on 19/11/2015 09:11:45 |
| clive swinney | 19/11/2015 14:26:16 |
| 6 forum posts | Should be interesting. I have built the 10H and 10V and am now building the Score.Out of interest the 10H cost £12.19 at the Model Engineering Exhibition in 1983 |
| Stuart Bridger | 19/11/2015 14:32:58 |
| 566 forum posts 31 photos | Just finished the "core build" on my first model, which is a 10V. I am currently at the "running in" stage before I strip down for finishing. i will be following with interest to see how how the various tasks are tackled. |
| Ferrum | 19/11/2015 15:15:50 |
| 23 forum posts | Hi David. Thank you for writing this build thread. I am at the same position as Stuart. I learnt a lot from Harold Hall's 10V MEW articles and web-site. I feel sure that I will learn some more from another editor of MEW! Ron |


Please login to post a reply.
Magazine Locator
Want the latest issue of Model Engineer or Model Engineers' Workshop? Use our magazine locator links to find your nearest stockist!
Sign up to our Newsletter
Sign up to our newsletter and get a free digital issue.
You can unsubscribe at anytime. View our privacy policy at www.mortons.co.uk/privacy
Latest Forum Posts
- *Oct 2023: FORUM MIGRATION TIMELINE*
05/10/2023 07:57:11 - Making ER11 collet chuck
05/10/2023 07:56:24 - What did you do today? 2023
05/10/2023 07:25:01 - Orrery
05/10/2023 06:00:41 - Wera hand-tools
05/10/2023 05:47:07 - New member
05/10/2023 04:40:11 - Problems with external pot on at1 vfd
05/10/2023 00:06:32 - Drain plug
04/10/2023 23:36:17 - digi phase converter for 10 machines.....
04/10/2023 23:13:48 - Winter Storage Of Locomotives
04/10/2023 21:02:11 - More Latest Posts...
- View All Topics
Support Our Partners


Shopping Partners
Subscription Offer

Latest "For Sale" Ads
- Reeves** - Rebuilt Royal Scot by Martin Evans
by John Broughton
£300.00 - BRITANNIA 5" GAUGE James Perrier
by Jon Seabright 1
£2,500.00 - Drill Grinder - for restoration
by Nigel Graham 2
£0.00 - WARCO WM18 MILLING MACHINE
by Alex Chudley
£1,200.00 - MYFORD SUPER 7 LATHE
by Alex Chudley
£2,000.00 - More "For Sale" Ads...
Latest "Wanted" Ads
- D1-3 backplate
by Michael Horley
Price Not Specified - fixed steady for a Colchester bantam mark1 800
by George Jervis
Price Not Specified - lbsc pansy
by JACK SIDEBOTHAM
Price Not Specified - Pratt Burnerd multifit chuck key.
by Tim Riome
Price Not Specified - BANDSAW BLADE WELDER
by HUGH
Price Not Specified - More "Wanted" Ads...
Get In Touch!
Do you want to contact the Model Engineer and Model Engineers' Workshop team?
You can contact us by phone, mail or email about the magazines including becoming a contributor, submitting reader's letters or making queries about articles. You can also get in touch about this website, advertising or other general issues.
Click THIS LINK for full contact details.
For subscription issues please see THIS LINK.
Digital Back Issues


Donate

 Register
 Log-in
Model Engineer Magazine
- Percival Marshall
- M.E. History
- LittleLEC
- M.E. Clock

ME Workshop
- An Adcock
- & Shipley
- Horizontal
- Mill

Subscribe Now
- Great savings
- Delivered to your door

Pre-order your copy!
- Delivered to your doorstep!
- Free UK delivery!
All Forum Topics > Stationary engines > Stuart 10H and 10V build thread