Forum sponsored by:

The Workshop Progress Thread 2020
| Roderick Jenkins | 15/01/2020 23:04:51 |
 2376 forum posts 800 photos | MAP ( note the one P ) is readily available. It is mostly propylene and is sold as a substitute for MAPP since it burns a bit hotter than propane but does not have the other desirable properties. Acetylene is probably the stuff to use for these atmospheric engines. Calcium carbide seems to be available so making a simple generator shouldn't be beyond the wit of an engineer. Rod |
| Martin W | 16/01/2020 00:44:41 |
| 940 forum posts 30 photos | Screwfix sell this which looks like Mapp gas, complete withy the double 'p', but whether it is the same as the old version of Mapp gas I have no idea. May be worth investigating. Martin |
| JasonB | 16/01/2020 07:20:14 |
 25215 forum posts 3105 photos 1 articles | But the Screwfix one is listed as MAP/Pro one of several like Rod says that are mostly propylene. The MAPP name is still used on some products but they are not the original gas, bit like lots of other products that have had the contents changed over the years It is not the temperature of the gas that matters on these engines but the way it ignites and burns which is the closest to old town gas that they would have run off. |
| Ron Laden | 16/01/2020 07:50:05 |
 2320 forum posts 452 photos | I read yesterday that the production of the original MAPP gas ceased in 2008.
|
| mechman48 | 16/01/2020 17:11:06 |
 2947 forum posts 468 photos | Done a bit more on the frames of my beam engine, looks like a model is emerging...
George. |
| Rockingdodge | 16/01/2020 18:20:14 |
 396 forum posts 111 photos | Reassembled my mini mill with taper roller bearings top and bottom, all looking good so far. Now need to go through adjusting gibs etc and then make swarf and see if I have improvements or not. Next stage will be power traverse. Roger |
| geoff walker 1 | 16/01/2020 19:36:22 |
| 521 forum posts 217 photos | Hi George, Did you cut/machine those frames yourself or are they laser cut. If the former, well done, great job. If the latter......... Nice work George, keep the photos coming Geoff |
| Michael Gilligan | 16/01/2020 20:17:55 |
 23121 forum posts 1360 photos | Posted by Martin W on 16/01/2020 00:44:41:
Screwfix sell this which looks like Mapp gas, complete withy the double 'p', but whether it is the same as the old version of Mapp gas I have no idea. May be worth investigating. Martin . Duly investigated, Martin ... **LINK** https://ulmysds.com/Handlers/PdfTransformer.ashx?p0=315&p1=10009&p2=1&p3=0&p4=1&p5=0&p6=-1&p7=null ... Check the ‘Product code’ entry ”Oh what a tangled web we weave, when first we practice to deceive!” MichaelG. . Explanation on Wikipedia: https://en.wikipedia.org/wiki/MAPP_gas Edited By Michael Gilligan on 16/01/2020 20:30:56 |
| mechman48 | 16/01/2020 20:27:53 |
2947 forum posts 468 photos | Posted by geoff walker 1 on 16/01/2020 19:36:22:
Hi George, Did you cut/machine those frames yourself or are they laser cut. If the former, well done, great job. If the latter......... Nice work George, keep the photos coming Geoff Originally I got some 3mm stainless frames laser cut by a friend who retired from a co. & still has links within it, which were spot on but the drawing asked for 6mm plate/brass/ aluminium so that the tapped bearing locations could be marked off the centre line, 3mm was too thin. He said the laser machine would blast the thin ribs when the machine power was adjusted to cut 6mm, & he couldn't get hold of any 6 mm steel; so he told me ?. I ended up buying some 6mm aluminium plate & started from scratch, remarking out the profile & set to drilling radii in the corners, chain drilling the outer profile out followed up with flat filing, then piercing saw the inner shapes out to suit, finally using small ( 4" ) smooth files to remove excess followed up with flat, round & 1/ 2 round needle files to draw file & finish off, so yes all done by myself. I've already done a few more of the fiddley bits, plus crankshaft...
My next step is to do the beam; I was looking at using a casting from Stuarts models but after e mailing them for info' their castings are too big so I will have to mill out from solid, the drawing call for MS plate but am tempted to use 6mm aluminium plate left over from frames, easier to machine out Machining the CI flywheel...
George.
|
| Jim Nic | 16/01/2020 21:26:52 |
 406 forum posts 235 photos | By 'eck George, that must have been a fair old bucket of swarf, good looking frames though. Nice finish on the crankshaft too. Keep it up. Jim |
| John Hinkley | 25/01/2020 13:45:15 |
 1545 forum posts 484 photos | I said in a previous post in the 2019 thread that I foresaw a marathon gear-cutting session looming. It did! Spread over a number of days and those days spread over a couple of weeks to preserve both my sanity and what remains of my hearing, I've at last finished the machining of the entire gearset for my 5-speed gearbox. Here they all are, laid out from left to right, 5th to reverse.
Boy, am I glad that bit's over! I'm going to use 10mm thick perspex sheet as casing "faces" which in turn will be fixed to a base plate made from an off-cut of solid oak kitchen worktop. That should be interesting in itself, as I've given away all my woodworking tools. More photos to come, as work progresses. John
|
| JasonB | 26/01/2020 16:23:04 |
25215 forum posts 3105 photos 1 articles | Gears look good John
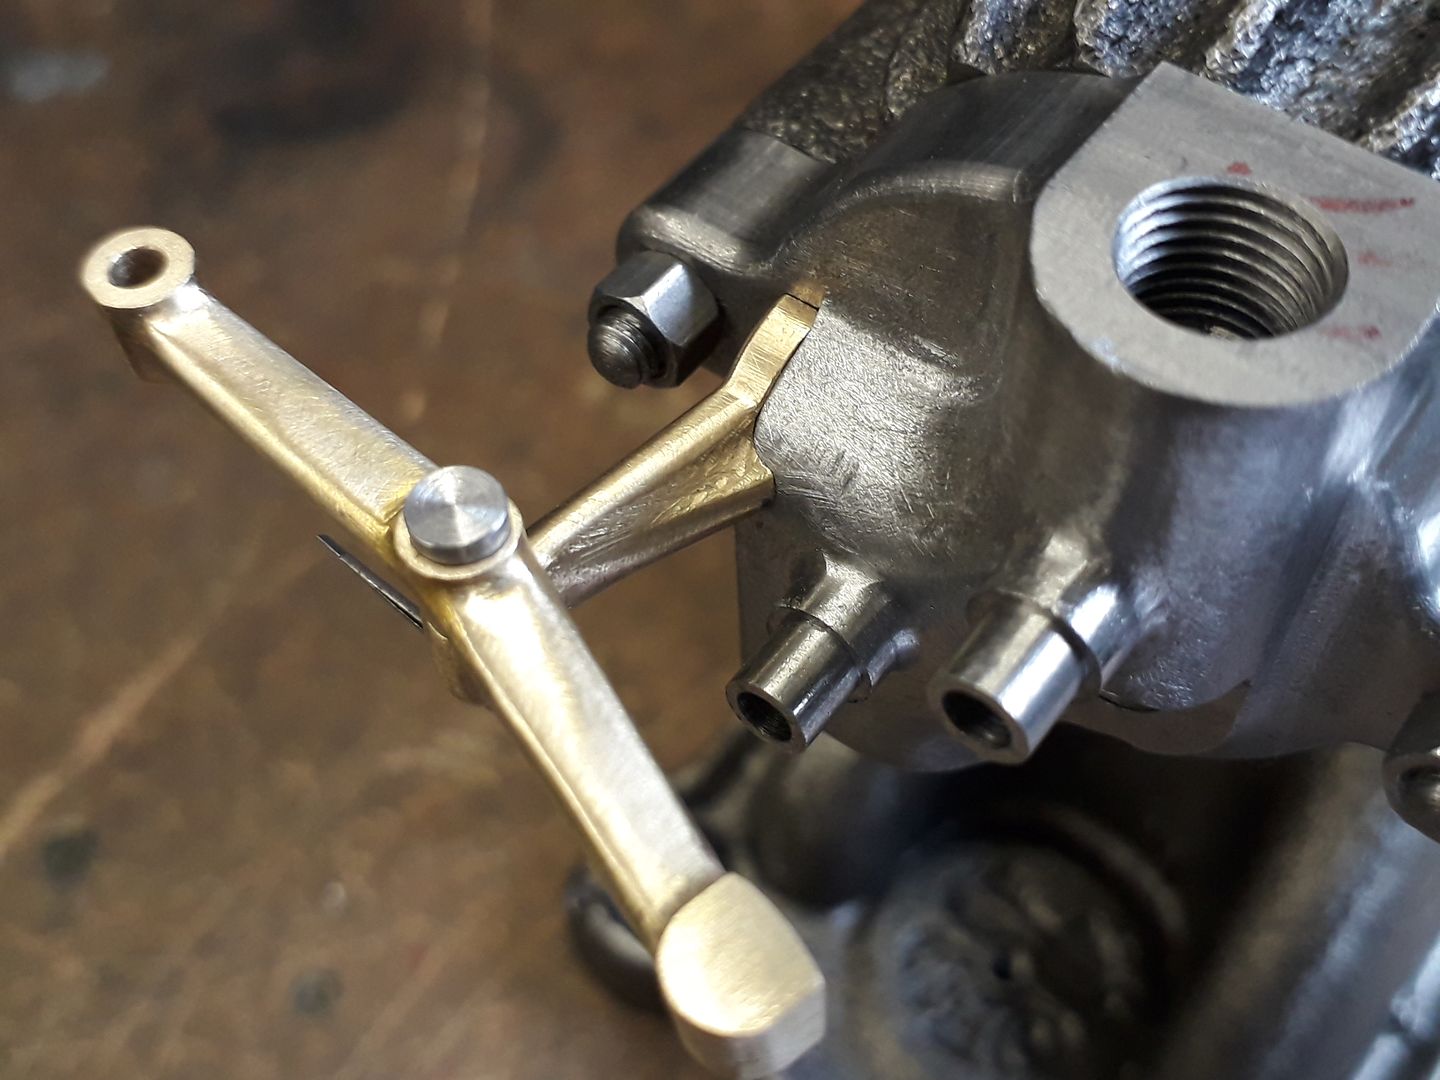
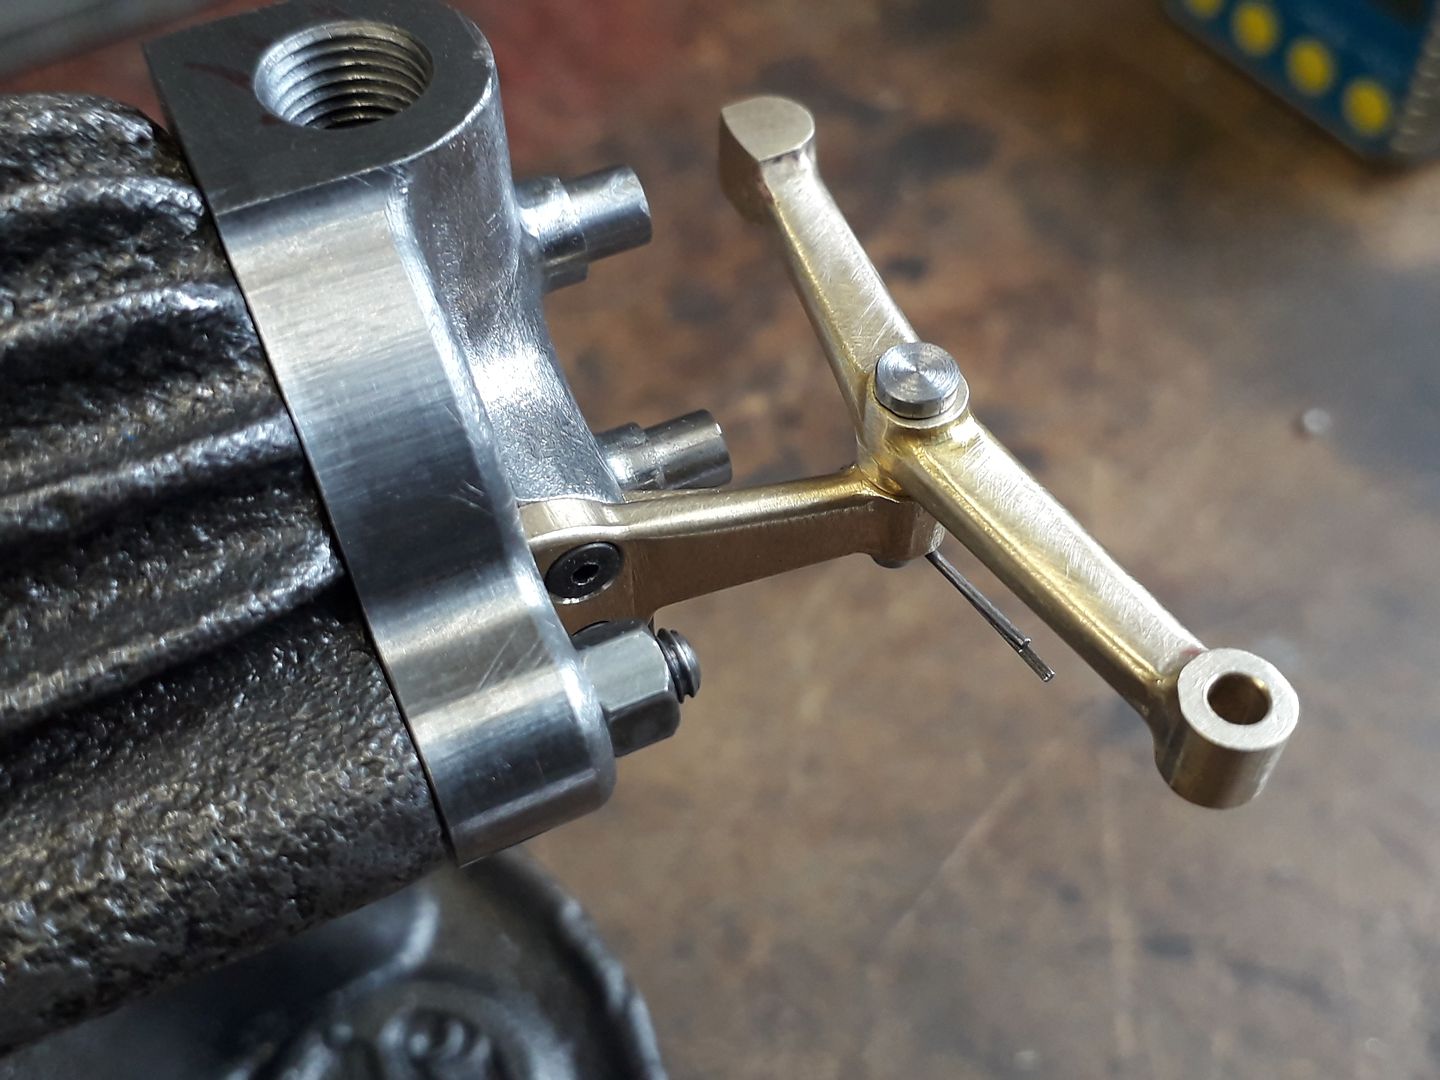
I have machined a few more bits for the 4-stroke conversion of the RMC engine. rocker arm to operate the exhaust valve and a post to mount it on that is fixed to the head. I will bond this on with JBWeld and also fill the CSK screw holes and add some fillets to the internal corners so that the post looks like it was cast as one with the head. Both done on the KX3 and needing two setups each so that both sides could be machined.
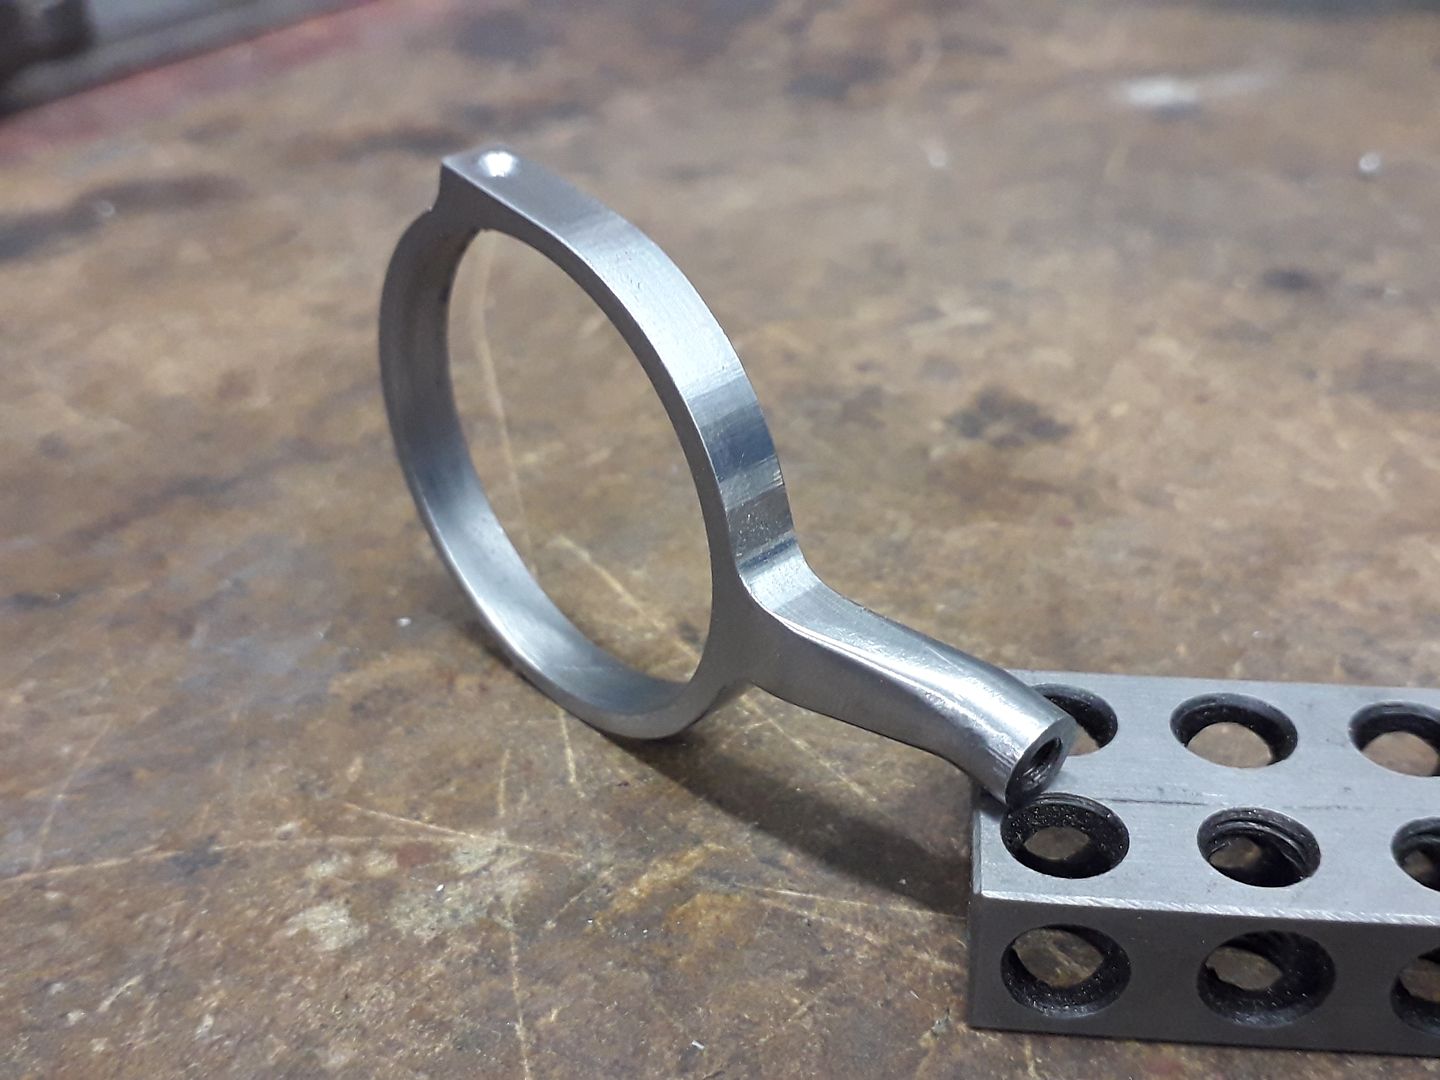
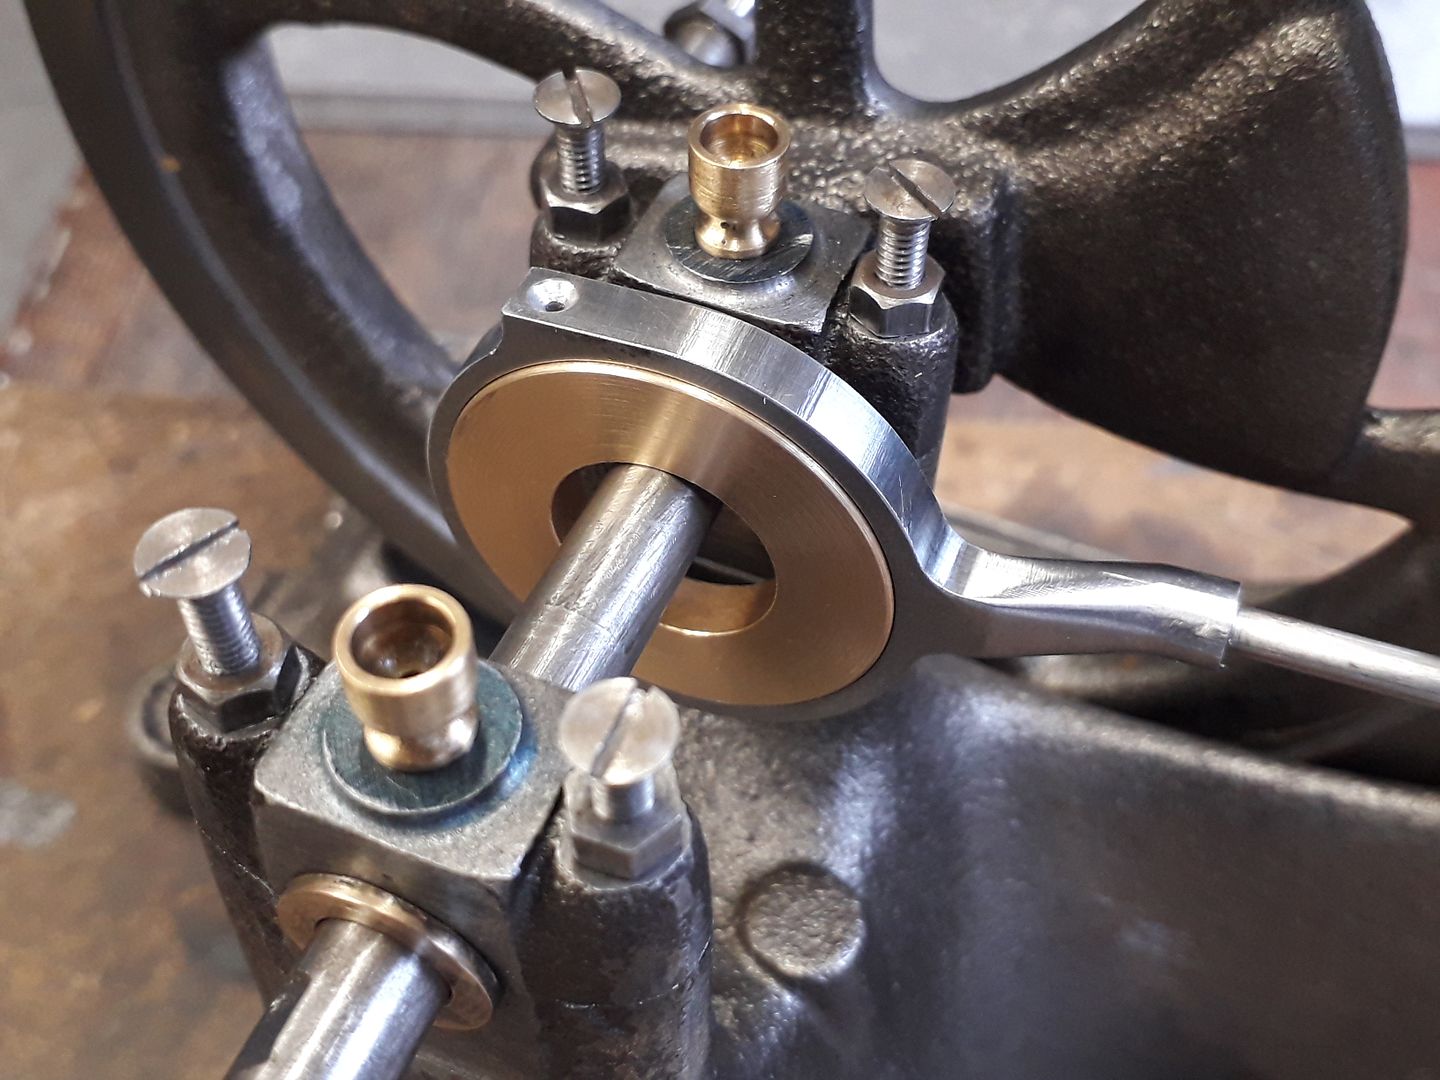
And made a start on the epicyclic gearbox by cutting the eccentric on the CNC which did the profile with ease and also made light work of the doglegged end that lofts from a rectangle at the eccentric to a circle where the rod enters with just a light touch of a needle file required to blend the remaining too step overs. That is a 10-20-40 block not a 1-2-3 one!
|
| Jim Nic | 28/01/2020 21:29:00 |
406 forum posts 235 photos | Some more progress on the Muncaster double acting oscillator engine. All of a sudden I now seem to have the major parts completed so I did a trial assembly
After that it looked as if it would run so I hooked up some air and lo and behold it did. I’m pleased with the way it ran considering the cylinder bottom cover is held with just 2 fasteners, there is no piston ring or piston rod gland seal and the port face has not been bedded to the cylinder. Plenty still to do. It needs a dummy output pully, some cylinder cladding, a wooden base, some decent pipework and of course a splash of paint. Jim Edited By Jim Nic on 28/01/2020 21:30:27 Edited By Jim Nic on 28/01/2020 21:32:12 |
| mechman48 | 28/01/2020 22:17:07 |
2947 forum posts 468 photos | Looking nice Jim; running nicely with more of a 'sigh' than a tick, tick, even without the gland seal & port face bedded in. George. |
| Steviegtr | 28/01/2020 22:28:15 |
 2668 forum posts 352 photos | That is lovely. Great to see it running. |
| Anthony Knights | 29/01/2020 09:06:58 |
| 681 forum posts 260 photos | Made these what I presume are called T bolts, from some redundant 8mm coach bolts. Turned down the threaded 8mm part to 6mm and cut a new thread. Then milled flats on the sides of the bolt heads so they would fit in the T slots of the table I will be using on a tool and cutter grinder I am rebuilding. |
| geoff walker 1 | 29/01/2020 18:38:35 |
| 521 forum posts 217 photos |
Well done, looking good, some nice personal touches, domed nuts, studs and nuts, two piece bearing housings and brass oilers. What sort of compressor are you using? I use an airbrush compressor and I found it lacks the volume to run this engine at high speed for an extended period. It will run it all day just ticking over but high speed only in short bursts. Keep the photos coming Jim enjoying it. Have a look in your mailbox I'm sending you a P.M. Geoff
|
| Jim Nic | 29/01/2020 20:37:57 |
406 forum posts 235 photos | George, Stevie and Geoff Thanks for the kind words, after that I'm tempted to leave it as is. My compressor is a Bambi, not the silent type as the ones I saw at the time I needed one did not have a very big free air delivery rate. It is quite compact though and has a decent size receiver so once it's up to pressure it will run this engine at a slow speed for ages before it kicks in again. Jim |
| mechman48 | 01/02/2020 16:42:44 |
2947 forum posts 468 photos | A couple more pieces made for my beam engine ; eccentric rod & yoke, main con rod & yoke ...
Conrod yoke held in Stevenson block for easier machining.
George. Edited By mechman48 on 01/02/2020 16:43:35 |
| Mark Rand | 01/02/2020 20:16:14 |
| 1505 forum posts 56 photos | Been steadily working away in the shed since 09:00 making a 'tray' to sit the beaver milling machine in. The shed floor isn't as even as it should have been (my fault), so self levelling casters/feet are an alternative to wedging/grouting machines into place. I finally gave up at about 20:00 when I realised that my welds were getting worse with practice... |


.jpg")
.jpg")


.jpg")
.jpg")
.jpg")
This thread is closed.
Magazine Locator
Want the latest issue of Model Engineer or Model Engineers' Workshop? Use our magazine locator links to find your nearest stockist!
Sign up to our Newsletter
Sign up to our newsletter and get a free digital issue.
You can unsubscribe at anytime. View our privacy policy at www.mortons.co.uk/privacy
Latest Forum Posts
- *Oct 2023: FORUM MIGRATION TIMELINE*
05/10/2023 07:57:11 - Making ER11 collet chuck
05/10/2023 07:56:24 - What did you do today? 2023
05/10/2023 07:25:01 - Orrery
05/10/2023 06:00:41 - Wera hand-tools
05/10/2023 05:47:07 - New member
05/10/2023 04:40:11 - Problems with external pot on at1 vfd
05/10/2023 00:06:32 - Drain plug
04/10/2023 23:36:17 - digi phase converter for 10 machines.....
04/10/2023 23:13:48 - Winter Storage Of Locomotives
04/10/2023 21:02:11 - More Latest Posts...
- View All Topics
Support Our Partners


Shopping Partners
Subscription Offer

Latest "For Sale" Ads
- Reeves** - Rebuilt Royal Scot by Martin Evans
by John Broughton
£300.00 - BRITANNIA 5" GAUGE James Perrier
by Jon Seabright 1
£2,500.00 - Drill Grinder - for restoration
by Nigel Graham 2
£0.00 - WARCO WM18 MILLING MACHINE
by Alex Chudley
£1,200.00 - MYFORD SUPER 7 LATHE
by Alex Chudley
£2,000.00 - More "For Sale" Ads...
Latest "Wanted" Ads
- D1-3 backplate
by Michael Horley
Price Not Specified - fixed steady for a Colchester bantam mark1 800
by George Jervis
Price Not Specified - lbsc pansy
by JACK SIDEBOTHAM
Price Not Specified - Pratt Burnerd multifit chuck key.
by Tim Riome
Price Not Specified - BANDSAW BLADE WELDER
by HUGH
Price Not Specified - More "Wanted" Ads...
Get In Touch!
Do you want to contact the Model Engineer and Model Engineers' Workshop team?
You can contact us by phone, mail or email about the magazines including becoming a contributor, submitting reader's letters or making queries about articles. You can also get in touch about this website, advertising or other general issues.
Click THIS LINK for full contact details.
For subscription issues please see THIS LINK.
Digital Back Issues


Donate

 Register
 Log-in
Model Engineer Magazine
- Percival Marshall
- M.E. History
- LittleLEC
- M.E. Clock

ME Workshop
- An Adcock
- & Shipley
- Horizontal
- Mill

Subscribe Now
- Great savings
- Delivered to your door

Pre-order your copy!
- Delivered to your doorstep!
- Free UK delivery!
All Forum Topics > Work In Progress and completed items > The Workshop Progress Thread 2020