Forum sponsored by:

The Workshop Progress Thread
Report your modelling and workshop milestones in this thread.
| JasonB | 10/10/2015 07:39:22 |
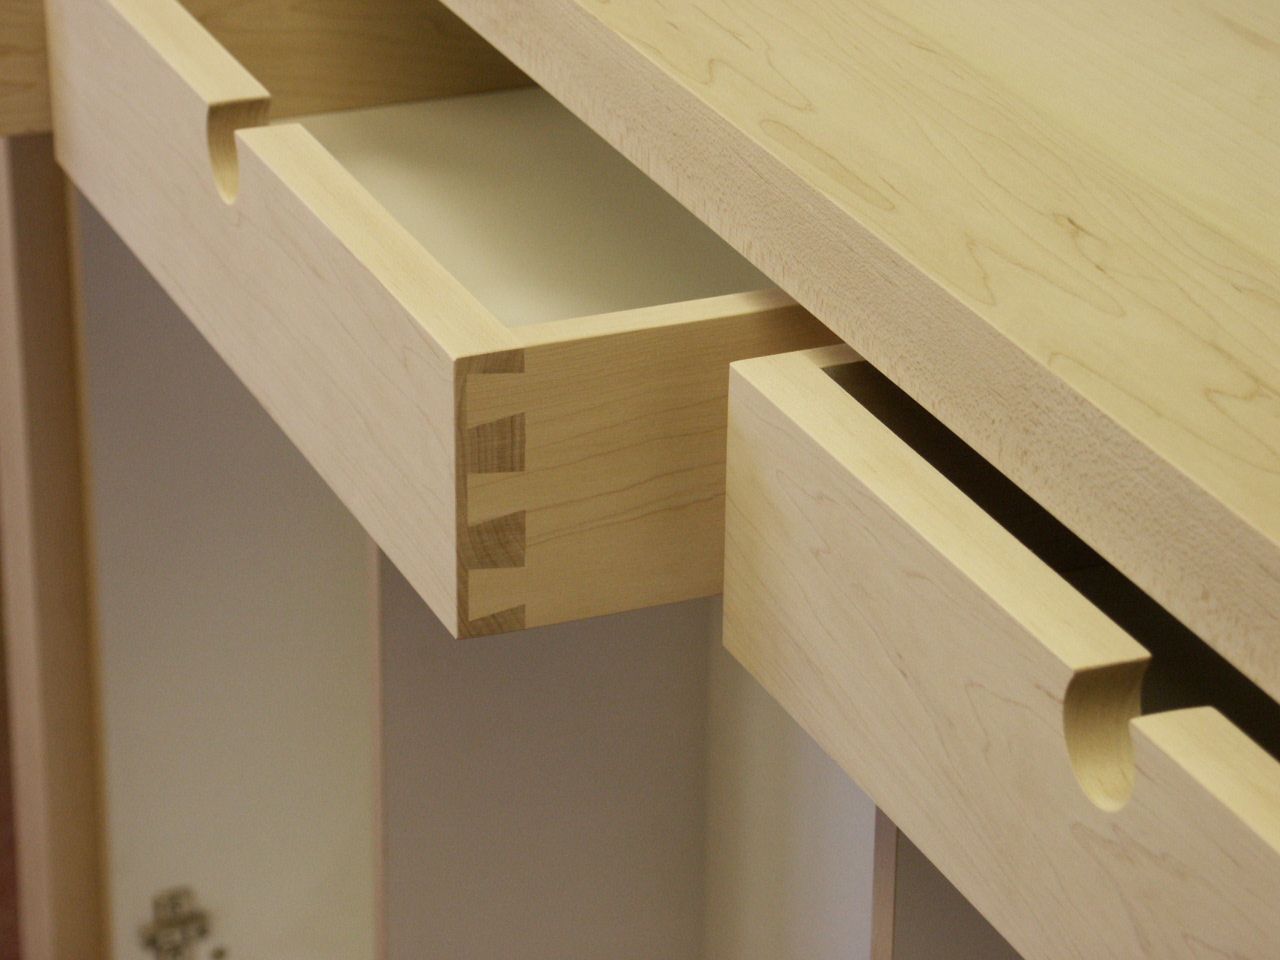
 25215 forum posts 3105 photos 1 articles | Nice engraving John, only one slight problem you have got your tails and pins mixed up, the idea is that as you pull on the front of the draw the pins will tighten into the "wedge" shape of the tails. As you have it the front will slide straight out of the joint. Although blind this is one I prepared earlier
Edited By JasonB on 10/10/2015 07:39:40 |
| Michael Gilligan | 10/10/2015 07:54:13 |
 23121 forum posts 1360 photos | Lovely work, Jason MichaelG. |
| Roderick Jenkins | 10/10/2015 09:19:25 |
 2376 forum posts 800 photos | Posted by Michael Gilligan on 10/10/2015 07:54:13:
Lovely work, Jason MichaelG. It certainly is. I tried cutting some dovetails last week. Gave up and used butt joints Rod |
| OuBallie | 10/10/2015 12:36:42 |
 1181 forum posts 669 photos | Rod, Man after my own heart! Gave up on 'proper' wood joints years ago Nice work Jason? Geoff - Metal any day, although I did enjoy making all those tool drawers. |
| KWIL | 10/10/2015 15:58:52 |
| 3681 forum posts 70 photos | The best competitive dovetails are the secret dovetails used on a mitre joint. Used them on a 24" sideboard made many years ago in Mahogany, sorry cannot show them, they are glued inside the mitre |
| Ian P | 10/10/2015 20:46:16 |
 2747 forum posts 123 photos | Posted by John Stevenson on 09/10/2015 22:45:09:
I have a penchant for wooden toolboxes, engineers type that is. So enough waffling about the past and fast forward to today. Three examples [ one didn't come out, weird font ] top and bottom are cut letters at low power, third one down is engraved or scanned. This is just a bit of crappy ply packing case sprayed afterwards with a rattle can of easing oil to get a uniform finish. Certainly looks promising and needs a bit more input. John I think this must be your first post where you have resorted to true bodging! In all your previous posts processes you have described as bodging, have actually been repairing, modifying and making things, by practical, expedient, ingenious, and clever engineering. These fake dovetails are completely at odds with your normal methods. Good dovetails are only visible by the differences in wood texture and grain direction, the joint lines might be undetectable otherwise. Etching thick lines with a laser is highlighting something that should not be there (and certainly not on the drawer face). Indelibly marking the drawers contents is OK if the contents are never going to change but if you are going to put text on there at least use a clear font. As a more engineering alternative you could laser cut the text deep enough to fill with epoxy loaded with bronze powder which could then be sanded flush so it looked like metal inlay. If you are going to make drawers why not comb-joint them (stack of slitting saws or indexed slots)? They would be visible on the front face but at least they are strong and look good, or at least look 'engineering like' On the other hand, maybe I got the wrong end of the stick and your fake dovetails were meant in jest? Ian P
|
| Michael Horner | 11/10/2015 19:57:06 |
| 229 forum posts 63 photos |
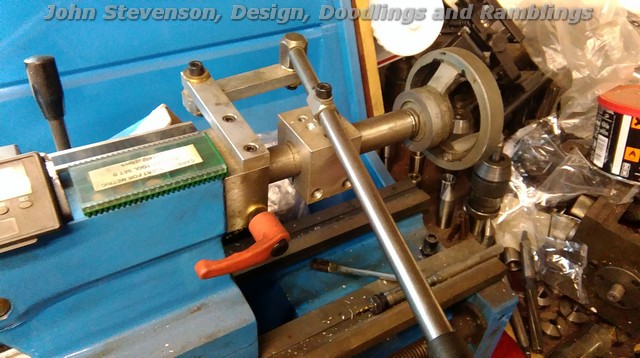
Finished my lever tailstock today only to find that when applying pressure to the drill bit the thing twists. The clamp bolt is tight. Looks like I will have to redesign the linkage so that the force is along the bed.
Had more luck with my lantern chuck!
Cheers Michael. |
| John Stevenson | 12/10/2015 15:07:34 |
 5068 forum posts 3 photos | Michael, Change your linkage over and put the link at the back.
I originally had mine like yours and experienced jamming etc.
John S. |
| Michael Horner | 12/10/2015 18:36:26 |
| 229 forum posts 63 photos | Thanks John. I will try that. Cheers Michael. |
| Bazyle | 12/10/2015 22:02:34 |
 6956 forum posts 229 photos | For anyone wanting a lever feed this is JS original post on his design. Final version of lever connection is quite some time later. Note a page or two earlier is what drove him to it, the annoyance of the taper ejecting before the barrel is fully retracted. |
| Ian Parkin | 13/10/2015 12:51:21 |
 1174 forum posts 303 photos | I bought a secondhand tailstock to try and make a lever action ram but found it too hard work when drilling larger than 6 mm or so...too much force needed so back to the drawing board and a BL mini steering rack was put into service as a sort of capstan drive Works well.. lots of feel on small bits and lots of power with larger ones
|
| Ian Parkin | 13/10/2015 12:58:56 |
1174 forum posts 303 photos | This was my lever action unit made the block that screws into the casting so it was just a modification to mount the steering rack
|
| JasonB | 17/10/2015 20:18:44 |
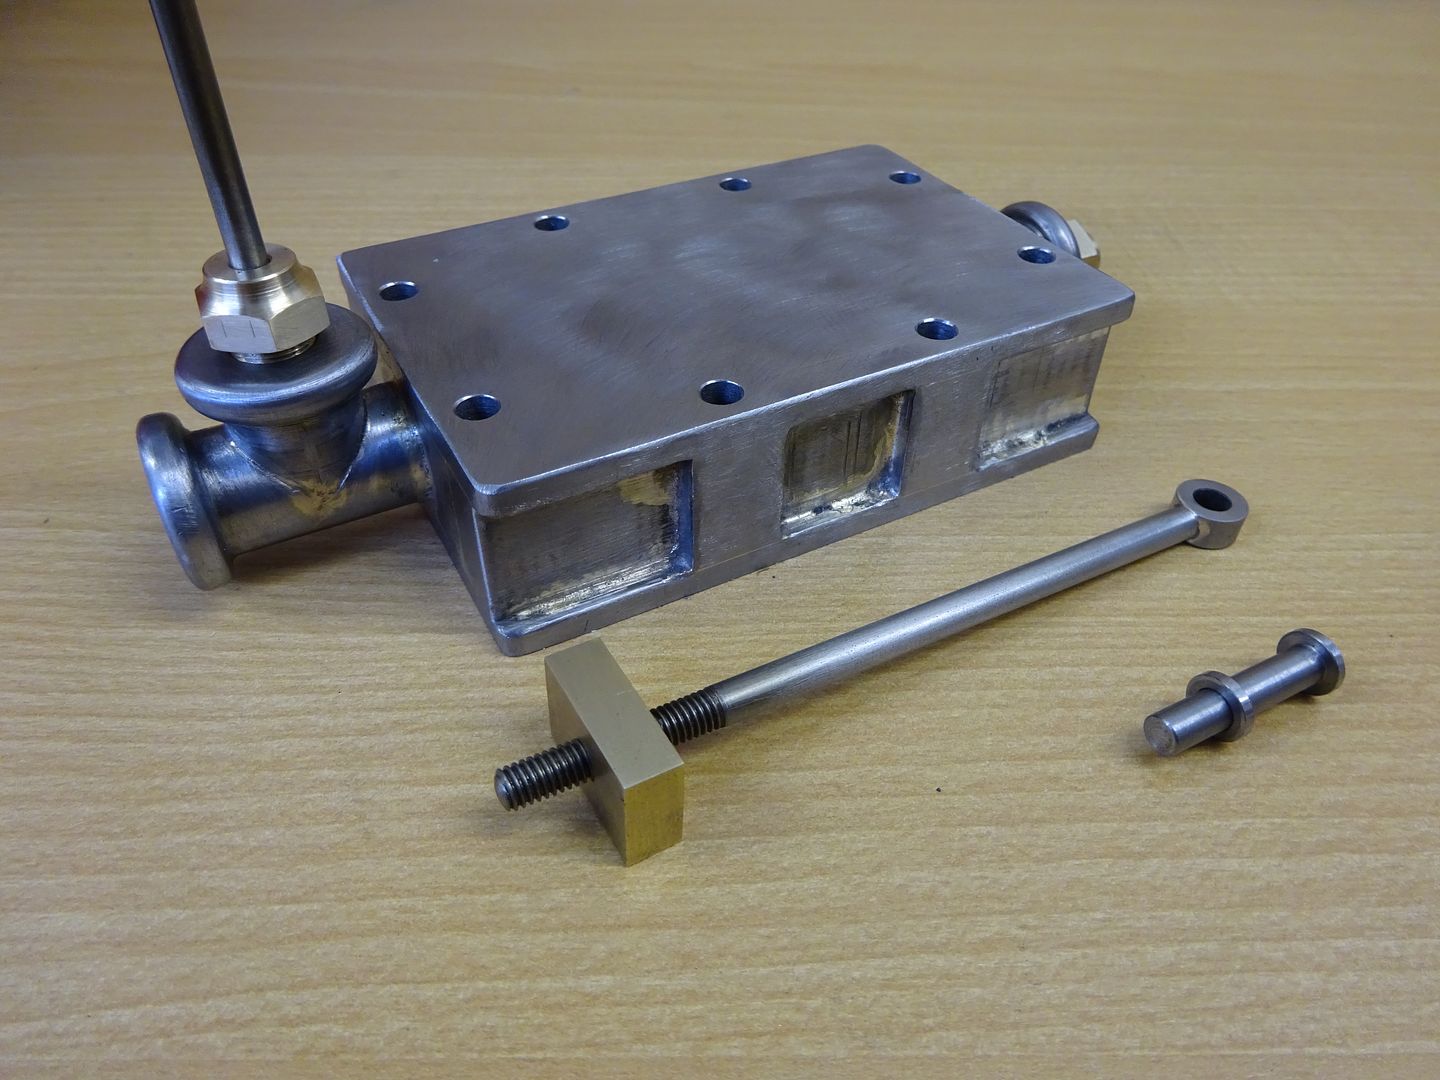
25215 forum posts 3105 photos 1 articles | Having got off to a bit of a false start when my propane bottle ran out half way through soldering the Tidman valve chest together I got it soldered OK with some new gas. Then treated it like a casting by facing off the mounting flange and poping a few holes in here and there. Also made tha governor butterfly valve, spindle & gland nut plus the Valve rod, nut, gland and pivot pin & washer. Chest is 2.5" x 3.75" x 1" thick with an unusual integral cover.
|
| NJH | 17/10/2015 21:42:46 |
 2314 forum posts 139 photos | Jason That is immensely depressing to we mere mortals ! Nice work - very well done. Norman |
| Chris Denton | 17/10/2015 23:28:15 |
| 275 forum posts | What's the purpose of the lever? Quicker drilling? |
| John Hinkley | 18/10/2015 17:42:55 |
 1545 forum posts 484 photos | At last, I finished fitting the Z-axis glass slide to the VMC mill. Used the DRO to make new tee nuts for it so that I can use the clamping kit I originally bought for the old, somewhat smaller lathe. I won't clutter up the thread with a photo - it looks just like the other two, only turned round 90°, not surprisingly. If you really must see, there's a photo in the album. John
|
| Neil Wyatt | 18/10/2015 18:56:53 |
 19226 forum posts 749 photos 86 articles | Well, last couple of days I've had a few tries at replacing the little metal clip that pulls the piston up on a 2-ton trolley jack. The difficult bit is that it needs to be flexible enough to fit over the end of the piston to locate in a groove without unclipping, and made so it doesn't distort under the strain. Vesrion 1, complete failure. version 2 worked, but I made the hole too small and it was taking the downforce so it partly collapsed and let go. I've schemed out version 3, but it will wait. I still can't figure out how the original failed. Neil |
| john carruthers | 22/10/2015 11:51:14 |
 617 forum posts 180 photos | Made the indirect mandrel indexer from an old 120 toothed wheel I was given. I turned a 10 TPI worm to fit it and mounted it on a bit of ally angle.
|
| Neil Wyatt | 22/10/2015 13:23:51 |
19226 forum posts 749 photos 86 articles | LS.. column fluting - my setup, note packing under tailstock.
As they are brass when you break the round nosed 1/16" end mill you can grind up a replacement from the stub
Neil |
| john carruthers | 22/10/2015 15:09:23 |
617 forum posts 180 photos | thanks Neil, I know what I'm doing tomorrow :-/ |


.jpg")
.jpg")
.jpg")


This thread is closed.
Magazine Locator
Want the latest issue of Model Engineer or Model Engineers' Workshop? Use our magazine locator links to find your nearest stockist!
Sign up to our Newsletter
Sign up to our newsletter and get a free digital issue.
You can unsubscribe at anytime. View our privacy policy at www.mortons.co.uk/privacy
Latest Forum Posts
- *Oct 2023: FORUM MIGRATION TIMELINE*
05/10/2023 07:57:11 - Making ER11 collet chuck
05/10/2023 07:56:24 - What did you do today? 2023
05/10/2023 07:25:01 - Orrery
05/10/2023 06:00:41 - Wera hand-tools
05/10/2023 05:47:07 - New member
05/10/2023 04:40:11 - Problems with external pot on at1 vfd
05/10/2023 00:06:32 - Drain plug
04/10/2023 23:36:17 - digi phase converter for 10 machines.....
04/10/2023 23:13:48 - Winter Storage Of Locomotives
04/10/2023 21:02:11 - More Latest Posts...
- View All Topics
Support Our Partners


Shopping Partners
Subscription Offer

Latest "For Sale" Ads
- Reeves** - Rebuilt Royal Scot by Martin Evans
by John Broughton
£300.00 - BRITANNIA 5" GAUGE James Perrier
by Jon Seabright 1
£2,500.00 - Drill Grinder - for restoration
by Nigel Graham 2
£0.00 - WARCO WM18 MILLING MACHINE
by Alex Chudley
£1,200.00 - MYFORD SUPER 7 LATHE
by Alex Chudley
£2,000.00 - More "For Sale" Ads...
Latest "Wanted" Ads
- D1-3 backplate
by Michael Horley
Price Not Specified - fixed steady for a Colchester bantam mark1 800
by George Jervis
Price Not Specified - lbsc pansy
by JACK SIDEBOTHAM
Price Not Specified - Pratt Burnerd multifit chuck key.
by Tim Riome
Price Not Specified - BANDSAW BLADE WELDER
by HUGH
Price Not Specified - More "Wanted" Ads...
Get In Touch!
Do you want to contact the Model Engineer and Model Engineers' Workshop team?
You can contact us by phone, mail or email about the magazines including becoming a contributor, submitting reader's letters or making queries about articles. You can also get in touch about this website, advertising or other general issues.
Click THIS LINK for full contact details.
For subscription issues please see THIS LINK.
Digital Back Issues


Donate

 Register
 Log-in
Model Engineer Magazine
- Percival Marshall
- M.E. History
- LittleLEC
- M.E. Clock

ME Workshop
- An Adcock
- & Shipley
- Horizontal
- Mill

Subscribe Now
- Great savings
- Delivered to your door

Pre-order your copy!
- Delivered to your doorstep!
- Free UK delivery!
All Forum Topics > Work In Progress and completed items > The Workshop Progress Thread