Forum sponsored by:

How Would You makes this?
| Stub Mandrel | 25/03/2012 21:35:38 |
 4318 forum posts 291 photos 1 articles | This took a little thought and a lot of patience - and several tries! How would YOU make it? Neil
|
| JasonB | 25/03/2012 21:43:13 |
 25215 forum posts 3105 photos 1 articles | Looks like its been punched out so would have to make a rectangular punch and space out a row of holes, step over for the next row and then back for the next etc. J |
| Ian P | 25/03/2012 22:07:00 |
 2747 forum posts 123 photos | If this is something you have already made it appears to have had a hard life after you finished it with a distressed/crumpled look! Its hard to tell from the picture what size it is, or what the material is. If its painted metal then the holes might be smaller than 2mm so drilling them on a milling machine would not be too onerous. Is the material curved in two planes, like a mudguard? that would explain why the fenestration does not look to be on the centreline.
Ian
|
| Keith Long | 25/03/2012 22:36:59 |
| 883 forum posts 11 photos | Think I'd look VERY seriously at photoetching. Keith |
| _Paul_ | 25/03/2012 23:47:49 |
 543 forum posts 31 photos | Looks like brass? I might have made a die block for the flypress perhaps not with all the holes say an inches worth then press index press..... ad infinitum
Paul |
| JasonB | 26/03/2012 07:27:42 |
25215 forum posts 3105 photos 1 articles | The bit of a metric scale in the bottom right makes it easy to see what the size is and how would you drill the rectangular holes on a mill? Yes I thought brass as well. J Edited By JasonB on 26/03/2012 07:27:59 |
| Ian P | 26/03/2012 08:29:21 |
2747 forum posts 123 photos | I was beginning to think I had a different picture to everyone else, then I zoomed in! I am still not quite sure what we are looking at, it could be a bit of brass shim but I'm not sure what the original poster wanted to know. Reading Neil's post again it seems like he has already made the part, in which case he posed the question as a sort of puzzle or test. It would have been better at the outset if he had said so or at least give us a some details of what we were supposed to be helping with. I saw the metric(?) scale in the background but without knowing how far back it was it was not easy to see its size relationship to the yellow plate. Some of the holes, which I can now see are rectangular) seem to be only partly formed, or are they blocked with paint?
Ian |
| Ady1 | 26/03/2012 08:42:24 |
 6137 forum posts 893 photos | Looks like its about 5cm square x 6cm 2" x 2.5" approx and it's been fabricated.... My inital thought was wire mesh which has been painted, then blown with compressed air to maintain the holes ...but it looks like it's been fabricated...and the holes have accuracy
It's the sort of pattern you could create on a sheet of soft metal with an industrial sewing machine which was fitted with a square needle
The alternative would be to make up a die punch block of square needles kind of thing, a lot of work for one job.
There seem to be scratches on each side of the mesh block, like it's travelled across something hard so I will go with the sewing machine guess Edited By Ady1 on 26/03/2012 09:00:51 |
| Ady1 | 26/03/2012 09:14:41 |
6137 forum posts 893 photos | To do it by hand I would clamp a piece of wood on the bottom Brass in the middle and wire mesh on the top as a template
Then punch the holes individually with a square awl
Would take a few goes to get it right though...lol
|
| NJH | 26/03/2012 16:51:28 |
 2314 forum posts 139 photos | I would ask Neil |
| Brian Dickinson | 26/03/2012 17:55:32 |
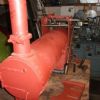 62 forum posts 13 photos | Punch it but make sure the die takes the correct amount of metal otherwise if it take less than its own area you will end up with stretching.
Cheers
Boiler |
| Stub Mandrel | 26/03/2012 20:29:27 |
4318 forum posts 291 photos 1 articles | Like this:
Brian is very right - the unhardened die plate got nibbled avway by the punch... hence distortion. But by making the spacings one and two turns of the handwheel apart, it wasn't too tedious even with two annealingas and flattenings. I called upon the spirits of copper-bashing (or at least those of my long-gone grandfather the coppersmith) and ended up with something a bit like this after some planishing:
The flash & polish makes it look worse than it is, but I may try a last anneal and planish. This is what it is meant to look like (yes I know it isn't dead to scale!):
Thing is, when painted will it look better than some wire gauze or mesh? The alternative is, as suggested, etching. Neil |
| Brian Dickinson | 26/03/2012 21:10:54 |
62 forum posts 13 photos | The bits below the running board look like a Hunslet i was watching at Porthmadog yesterday shunting flat trucks onthe new line that crosses the road.
I wanted to measure it up but they said i could not as it was working!
I will have to catch it when there not looking
Brian Edited By Brian Dickinson on 26/03/2012 21:11:14 |
| Cornish Jack | 27/03/2012 11:13:15 |
| 1228 forum posts 172 photos | John (Bogs2) - those wheels are, apparently, used for imprinting patterns on cloth for cutting. Presumably available at most haberdashers - if such a thing exists nowadays!! Rgds Bill |
| David Clark 1 | 27/03/2012 12:23:20 |
 3357 forum posts 112 photos 10 articles | Hi Bogstandard2 I do check Avatars. All are passed if they are non commercial, not Wallace or Gromit or the Tea drinking monkey or similar. regards David Edited By David Clark 1 on 27/03/2012 12:23:39 |
| JasonB | 27/03/2012 12:26:49 |
25215 forum posts 3105 photos 1 articles |
Looks like you will have to get someone to take of Photo of you and Bandit and use that then John
J |
| JasonB | 27/03/2012 12:26:57 |
25215 forum posts 3105 photos 1 articles | Double post Edited By JasonB on 27/03/2012 12:27:24 |
| Ian S C | 27/03/2012 14:04:23 |
 7468 forum posts 230 photos | The wheels with the star points are called tracing wheels, found in dress making equipment shops/departments. I have some (with different tooth spacing) used by leather workers, for marking stich spacing, these are made of much higher quality steel than the tin plate ones used by seamstress's. Do'nt know where, or if you can get these now, the belonged to my Grandfather, and possibly his father before that, they were leather manufacturers in Dunedin NZ up till WW2 when Grandpa retired. Neil, what do you use under the metal as you punch the holes? Ian S C |
| Bazyle | 27/03/2012 17:16:55 |
 6956 forum posts 229 photos |
Makes you wonder what prize words the workshop used about the design office when presented with the original drawing. |
| JasonB | 27/03/2012 17:24:42 |
25215 forum posts 3105 photos 1 articles | The wheels for marking leather are still available, this is one of the suppliers I use for woodworking tools but they do leather working as well |


Please login to post a reply.
Magazine Locator
Want the latest issue of Model Engineer or Model Engineers' Workshop? Use our magazine locator links to find your nearest stockist!
Sign up to our Newsletter
Sign up to our newsletter and get a free digital issue.
You can unsubscribe at anytime. View our privacy policy at www.mortons.co.uk/privacy
Latest Forum Posts
- hemingway ball turner
04/07/2025 14:40:26 - *Oct 2023: FORUM MIGRATION TIMELINE*
05/10/2023 07:57:11 - Making ER11 collet chuck
05/10/2023 07:56:24 - What did you do today? 2023
05/10/2023 07:25:01 - Orrery
05/10/2023 06:00:41 - Wera hand-tools
05/10/2023 05:47:07 - New member
05/10/2023 04:40:11 - Problems with external pot on at1 vfd
05/10/2023 00:06:32 - Drain plug
04/10/2023 23:36:17 - digi phase converter for 10 machines.....
04/10/2023 23:13:48 - More Latest Posts...
- View All Topics
Support Our Partners


Shopping Partners
Subscription Offer

Latest "For Sale" Ads
- Reeves** - Rebuilt Royal Scot by Martin Evans
by John Broughton
£300.00 - BRITANNIA 5" GAUGE James Perrier
by Jon Seabright 1
£2,500.00 - Drill Grinder - for restoration
by Nigel Graham 2
£0.00 - WARCO WM18 MILLING MACHINE
by Alex Chudley
£1,200.00 - MYFORD SUPER 7 LATHE
by Alex Chudley
£2,000.00 - More "For Sale" Ads...
Latest "Wanted" Ads
- D1-3 backplate
by Michael Horley
Price Not Specified - fixed steady for a Colchester bantam mark1 800
by George Jervis
Price Not Specified - lbsc pansy
by JACK SIDEBOTHAM
Price Not Specified - Pratt Burnerd multifit chuck key.
by Tim Riome
Price Not Specified - BANDSAW BLADE WELDER
by HUGH
Price Not Specified - More "Wanted" Ads...
Get In Touch!
Do you want to contact the Model Engineer and Model Engineers' Workshop team?
You can contact us by phone, mail or email about the magazines including becoming a contributor, submitting reader's letters or making queries about articles. You can also get in touch about this website, advertising or other general issues.
Click THIS LINK for full contact details.
For subscription issues please see THIS LINK.
Digital Back Issues


Donate

 Register
 Log-in
Model Engineer Magazine
- Percival Marshall
- M.E. History
- LittleLEC
- M.E. Clock

ME Workshop
- An Adcock
- & Shipley
- Horizontal
- Mill

Subscribe Now
- Great savings
- Delivered to your door

Pre-order your copy!
- Delivered to your doorstep!
- Free UK delivery!
All Forum Topics > General Questions > How Would You makes this?