Forum sponsored by:

Machine vice square on mill table
| petro1head | 12/03/2023 10:22:43 |
 984 forum posts 207 photos | Has anyone come up with a reliable way to fit a machine vice to a mill so its always square/parrallel |
| Emgee | 12/03/2023 10:28:10 |
| 2610 forum posts 312 photos | Accurately fitted tenons work provided there is no damage to the Tee slots which also need to be machined in accurate alignment with the table axis. I have 1 vice with a bar fixed on the underside that butts up to the front machined edge of the mill table, works OK for most jobs. If the job is calling for best accuracy always check alignment before machining. Emgee Same as Andrew check on the fixed jaw during setup, link to Youtube video. https://youtu.be/KNo82KCiGdo?t=18 Edited By Emgee on 12/03/2023 10:40:27 |
| John Haine | 12/03/2023 10:29:05 |
| 5563 forum posts 322 photos | Bolt key to it's base to fit the tee slots. |
| petro1head | 12/03/2023 10:29:59 |
984 forum posts 207 photos | Appologies, should have done a search https://www.model-engineer.co.uk/forums/postings.asp?th=142180 |
| Andrew Johnston | 12/03/2023 10:30:26 |
 7061 forum posts 719 photos | I use a dial test indicator on the back of the fixed jaw aiming for 0.01mm across the jaw width. Although all three of my mills have nominal 5/8" slots in practice they are all slightly different widths so I don't use tenons. Another issue with tenons is that they can get damaged, or damage the table. Andrew |
| Dave Halford | 12/03/2023 10:51:12 |
| 2536 forum posts 24 photos | The one with the rotary base needs the base removing, there should be a groove underneath the vice with two tapped holes. With a lever indicator mounted in the spindle check the rear of table tee slots run parallel when you move the table. If they do turn the vice upside down and grip the tee slot with the jaws and do the same indicator check on the groove. If parallel great, if not make it so with a milling cutter. Make 2 tenons to fit the vice groove exactly and also table tee slots with a little clearance. When you now mount the vice in the tees the rear fixed jaw should indicate parallel when tapped toward the back of the table. Just don't clatter the vice about when not on the machine or Andrews warning will come true. Edited By Dave Halford on 12/03/2023 10:56:46 |
| SillyOldDuffer | 12/03/2023 10:51:24 |
| 10668 forum posts 2415 photos | A set-square is gets close, but isn't good enough on my mill because the vice sides aren't finished accurately square to the fixed jaw. It's an inexpensive vice! People have fitted pegs underneath to align with the T slots. This works reasonably well, but the accuracy depends on how well the pegs are placed, how accurately the slot is cut, and there's no wear and tear. So I use a DTI held in the spindle to square the fixed jaw.
This setting accuracy achieved by this method is high, and it depends mainly on the accuracy of the fixed jaw and the DTI (as a comparator). Chief dangers are accidentally turning the spindle, which is unlikely, and jambing against rather than swivelling round the bolts. First attempt likely to be painfully slow, but becomes surprisingly quick after several practice sessions. Dave |
| not done it yet | 12/03/2023 10:51:46 |
| 7517 forum posts 20 photos | How long does alignment take? 2 minutes? I generally bump the vise up to the mill column (or with a parallel slipped to take up any slack) and bolt it down if it only needs to be rough and ready, as that is close enough for some jobs. After fitting and tightening down (gently) it takes naff-all extra time to square it up with a dial gauge or dti before tightening further/fully and checking again. |
| Vic | 12/03/2023 10:53:28 |
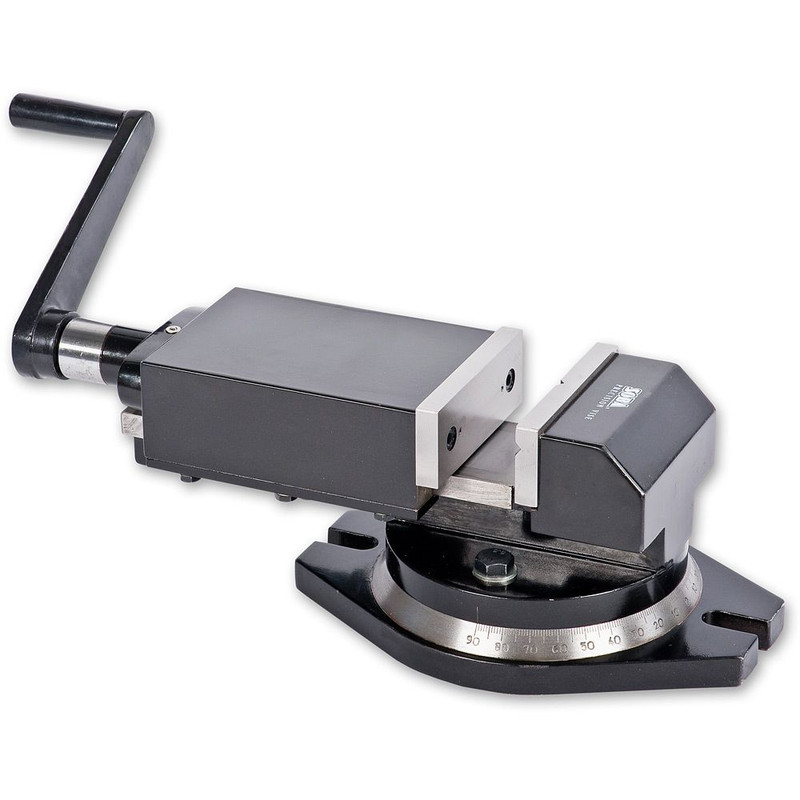
| 3453 forum posts 23 photos | I didn’t want to start cutting or drilling my vice so I made a couple of stepped sleeves that are an interference fit on my vice mounting holes and a snug fit in the tee slots. Simply placed on the table with the sleeves in the T slots and it’s within about one thou. If I’m really picky I clock it as well but it doesn’t take long. Luckily the design of my vice - two accurately bored mounting holes, rather than slots allowed this. Edit: This is the type I have but it was supplied without the swivelling base.
Edited By Vic on 12/03/2023 11:03:51 |
| Paul Lousick | 12/03/2023 11:37:36 |
| 2276 forum posts 801 photos | My mill vice came with a rotating base but I don't use it and milled key slots and fitted keys to locate in the table slots and use a vice/chuck on a rotary table for milling at an angle. Always push the vice keys against one side of the table slots while clamping which will eliminate any miss-alignment in a sloppy fit. The keys are accurate enough for 99% of jobs. Always dial in for accurate cuts.
|
| Clive Foster | 12/03/2023 12:52:14 |
| 3630 forum posts 128 photos | I leave the rotating bases on my pair of normal use vices. But I drive a Bridgeport so I've got more headroom than folk with smaller machines and the lost inch+ is no great issue. Can't be bothered with keys and the like. Simply pulling the vice back so the bolts are both hard against the edge of the Tee slots before final tightening is repeatable to something between a quarter and half a thou per inch of jaw width. Good enough for ordinary jobs. Each holding down slot has its own designated set of Tee nut, bolt and washer which Intake great care not to interchange. Way back I contemplated something a little more engineering like with Tee nuts in the vice slots engaging with special Tee nuts in the table slots to give flat surfaces for registration. Still wouldn't have been perfect so the effort didn't seem worthwhile. If you drop the rotary base it would be sensible to cut the slot sides dead parallel to the jaws with the vice inverted and gripping a suitably aligned block on the lathe. Could simply pull back against the bolt, as I do, but a stepped Tee nut on top dropping down into the table slot a little might be worth the effort. Jason has previously reported that he also uses the pull back against the bolts method with a plain base vice and has negligible alignment error. Tenths per inch at worst. Generally vice fixing slots aren't something where great efforts are made to accurately machine them. Buy the very nature of manufacturing methods the sides will be close to parallel with the jaws but how close is matter of luck. I'd say better than 5 thou per inch of jaw width on a 4 inch vice can be expected but its not something specially checked by the maker so Jason got lucky. A survey might be interesting. I'd put money on the simple pull back method errors for decent, but still affordable, vices clustering around the 2 to 3 thou per inch. The ground all over CNC specific and toolmakers vices being different issue by they generally don't have slots. Clive |
| colin vercoe | 12/03/2023 13:07:32 |
| 72 forum posts | I never used tennons as they dont give reliable accuracy, you would still have to check with a dial gauge, I place a parallel bar in the vice then a steel ruler on top and grip in the vice then eye the edge of the ruler with a tee slot this will with practice get you within a couple of thou every time then finish with a dial gauge. |
| JasonB | 12/03/2023 13:09:05 |
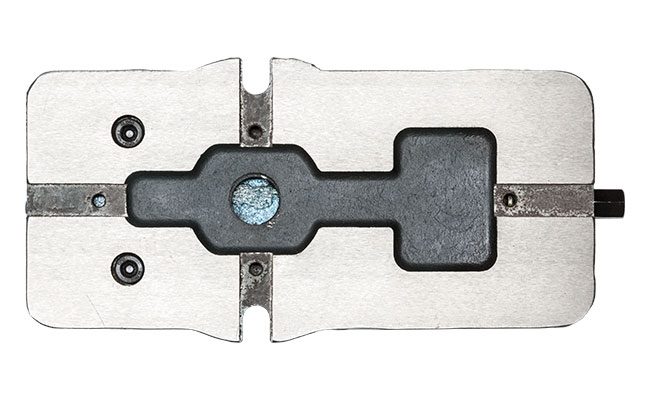
 25215 forum posts 3105 photos 1 articles | If you are still using this vice take off the swivel and go looking for the two metal keys and screws that came with it when bought, Uncle Ketan has kindly cut the slots and tapped the holes for you. I use them on my 80mm version on the CNC and like Andrew just clock the back jaw of my K4 on the manual mill.
Edited By JasonB on 12/03/2023 13:10:35 |
| Howard Lewis | 12/03/2023 13:29:34 |
| 7227 forum posts 21 photos | If you cannot fir keys to the base of the vice, I made up an alignment fixture (not my original idea; a variation on what was shown in an article in M E W a long while ago) Send me an E mail address and I'll find a picture of it for you. Everynone has to be bespoke to suit the mill and vice combination, but it puts my vice on to within a thou. Howard. |
| petro1head | 12/03/2023 15:46:01 |
984 forum posts 207 photos | Cheers guys some great ideas. As Jason very kindly pointed out i have that vise and will use the slots. |
| Howard Lewis | 12/03/2023 16:08:20 |
| 7227 forum posts 21 photos | My fixture is like a goal post. Two uprights, a snug fit in the T slot (Acting as dowels ) and a cross bar onto which the vice clamps. The pillars are drilled and long bolts screw into T nuts. The gag is to take a skim along the cross bar so that the vice clamps onto the machined face wich is the path traced by an end mill when in use. Once the vice is aligned and clamped down, the goalpost is removed Howard. |
| petro1head | 12/03/2023 16:14:16 |
984 forum posts 207 photos | Posted by Howard Lewis on 12/03/2023 16:08:20:
My fixture is like a goal post. Two uprights, a snug fit in the T slot (Acting as dowels ) and a cross bar onto which the vice clamps. The pillars are drilled and long bolts screw into T nuts. The gag is to take a skim along the cross bar so that the vice clamps onto the machined face wich is the path traced by an end mill when in use. Once the vice is aligned and clamped down, the goalpost is removed Howard. Is that ti avoid an own goal |
| Howard Lewis | 12/03/2023 16:46:23 |
| 7227 forum posts 21 photos | Trying to machine with it in place would be!
|
| John Purdy | 12/03/2023 17:22:58 |
 431 forum posts 252 photos | I do as Andrew, and use a dial indicator in the collet/chuck on the fixed jaw. I have made a couple of extra posts for the indicator so it always fits whatever I have in the spindle ( well almost always! ). I snug down one bolt fairly tight and leave the other slightly loose, then tap the end of the vice one way or the other while running the table back and forth till I get the min reading end to end, then tighten down both bolts and recheck. It only takes a minute, two at the most, to get the 6" jaw within a thou end to end. John
Edited By John Purdy on 12/03/2023 17:31:03 Edited By John Purdy on 12/03/2023 17:32:14 |
| Richard Millington | 12/03/2023 18:42:00 |
| 101 forum posts 9 photos | Quick and easy: I use two squares and a 3:2:1 block for quick and easy placement of my 3" Abwood, one square clamped in the vice, 3:2:1 block up to that and the other square off the mill table to set at 90 deg. For the other vice (ground toolmakers) I use one square off the table. If I want it really accurate, 6" long ground block clamped in the vice and a DTI off that as it gives a longer travel than just the 3" vice jaws. |


Please login to post a reply.
Magazine Locator
Want the latest issue of Model Engineer or Model Engineers' Workshop? Use our magazine locator links to find your nearest stockist!
Sign up to our Newsletter
Sign up to our newsletter and get a free digital issue.
You can unsubscribe at anytime. View our privacy policy at www.mortons.co.uk/privacy
Latest Forum Posts
- *Oct 2023: FORUM MIGRATION TIMELINE*
05/10/2023 07:57:11 - Making ER11 collet chuck
05/10/2023 07:56:24 - What did you do today? 2023
05/10/2023 07:25:01 - Orrery
05/10/2023 06:00:41 - Wera hand-tools
05/10/2023 05:47:07 - New member
05/10/2023 04:40:11 - Problems with external pot on at1 vfd
05/10/2023 00:06:32 - Drain plug
04/10/2023 23:36:17 - digi phase converter for 10 machines.....
04/10/2023 23:13:48 - Winter Storage Of Locomotives
04/10/2023 21:02:11 - More Latest Posts...
- View All Topics
Support Our Partners


Shopping Partners
Subscription Offer

Latest "For Sale" Ads
- Reeves** - Rebuilt Royal Scot by Martin Evans
by John Broughton
£300.00 - BRITANNIA 5" GAUGE James Perrier
by Jon Seabright 1
£2,500.00 - Drill Grinder - for restoration
by Nigel Graham 2
£0.00 - WARCO WM18 MILLING MACHINE
by Alex Chudley
£1,200.00 - MYFORD SUPER 7 LATHE
by Alex Chudley
£2,000.00 - More "For Sale" Ads...
Latest "Wanted" Ads
- D1-3 backplate
by Michael Horley
Price Not Specified - fixed steady for a Colchester bantam mark1 800
by George Jervis
Price Not Specified - lbsc pansy
by JACK SIDEBOTHAM
Price Not Specified - Pratt Burnerd multifit chuck key.
by Tim Riome
Price Not Specified - BANDSAW BLADE WELDER
by HUGH
Price Not Specified - More "Wanted" Ads...
Get In Touch!
Do you want to contact the Model Engineer and Model Engineers' Workshop team?
You can contact us by phone, mail or email about the magazines including becoming a contributor, submitting reader's letters or making queries about articles. You can also get in touch about this website, advertising or other general issues.
Click THIS LINK for full contact details.
For subscription issues please see THIS LINK.
Digital Back Issues


Donate

 Register
 Log-in
Model Engineer Magazine
- Percival Marshall
- M.E. History
- LittleLEC
- M.E. Clock

ME Workshop
- An Adcock
- & Shipley
- Horizontal
- Mill

Subscribe Now
- Great savings
- Delivered to your door

Pre-order your copy!
- Delivered to your doorstep!
- Free UK delivery!
All Forum Topics > General Questions > Machine vice square on mill table