Forum sponsored by:

How to align a fixed steady?
| Philip A | 04/02/2021 09:40:49 |
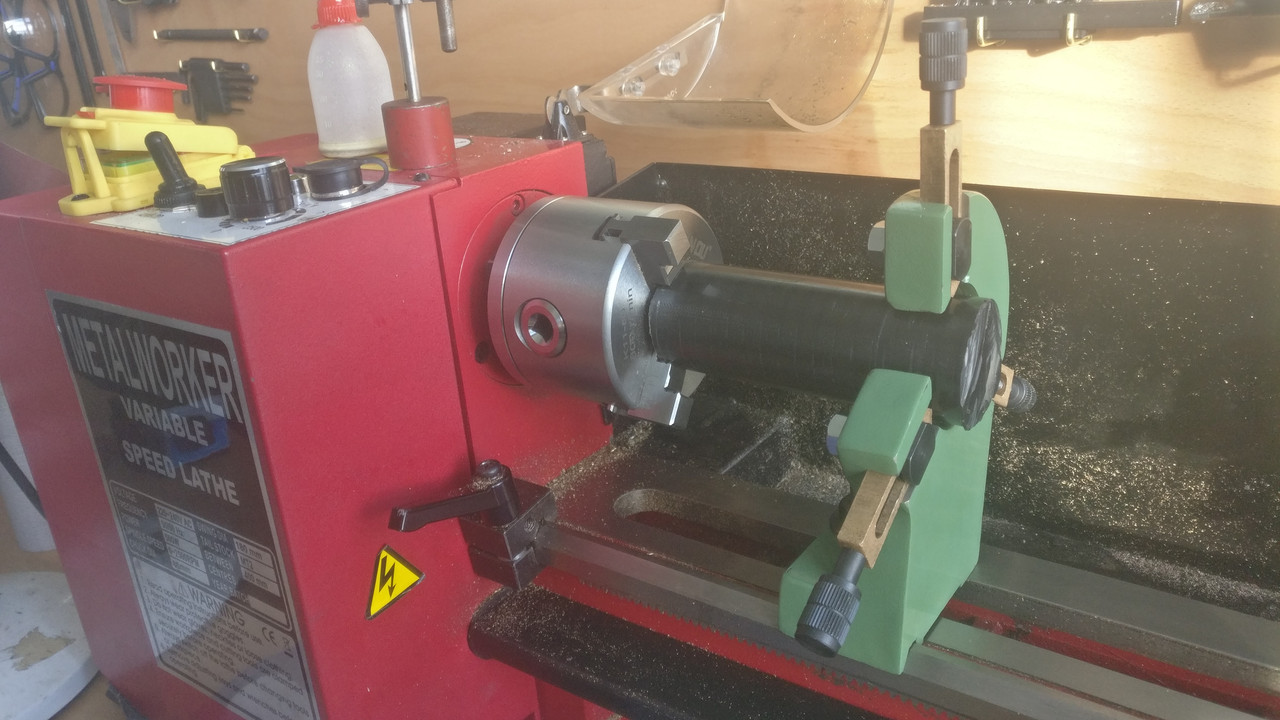
 39 forum posts | This is my first workpiece that requires a steady. I'm not sure how to align the steady so that the workpiece sits staight. YouTube proposes a couple of methods, one very long winded which requires specialist tools and another method using a dial guage attached to the chuck. The dial guage method isn't working for me due to lack of space on the mini lathe. What methods are mini lathe owners on this site using?
|
| Jeff Dayman | 04/02/2021 09:54:32 |
| 2356 forum posts 47 photos | I'd suggest a dial indicator with a magnetic base and stand. Mag base positioned on lathe bed top or front, indicator tip running on the end of the workpiece near centre front. adjust the steady's jaws until runout is near zero. That's it. The setup in your pic looks like there is lots of room for this method. |
| Emgee | 04/02/2021 09:55:29 |
| 2610 forum posts 312 photos | If the workpiece is running true and is circular then fit the steady to the bed as close as possible to the chuck, set the steady fingers to the job and lock off the bottom 2, slacken the top finger to allow the released steady to move along the bed closer to the end of the work then lock the steady to the bed and tighten the top finger to the work. Emgee |
| David Millar 3 | 04/02/2021 09:56:54 |
| 28 forum posts | Hi Philip. I've never used one either but I watched a doubleboost video on youtube yesterday where John set one up.
He mounted the work in the chuck, set the steady around the work piece, close / adjacent to the chuck. Adjusted the steady so the fingers just made contact with the work piece. Then moved the steady to it's desired location. The logic being that the workpiece and chuck would be very close to concentic close to the work piece and errors increasing as you move away from the chuck. |
| JasonB | 04/02/2021 10:08:42 |
 25215 forum posts 3105 photos 1 articles | Like Emgee I will chuck the work and just turn the chuck by hand to make sure it eyeballs true then set the steady close to the chuck locking the two lower fingers. Loosen top finger and slid esteady to end of job then set top finger. Can't see the point in using a DTI on the end as it could be indicating true but may be up down or sideways from the lathes axis and if so can start to walk out of the chuck when you start up. If you are going to use a DTI fit to carriage and run along side then top of the work to check it is parallel to lathe axis One I did last week
Edited By JasonB on 04/02/2021 10:12:57 |
| Former Member | 04/02/2021 10:15:01 |
| 1085 forum posts | [This posting has been removed] |
| Tony Pratt 1 | 04/02/2021 10:17:13 |
| 2319 forum posts 13 photos | The supported & chucked end has to run true & the part has to be true to the lathe axis both in a vertical & horizontal plane. As the fingers need to touch the work there is always going to be some marking. Tony Edited By Tony Pratt 1 on 04/02/2021 10:18:09 |
| larry phelan 1 | 04/02/2021 10:23:48 |
| 1346 forum posts 15 photos | I seem to remember that Sparey covered this issue in his book |
| DC31k | 04/02/2021 11:16:26 |
| 1186 forum posts 11 photos | Posted by br on 04/02/2021 10:15:01:
How do you stop the fingers marking the material, just out of interest ? One option is to use roller fingers. Small bearings can be used for this. Plastic bearings are also available. Wood turners use skateboard or roller blade wheels. The trouble is that most steadies supplied as standard with a lathe are woefully small. I believe Hemingway offers a large capacity one and John Stevenson showed one made up of laser-cut steel sheets laminated together. |
| Ady1 | 04/02/2021 11:29:13 |
 6137 forum posts 893 photos | You don't need to align the steady, just make sure it sits right It's the workpiece that needs aligning, use a dti can take a while, a dead centre in the tailstock helps a lot, then remove it for final tweaks edit you can use other systems like the cutting tool touching but if you want good accuracy you must get a dti system setup GL Edited By Ady1 on 04/02/2021 11:32:22 |
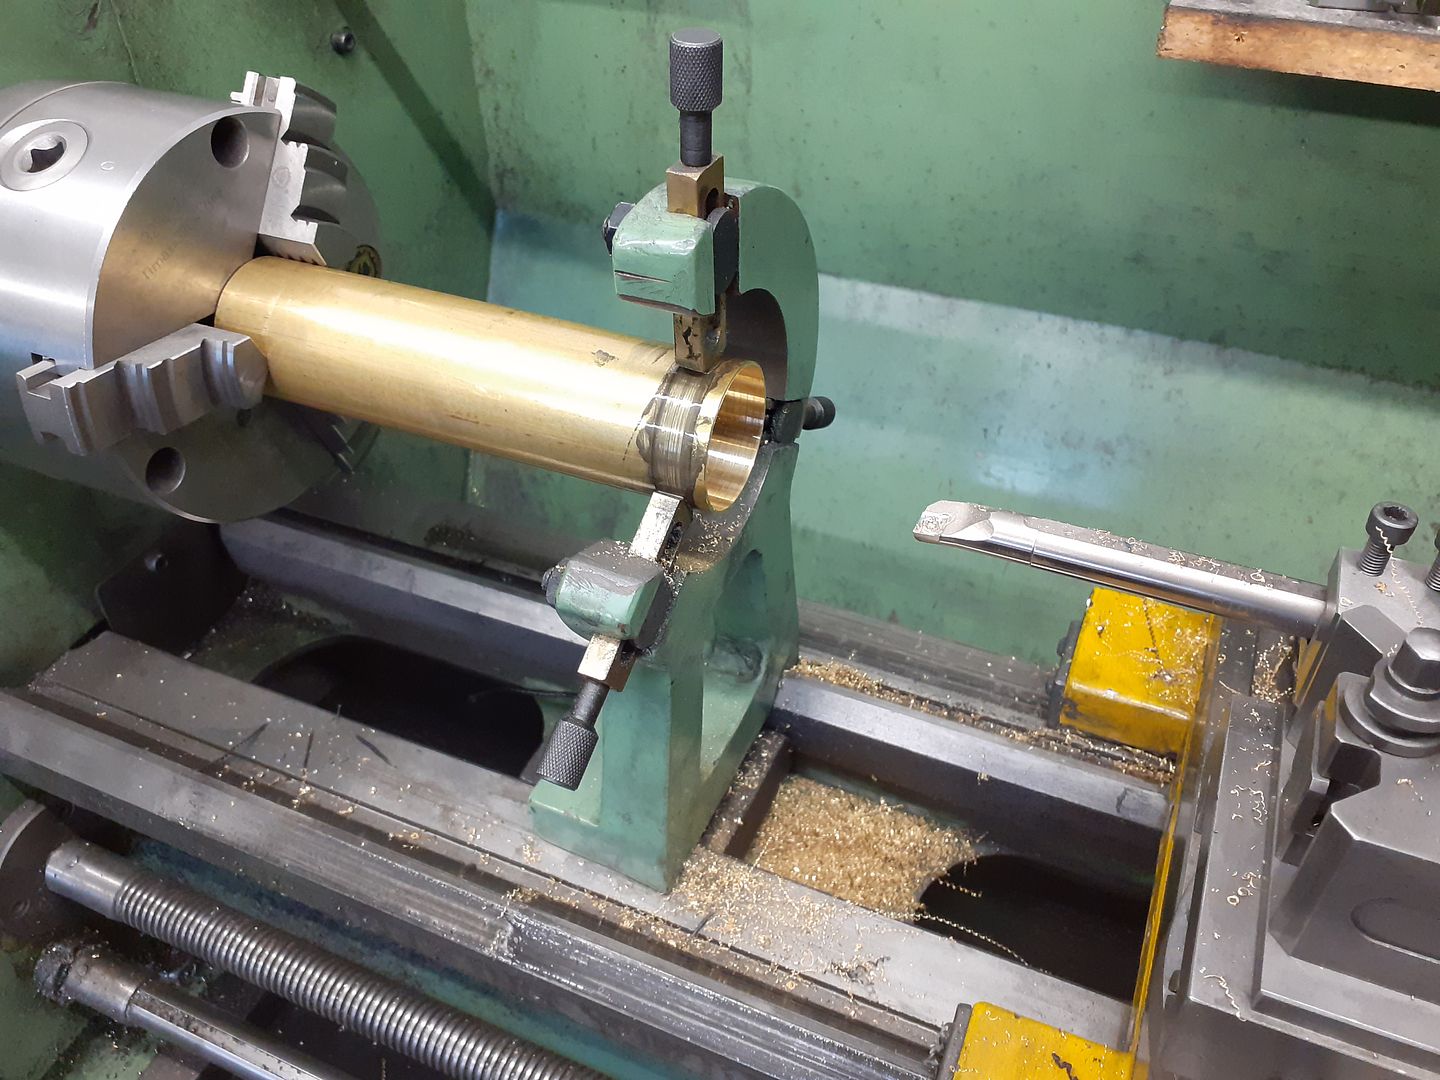
| Andrew Johnston | 04/02/2021 11:43:06 |
 7061 forum posts 719 photos | For quick 'n' dirty work I use the 3-jaw chuck and adjust the fixed steady to align a mark on the end of the bar to a centre in the tailstock:
For more accurate work I use a short length of stock in the 4-jaw, centred with a DTI, and then used to set the steady. Then the steady is moved, the workpiece installed and the chuck end checked with the DTI, as with this 30" long bar:
When the steady fingers are well oiled they don't seem to noticably mark steel or cast iron. If marking is a problem then use a ring of oiled paper between fingers and work. Andrew |
| Emgee | 04/02/2021 12:18:01 |
| 2610 forum posts 312 photos | I turned a nylon piece to be a close fit on the part diameter where the steady fingers were making contact, see in the video here. **LINK** Emgee |
| Roderick Jenkins | 04/02/2021 13:06:50 |
 2376 forum posts 800 photos | Posted by Ady1 on 04/02/2021 11:29:13:
You don't need to align the steady, just make sure it sits right It's the workpiece that needs aligning, use a dti can take a while, a dead centre in the tailstock helps a lot, then remove it for final tweaks edit you can use other systems like the cutting tool touching but if you want good accuracy you must get a dti system setup GL Edited By Ady1 on 04/02/2021 11:32:22 But not just checking the rotation. You also need to check the alignment along the length, vertically and horizontally, to ensure that the steady is not bending the workpiece. Setting the steady up at the chuck end then moving it along the bed to the required position has always worked for me. Stay well, Rod |
| Bo'sun | 04/02/2021 13:18:25 |
| 754 forum posts 2 photos | DC31k mentions the use of small rollers instead of fingers. While this sounds like a good idea, I'd be concerned about small shavings being crushed into the workpiece. Fingers will simply brush the shavings aside. I have the same concern with roller blade guides on a wood bandsaw squashing resin onto the blade. |
| Ady1 | 04/02/2021 13:58:04 |
6137 forum posts 893 photos | The chuck can mess things about too, especially if its a 3 jaw 4 jaw is best, but more hassle to set up |
| John MC | 04/02/2021 14:38:17 |
 464 forum posts 72 photos | My favourite method is to turn a short length of material to the same diameter as the work to be supported by the steady. Then set the steady to that. I also prefer to hold the work in a four jaw chuck so it can be held true. Inaccuracies can cause some interesting geometrical errors. In extreme, a poorly setup steady can cause the work to "walk" out of the chuck jaws. John |
| Neil Wyatt | 04/02/2021 15:05:28 |
 19226 forum posts 749 photos 86 articles | Posted by Emgee on 04/02/2021 09:55:29:
If the workpiece is running true and is circular then fit the steady to the bed as close as possible to the chuck, set the steady fingers to the job and lock off the bottom 2, slacken the top finger to allow the released steady to move along the bed closer to the end of the work then lock the steady to the bed and tighten the top finger to the work. Emgee THIS^ Neil |
| old mart | 04/02/2021 15:08:14 |
| 4655 forum posts 304 photos | I would align the workpiece first and then carefully bring the fingers into contact, using a dti to make sure that a minimum of deflection was present. If the work needed turning at the point where the fingers were going, I would attempt to turn a portion near the chuck and then turn the workpiece around if possible. I made a set of fingers with little ball races for less friction and no wear. As already mentioned, a collar could be used to run on if the marking was not desirable. A piece of card should be cut to form a barrier against swarf getting stuck in the fingers. Even with medium hard steel and rollers, marking is likely, the steady marks show on this spindle, but do not matter, fortunately.
|


Please login to post a reply.
Magazine Locator
Want the latest issue of Model Engineer or Model Engineers' Workshop? Use our magazine locator links to find your nearest stockist!
Sign up to our Newsletter
Sign up to our newsletter and get a free digital issue.
You can unsubscribe at anytime. View our privacy policy at www.mortons.co.uk/privacy
Latest Forum Posts
- *Oct 2023: FORUM MIGRATION TIMELINE*
05/10/2023 07:57:11 - Making ER11 collet chuck
05/10/2023 07:56:24 - What did you do today? 2023
05/10/2023 07:25:01 - Orrery
05/10/2023 06:00:41 - Wera hand-tools
05/10/2023 05:47:07 - New member
05/10/2023 04:40:11 - Problems with external pot on at1 vfd
05/10/2023 00:06:32 - Drain plug
04/10/2023 23:36:17 - digi phase converter for 10 machines.....
04/10/2023 23:13:48 - Winter Storage Of Locomotives
04/10/2023 21:02:11 - More Latest Posts...
- View All Topics
Support Our Partners


Shopping Partners
Subscription Offer

Latest "For Sale" Ads
- Reeves** - Rebuilt Royal Scot by Martin Evans
by John Broughton
£300.00 - BRITANNIA 5" GAUGE James Perrier
by Jon Seabright 1
£2,500.00 - Drill Grinder - for restoration
by Nigel Graham 2
£0.00 - WARCO WM18 MILLING MACHINE
by Alex Chudley
£1,200.00 - MYFORD SUPER 7 LATHE
by Alex Chudley
£2,000.00 - More "For Sale" Ads...
Latest "Wanted" Ads
- D1-3 backplate
by Michael Horley
Price Not Specified - fixed steady for a Colchester bantam mark1 800
by George Jervis
Price Not Specified - lbsc pansy
by JACK SIDEBOTHAM
Price Not Specified - Pratt Burnerd multifit chuck key.
by Tim Riome
Price Not Specified - BANDSAW BLADE WELDER
by HUGH
Price Not Specified - More "Wanted" Ads...
Get In Touch!
Do you want to contact the Model Engineer and Model Engineers' Workshop team?
You can contact us by phone, mail or email about the magazines including becoming a contributor, submitting reader's letters or making queries about articles. You can also get in touch about this website, advertising or other general issues.
Click THIS LINK for full contact details.
For subscription issues please see THIS LINK.
Digital Back Issues


Donate

 Register
 Log-in
Model Engineer Magazine
- Percival Marshall
- M.E. History
- LittleLEC
- M.E. Clock

ME Workshop
- An Adcock
- & Shipley
- Horizontal
- Mill

Subscribe Now
- Great savings
- Delivered to your door

Pre-order your copy!
- Delivered to your doorstep!
- Free UK delivery!
All Forum Topics > Beginners questions > How to align a fixed steady?