Forum sponsored by:

Workbench drawers
| ChrisB | 22/06/2017 23:00:22 |
| 671 forum posts 212 photos | Hello, I'm at a loss trying to figure out the best way to construct drawers for a workbench and two machine stands. Basically I want three shallowish drawers at the top (10cm deep) and a single deeper drawer (23cm deep). I'm no carpenter so I have no idea how to go about doing them. My thoughts were plywood sides, fronts and backs on telescoping rails and a steel or aluminium bottom, ( if I went for plywood bottom I'd loose more space because of the thickness)... am I on the right track? Ideas and advice are most welcome. This is what I have in mind, to explain myself better.
|
| Frances IoM | 22/06/2017 23:24:33 |
| 1395 forum posts 30 photos |
MDF is easy to use - 18mm MDF for sides screwed + glued base with extendible runners (eg from Screwfix) will take considerable weight (eg my granite surface plate sits in one such drawer - make a small jig (as used in making picture frames) to keep corners square - careful measurement or use a sawbench with guides. Often the larger B+Q branches will sell MDF offcuts suitable for sides at 50p or so (or even give it away ) just cut all drawer sides at same saw settings to guarantee easy square frames - consider use of the various plastic box inserts sold for the 'really useful' range of boxes
|
| Paul Lousick | 23/06/2017 00:40:45 |
| 2276 forum posts 801 photos | I used plywood for the sides and bottom of the drawers and re-inforced the corners with 16g steel angle. The angle was pop rivetted to the plywood. Steel washers used as a backing to prevent the rivets pulling thru the plywood and the draw slides rivetted to the steel angle. These drawers are light and strong and will extend completely out of the cabinet on the telescopic slides.
|
| Joseph Noci 1 | 23/06/2017 07:21:23 |
| 1323 forum posts 1431 photos | Why not fully from 2mm Aluminium, as I did here:
Joe
|
| ChrisB | 23/06/2017 08:14:33 |
| 671 forum posts 212 photos | Posted by Joseph Noci 1 on 23/06/2017 07:21:23:
Why not fully from 2mm Aluminium, as I did here: Joe Nice! but that would take me a couple of ages to complete! Besides I have three benches to do on which I still have to mount the lathe and mill, so the sooner I'm over and done with the better so I'll start making some swarf! Was not considering MDF as I thought that was a bit soft for a workshop environment and has a tendency to swell in contact with water so I was heading to marine plywood or some cheapish solid wood. The drawer width being 63cm and bearing in mind that some heavy items will be stored in these drawers (lathe/mill tools) would a wooden base be sufficient? |
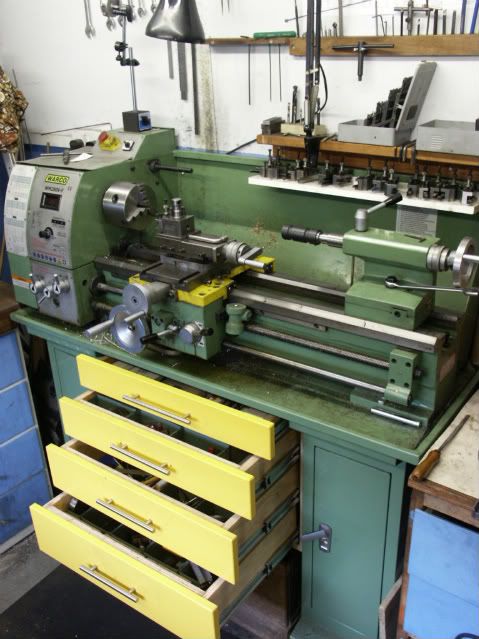
| JasonB | 23/06/2017 08:14:38 |
 25215 forum posts 3105 photos 1 articles | These ones are 18mm FE plywood sides glued and biscuited with a rebate cut in the bottom and 6mm MDF bottom screwed and glued in place on full extension runners.
These ones are a mix of ply and MDF sides as I was using up offcuts, again 6mm bottoms screwed on but no rebate.
The Bisley draws you can see on teh left are good for small cutters etc.especially when you can get them for about £10 each |
| Frances IoM | 23/06/2017 08:24:14 |
| 1395 forum posts 30 photos | you use floor varnish on the MDF once the drawers are complete - two coats will give excellent protection from oil + water - MDF is also dimensionally stable whereas natural wood needs allowance to be made for changes due to moisture + temperature If you are making them to go in an outside shed then be wary of metal drawers that can act as condensation hideaways |
| JasonB | 23/06/2017 08:32:59 |
25215 forum posts 3105 photos 1 articles | We posted at the same time. Not all MDF is soft and prone to swell. I almost only use MR (Moisture resistant) MDF for work, not only will this resist reasonable short term wetting and not be affected by humidity it is about 50% denser than Standard grade MDF and even more so than DIY shed MDF. As with all MDF boards be careful when screwing into the edge, pilot drill and use suitable carcase or MDF screws. As Frances says a waterbased floor varnish is easy to apply and hardwearing, having said that none of my draw sides are sealed. The lathe draws have 6mm Melamine faced MDF but the blue ones are just bare MRMDF. |
| Perko7 | 23/06/2017 08:33:08 |
| 452 forum posts 35 photos | Most flat-pack kitchen cupboard & drawer units are made from water-resistant MDF and seem to last quite well. I usually scout around for used kitchen units from houses that are being renovated. With a bit of modification they work quite well, but sometimes need new drawer runners.
|
| richardandtracy | 23/06/2017 08:37:01 |
 943 forum posts 10 photos | Whatever you do, DON'T use chipboard. If there is high humidity through whatever reason, the chipboard will slowly sag under the weight of tools. In time, even in a dry workshop, chipboard will sag anyway, but humidity speeds things up. I do tend to use pallet planks run through a thicknesser, leaving the finished thickness around 19-20mm. This is thick enough not to bend under a reasonable load, and I can get pallets for nothing so it's a good supply of raw material at a price I'm prepared to pay. Mind you, my workshop could not be accused of being 'pristine' like some of those here. Last night I sawed enough firewood to create a bucket full of saw-dust, so with it being a multi-purpose shop it'll never be as clean as some of those photographed above. Regards, Richard.
|
| pgk pgk | 23/06/2017 08:45:58 |
| 2661 forum posts 294 photos | When i made my shed storage system it was all mdf.. and apart from some temporary hold on the base units it was all glued with brown glue and sash clamps rather than screws into mdf ends. For the drawers i made up a simple jig - lines on a baseboard with DIY angles for the boards to butt against and triangular wedges (like adjustable parallels) one of the pair screwed down and the other tapped in as necessary. The 6mm mdf drawer base was also glued on and weighed down with a 10L paint can. I had a bunch of them stacked like a pagoda and then tidied everything up with a ball-bearing router bit and yacht varnished. I've had bad experiences with cheap runner systems and too mean to buy the expensive ones so stayed with simple timber runners and wax. |
| ChrisB | 23/06/2017 08:49:15 |
| 671 forum posts 212 photos | Thanks gents, lots of useful advice as always - good enough to get me started in the right direction. Will have a look at the local timber shop to see what's available. |
| Spurry | 23/06/2017 10:46:41 |
| 227 forum posts 72 photos | My version of storage is covered by commercial trays of many sizes. I find it much easier to pull out the 'drawer' entirely and place it on the floor or bench-top to access the contents. The individual carcases are made from mdf and just knocked together with a rubber mallet, and are free-standing. Pete |
| Gordon A | 23/06/2017 11:48:57 |
| 157 forum posts 4 photos | Steel sides and runners are available on "The Bay" at reasonable prices. You just have to provide front, back and base. http://www.ebay.co.uk/bhp/kitchen-drawer-boxes. Gordon. |
| Frances IoM | 23/06/2017 13:04:05 |
| 1395 forum posts 30 photos | one thing to note with telescopic slides is the accuracy needed in drawers + carcase - you need accurate right angles etc so use jigs + sawbench fences etc if possible. One dodge is to produce the basic drawer with an attached decorate front but to initially cut a single piece of MDF that covers the full front for all drawers - drill out the holes for the bolts to hold handles easy to align these vertically then attach the full front to the bottom drawer using screws thro these bolt holes then pull out drawer + base + fix each drawer to full panel using prepared holes from inside the drawer - work up the drawers in turn - then unscrew all drawers from front panel, take panel to sawbench and slice each drawer front off the panel - add an extra curf cut(typically 1.5 - 2mm) at bottom of bottom panel to allow clearance - now attach all handles to fronts having counterdrilled holes at rear to allow machine screw heads to be flush (most handle fittings are 5mm thread and you may need to cut down supplied screws to fit + also add a washer) now just attach fronts to each drawer using the created screw holes - bingo all drawer fronts line up vertically + horizontally with just enough clearance |
| Bill Dawes | 23/06/2017 13:06:56 |
| 605 forum posts | Like Gordon I used some of these ready made runners, they enable drawer making to be really easy, most of the difficult work is already done for you. Bill D. |
| Clive Foster | 23/06/2017 13:31:23 |
| 3630 forum posts 128 photos | For workshop purposes you should always use full extension, full load, runners so the whole of the drawer is directly accessible. Many of the kitchen drawer kits are only partial extension so you need to fiddle stuff at the back out past what's in front or even partially unload the drawer first. That gets old real fast. Even those with full extension runners may not have full load capacity at full extension. Need to distribute things to keep the weight towards the back. Specifications also assume the load is evenly distributed. Plonking a small rotary table or decent size chuck in the front corner many be more than the structure or runners can cope with. If you plan to store larger, heavier items such as chucks, faceplates rotary tables or vices et al consider making the relevant drawers open side with only a minimal lip for the runners. Easier to get a good grip without the sides in the way. Less lift needed to clear the sides too which can also help handling. Often worth packing up the bottom so as to give a straight slide off with no lift. Pretty much mandatory to do this with the common horizontal / vertical rotary table as the handle and dial assembly projects below the base so you either have to lift the base or cut a slot. Slot is not a good idea in practice! Tried it and rapidly re-engieered to pack up the base. If one side of the cabinet is going to be up against a wall carefully consider what is going in that last bay as loading and unloading will have to be done semi-sideways with no elbow room on the wall side. Good place for sideless drawers or plates of holes for things like drill chucks, collets, et al. Clive. |
| Alan Wood 4 | 23/06/2017 14:31:55 |
| 257 forum posts 14 photos | The Wine Society at Stevenage keeps a stack of empty wooden wine shipment boxes in their shop entrance which you can take for a small contribution to charity. These make lovely drawers and storage boxes for little cost and they have a nice regional branded image on the end face. There is the added advantage that if you are desperate and it's after midday you can always sniff the wood. |
| clogs | 24/06/2017 07:33:25 |
| 630 forum posts 12 photos | HI, easy to get resin bonded shuttering ply if ur doing a lot and very cheap....I bought 5 pallets (250 sheets) when I last moved, been 13 years and it's almost gone.....hahaha...... always nice to use faced ply but oh so expensive......usually run a round over bit on the edges (router) and have a pre-made jig for the grab holes....no sticky out handles....will try to place a photo in my album.... oh, nice workshop Spurry........clogs
|
| Neil Wyatt | 24/06/2017 10:36:41 |
 19226 forum posts 749 photos 86 articles | Light duty benches (e.g. for electrics) I stick a new top on old units/desks. Big benches I fabricate from 2x3 studding. Neil |


Please login to post a reply.
Magazine Locator
Want the latest issue of Model Engineer or Model Engineers' Workshop? Use our magazine locator links to find your nearest stockist!
Sign up to our Newsletter
Sign up to our newsletter and get a free digital issue.
You can unsubscribe at anytime. View our privacy policy at www.mortons.co.uk/privacy
Latest Forum Posts
- hemingway ball turner
04/07/2025 14:40:26 - *Oct 2023: FORUM MIGRATION TIMELINE*
05/10/2023 07:57:11 - Making ER11 collet chuck
05/10/2023 07:56:24 - What did you do today? 2023
05/10/2023 07:25:01 - Orrery
05/10/2023 06:00:41 - Wera hand-tools
05/10/2023 05:47:07 - New member
05/10/2023 04:40:11 - Problems with external pot on at1 vfd
05/10/2023 00:06:32 - Drain plug
04/10/2023 23:36:17 - digi phase converter for 10 machines.....
04/10/2023 23:13:48 - More Latest Posts...
- View All Topics
Support Our Partners


Shopping Partners
Subscription Offer

Latest "For Sale" Ads
- Reeves** - Rebuilt Royal Scot by Martin Evans
by John Broughton
£300.00 - BRITANNIA 5" GAUGE James Perrier
by Jon Seabright 1
£2,500.00 - Drill Grinder - for restoration
by Nigel Graham 2
£0.00 - WARCO WM18 MILLING MACHINE
by Alex Chudley
£1,200.00 - MYFORD SUPER 7 LATHE
by Alex Chudley
£2,000.00 - More "For Sale" Ads...
Latest "Wanted" Ads
- D1-3 backplate
by Michael Horley
Price Not Specified - fixed steady for a Colchester bantam mark1 800
by George Jervis
Price Not Specified - lbsc pansy
by JACK SIDEBOTHAM
Price Not Specified - Pratt Burnerd multifit chuck key.
by Tim Riome
Price Not Specified - BANDSAW BLADE WELDER
by HUGH
Price Not Specified - More "Wanted" Ads...
Get In Touch!
Do you want to contact the Model Engineer and Model Engineers' Workshop team?
You can contact us by phone, mail or email about the magazines including becoming a contributor, submitting reader's letters or making queries about articles. You can also get in touch about this website, advertising or other general issues.
Click THIS LINK for full contact details.
For subscription issues please see THIS LINK.
Digital Back Issues


Donate

 Register
 Log-in
Model Engineer Magazine
- Percival Marshall
- M.E. History
- LittleLEC
- M.E. Clock

ME Workshop
- An Adcock
- & Shipley
- Horizontal
- Mill

Subscribe Now
- Great savings
- Delivered to your door

Pre-order your copy!
- Delivered to your doorstep!
- Free UK delivery!
All Forum Topics > Workshop Tools and Tooling > Workbench drawers