Forum sponsored by:

What did you do Today 2018
| David Taylor | 03/09/2018 08:27:50 |
 144 forum posts 39 photos | I moved the milling machine. Couldn't find a better place for it so I'll try this. Thanks Perko. It wobbles at the moment so needs shimming under the cabinets. But it also needs to move towards the camera in the photo below now the milling machine has been placed. The bench needs to come towards the camera too, the vice is barely usable now and I'm left-handed.
I also did some work on the 5" mogul and tried an example file in Cut2D. The Tormach post-processor has something nasty in the preamble code that plunged my slot drill right through my workpiece, which luckily was thick wood, hanging off the end of the vice! I copied the preamble from a Fusion generated file and things got better. I still didn't get to the E-stop in time, even though I was expecting trouble and had slowed the machine moves down... I think the problem is you don't want to wait forever so set the moving height to say 20mm, but that doesn't give you enough time to kill it if it continues to rapid move down. |
| Andrew Johnston | 03/09/2018 09:16:09 |
 7061 forum posts 719 photos | Posted by David Taylor on 03/09/2018 08:27:50:
The Tormach post-processor has something nasty in the preamble code that plunged my slot drill right through my workpiece, which luckily was thick wood, hanging off the end of the vice! I copied the preamble from a Fusion generated file and things got better. I still didn't get to the E-stop in time, even though I was expecting trouble and had slowed the machine moves down... I think the problem is you don't want to wait forever so set the moving height to say 20mm, but that doesn't give you enough time to kill it if it continues to rapid move down. Almost certainly a tool change problem. It's normal to set X, Y and Z zeros using tool 0, the master tool. When you change to tool 1, say, which is a different length the machine needs to take that into account. With the old Mach3 setup you could tweak the Z postion on the screen. But PathPilot doesn't allow that so you need to account for the different length in the tool table, either manually or automatically. In the end I got sufficiently pee'd off manually zeroing each tool and typing the numbers in that I bought an electronic tool height setter. Andrew |
| Mark Rand | 03/09/2018 11:22:32 |
| 1505 forum posts 56 photos | Posted by David Taylor on 03/09/2018 08:27:50:
The bench needs to come towards the camera too, the vice is barely usable now and I'm left-handed.
Being also left handed, I reasoned that all the vices in the school woodwork shop and apprentice training school were set up for right handed folk. So I put my vice at the other (right) end of the bench in my shed. Works for me |
| David Taylor | 03/09/2018 12:56:02 |
144 forum posts 39 photos | Posted by Andrew Johnston on 03/09/2018 09:16:09:
Almost certainly a tool change problem. It's normal to set X, Y and Z zeros using tool 0, the master tool. When you change to tool 1, say, which is a different length the machine needs to take that into account. I've been looking at the code from Fusion, PP conversational, and Cut2D. I think the problem is that the Cut2D post-processor turns off tool length compensation (G49), then travels to Z20.320 which the post-processor is calling the home Z position. But when there is a tool sticking 70mm out this means it will plunge 50mm into the material! Only after this does it do the G30 like the others. It makes no sense to me, even if I had an empty spindle it is just an unnecessary Z move which will be undone by the G30 so I can put the tool in. G0 G17 G21 G90 G40 G49 G64 P0.03 The G0s between G80 and G30 are not required - PP and Fusion don't do them.
|
| Andrew Johnston | 03/09/2018 16:12:29 |
7061 forum posts 719 photos | Here's a snippet of my code with tool heights taken from the table at tool change: N10 G21 There are a few oddities in the toolchange code, such as the G90, which is there for historical reasons, must get rid of it sometime. The G04 delay is to allow the spindle to get up to speed before moving axes when machine tapping. The following is the sequence I use after powering up the Tormach: RESET the controller using the button on the screen Reference all active axes using the buttons - I reference Z first in case there's anything in the way. This sets the machine co-ordinates using the limit switches Set Z=0 on the mill table using tool 0, which in my case is a length of silver steel with a ballnose end and longer than any tool I'm likely to use If I need to fill the tool table I use the electronic tool setter and the offsets screen making sure the tool number box represents the tool I want each time Once the work is in place I set X=0 and Y=0 on the work, or fixture, according to where I've set the origin in the CAM program I then set Z=0, using tool 0 with 0 selected in the tool window, on the work or fixture, again according to where the CAM program origin is set Once that is done putting tool 1 in the spindle,and selecting tool 1 in the box, should give Z=0 at the same origin as set with tool 0 It may not be the most elegant method but it works for me. When I updated to PathPilot I had a disagreement with Tormach about using tool 0. They now recommend using the spindle nose rather than a master tool. But the spindle nose is big and clumsy, and you can't see what you're doing. So I don't use it. The post-processor is part of the CAM program rather than part of the Tormach controller. It is normal to write ones own. Which is what I did for my CAM program (VisualMill). I've got two, one using tool tables and one not. I use tool tables 95% of the time. But when I use the high speed spindle I don't want to use tables, as the spindle has no repeatable way to swap tools. Homing for tool changes is something I must sort out. At the moment I simply edit the G-code to put in a G0 Z100.00 to move the spindle up far enough for a manual tool change. Roll on retirement, then I'll have time to sort out all these little issues! Andrew |
| mechman48 | 03/09/2018 19:17:09 |
 2947 forum posts 468 photos | Yesterday actually; replaced a defunct cooker hood fan that decided to stop working last week. managed to find a 'generic' replacement on 't'internet from electrical spares provider so with the aid of a builder friend & some fiddly manoeuvring managed to swap it out. Tested out fine before replacing hood on wall so job done, in the same context has anyone done the same /similar, & would any one know if these motors are repairable as it seem a waste to throw it out if it can be repaired, the replacement aint what I would call cheap, but a lot cheaper than buying a complete new hood. |
| Neil Wyatt | 03/09/2018 21:30:04 |
 19226 forum posts 749 photos 86 articles | I tried my first experiment with anodising today. Just a rough-finished block that I had knocked up as a temporary telescope dovetail clamp, as it was the right size. Don't judge the workmanship! The result was a very impressive colour, although I had to microwave the (industrial) dye to get it to work and yes it faithfully kept all the original machining marks. I can run a hardened steel screwdriver ove the finish with light pressure and it doesn't mark it, which is good. More noticeable was where I had filled some wrongly placed holes with Alutite - they went black in the caustic soda, didn't anodise and didn't take any die. They look like JB Weld but aren't! Tomorrow I will try a couple of 'proper' parts.
|
| Mark Rand | 03/09/2018 23:07:01 |
| 1505 forum posts 56 photos | I'm not sure I really want a finishing process that highlights all of my 'design changes'! |
| Sam Stones | 03/09/2018 23:50:37 |
 922 forum posts 332 photos | George (mechman48) ... I sent you a PM. Regards, Sam |
| Neil Wyatt | 04/09/2018 08:49:12 |
19226 forum posts 749 photos 86 articles | Posted by Mark Rand on 03/09/2018 23:07:01:
I'm not sure I really want a finishing process that highlights all of my 'design changes'!
The block has been repurposed at least twice - that's why I had to change the placement/size of holes. It also shows the scratched and dings unanodised alloys collect when left rattling around for a year or two. Neil |
| Robin | 04/09/2018 09:16:07 |
 678 forum posts | Posted by Neil Wyatt on 03/09/2018 21:30:04:
The result was a very impressive colour, although I had to microwave the (industrial) dye to get it to work and yes it faithfully kept all the original machining marks. I can run a hardened steel screwdriver ove the finish with light pressure and it doesn't mark it, which is good. My one attempt at anodising preserved the metal most wondrously but I could not get the colour to penetrate. Controlling the current using an auto bulb meant it took a lot longer than expected to convert and I thought that was the problem. Please explain this microwaving thing if you have time. I thought hot water sealed the surface. |
| duncan webster | 04/09/2018 10:18:28 |
| 5307 forum posts 83 photos | I trust we're to look forward to an article in MEW about anodising. I'm making some bits in ally which would look a lot better black. Edited By duncan webster on 04/09/2018 10:18:47 |
| Neil Wyatt | 04/09/2018 11:12:03 |
19226 forum posts 749 photos 86 articles | Posted by Robin on 04/09/2018 09:16:07:
Please explain this microwaving thing if you have time. I thought hot water sealed the surface. It does, but the dye I'm using is optimised for 40-60C with lower temperatures giving a less intense colour. Unlike most anodising dyes it's a chemical process based on ferric oxylate which reacts with the oxidised layer and the solution is bright green. I'm following an industrial process which also means sealing in a cold seal solution then finishing with a simmer. Neil |
| Neil Wyatt | 04/09/2018 11:14:03 |
19226 forum posts 749 photos 86 articles | Posted by duncan webster on 04/09/2018 10:18:28:
I trust we're to look forward to an article in MEW about anodising. I'm making some bits in ally which would look a lot better black. Edited By duncan webster on 04/09/2018 10:18:47 Yes, I'm hoping for one, but it's unlikely to be written by me. Out of interest, that Alutite has gone 'porous' on the surface - my guess is that zinc has leached out. If scratched it shows bright silver. Neil |
| mechman48 | 04/09/2018 14:21:42 |
2947 forum posts 468 photos | Posted by Sam Stones on 03/09/2018 23:50:37:
George (mechman48) ... I sent you a PM. Regards, Sam
|
| Neil Wyatt | 04/09/2018 14:59:18 |
19226 forum posts 749 photos 86 articles | This looks bit better. Three knobs for my telescope. I did them together and one turned out pale (I don't think it had a very good connection with the titanium wire). It gopt close to the other two after an extra half hour in the die but I could see it wasn't ever going to match so I stripped it with caustic and reanodised it. In warm water these take about 20 -30 minutes to achieve full colour. I'm guessing the conventional black die will take quicker.
|
| Mick B1 | 04/09/2018 19:59:30 |
| 2444 forum posts 139 photos | Finished a nutcracker patterned after a 1950s example by Austrian modernist Carl Auböck. Not especially effective when compared to a Mole wrench but looks good:-
...plus the truck bracket subassembly (trepanned out of flat bar) for a 68-pdr Carronade model.
|
| Spurry | 04/09/2018 20:51:30 |
| 227 forum posts 72 photos | In an attempt to try and find things when I need them, my "system" is to have various heights of 600x400 plastic trays positioned in modules with the locations shown in a database on the PC. A requirement for a mobile module had arisen and it was completed today. These are my original static modules made for the old workshop
A few shelves First side
Assembled unit. All fitted together with just a rubber mallet.
Most difficult part was trying to work out how to post text and pictures. Pete
|
| Jon Lawes | 04/09/2018 20:54:49 |
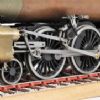 1078 forum posts | Neil those telescope knobs look superb! I reprofiled the Britannia wheels to give them the 3 degree profile recommended, and made more of the bogie. Very satisfying. |
| Neil Wyatt | 04/09/2018 21:39:20 |
19226 forum posts 749 photos 86 articles | Very nice Mick. Neil |


This thread is closed.
Magazine Locator
Want the latest issue of Model Engineer or Model Engineers' Workshop? Use our magazine locator links to find your nearest stockist!
Sign up to our Newsletter
Sign up to our newsletter and get a free digital issue.
You can unsubscribe at anytime. View our privacy policy at www.mortons.co.uk/privacy
Latest Forum Posts
- hemingway ball turner
04/07/2025 14:40:26 - *Oct 2023: FORUM MIGRATION TIMELINE*
05/10/2023 07:57:11 - Making ER11 collet chuck
05/10/2023 07:56:24 - What did you do today? 2023
05/10/2023 07:25:01 - Orrery
05/10/2023 06:00:41 - Wera hand-tools
05/10/2023 05:47:07 - New member
05/10/2023 04:40:11 - Problems with external pot on at1 vfd
05/10/2023 00:06:32 - Drain plug
04/10/2023 23:36:17 - digi phase converter for 10 machines.....
04/10/2023 23:13:48 - More Latest Posts...
- View All Topics
Support Our Partners


Shopping Partners
Subscription Offer

Latest "For Sale" Ads
- Reeves** - Rebuilt Royal Scot by Martin Evans
by John Broughton
£300.00 - BRITANNIA 5" GAUGE James Perrier
by Jon Seabright 1
£2,500.00 - Drill Grinder - for restoration
by Nigel Graham 2
£0.00 - WARCO WM18 MILLING MACHINE
by Alex Chudley
£1,200.00 - MYFORD SUPER 7 LATHE
by Alex Chudley
£2,000.00 - More "For Sale" Ads...
Latest "Wanted" Ads
- D1-3 backplate
by Michael Horley
Price Not Specified - fixed steady for a Colchester bantam mark1 800
by George Jervis
Price Not Specified - lbsc pansy
by JACK SIDEBOTHAM
Price Not Specified - Pratt Burnerd multifit chuck key.
by Tim Riome
Price Not Specified - BANDSAW BLADE WELDER
by HUGH
Price Not Specified - More "Wanted" Ads...
Get In Touch!
Do you want to contact the Model Engineer and Model Engineers' Workshop team?
You can contact us by phone, mail or email about the magazines including becoming a contributor, submitting reader's letters or making queries about articles. You can also get in touch about this website, advertising or other general issues.
Click THIS LINK for full contact details.
For subscription issues please see THIS LINK.
Digital Back Issues


Donate

 Register
 Log-in
Model Engineer Magazine
- Percival Marshall
- M.E. History
- LittleLEC
- M.E. Clock

ME Workshop
- An Adcock
- & Shipley
- Horizontal
- Mill

Subscribe Now
- Great savings
- Delivered to your door

Pre-order your copy!
- Delivered to your doorstep!
- Free UK delivery!
All Forum Topics > The Tea Room > What did you do Today 2018