Forum sponsored by:

The Workshop Progress thread 2018
| JasonB | 14/10/2018 15:24:05 |
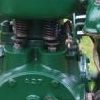
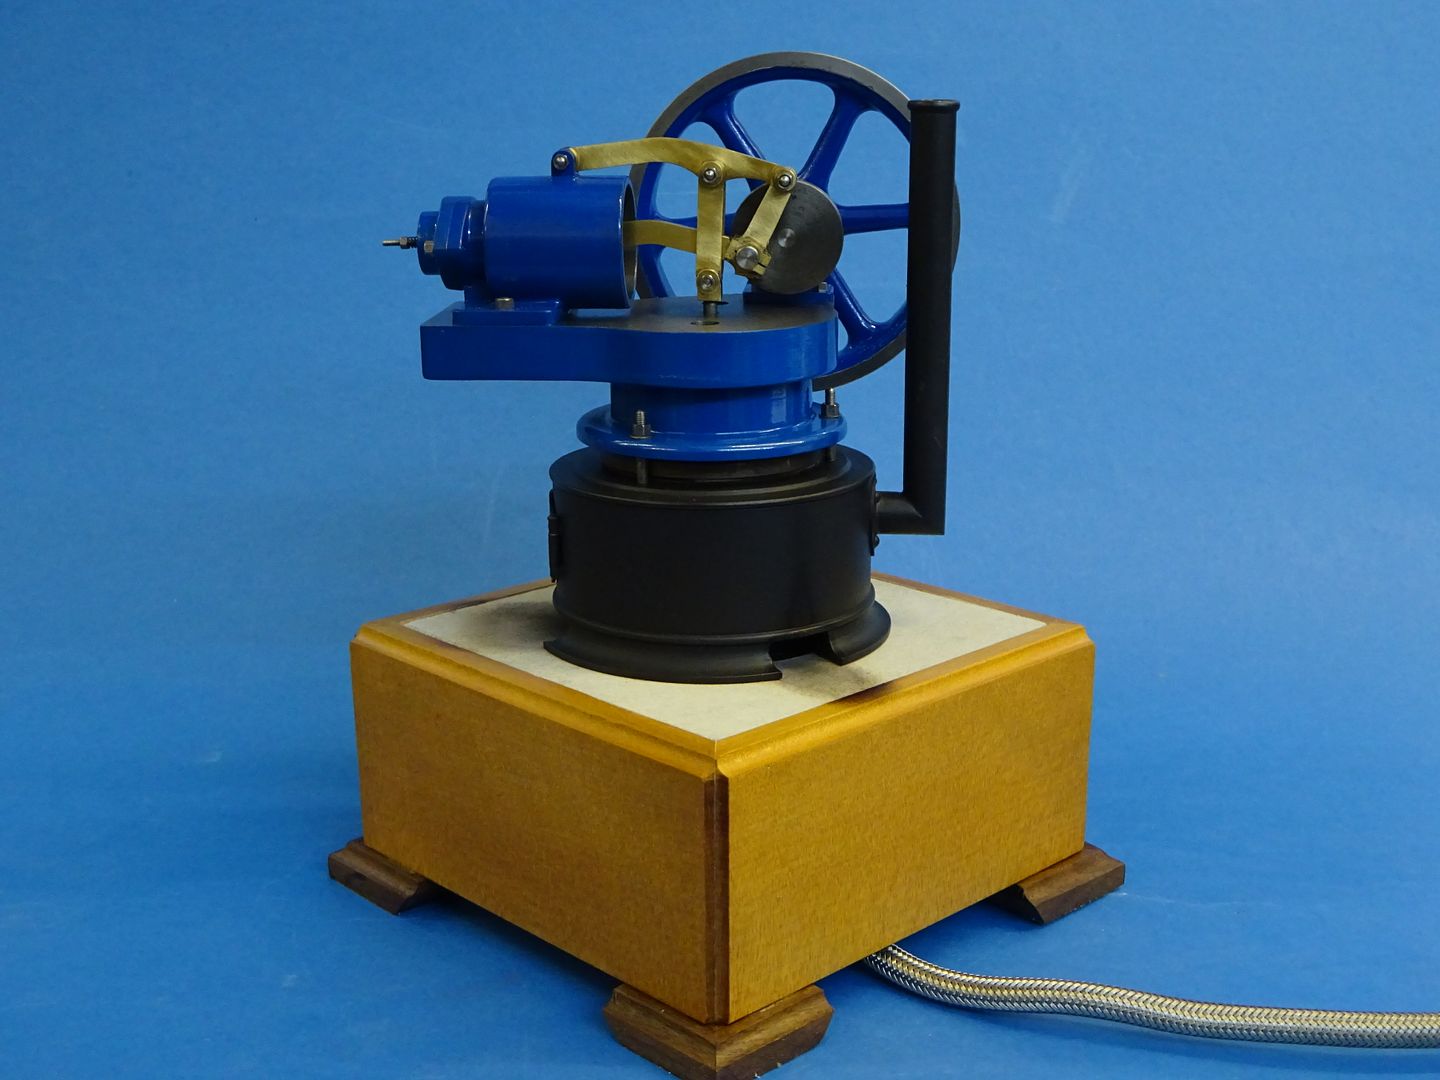
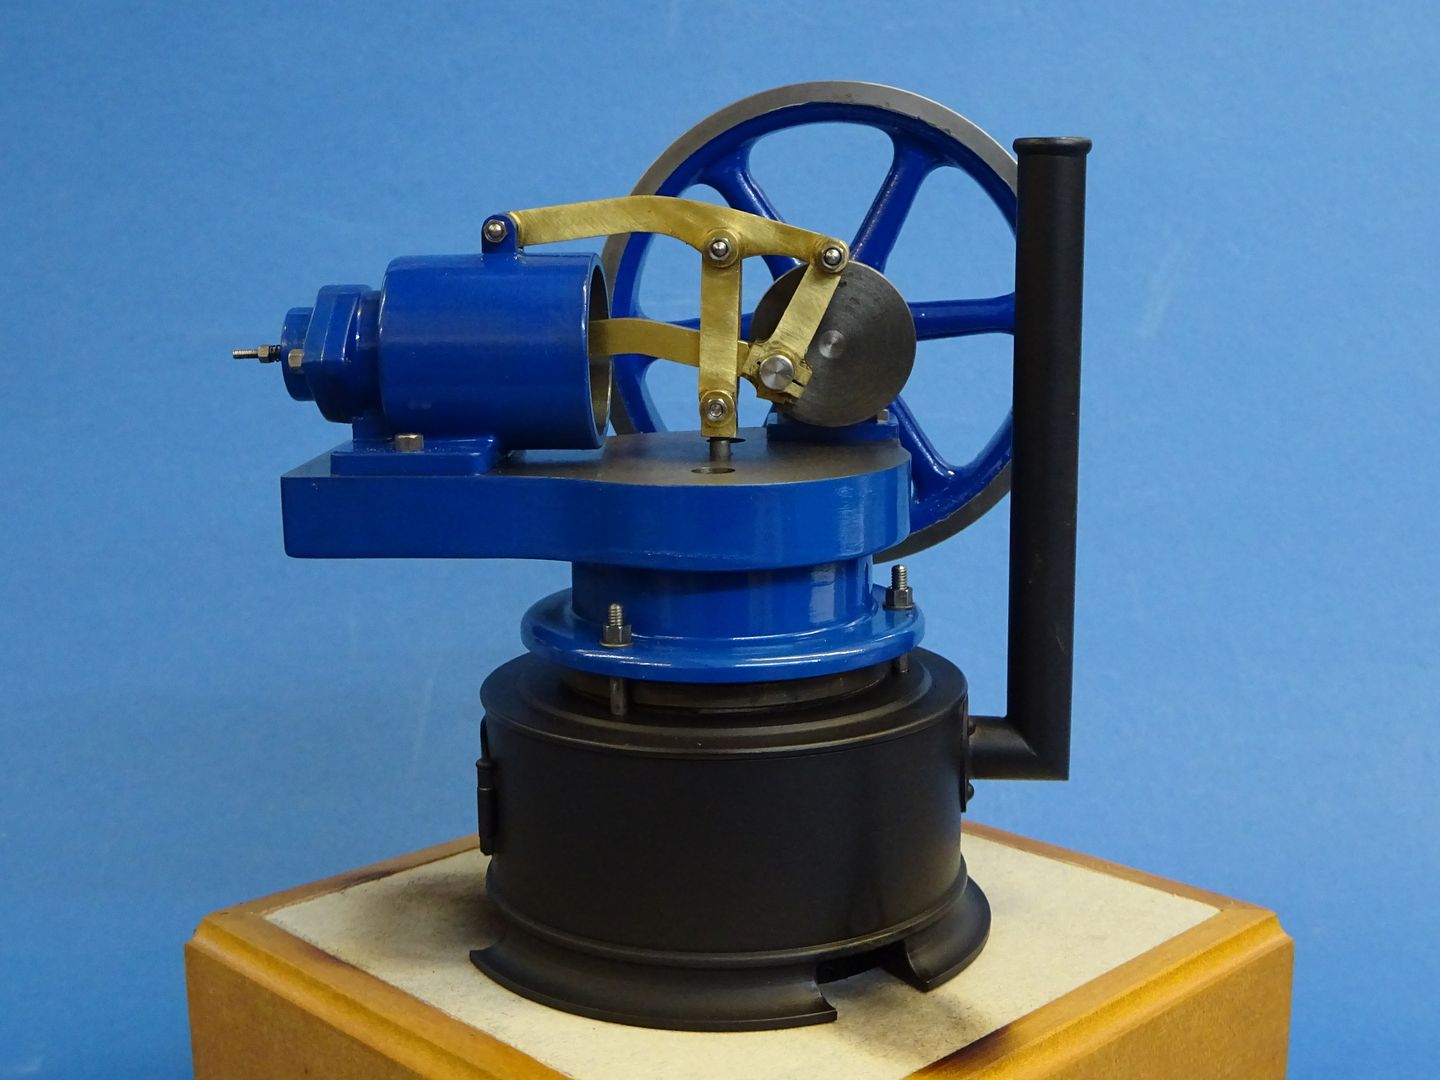
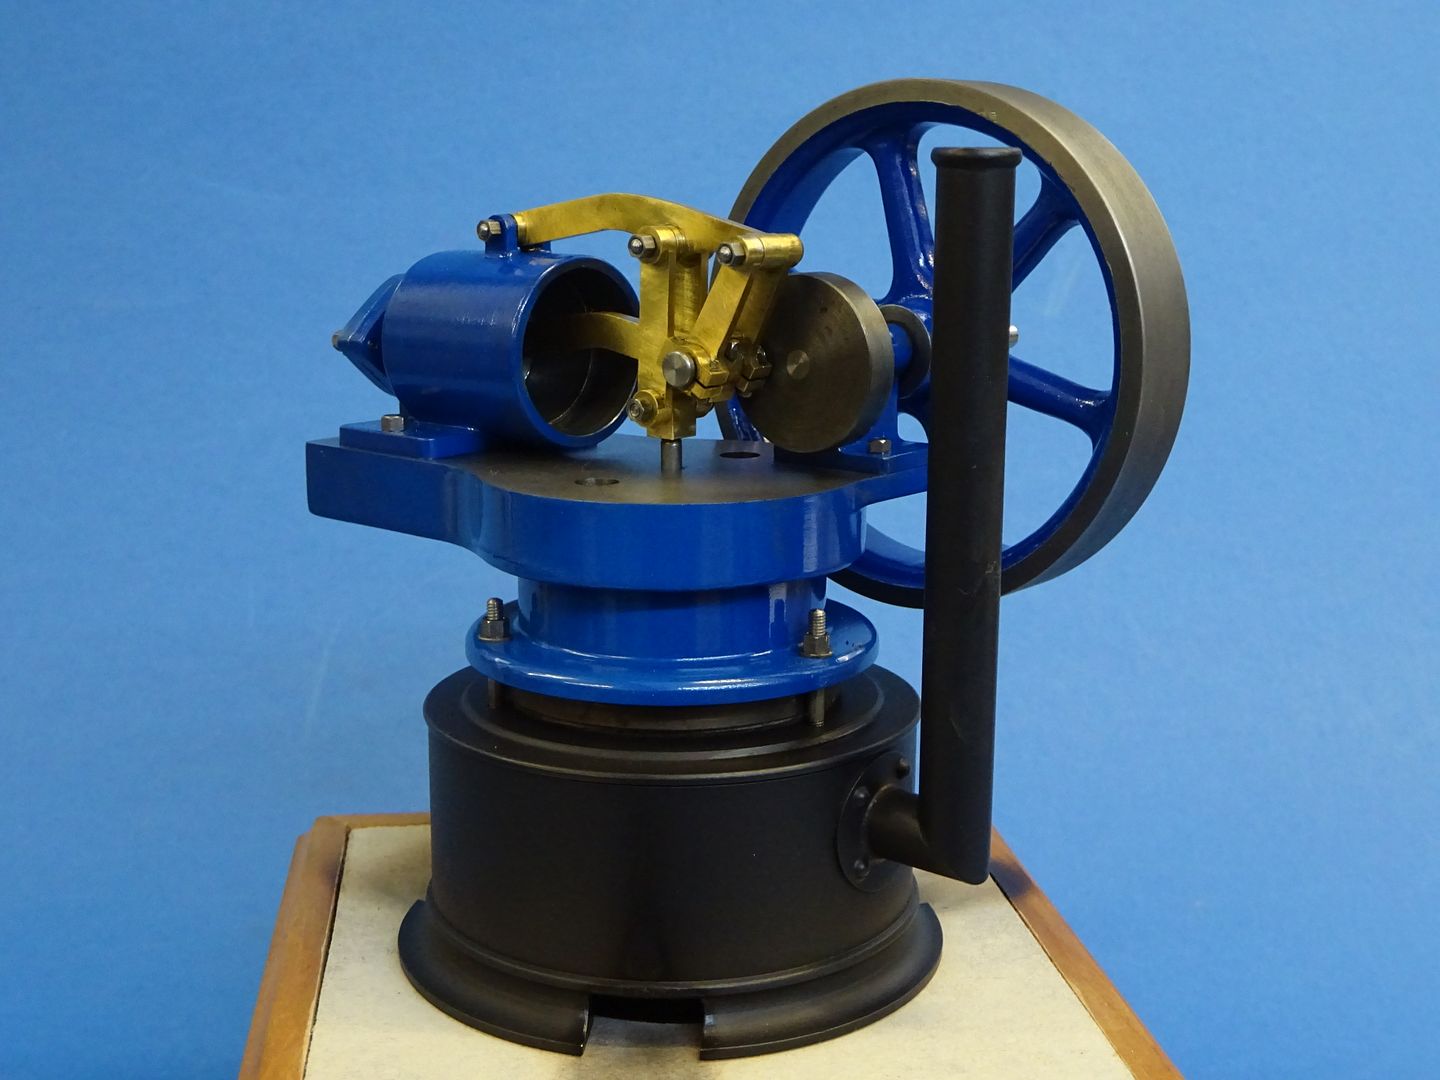
 25215 forum posts 3105 photos 1 articles | I got the burner and base for my wee Robbie finished off so thought a couple of pictures were in order, seems like blue is the popular choice for these engines.
I did try it with Mamod fuel tabs without the base and it ran OK on them going nearly the full 10min burn time before slowing as the engien got a bit hot, I was nor running any cooling water. However the style of base I made would not work with the tablets as there was not enough air and the flame soon went out. So a change of firing method was needed, I settled on a modified camping gas stove as this draws it's air from outside or in this case up from under the raised display base and also offers more control over the flame not to mention less of a smell.
As seems to be the usual case the engine did not want to run once it was all back on the base, I eventually traces this to the flywheel being a bit close to the bearing and rubbing but not before I had tried it with a bit more heat than I should which resulted in a scorched base and one of the joints opening up Anyway the base repairs can wait, here is the video. Ruler make sit look a bit shorter than it is but still only 4 1/2 " from back of cylinder to front of chimney.
|
| Neil Wyatt | 15/10/2018 12:02:25 |
 19226 forum posts 749 photos 86 articles | Is that from the Polly castings? Neil |
| JasonB | 15/10/2018 12:10:47 |
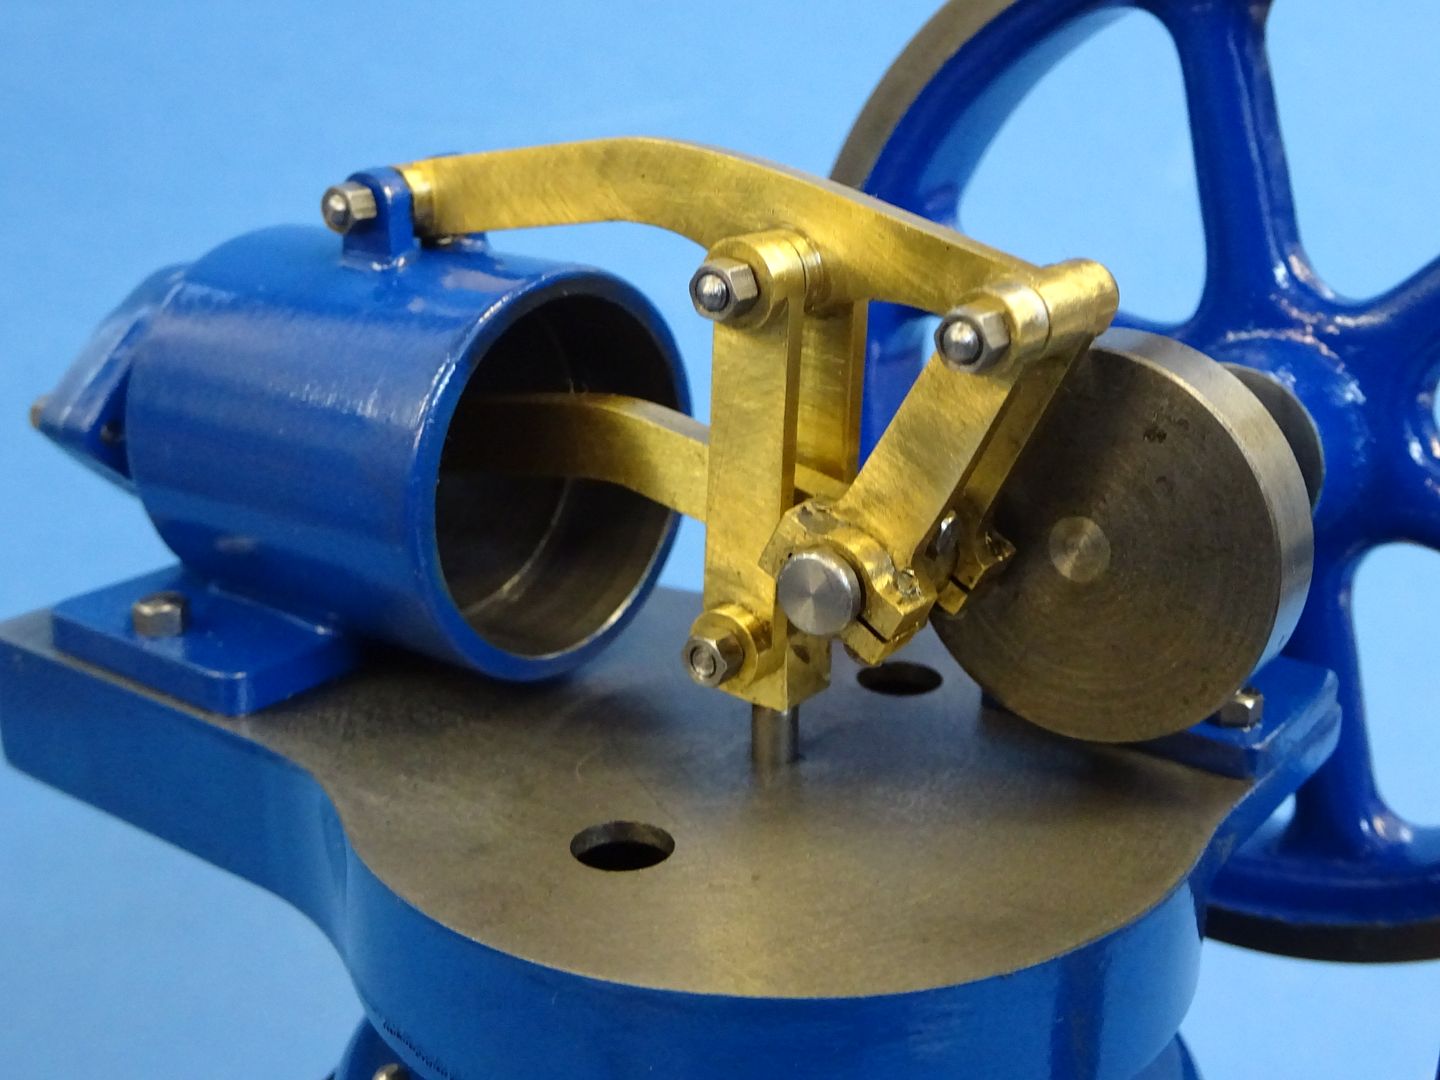
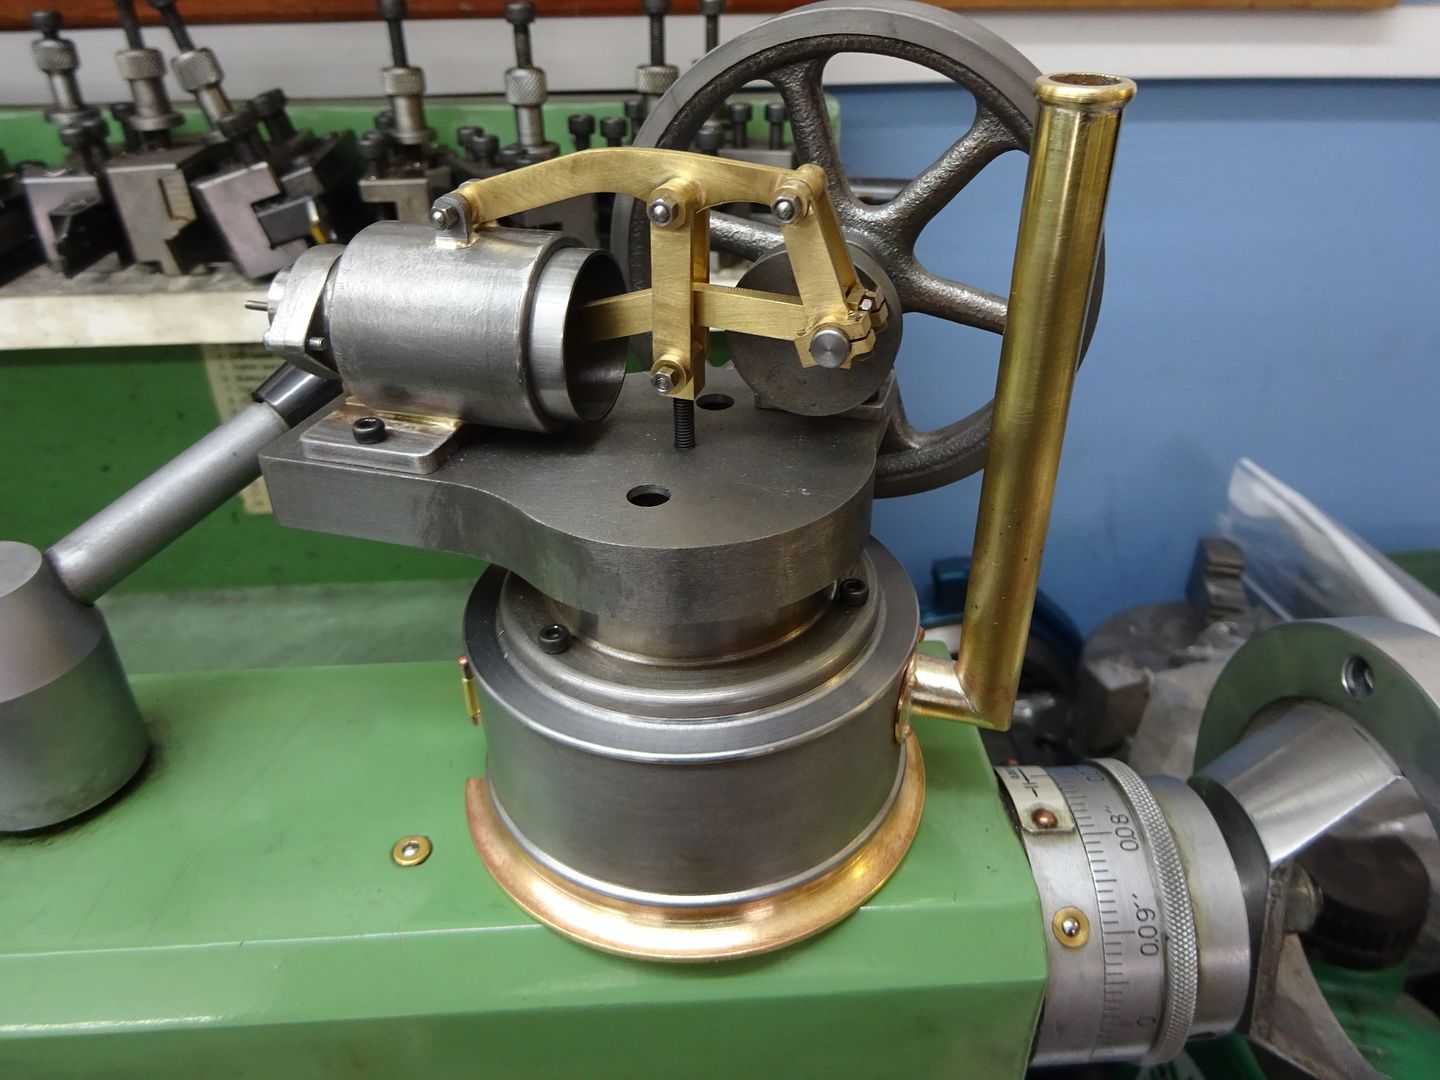
25215 forum posts 3105 photos 1 articles | No all carved from solid or fabricated except the flywheel which is a Stuart 10 size casting. Scaled down to 24mm bore from the Alyn half scale drawings with suitable alterations for size and not using castings. This "naked" shot of it sat on my tailstock shows the bare materials.
Edited By JasonB on 15/10/2018 12:16:24 |
| Jim Nic | 15/10/2018 12:28:10 |
 406 forum posts 235 photos | I'm not a fan of hot air engines, but I have to admire the workmanship and appearance of the finished article. Nice one Jason. Jim |
| David T | 15/10/2018 15:50:53 |
| 76 forum posts 14 photos | Completed (mostly) building my dividing head. Having said that, I've got a random dividing plate that SWMBO picked up on a whim; at some point I'll make up a worm attachment for it. Now if only I could remember why I needed a dividing head in the first place...............?
|
| mechman48 | 15/10/2018 17:01:23 |
 2947 forum posts 468 photos | Nice little runner there Jason. George. Edited By mechman48 on 15/10/2018 17:02:09 |
| JasonB | 21/10/2018 17:21:18 |
25215 forum posts 3105 photos 1 articles | Well as I got the Robinson running nicely last weekend I thought I would see if my luck would hold out a while longer so got the R&V vertical out and spent most of the day tinkering with that. It's now close enough to being a runner that it can be stripped and painted as any further adjustments will only be minor and should not risk mucking up the paint.
J |
| Jim Nic | 23/10/2018 19:51:29 |
406 forum posts 235 photos | One step forward and 2 steps back on the Overcrank. I made the base, just a piece of ali sheet with 6 round holes for the crank bearing supports and 4 elongated holes for the cylinder block. What could possibly go wrong?
When I offered up the cylinder to the base I found out. The holes in the cylinder base were incorrectly positioned and although I could have used them the cylinder would have been 90 deg out and pointing acrtoss the base instead of along it. The correct positions are marked out in the picture below.
"Oh, pooh sticks." I said, and went for a lie down while I considered whether to scrap the base or the cylinder block. After a while when calm was restored I came up with a simple plan and plugged the M4 holes in the cylinder base and redrilled them in the correct place.
After that I made the crankshaft bearing supports. Here is the base with one shaped support and 1 blank (the third is set up on the milling machine).
For some time now I have been muttering within earshot of the Domestic Authority that I could do with somebody to talk to while I'm busy making important stuff in my "playroom" as she calls it. I have let it be known that a dog would probably fit the bill despite her lifelong objection to domestic animals making a mess in her nice clean house. Well to day she gave in and came home with my new pet. Meet Doug:
I'm not sure she is taking this matter seriously. Jim
|
| Ian McVickers | 28/10/2018 15:40:15 |
| 261 forum posts 117 photos | Finally managed to finish off the grinder tool rests today. Seems like I've been working on them for weeks.
Also cobbled together a nichrome wire perspex bender. I've got a few sheets of coloured 4mm thick stuff that I'm planning on making into drawer dividers. |
| GoCreate | 01/11/2018 20:35:45 |
 387 forum posts 119 photos | Hi I have a Stuart 10V i'd like to paint and do a bit of lining on. I've done some lining with an old fashioned draughtsman pen but wanted to try a lining pen. I found some 'blunt dispensing needles' and used them to make a lining pen. My initial trials have given some pretty good results though I need to learn more of the technique. I made some video's to share the idea if anyone should be interested.
Nigel
Edited By tractionengine42 on 01/11/2018 20:44:57 |
| paul rayner | 01/11/2018 22:49:33 |
| 187 forum posts 46 photos | Nigel thats very interesting and informative thank you PS the last link won't work but I've managed to view it through the tube regards paul |
| GoCreate | 01/11/2018 23:00:25 |
387 forum posts 119 photos | Thanks Paul, The needles cost less than £2 the set and all the other materials were just some off cuts so a very cheap and quick project, the practice takes longer than the building. I missed a digit off the last link, here it is again. Nigel |
| JasonB | 02/12/2018 17:38:43 |
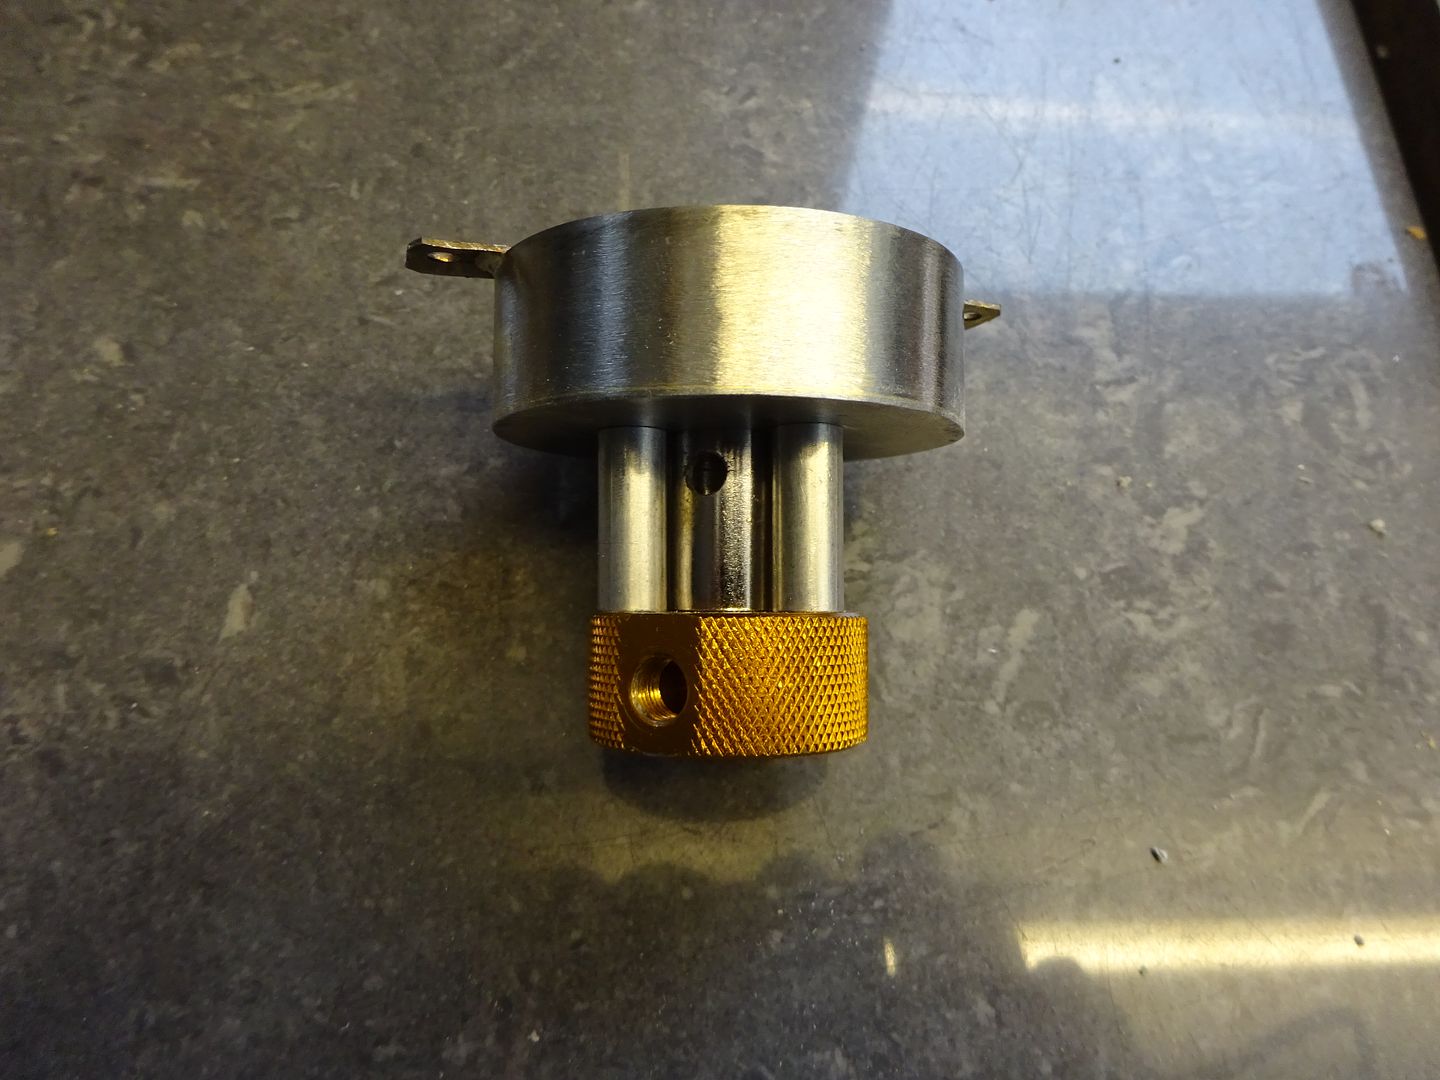
25215 forum posts 3105 photos 1 articles | I decided to make the bearing supports and bearings for the IF Allman from scratch as the supplied castings had a couple of issues so over the last couple of days have machined those which allowed me to work out how to mount the larger timing gear and the eccentric that is fixed to it. All seems to turn over nice and smoothly.
|
| martin perman | 02/12/2018 18:38:46 |
 2095 forum posts 75 photos | Posted by JasonB on 15/10/2018 12:10:47:
No all carved from solid or fabricated except the flywheel which is a Stuart 10 size casting. Scaled down to 24mm bore from the Alyn half scale drawings with suitable alterations for size and not using castings. This "naked" shot of it sat on my tailstock shows the bare materials.
Edited By JasonB on 15/10/2018 12:16:24 I see full size Robinsons at vintage rallies during the summer and I have one of those burners with its stand to boil my tea kettles, its one of the best I've bought for camping. Martin P |
| mechman48 | 08/12/2018 10:48:51 |
2947 forum posts 468 photos |
|
| Ian S C | 09/12/2018 11:05:08 |
 7468 forum posts 230 photos | A full size example, running on a wood fire. Ian S C |
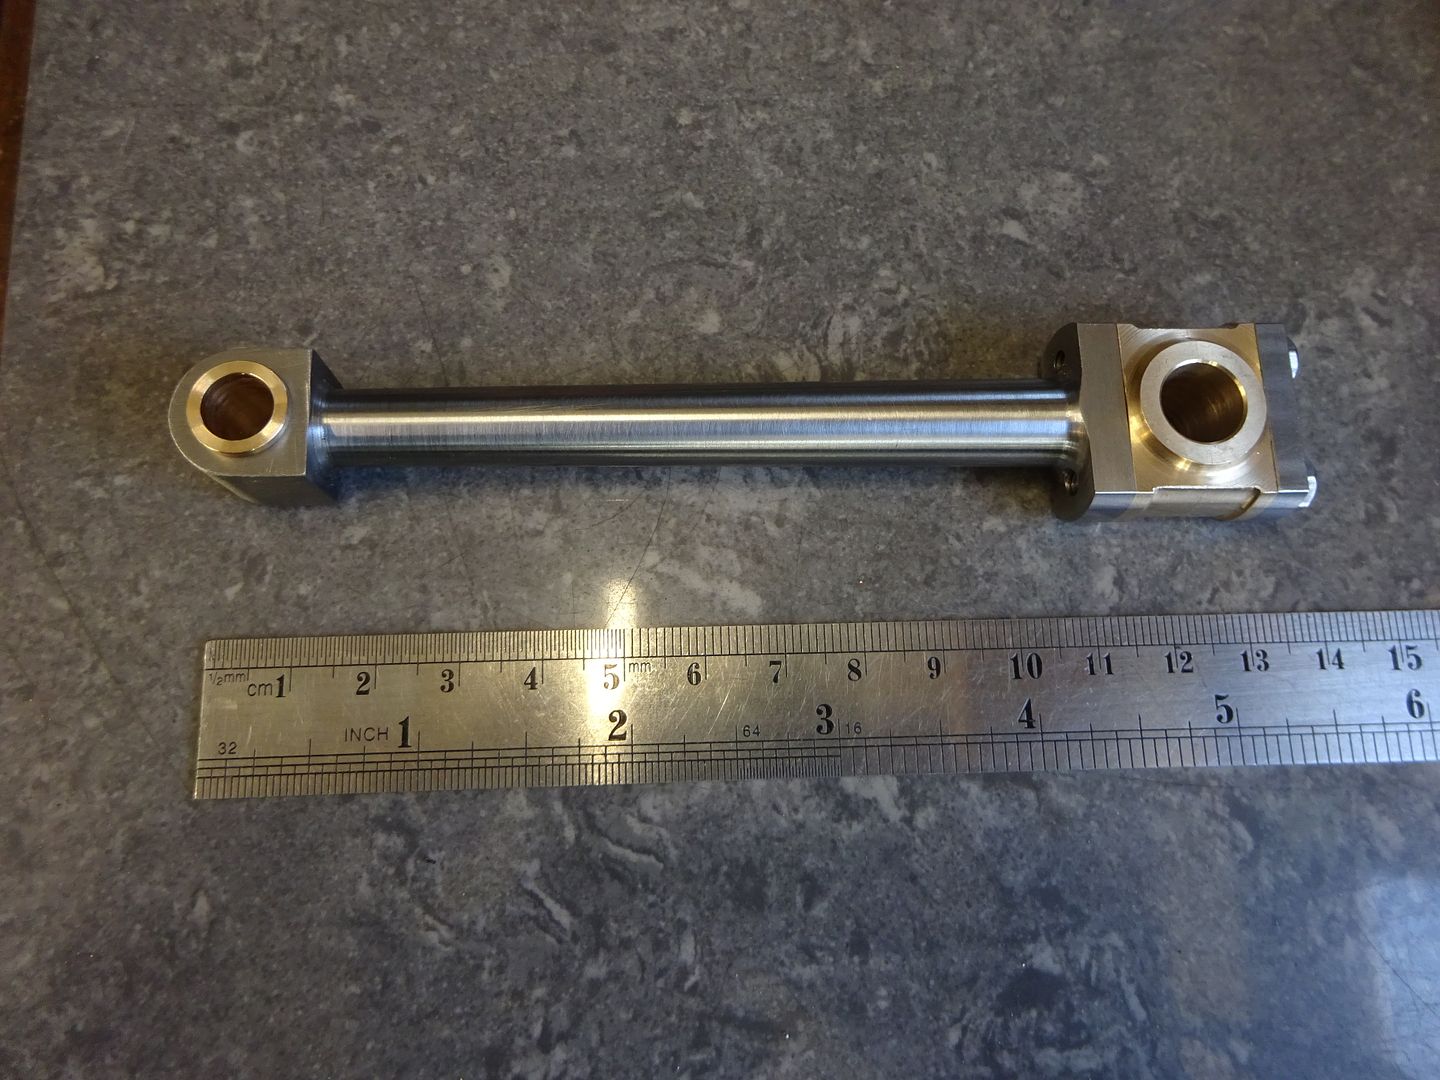
| JasonB | 09/12/2018 17:04:21 |
25215 forum posts 3105 photos 1 articles | Thanks Ian, I think you posted that on MEM and I used it as a ref when making my base. Made the conrod for the IF Allman this weekend
|
| JasonB | 18/12/2018 19:09:50 |
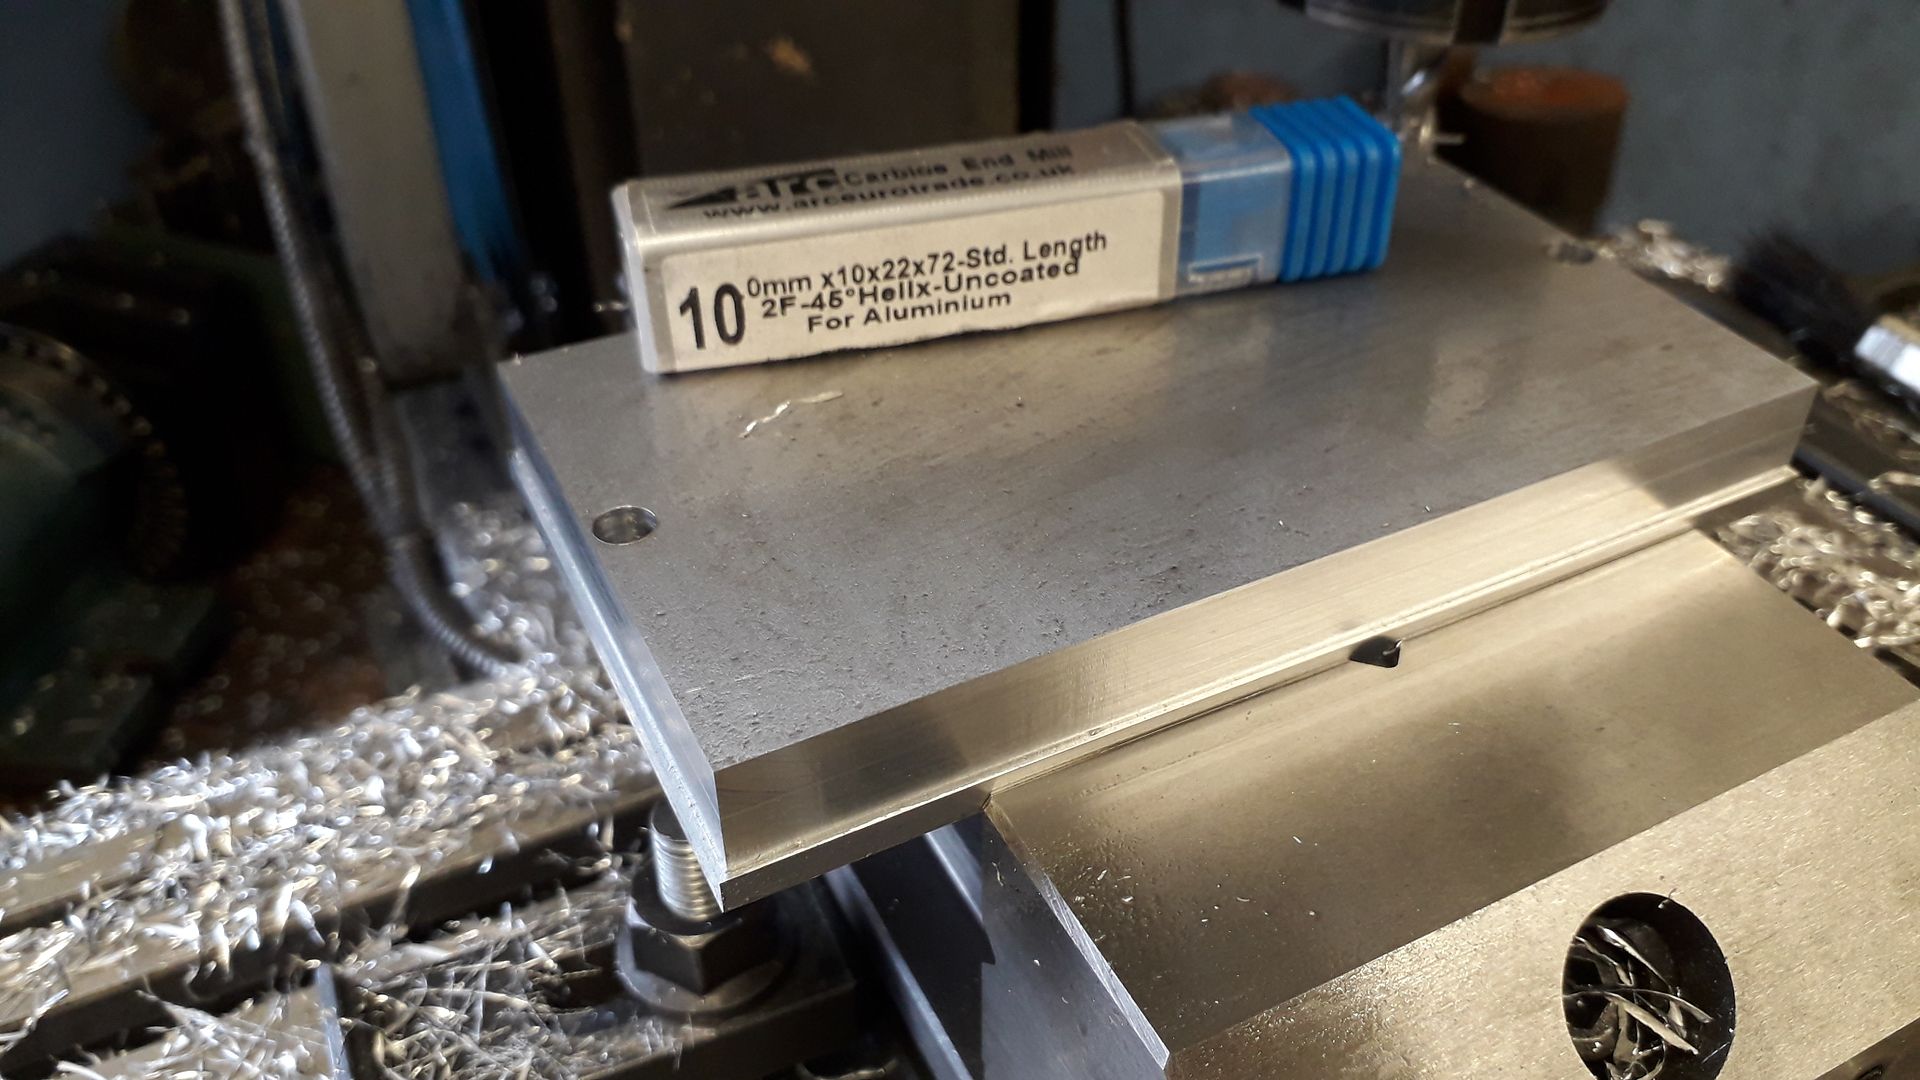
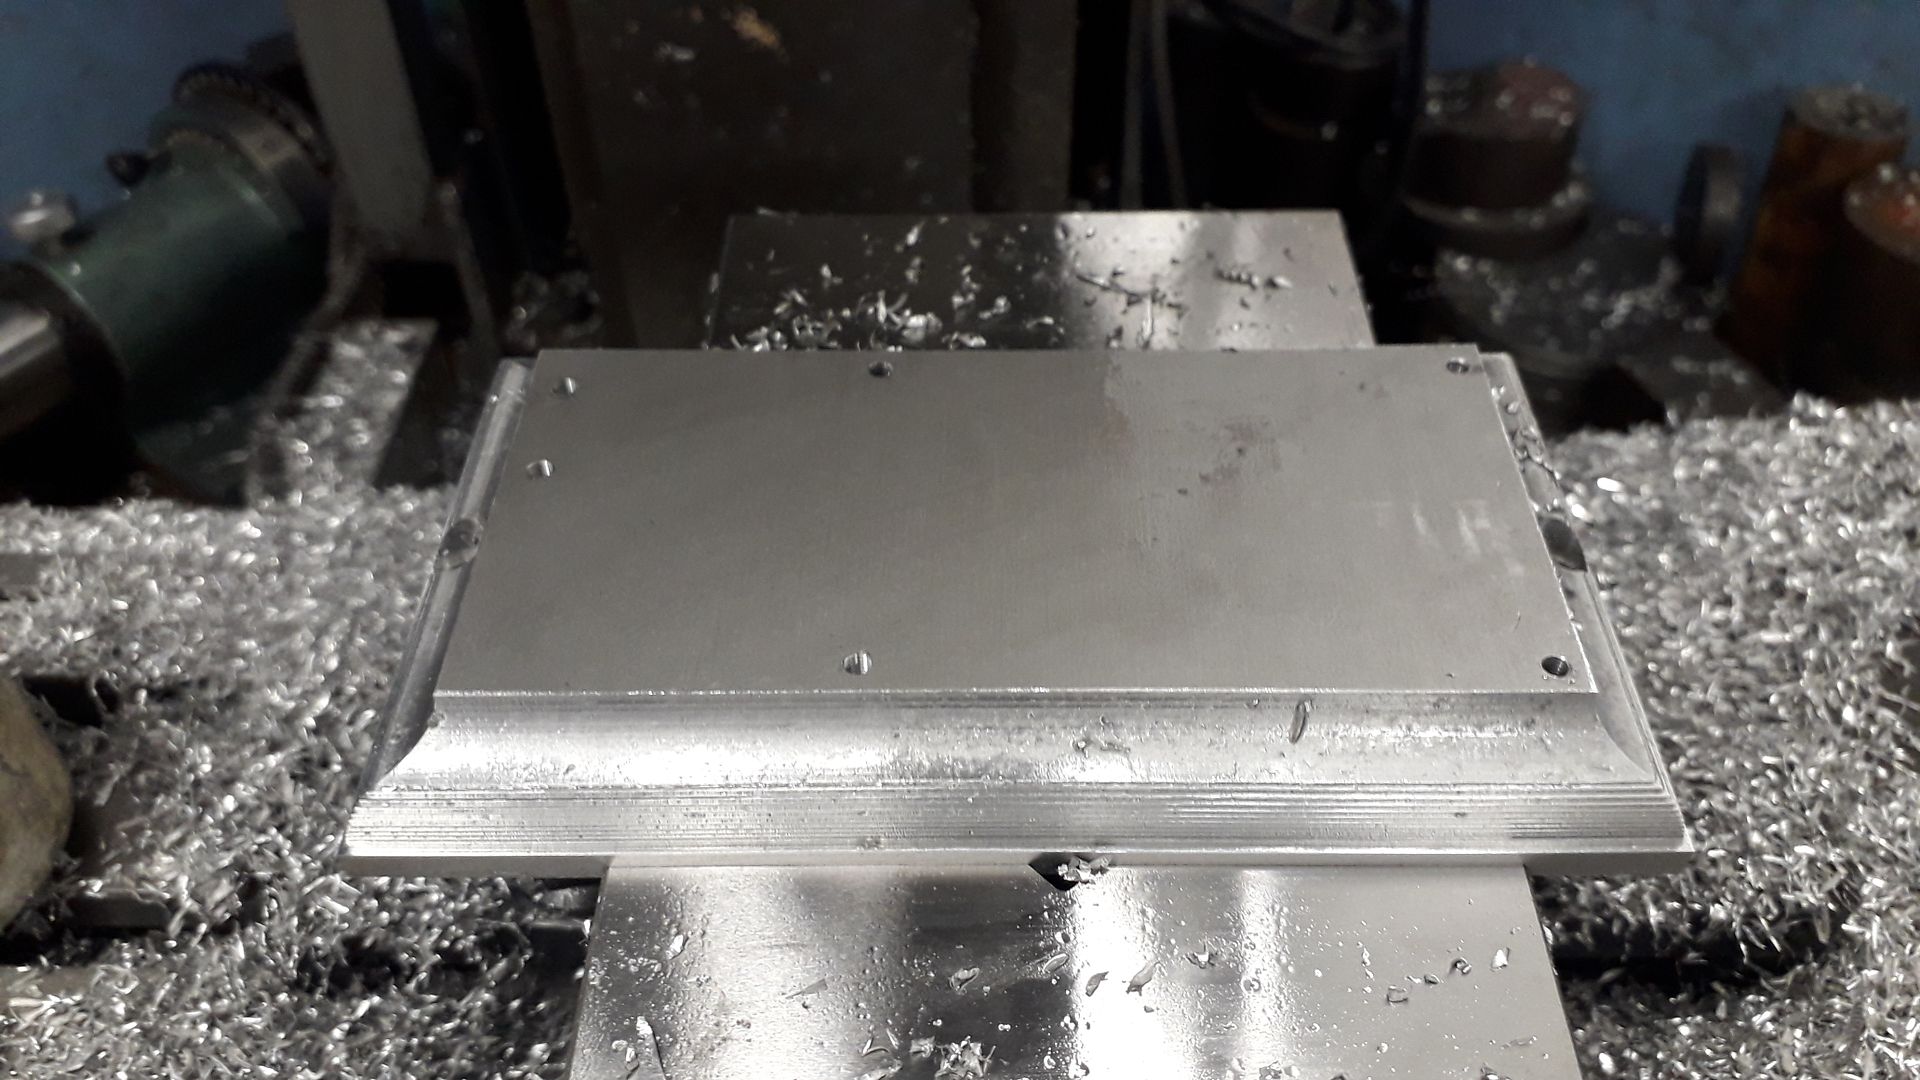
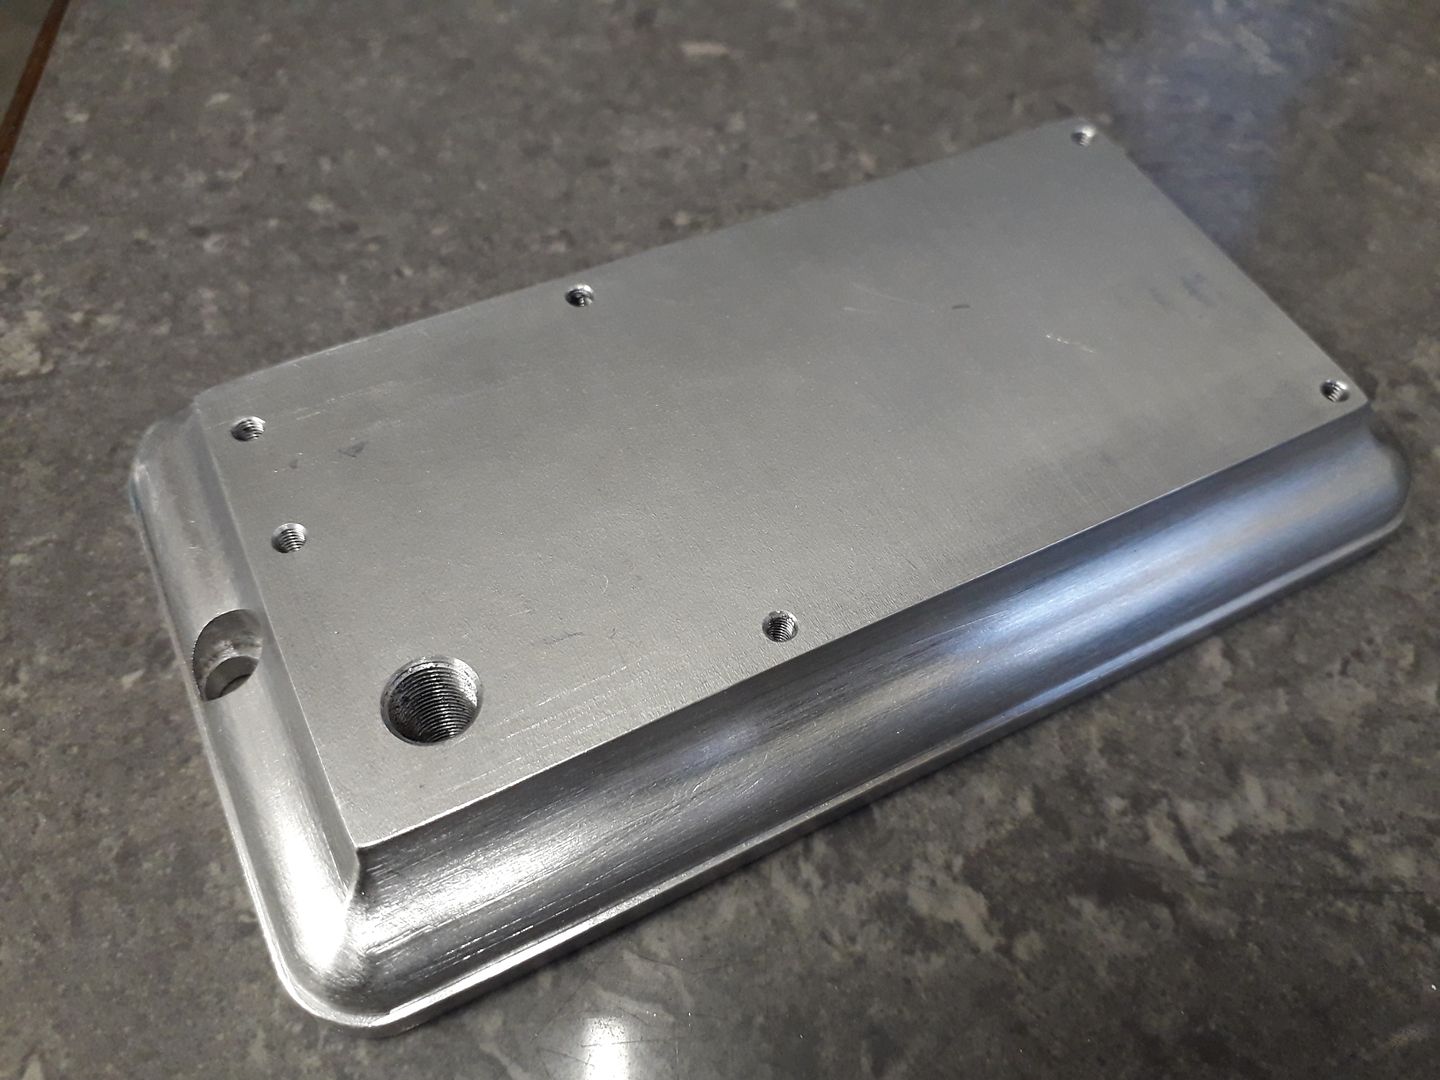
25215 forum posts 3105 photos 1 articles | It's jobs like this that make CNC appealing but do I really need it when I have got Alibre to give me some tool offsets and a DRO so the mill can be set to these? Started with a bit of 16mm 6082, drilled a couple of holes that will be easier now than later and then squared the ends with a couple of full depth passes.
Made a start with a 12mm high by 1mm deep pass all round
Then worked my way up in 0.5mm increments
Until I got to a height where a 12mm bull nose cutter could be used for the other half of the ogee
Then did similar to the corners except I used 1.0mm steps
Then a bit of hand work to blend in all the steps.
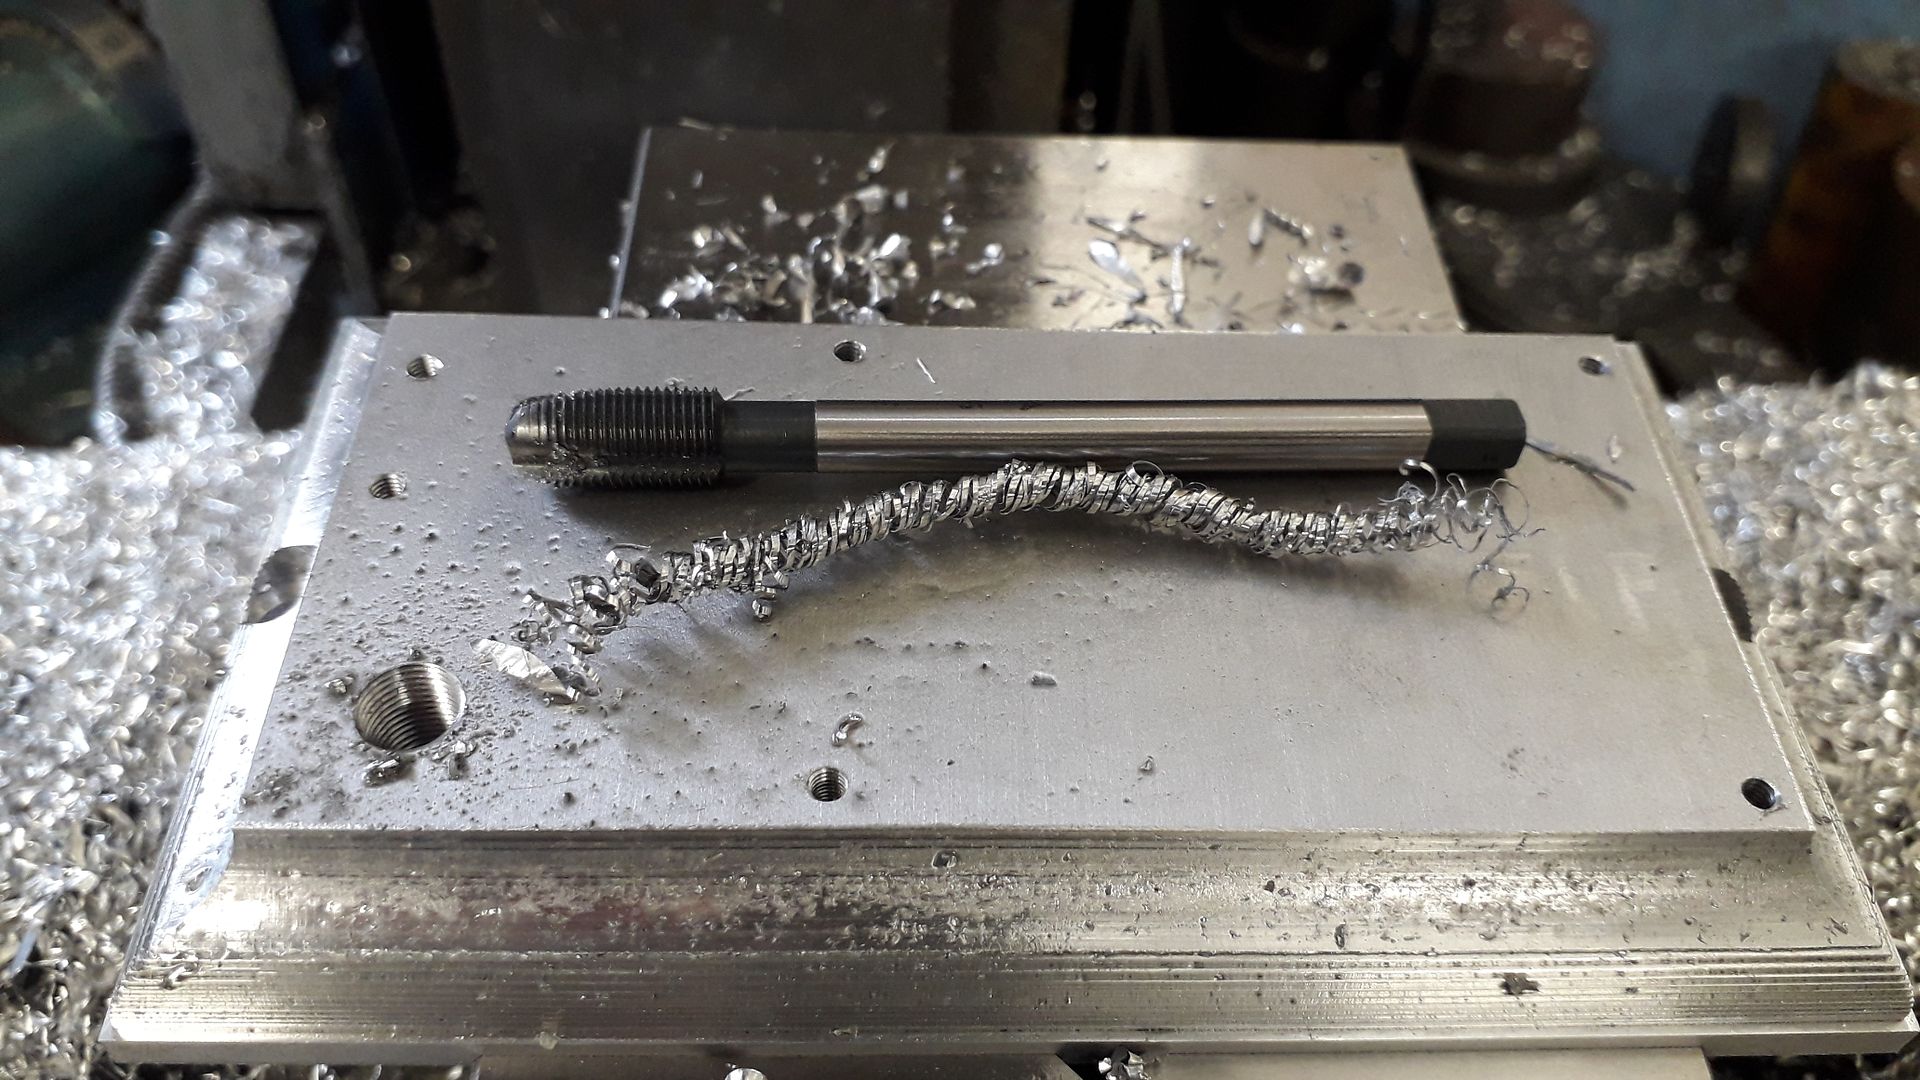
If you have not used a spiral point tap for through holes you have been missing out, I cut this M8 x 0.75 without backing off the tap and the swarf shown all came out the bottom of the hole rather than clogging up the flutes like you would get with a traditional tap.
Edited By JasonB on 18/12/2018 19:17:24 |
| Ron Laden | 18/12/2018 19:54:51 |
 2320 forum posts 452 photos | Jason, you have made a nice job of that, you say a bit of hand work to blend in all the steps, but what tool/tools did you use. Also how does the tip of the tap differ, its a bit difficult to see from the picture. If like the name suggests it has spirals just at the tip they must be quite short..? Ron |
| JasonB | 18/12/2018 20:41:20 |
25215 forum posts 3105 photos 1 articles | Nothing special in the hand tool department, mostly a 6mm square file to blend the stepped convex part, a 10mm round file, few grades of emery and a bit of 12mm steel bar to wrap the emery around as well as around the sq file. As the name suggests it is only the point or end that has a spiral which due to being so short looks more like an angled flute here, unlike a drill the flute is left handed so pushes the swarf down. You can see the spiral a lot better on spiral flute taps which have a longer spiral and that is right handed so it lifts the swarf out of blind holes here and below.
|


.jpg")
.jpg")
.jpg")


This thread is closed.
Magazine Locator
Want the latest issue of Model Engineer or Model Engineers' Workshop? Use our magazine locator links to find your nearest stockist!
Sign up to our Newsletter
Sign up to our newsletter and get a free digital issue.
You can unsubscribe at anytime. View our privacy policy at www.mortons.co.uk/privacy
Latest Forum Posts
- hemingway ball turner
04/07/2025 14:40:26 - *Oct 2023: FORUM MIGRATION TIMELINE*
05/10/2023 07:57:11 - Making ER11 collet chuck
05/10/2023 07:56:24 - What did you do today? 2023
05/10/2023 07:25:01 - Orrery
05/10/2023 06:00:41 - Wera hand-tools
05/10/2023 05:47:07 - New member
05/10/2023 04:40:11 - Problems with external pot on at1 vfd
05/10/2023 00:06:32 - Drain plug
04/10/2023 23:36:17 - digi phase converter for 10 machines.....
04/10/2023 23:13:48 - More Latest Posts...
- View All Topics
Support Our Partners


Shopping Partners
Subscription Offer

Latest "For Sale" Ads
- Reeves** - Rebuilt Royal Scot by Martin Evans
by John Broughton
£300.00 - BRITANNIA 5" GAUGE James Perrier
by Jon Seabright 1
£2,500.00 - Drill Grinder - for restoration
by Nigel Graham 2
£0.00 - WARCO WM18 MILLING MACHINE
by Alex Chudley
£1,200.00 - MYFORD SUPER 7 LATHE
by Alex Chudley
£2,000.00 - More "For Sale" Ads...
Latest "Wanted" Ads
- D1-3 backplate
by Michael Horley
Price Not Specified - fixed steady for a Colchester bantam mark1 800
by George Jervis
Price Not Specified - lbsc pansy
by JACK SIDEBOTHAM
Price Not Specified - Pratt Burnerd multifit chuck key.
by Tim Riome
Price Not Specified - BANDSAW BLADE WELDER
by HUGH
Price Not Specified - More "Wanted" Ads...
Get In Touch!
Do you want to contact the Model Engineer and Model Engineers' Workshop team?
You can contact us by phone, mail or email about the magazines including becoming a contributor, submitting reader's letters or making queries about articles. You can also get in touch about this website, advertising or other general issues.
Click THIS LINK for full contact details.
For subscription issues please see THIS LINK.
Digital Back Issues


Donate

 Register
 Log-in
Model Engineer Magazine
- Percival Marshall
- M.E. History
- LittleLEC
- M.E. Clock

ME Workshop
- An Adcock
- & Shipley
- Horizontal
- Mill

Subscribe Now
- Great savings
- Delivered to your door

Pre-order your copy!
- Delivered to your doorstep!
- Free UK delivery!
All Forum Topics > Work In Progress and completed items > The Workshop Progress thread 2018