Forum sponsored by:

What did you do today? (2013)
| JasonB | 17/03/2013 20:02:39 |
 25215 forum posts 3105 photos 1 articles | I laid some blocks and flag stones in preparation for my soon to be complete Large scale Easton & Anderson Grasshopper Beam
Neil, most traction engines have a bare rim so they can be used for belt work, don't think I've ever seen one painted.
J |
| Stub Mandrel | 17/03/2013 20:12:35 |
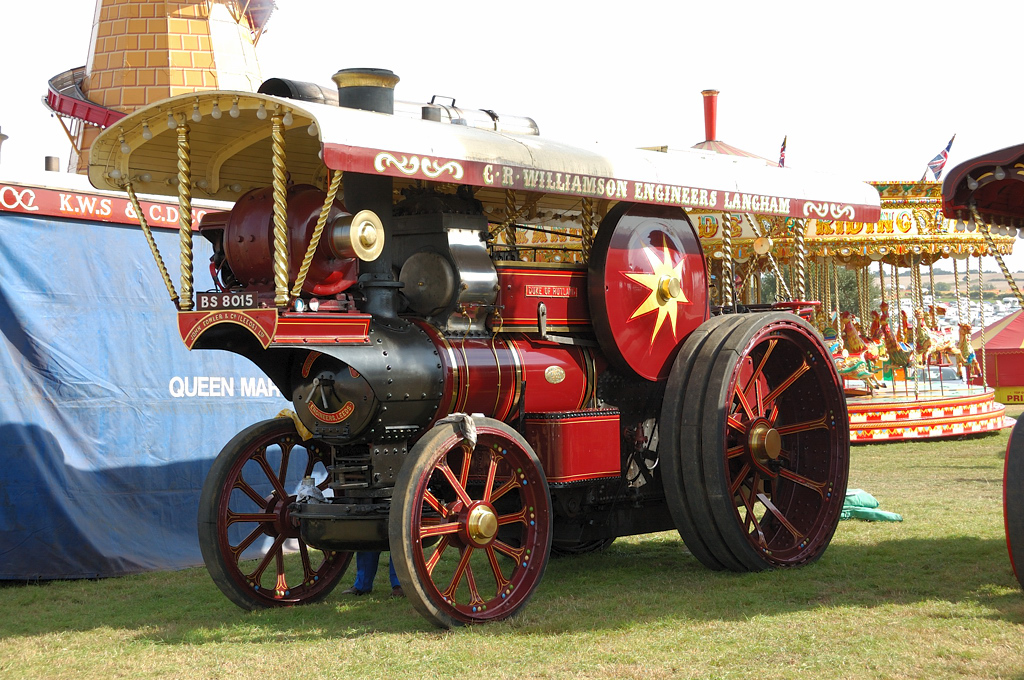
 4318 forum posts 291 photos 1 articles | Model ones usually have bright rims, but there are lots of painted flywheels in evidence HERE such as these ones:
Neil Edited By Stub Mandrel on 17/03/2013 20:25:41 |
| Windy | 17/03/2013 21:35:22 |
 910 forum posts 197 photos |
Posted by Andrew Johnston on 17/03/2013 19:27:55:
Posted by Windy on 17/03/2013 11:52:11:
Rebuilt the flash steamer engine with a lightened piston and new Dykes ring. Well I never, I didn't know Dykes rings were still used. Paul Dykes was listed as an engineering fellow of college when I matriculated in 1980, but I don't think he was active in college by then. I certainly never met him. The dykes rings are still used in some of the top drag racing cars fuelled with nitro etc. Paul |
| Boiler Bri | 17/03/2013 22:00:55 |
 856 forum posts 212 photos | I watched two black fives thunder through one of our local stations with 11 coaches in tow.
NICE.
http://www.youtube.com/watch?v=SLspgfrzBkY
No brownie points scoring you two!
Bri Edited By Boiler Bri on 17/03/2013 22:02:03 |
| JasonB | 18/03/2013 07:49:26 |
25215 forum posts 3105 photos 1 articles | Neil, I did say traction engines as in General purpose or agricultural which were used for belt work. Also need to take into account that preserved engines may not be true to original. The top picture is a road loco and they did not do a lot on the belt so were sometimes painted. And as you Duke oF Rutland the showmans road loco have a closer look thats not a black painted ring its a nice patina on the CI caused by years of running the generator off the belt. The other thing that may be hard to do if it were ground is to put the crown on the rim, would need some form of copy grinder I suppose. Edited By JasonB on 18/03/2013 07:50:52 Edited By JasonB on 18/03/2013 07:57:15 |
| mick H | 18/03/2013 08:28:38 |
| 795 forum posts 34 photos | Well, yesterday really. I posted a thread asking for information on a component I need to make a drawbar extractor that will fit the bizarre thread on my mill drill spindle. By teatime I had been made a generous offer and asked, by a regular contributor, for the dimensions of the proposed extractor as he was "set up" for it and it would save me having to braze a piece in! What an amazing forum this is with even more amazing people contributing to it. Mick Edited By mick H on 18/03/2013 08:28:54 |
| Stub Mandrel | 18/03/2013 20:55:33 |
4318 forum posts 291 photos 1 articles | OK Jason, I surrender! If only to distract you, can I complement on your stonework? What did you use? Neil |
| JasonB | 18/03/2013 20:58:22 |
25215 forum posts 3105 photos 1 articles | I used a mix of PVA type glue water and drywall compound but polyfilla would do. I'll write it up in the build thread for the E&A on MEM and put a link here when its done, will be a week or so as I need to paint the stone. Just off to read about your latest creation J |
| _Paul_ | 23/03/2013 18:29:13 |
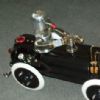
 543 forum posts 31 photos | What I made today
Edit Images resizes. J Edited By JasonB on 23/03/2013 20:01:18 |
| Stub Mandrel | 23/03/2013 21:33:55 |
4318 forum posts 291 photos 1 articles |
You're ready to face the world with that Jason I fitted a new loo seat, fitted a curtain rail, shortened a new pair of curtains and eventually got to make a couple of parts for Gray's neat differential leadscrew dial design (the main spindle, less the gear cutting, and the washer). I've never worked to hundredths of a millimetre before - high stress and difficult mental calculations with dials marked in 0.025mm! Much judicious use of emery cloth! Neil |
| 1 | 30/03/2013 20:28:14 |
| 65 forum posts 1 photos | Today I started on converting a warm and well lit home office into a warm and well lit model engineering workshop. What passes for my current workshop is the end of a draughty and uninsulated garage with very little natural light and the office is very lightly used due to impending retirement. I have done very little in my shop for the last 4 weeks or so since freezing my wossnames off in pursuit of a hobby seemed a bit extreme so casting around for somewhere better suited I lit on the office and the decision seemed to be what our former colonial subjects would call a "no brainer". There is some electrical work to install power sockets at bench height, a bench to make, which will be a 3 metre long kitchen worktop, and some shelves to put up. After that move the lathe and mill/drill and away we go. Hopefully I should be set up again just in time for Spring! Jim
|
| Nicholas Farr | 30/03/2013 20:48:52 |
 3988 forum posts 1799 photos | Hi, well today I found out that I need another 32 tooth change gear for my Boxford to screwcut my new blank backplate. So thats that job on hold till at least Thursday evening. Regards Nick. |
| Ian Welford | 30/03/2013 21:16:18 |
| 300 forum posts | Set off with the intention of working on the ball turning tool from MEW. Having yesterday compeleted a hand turning rest ( modelled on GHT's version) for my Boxford. . The SWMBO decided , as it was above zero, that the caravan should be cleaned! Four hours later it looked a lot cleaner and most of the muck was on me instead. Decided instead to sand and oil a 12" Burr oak bowl which I was working on yesterday. Then got carried away and sorted a burr elm bowl (only 5" dia) as well. Still to sand and oil that but retired to computer as needed some inspiration ! Tomorrow may take dogs / kids or combination of the same to Brimham Rocks climbing or might go to York club for Easter steaming- SWMBO permitting! Regards Ian |
| magpie | 30/03/2013 22:43:09 |
 508 forum posts 98 photos |
|
| mechman48 | 31/03/2013 17:00:04 |
 2947 forum posts 468 photos | Terryd I have the WM16 with the digi readout like yours,& have been have a bit of a prob' correctly using the up / down arrows to set measurement ref. maybe I need to clean mine as there seems to be spurious readings when I try to put a d.o.c. on, would appreciate your tip on how to utilise this reading facility correctly as the manual mentions nothing about its setting? TIA George |
| mechman48 | 31/03/2013 17:08:31 |
2947 forum posts 468 photos | Did have the intention of having a easter weekend with the grandkids & family, plus replace a rumbling bearing on my 4"x6" bandsaw blade guide; this all went to pot as ma in law (94) took ill with the Norovirus on Fri. To cut a long story short my better half & myself ended catching it too, so kaput went the weekend,obviously the grandkids were upset as they were looking to have plenty of choccies from nanna & great nanna, Should be ok in a couple of days though, Cest la Vie as the adage goes. Cheers George |
| Andrew Johnston | 31/03/2013 18:13:12 |
 7061 forum posts 719 photos | My afternoon tug pilot slot today was cancelled, on the grounds that the morning crew tried to get a glider out to the launch point, and promptly got it bogged down in the mud half way there. Yippee, workshop time beckons. I thought I'd make a start on drilling and profiling all the rear spokes for my traction engines on the CNC mill. I fired up the CAM program, created the code, and went into the workshop to set the new tool table, set up a fixture and set the work co-ordinates. I thought I'd better do a quick 'air' cut, just to make sure the drill was going to clear the clamps. First run the spindle starts and then stops. Second time around it never started, although the X, Y and Z axes all moved perfectly each time. What the *****!
Therein followed a close examination of the code and individual G & M codes. All looked fine, and it was consistent with a previous CAM program for drilling that worked perfectly. Conclusion, there's summat wrong in t'mill. Poking about inside the control cabinet and measuring assorted voltages on the emergency stop lines and contactors according to the troubleshooting guide in the manual didn't raise any issues. Following one of the key rules of circuit debugging I then attempted to break the thing properly by pushing and pulling various bits. Bingo, pushing on some relays on one of the PCBs made the spindle run! Let go and it stopped. Modulate the push force and the spindle speed varied in sympathy. That makes some sort of sense, since the wires on the nearest connector are to do with spindle speed feedback. The crimps on these wires seem ok, taking each one out and giving it a tug, but in my experience with crimps that's not a reliable guide. So most likely I've got some dodgy crimps on the speed feedback, or possibly the PCB itself has a dodgy solder joint or broken track. The next move is to get some suitable bootlace crimps and remake the said crimps to see if that cures the problem. Oddly enough I had some speed and spindle issues a couple of months ago, which seemed to be resolved, as I've used the CNC mill quite a lot in the last couple of weeks with no problems. I put the issue down to condensation in the very cold workshop as the spindle seemed to run fine after the machine had been on for a while. It would seem that I might have been wrong. Regards, Andrew |
| Stub Mandrel | 02/04/2013 19:08:25 |
4318 forum posts 291 photos 1 articles | Last night I suggested taking the dog for a walk, locked the back door behind us and when we got back it wa jammed solid. (This is the other lock from teh one that locked up a year of so ago on the same door!
Today, after much banging, squirting and probing I ended up having to chisel a slot 8" long and 1 1/2" deep in the door jamb so I could flex the frame enough open the door I can fill the hole with a wood block to restore security and I discovered that chemical metal sticks to uPVC which was a pleasant surprise! Shame it is grey... As for the lock, it had a big burr on the lock pillar and seems to be very worn. I got it working at last - then dropped the key somewhere under my bench. I think it fell in my car repair toolbox, which is like Hermione's beaded bag - for those familiar with 'Harry Potter and The Deathly Hallows' Neil
|
| JasonB | 02/04/2013 19:22:31 |
25215 forum posts 3105 photos 1 articles | Neil, I've writen up how I did the base for my E&A here as you expressed an interest.
J |
| Windy | 02/04/2013 19:35:08 |
910 forum posts 197 photos | Finished making a hydraulic test pump out of the bits and pieces box then tested my flash steam generator at over 4000psi
After fitting redesigned piston checked valve timing then pump stroke.
Paul |


This thread is closed.
Magazine Locator
Want the latest issue of Model Engineer or Model Engineers' Workshop? Use our magazine locator links to find your nearest stockist!
Sign up to our Newsletter
Sign up to our newsletter and get a free digital issue.
You can unsubscribe at anytime. View our privacy policy at www.mortons.co.uk/privacy
Latest Forum Posts
- hemingway ball turner
04/07/2025 14:40:26 - *Oct 2023: FORUM MIGRATION TIMELINE*
05/10/2023 07:57:11 - Making ER11 collet chuck
05/10/2023 07:56:24 - What did you do today? 2023
05/10/2023 07:25:01 - Orrery
05/10/2023 06:00:41 - Wera hand-tools
05/10/2023 05:47:07 - New member
05/10/2023 04:40:11 - Problems with external pot on at1 vfd
05/10/2023 00:06:32 - Drain plug
04/10/2023 23:36:17 - digi phase converter for 10 machines.....
04/10/2023 23:13:48 - More Latest Posts...
- View All Topics
Support Our Partners


Shopping Partners
Subscription Offer

Latest "For Sale" Ads
- Reeves** - Rebuilt Royal Scot by Martin Evans
by John Broughton
£300.00 - BRITANNIA 5" GAUGE James Perrier
by Jon Seabright 1
£2,500.00 - Drill Grinder - for restoration
by Nigel Graham 2
£0.00 - WARCO WM18 MILLING MACHINE
by Alex Chudley
£1,200.00 - MYFORD SUPER 7 LATHE
by Alex Chudley
£2,000.00 - More "For Sale" Ads...
Latest "Wanted" Ads
- D1-3 backplate
by Michael Horley
Price Not Specified - fixed steady for a Colchester bantam mark1 800
by George Jervis
Price Not Specified - lbsc pansy
by JACK SIDEBOTHAM
Price Not Specified - Pratt Burnerd multifit chuck key.
by Tim Riome
Price Not Specified - BANDSAW BLADE WELDER
by HUGH
Price Not Specified - More "Wanted" Ads...
Get In Touch!
Do you want to contact the Model Engineer and Model Engineers' Workshop team?
You can contact us by phone, mail or email about the magazines including becoming a contributor, submitting reader's letters or making queries about articles. You can also get in touch about this website, advertising or other general issues.
Click THIS LINK for full contact details.
For subscription issues please see THIS LINK.
Digital Back Issues


Donate

 Register
 Log-in
Model Engineer Magazine
- Percival Marshall
- M.E. History
- LittleLEC
- M.E. Clock

ME Workshop
- An Adcock
- & Shipley
- Horizontal
- Mill

Subscribe Now
- Great savings
- Delivered to your door

Pre-order your copy!
- Delivered to your doorstep!
- Free UK delivery!
All Forum Topics > Work In Progress and completed items > What did you do today? (2013)