Collet Chucks out of true
How much do I have to spend?
| Vic | 04/08/2019 22:05:57 |
| 3453 forum posts 23 photos | Well spotted Jason. |
| Iain Downs | 05/08/2019 07:30:41 |
| 976 forum posts 805 photos | Thanks all.
I had cleaned the MT3 taper in the spindle and I had learned about snapping collets the last time Jason told me off (; But always good to check... Next time I'm in the shed, I'll check the taper of the chucks - probably at two places (depths in the taper) and also check the colletts for mess. I suppose that I can check the wobble on several bars with different colletts and if they are all similar it's the chuck if they are wildly different it's the colletts. Iain |
| Iain Downs | 05/08/2019 20:55:48 |
| 976 forum posts 805 photos | I've measured the 'wobble' / run out on the ER32 tapers and they run to around 0.08mm. I've also double checked the spindle and there's none (to the limit of my ability to measure. So the chucks aren't brilliant. I'm up for attempting to re-machine the ER32 taper in principle, but concerned it will end up scrap. How I would approach this is as follows. wind back the topslide, loosen the bolts holding it and set to exactly 8 degrees with my aldi angle gauge.(actually it will be 98 degrees as I will measure against the cross-slide edge). put in the dodgy chuck and tighten up with the bolt. take fine cuts at high speed (1500rpm?). Try measuring again. From what I can make out if the angle is within a few tenths should kind of work. Mr Hall mentions 'within a few degrees' but that seems implausible. Do you think that would work OK?
Iain |
| John Baron | 05/08/2019 21:09:21 |
520 forum posts 194 photos | Hi Iain, I would double check everything, 0.08 mm is 3.2 thou that is an awful lot of runout ! I get an average of 3/10 ths of a thou at 3 inches. And that is after I've cleaned everything and made sure that there are no burrs anywhere. A clue to having a burr in a collet is tiny scratches on the work. Similar on the edges of the chuck. Check the collet for scratches.
Edited By John Baron on 05/08/2019 21:10:13 |
| not done it yet | 05/08/2019 21:18:56 |
| 7517 forum posts 20 photos | I doubt you will attain the precision required by using an angle guage. The usual way with a morse taper is to mount a known good item between centres and adjust the top side, using a dial gauge until traversing results in no deflection whatsoever. ER collets are rather shorter, so more difficult to manage. Either fit a good ER collet over a parallel dowel and use that to set the angle, or check for exactly 4.00mm change over a distance of 28.74mm. Others may have alternative views. |
| Pete Rimmer | 05/08/2019 23:03:53 |
| 1486 forum posts 105 photos | I would pre-set the compound for cutting the 8 degree inside taper half-angle then mount a DTI so the probe is measuring at exactly 9 o'clock on the inside taper when looking at the chuck face. It also must be exactly on centre height (so that's dead on centre height measuring the point nearest the operator). Now turn the chuck and watch the DTI swing through it's full range. Note the highest and lowest readings (which should be opposite each other) and stop turning the chuck when the dial is exactly half way between them (so the high and low points are at 12 and 6 o'clock). This is the point where the taper angle should be correct for measuring. Run the compound in and out and start making small adjustments until you can sweep the taper without the dti moving. Lock the compound and check the dti again and if it hasn't moved you can mount a tipped tool (once again dead on centre height - it's extremely important that this is observed) and use a skim cut to true the taper. |
| Robin Graham | 06/08/2019 01:00:11 |
| 1089 forum posts 345 photos | Hi Iain. Harold Hall's 'a degree or two may not be a problem' (if we're reading from the same page) refers to the approach angle of the dial indicator to the test bar not to the taper - a degree or two out in the taper would indeed be a problem! I recently made an ER40 lathe collet chuck from scratch. I set the topslide by turning the end of a piece of ali bar in the 3-jaw to a 'very light push fit' in an ER40 collet then set the topslide to match the collet as ndiy suggests. For reasons I don't understand the 4.00/28.74 method didn't quite tally, so after a bit of agonising I went for setting from the collet and ended up with about 0.008mm TIR on a test bars in (cheapo) collets. So it's doable - even by a rank amateur like me! Robin
Edited By Robin Graham on 06/08/2019 01:03:31 |
| Niels Abildgaard | 06/08/2019 06:27:23 |
| 470 forum posts 177 photos | Posted by Iain Downs on 05/08/2019 20:55:48:
I'm up for attempting to re-machine the ER32 taper in principle, but concerned it will end up scrap. How I would approach this is as follows. wind back the topslide, loosen the bolts holding it and set to exactly 8 degrees with my aldi angle gauge.(actually it will be 98 degrees as I will measure against the cross-slide edge).
You can save a lot of anger by drilling two holes in the topslide as shown on picture. The outhermost hole is for the indexing of the the fourway.Not relevant The other hole in topslide sits directly over one of the locking Unbrako screws with topslide in more or less normal working position..It has a mate not shown but symmetrical. |
| Iain Downs | 06/08/2019 07:26:31 |
| 976 forum posts 805 photos | Thanks all, particularly Niels. One of my concerns was having to wind the top slide ALL the way back to unbolt, make a very fine adjustment, wind it forward and repeat. But if I can make the adjustment with the topslide in normal position that may work better. When I measure run out on a test bar or an MT3 blank arbour, I get good results. When I do so with the sockets I get bad results. However, I probably will try and measure again - though this is the 3rd time through the process! Iain |
| SillyOldDuffer | 06/08/2019 08:06:40 |
| 10668 forum posts 2415 photos | Posted by JasonB on 04/08/2019 20:56:33:
Iain, I wonder if some or all of the error you are getting is from incorrect fitting of the collet. looking at some of your photos it looks like the collet is sitting way to far back into the nut.
The collet should be snapped into the nut and then the two fitted to the chuck, our good friends ARC show how to do it here Iain, before doing anything else can you confirm you now have the collets fitted correctly? The pictures Jason posted clearly show collets NOT clicked properly into the collar, which will cause poor alignment. Apologies if you're past that mistook and it's already been eliminated as the cause. Dave
|
| Iain Downs | 06/08/2019 17:30:02 |
| 976 forum posts 805 photos | Yeah, Dave - I mentioned that in the post at the top of the page. Still well worth checking though. I can see that I'll be known in 10 years as the 'badly fitted collet chap' Just been to have my shoulder mauled by the chiropractor so, even though it's not my handle-turning shoulder, I reckon that tonight's not the night for machine tools
Iain |
| Howard Lewis | 06/08/2019 17:32:05 |
| 7227 forum posts 21 photos | Starting from basics, are the male and femal MT tapers in good condition? If YES, with everything clean, what is the run out of the female taper in the ER chuck body? As already said, the collets must be correctly fitted to the Clamp Nut, free of burrs, externally, and Internally When all these possible faults have been eliminated, then the accuracy can be measured. This assumes that the measuring equipment is rigidly held, accurate, and repeatable. You may find that a few minutes work with a diamond hone, may produce a much better result. With regard to "wobble" some distance from the chuck, is the bar straight and parallel? Eliminate the possible variations, one by one, and than carry out checks. You wouldn't enter a scratched and dirty car in a concours d'elegance, would you? Howard |
| Iain Downs | 10/08/2019 15:44:51 |
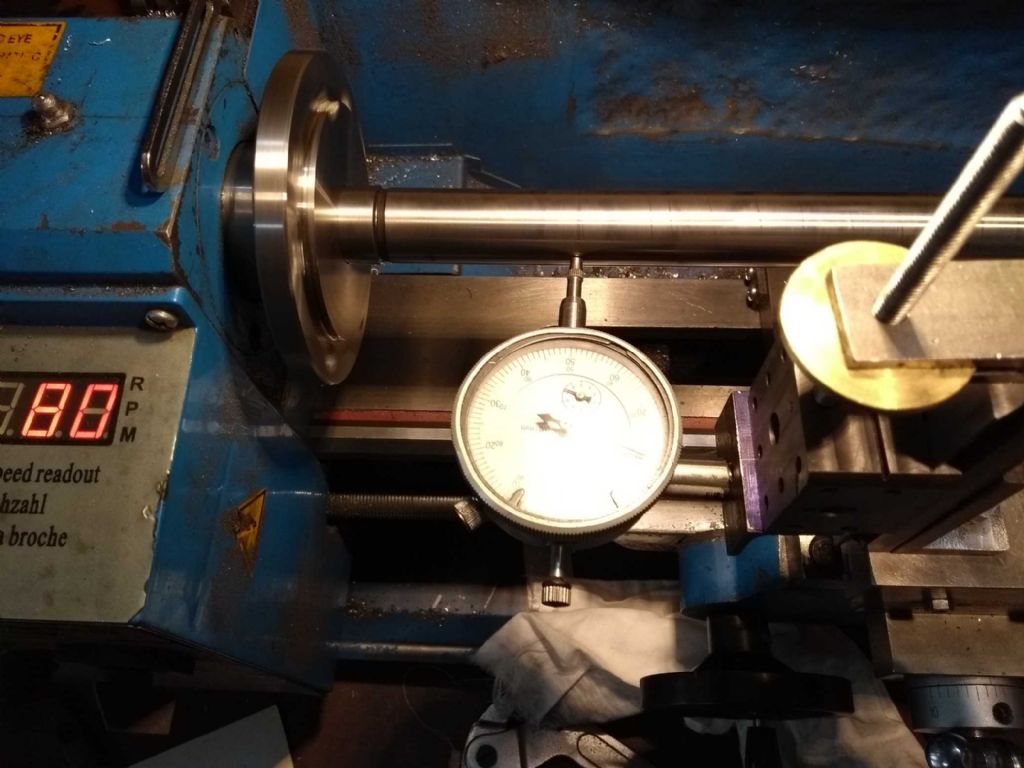
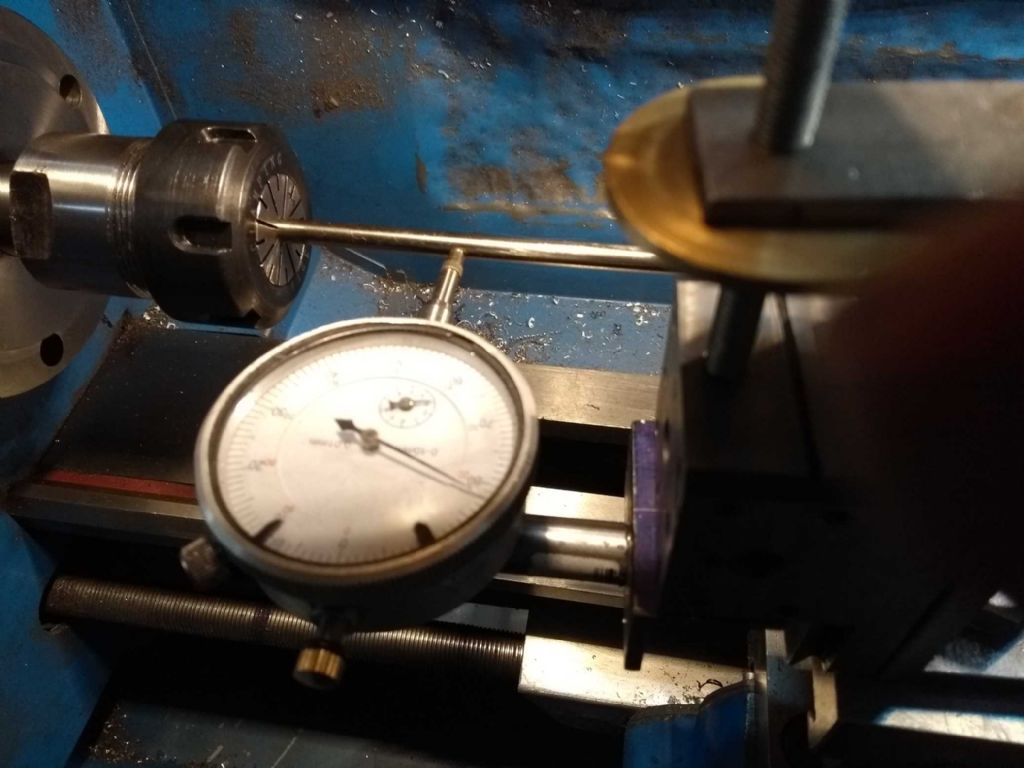
| 976 forum posts 805 photos | I though (following Howard's advice among others) that I would approach this in a systematic way. Management summary: I'm still confused! First I took an MT3 test bar and clocked the wobble.
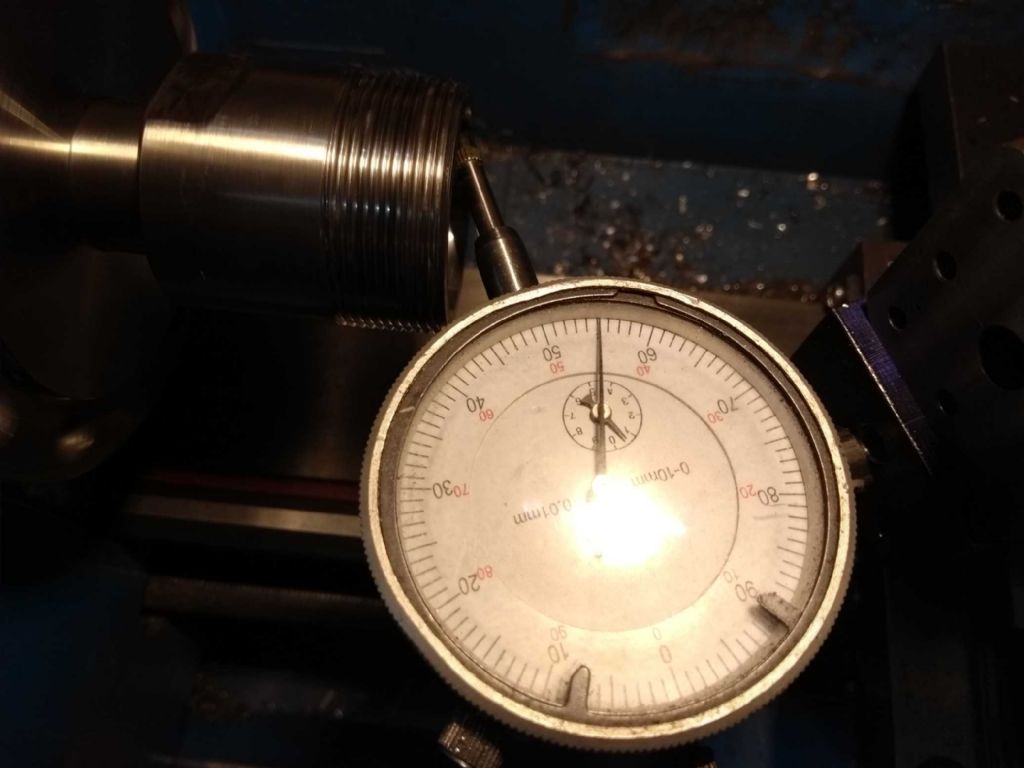
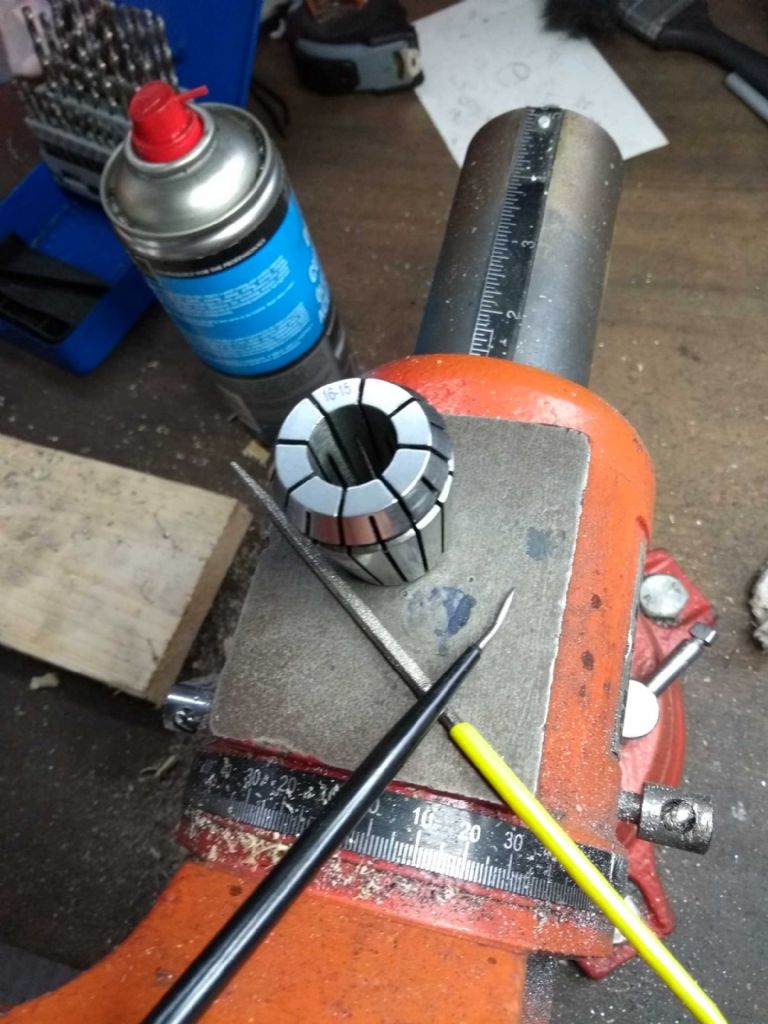
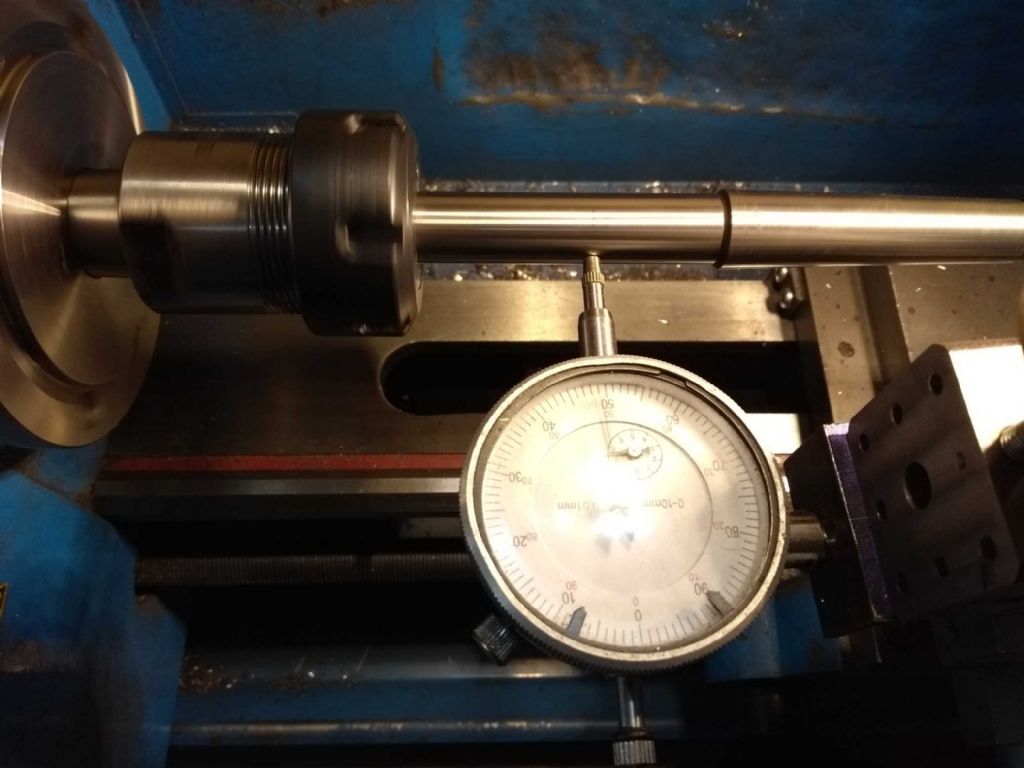
I took most of my measurements 110 mm from the face of the spindle. I'm going to use the term wobble to describe what I'm measuring. I'm not entirely sure I understand what run-out is - is it wobble (item at an angle to the spindle axis) or offset (item in line with axis bit not on centre). Accordingly, I will use an informal term so I don't get flamed The wobble was of the order of 0.02mm. Hard to tell for sure as there was a definite tick which I think is a problem on the surface. However, under a thou seems reasonable.. This shows that the spindle is accurate and that there is no much in the spindle bore. Next I measured the wobble in the chuck taper. This came to around 0.06mm at three locations inside the bore. I measured again after re-seating and got a little bit less (around 0.05mm). I didn't try and see if the near points down the bar were in line (offset) or out of line (wobble). I've only just thought of it! Having established that the chuck isn't crackingly good, I thought I'd measure some test bars in collets. First up was an MT2 test bar held in a 16mm collet. Before trying this I attempted to deburr the collet. I took a small square diamond fine and run a a few passes on the insides and outsides of all the cuts. next I took a pick and pulled along the cuts to drag and swarf out. then finished off with a clean with WD14 and a rag. I should say that there was no evidence of buts by feel before hand. And this was the test bar mounted in the collet. I got wobble of 0.17mm at 75mm from the spindle face, 0.25 at 110mm and 0.36mm at 135mm. The wobble was entirely visible. Next some 12mm silver steel. this was noticeably better -and better than the readings I'd taken before. 75mm - 0.06, 110 - 0.10 and 135- 0.14. Next some 6mm scanner bar - like the bars in printers these should be ground and accurate. at 110 mm I got 0.21mm wobble. Finally, I took a piece of 20mm silver steel original intended for a crank, and did a few more things with it. With the collet straight out of the box (first time of use), but cleaned: 0.30 mm at 110mm. Next I turned the rod in the collet (or possibly the collet in the chuck). This gave me 0.11mm wobble.at 110 mm. I took the collet out and deburred as above and tried again. this time I got 0.24mm wobble at 110mm. I tried again to rotate.(through 180 degrees) and got a wobble which was much less (0.07!). As far as I can tell the low point of the wobble is the same with respect to the chuck / spindle regardless of the orientation of the collet or bar. My best guess is that both the chuck and the collets are bad, so if the bad aligns, it's very bad, if it doesn't then not so much. This is not a nice thought and it doesn't seem realistic that all the collets are bad in a comparable way. Any other ideas or diagnostics most welcome!
Iain |
| JasonB | 10/08/2019 16:13:53 |
25215 forum posts 3105 photos 1 articles | Iain, did you use that same DTI to take all three readings inside the collet taper? If so the inner two won't be true as you would have had to have the plunger at a shallower angle to the taper as you went firther in which would give increasingly lower readings. It should be perpendicular to the taper to give a true reading so you really want a lever type not a plunger. So your 0.06, 0.06, 0.06 readings which suggest an eccentric runout are more likely to be 0.06. 0.08, 0.1 indicating the taper is angled to the lathe axis which would seem more likely as the errors measured along the various bars get worse with more stick out. |
| Tony Pratt 1 | 10/08/2019 18:01:53 |
| 2319 forum posts 13 photos | As you say the collet chuck 'isn't the best' so you really have no decent reference to diagnose the collets, can't really say any more than that apart from the run out will get worse as you move away from the collet/collet chuck which is exactly your situation. Tony |
| Neil Wyatt | 10/08/2019 21:24:20 |
19226 forum posts 749 photos 86 articles | Is it possible the earlier adventures damaged the release ring inside the nut? It could then push the collet askew? Neil |
| peak4 | 11/08/2019 11:05:41 |
2207 forum posts 210 photos | This might sound a slightly odd suggestion, but how about a quick trial on the morse taper. Chuck a piece of bar in a conventional 3/4 jaw and turn exactly true and parallel; leave it in the chuck and on the lathe. Insert suitable sized collet and tighten the MT collet chuck on the known true stub you've just made, then clock the now exposed morse taper, which will be pointing towards the tailstock. I bought a second hand, backplate type, ER25 collet chuck that unbeknown to me, someone had made a hash of fitting to the Myford backplate. This method let me see what was happening, and in my case, allowed me to re-machine the back side of the chuck. I'm not suggesting that you use it to re-machine the morse end, just to see where the misalignment nay be occurring. Bill |
| Iain Downs | 11/08/2019 18:42:45 |
| 976 forum posts 805 photos | HI, Peak4 - that's an interesting idea.
I had something a little similar in mind to do today, until Madam suggested that we pop up to Saltburn for some fish and chips in the rain. Actually, quite a pleasant day out, but being an hour or so away it's used up my swarfing time. Apart from looking at the nut (and photoing for proof), I had in mind to turn a mandril and put one of the collets on. I can check the collet for true on the mandrel (which will be true) and I can also use the collet on the mandril to line up the top slide exactly (within my skill level) with the collet taper. I'm thinking I will start with some 20mm silver steel and turn that down to 19mm for the 19mm collett. I don't rightly know if I want to run through all the sizes to get a feel for the overall quality, but I might do two or three of them to check it out before I attempt to skim the inner taper. I might also try Bill's idea as well. Not sure when I'll get round to it, actually. One evening would be ideal, but it depends on how work goes. Jason, I'm not sure I'm quite following. I'm measuring the change in distance from the clock whilst I rotate the spindle. I agree that the actual measurement will be different due to the angle of the DTI, but I don't think it will change as the DTI moves into the check as the relative angle remains the same - the DTI is connected to the cross slide which I move in towards the spindle. I have also previously done this test with a lever type with similar results. Thanks to all for the input. Iain |
| Howard Lewis | 11/08/2019 20:33:34 |
| 7227 forum posts 21 photos | To check the internal taper of the ER collet for eccentricity, a Finger clock would be better, since the probe can be perpendicular to the surface in both planes, where a Plunger clock cannot., producing greater accuracy in measurement. And the graduations are likely to be smaller than the plunger clock. Also it should be possible to mount a finger clock more rigidly, to lessen any chance of unwanted movement. Howard |
| Grizzly bear | 12/08/2019 19:47:03 |
| 337 forum posts 8 photos | Iain, Why are you measuring at 110mm, that's ~ 4.25 inches? Bear.. |
Please login to post a reply.
Want the latest issue of Model Engineer or Model Engineers' Workshop? Use our magazine locator links to find your nearest stockist!
Sign up to our newsletter and get a free digital issue.
You can unsubscribe at anytime. View our privacy policy at www.mortons.co.uk/privacy
- hemingway ball turner
04/07/2025 14:40:26 - *Oct 2023: FORUM MIGRATION TIMELINE*
05/10/2023 07:57:11 - Making ER11 collet chuck
05/10/2023 07:56:24 - What did you do today? 2023
05/10/2023 07:25:01 - Orrery
05/10/2023 06:00:41 - Wera hand-tools
05/10/2023 05:47:07 - New member
05/10/2023 04:40:11 - Problems with external pot on at1 vfd
05/10/2023 00:06:32 - Drain plug
04/10/2023 23:36:17 - digi phase converter for 10 machines.....
04/10/2023 23:13:48 - More Latest Posts...
- View All Topics
- Reeves** - Rebuilt Royal Scot by Martin Evans
by John Broughton
£300.00 - BRITANNIA 5" GAUGE James Perrier
by Jon Seabright 1
£2,500.00 - Drill Grinder - for restoration
by Nigel Graham 2
£0.00 - WARCO WM18 MILLING MACHINE
by Alex Chudley
£1,200.00 - MYFORD SUPER 7 LATHE
by Alex Chudley
£2,000.00 - More "For Sale" Ads...
- D1-3 backplate
by Michael Horley
Price Not Specified - fixed steady for a Colchester bantam mark1 800
by George Jervis
Price Not Specified - lbsc pansy
by JACK SIDEBOTHAM
Price Not Specified - Pratt Burnerd multifit chuck key.
by Tim Riome
Price Not Specified - BANDSAW BLADE WELDER
by HUGH
Price Not Specified - More "Wanted" Ads...
Do you want to contact the Model Engineer and Model Engineers' Workshop team?
You can contact us by phone, mail or email about the magazines including becoming a contributor, submitting reader's letters or making queries about articles. You can also get in touch about this website, advertising or other general issues.
Click THIS LINK for full contact details.
For subscription issues please see THIS LINK.
Model Engineer Magazine
- Percival Marshall
- M.E. History
- LittleLEC
- M.E. Clock
ME Workshop
- An Adcock
- & Shipley
- Horizontal
- Mill
Subscribe Now
- Great savings
- Delivered to your door
Pre-order your copy!
- Delivered to your doorstep!
- Free UK delivery!

![wp_20190722_005[1].jpg wp_20190722_005[1].jpg](/sites/7/images/member_albums/162324/835182.jpg)




 Register
 Log-in


