Member postings for Iain Downs
Here is a list of all the postings Iain Downs has made in our forums. Click on a thread name to jump to the thread.
| Thread: Levelling my lathe - a build log |
| 30/09/2023 14:31:10 |
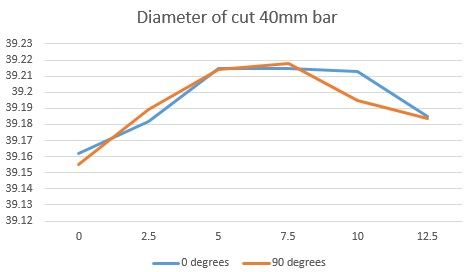
Headstock end, Benedict. Apologies if I mistyped earlier. I would say it's old age, but I've always been prone to typos!. I have cut a 40mm bar in earlier tests and measured the diameter with a micrometer twice (one at 90 degrees to the other) Yes I cleaned up the faces and as you can see I get very close agreement between the two sets of measurements. In fact most of the pairs of measurements are less then 5 microns apart. At 40mm I would not have expected tailstock support to make much difference due to the stiffness. Also bringing the tailstock in would add an unwelcome extra factor. Iain |
| 30/09/2023 14:17:12 |
Thanks, Martin. Sadly, my lathe falls in the cheaper category. The ways are about 86mm across and the carriage 100mm wide. Ther bed mounting bolts are on a 70mm centre. I've tweaked the thing here and there and have some extra support under the ways. I recently tuned this up and have very little (under 1 thou) of lift on any part of the carriage - which moves freely until you get to the far tailstock end at which point it becomes stiff. So I have wear, but I think I've compensated for it as well as I can on a machine of this type. Wanna swap lathes?? (no not serious!)
Iain |
| 30/09/2023 12:59:40 |
Both slope inwards towards the headstock...
Iain |
| 30/09/2023 12:54:12 |
I get about 2 thou over 75mm (er three inches) near the headstock. This applies to boring and finishing the outside.
Iain |
| 30/09/2023 12:17:39 |
Thanks for this Benedict - good video! Sadly, my lathe has a prism on the near side Also, best I can tell (from sweeping the bed with an indicator when sitting on the mill bed), any errors are probably under a thou which makes feeler gauges a bit too big. Iain |
| 30/09/2023 11:36:31 |
Hi, Pete. The level is measuring across the width of the bed on top of the cross slide. the top slide has been removed so the surface is flat. I note that Neil's recommendation is the opposite of yours! That is to use the cross slide and not the bed. That actually makes sense to me as local wear on the bed will be picked up more by the short (20mm?) width of the level vs the (comparatively) larger width of the saddle - 100mm in this case. Surely if the bed is worn (on one edge) then I will see an angle change with the level regardless of it being on the bed or on the carriage? I did note when I had the bed on the mill table that there appeared to be around 0.01 mm of wear along the most used part of the bed (that is nearest the headstock). By which I mean that there was a dip in this area. Which could either be wear or a twist. I suppose. Iain |
| 29/09/2023 17:36:56 |
So I got out to the lathe today and tried to follow the instructions above. My first comment is that I found it very difficult to get repeatable readings Just leaning on the bench would shift the level bubble noticeably! Using the feet on the base I was able to get the head end more or less level (within 2 microns on the level). I then ran along the bed and got readings like this. Note +/- infinity means off scale, + being front of the bed higher, -negative back is higher. distances are from starting point near headstock to tailstock in cm. numbers are in microns (approx).
0 : 0 5 : -∞ 10 : -∞ 15 : +4 20 : +∞ 25 : +∞ 30 : +∞ 35 : ∞ To get some idea of how far out the bed is, I tried using some shims to prop up one end of the level or another. Unfortunately my smallest shim (0.05mm or 2 thou) is too large. I then tried some aluminium foil which seems to run between 15 and 20 microns in thickness. This is where I struggled with repeatability. Sometimes one thickness would reverse from +∞ to -∞ and sometimes two thicknesses didn't quite get it to zero. Which was frustrating. I then ran down the length of the bed (at my stopping points above) to see how much foil was needed to correct the angle. Broadly I found that at all the ∞ points one or two thicknesses of foil was enough to get the level around zero or to at least reverse the direction of tilt. Long and short of that, assuming I've not been an idiot (rash assumption that) is that a) the twist is not linear along the bed and (more important) the shim needed to correct the twist at the tailstock end is likely to be around 20 microns, but quite possibly less. The level is 100mm and the mounting feet of the lathe bed are on 70mm centres, Any suggestions (as always) most welcome.
Iain |
| 26/09/2023 14:11:13 |
Hi, Neil. If I can paraphrase:-
Set the headstock end of the bed via the cross slide to be level across the bed. Move to the tailstock end and tune that until it's level (across the bed). Rinse and repeat until both ends are level ... I assume that I can set the headstock end level using the adjustment feet on the base. I will then make sure that the base is stable at the tailstock end and use shims between the base and the lathe feet to level the tailstock end. I will give that a go. Thanks
Iain |
| 25/09/2023 14:40:10 |
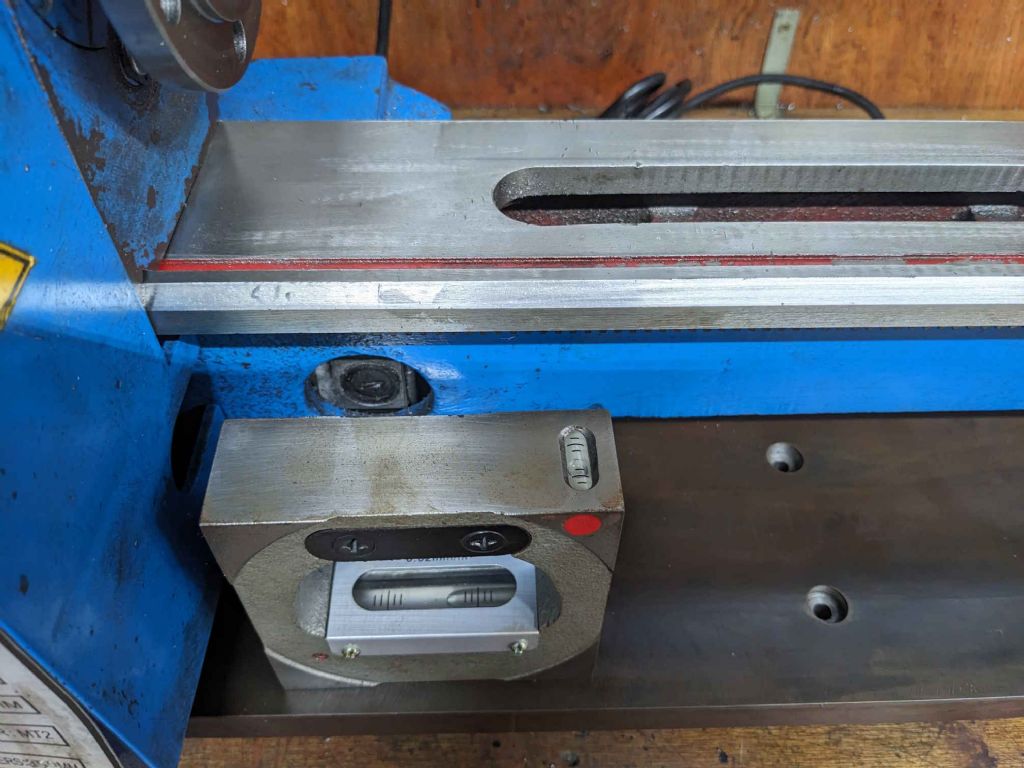
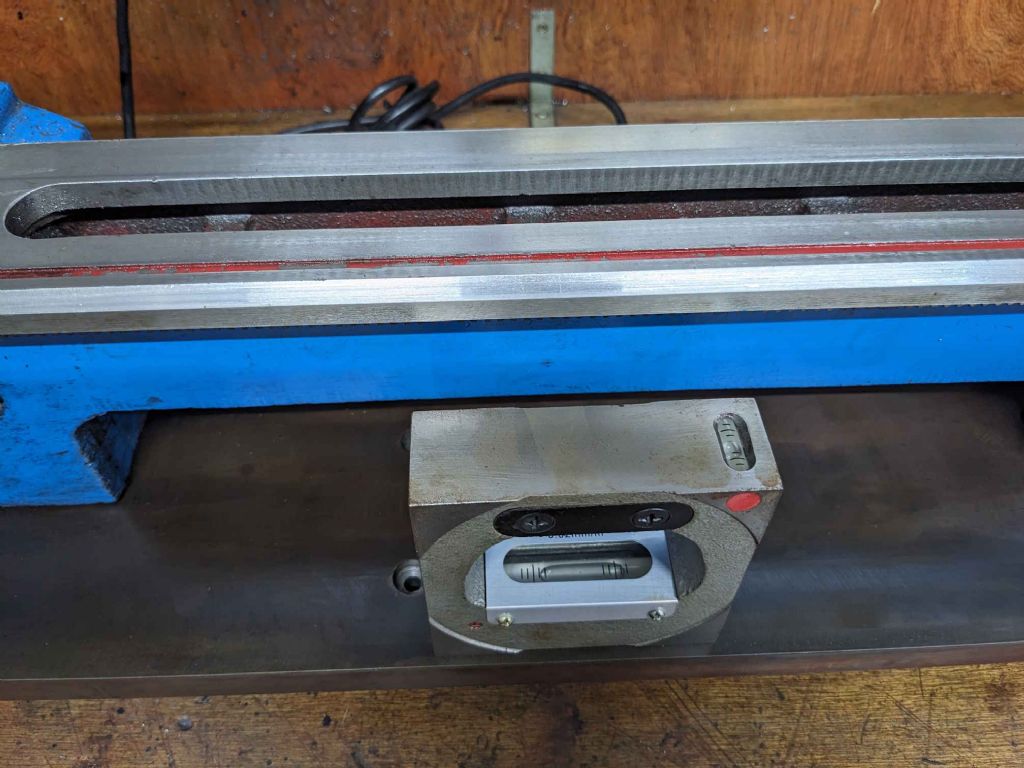
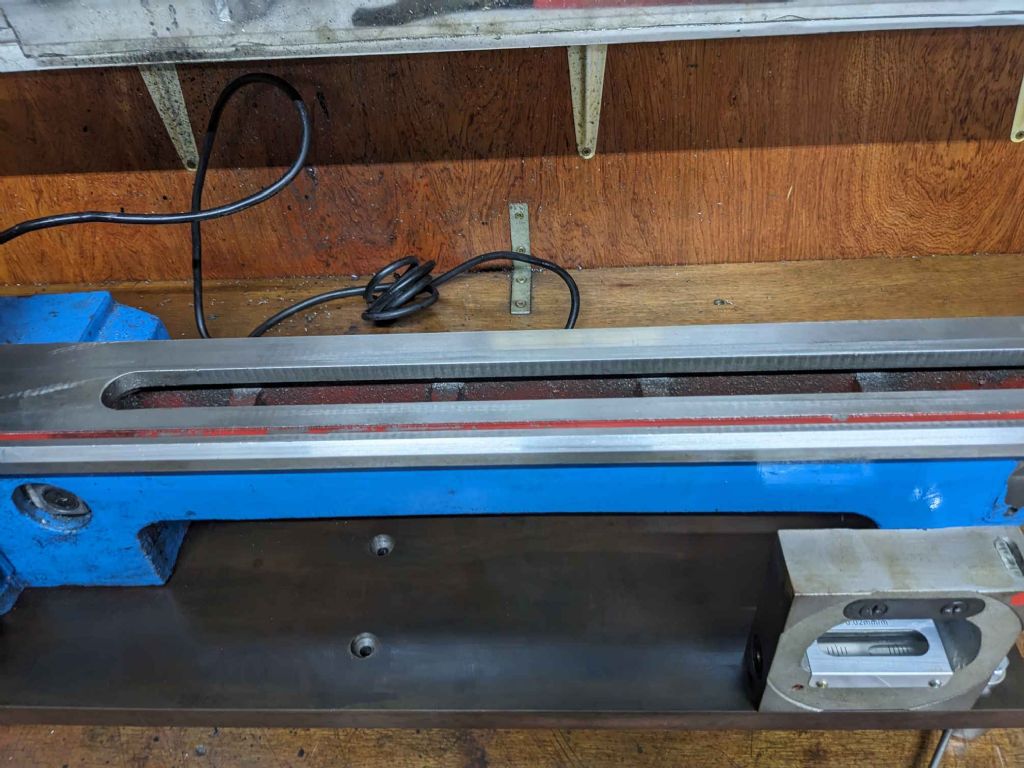
Ah, but, I didn't finish there! I've made some levelling feet for the base and set up the lathe and attempted to level the base. Is the base level? Not really! It's maybe a bit hard to see, but the centre is pretty level, but both left and right ends slope upwards to the right. I must say it was a pleasure to break out the engineers level as I've never used it since asking for it for a birthday present about 10 years back! I was sure I would need it... If I've understood this level correctly each graduation represents 0.02mm / m. In which case the drift upwards is over 20 microns across the width of the (100mm) level. That's taking a guess at how for off centre the bubble is (10 graduations..). This does seem to be maxed out so it could be anything. When on the mill bed, there was no rocking of the base, but it was definitely spinning around the centre not near the ends, so I expect it is mildly out - Of course as well as straightening up the lathe, this will have twisted the base a little. I've had a bit of a go at levelling just one end and also looking at the levels on the lathe bed, but it was doing my head in so I gave up for the day. Any advice will be much appreciated!
Iain |
| 25/09/2023 14:29:13 |
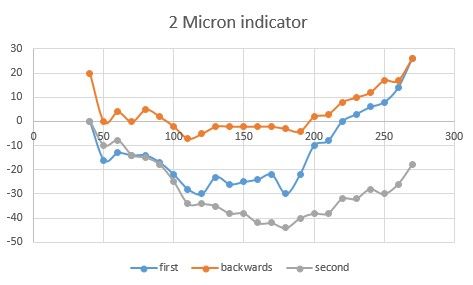
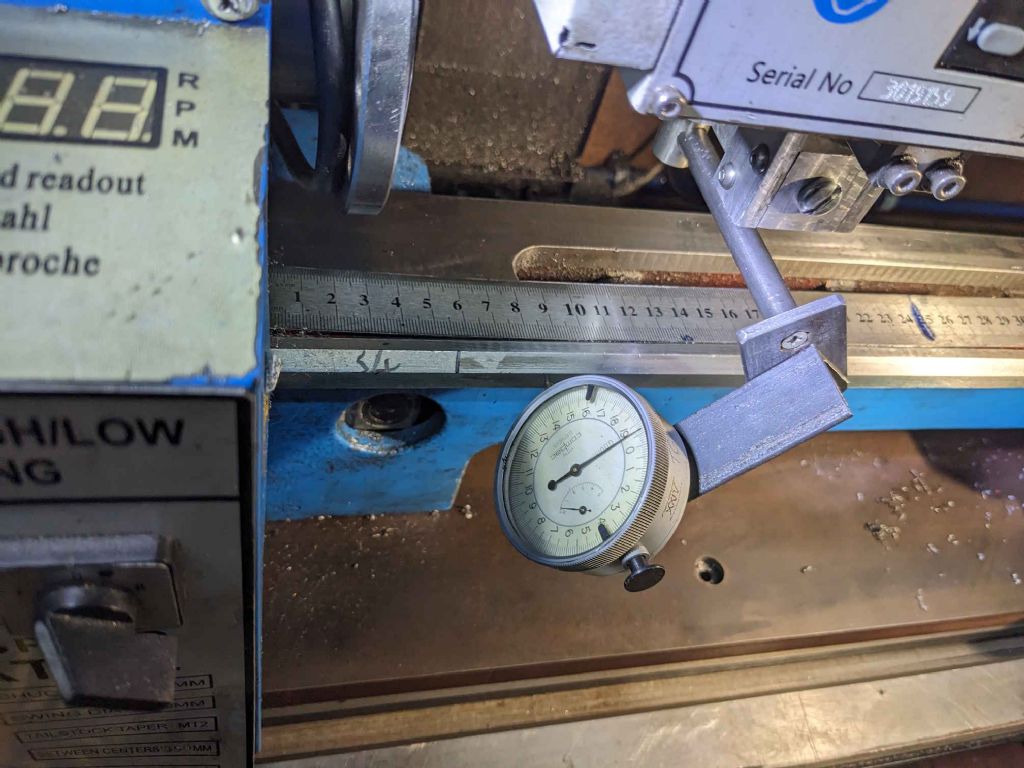
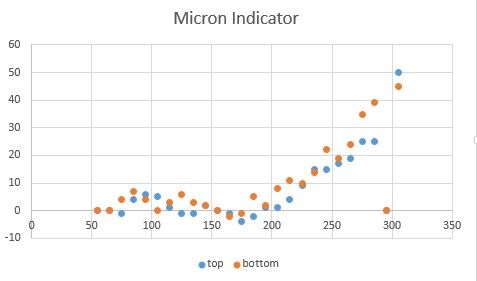
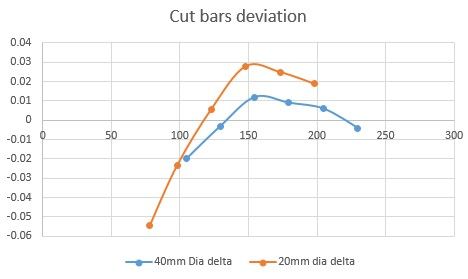
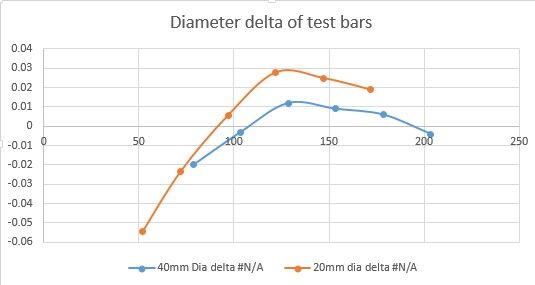
hm. Things don't get much simpler do they? The base is complete (and heavy). Before bolting it on, I put the lathe on the mill table to measure how straight the edge of the bed was. My first concern was that the lathe rocked somewhat and I needed to put a 0.15mm shim under the back left foot to chock it up. Clearly the bed, at some level is twisted!. I used a 2 micron test indicator attached to the spindle to measure along the edge of the bed. I recorded the results in 10mm increments. Being ocassionaly careful, I ran back in a second pass and ended up in a different place TWO Micron Indicator results Blue is the first run forward, orange the dun backwards after that and grey a 2nd run forward. I suspect that either the indicator is being swayed by being pulled sideways along the bed or that the spindle is being pulled slightly. To try this in a more controlled way, I bolted the lathe to the new base, locked the spindle and broke out my one micron compac indicator. Micron Indicator on mill The results of that are rather more consistent:- Lathe bed deviation in Microns I took one run at the top and one at the bottom of the edge. As a reminder, the graph below (now normalised for distance from headstock), shows the deviation from an average of the diameter of the 20mm and 40mm bars cut in the collet and chuck.
Bar deviation in MM This all makes some mechanical sense if the headstock is angled slightly away from the bed (that is furthest away at the tailstock). No at all sure what I can do with this.
Iain
|
| 16/09/2023 15:44:01 |
Hi, Benedict. That is what the second graph shows. And the headstock has no natural way of being adjusted. It bolts directly on the bed, onto the prism.
Iain |
| 16/09/2023 13:46:26 |
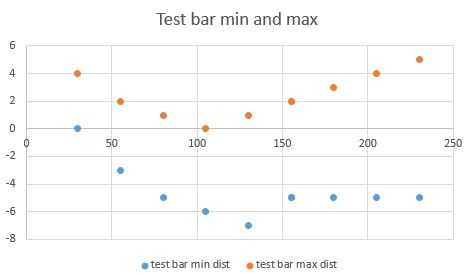
Dave. Duh! That makes a lot of sense. The mill would allow me to clock the prism along the area of interest. Pain to disassemble the lathe again, but needs must. Benedict. I would expect to cut wider away from the chuck due to reduced rigidity. However, this is starting to cut narrower + I took a few of spring passes and there was no material being removed (or microns) after. Also, the 40mm bar should be rigid enough to avoid that. Martin. Looking at the two sets of results, I realise that they don't quite make sense. The test bar should show a closer distance to the toolpost, then further then nearer. I need to have another look at that. Thanks, guys.
Iain |
| 16/09/2023 11:01:22 |
I have got to the point where I've built my bed and bolted it to the lather I've then run a series of tests as follows:- MT3 test bar in headstock, min and max deviation of distance from toolpost. Fine cut of 40mm bar in 3 jaw chuck. Diameters and devation from 0 along one side. Fine cut 20mm bar in ER32 collet. diameters and min and max devation from 0 along along length.
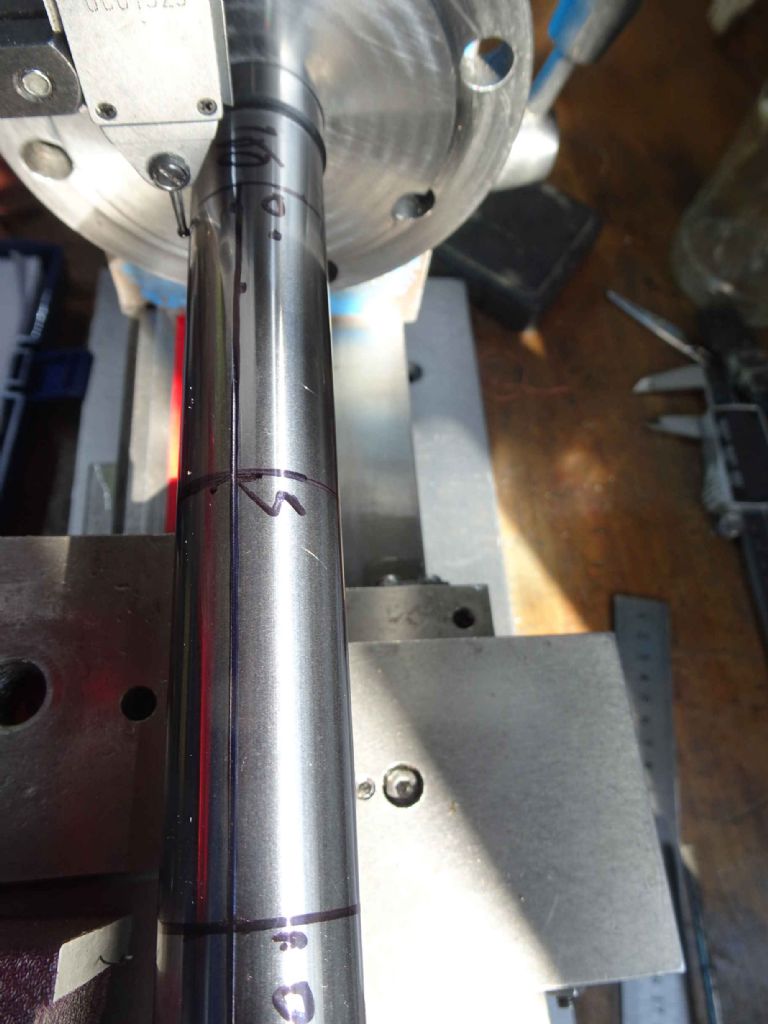
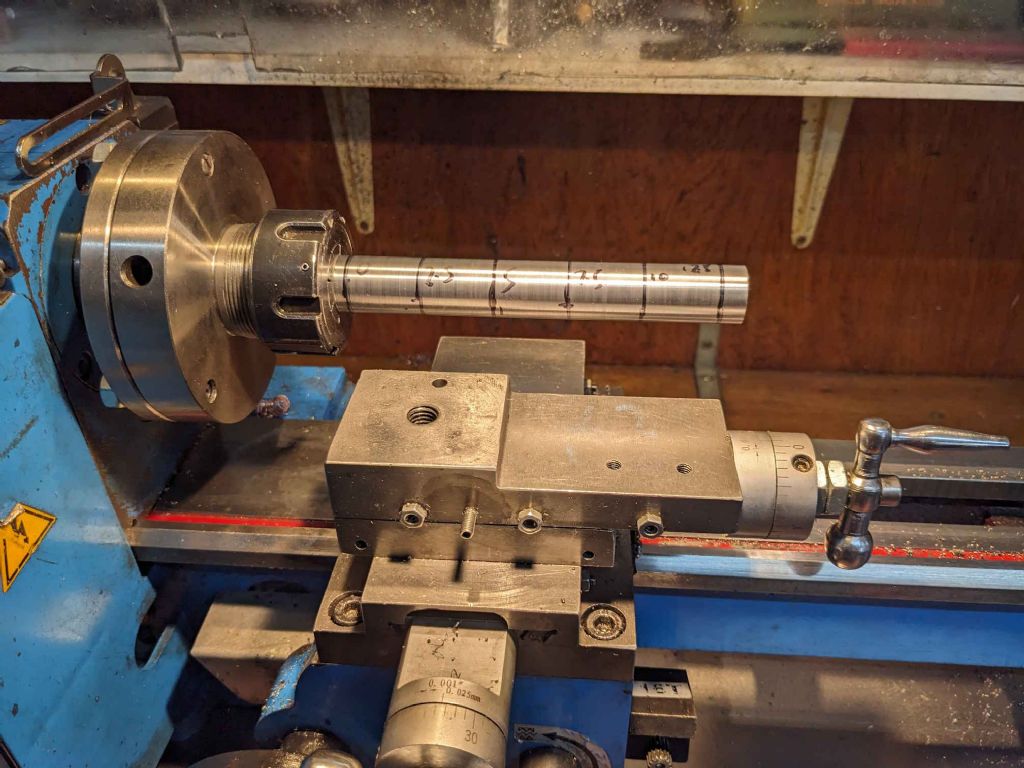
TEST BAR 20mm bar in collet Here are a couple of graphs. the first is the diameter measured at a number of points along the length of the test bars with a 20mm bar in a collet chuck (ER32) and a 40mm bar in a 3 jaw). the distances shown are the distance from the end of the spindle rather than from the chuck. the collet chuck is about 47mm deep and the 3 jaw around 75. 20mm bar and test bar measured with a micron digital micrometer. 40mm bar with an analog vernier micrometer. Diameter changes The one below is the min and max distances from the tool post to the test bar Test bar min and max from toolpost The test bar diameter is within a couple of microns all the way along the length, but I can't guarantee it's straight (though I would hope it is, it's new!). If you remember back to my first post, I found that a bar held in the 3 jaw cut to be narrower at the headstock end by a thou or two over 50mm. As far as I can see this information supports it. It would appear that as it moves from the head, the crossslide moves OUT until around 150mm from the spindle. It then starts to move back in a little. IN short the bed appears to have a dogleg in it. All of this (long) blurb ends up with a simple question... 'how can I fix this?'. The base is probably reasonably flat (I don't really have the kit to test it over a long distance). The bed bolted down to it without any obvious stress implying the feet may already be planar. If the bed was just twisted I would have expected to see the movement (change of diameter) in one direction not in two. So I can't see how shimming the feet will help - I could possibly twist out the deviation at the headstock end, but it would make the later deviation worse. Help!
Iain |
| 03/09/2023 15:27:18 |
Neil - the lathe has a single prism which the headstock and carriage both align on. The only adjustment per se is to tighten up the largely inaccessible bolts a bit more or less. I've tried shimming the headstock on the prism to tweak it a bit with mild success. However from checking an MT3 test bar with an indicator the bed has a small angle in it rather than just being off in one direction. Hence, I suppose a twist in the bed. Having thought about this, I think my first step is to bolt up from underneath through just the base. This may or may not work. If it does it's saved me a huge amount of pain. If it doesn't then we try the next step! Ta all.
Iain |
| Thread: Power feed for a VM32L mill |
| 02/09/2023 12:39:51 |
I find that I can turn the handles slowly but if I go too fast the turn starts to get a bit notchy. I suspect the back emf from the motor is enough to get through the protection diodes and forms the resistance. I should add that I may be talking gibberish here!
Iain |
| Thread: Levelling my lathe - a build log |
| 02/09/2023 12:34:34 |
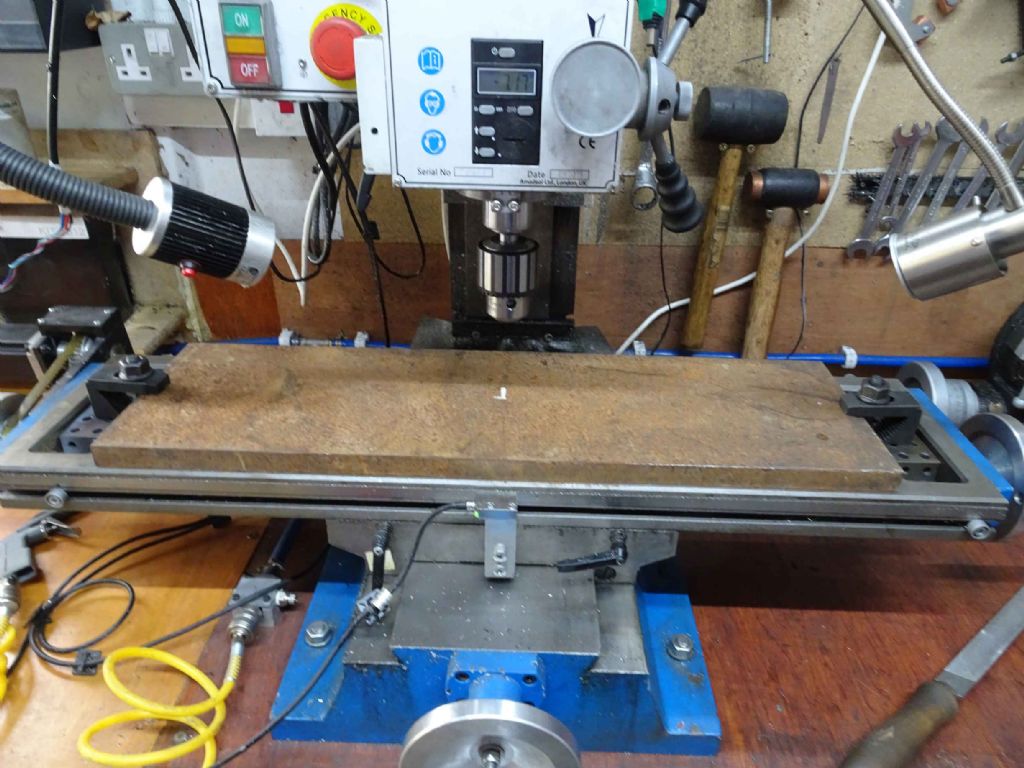
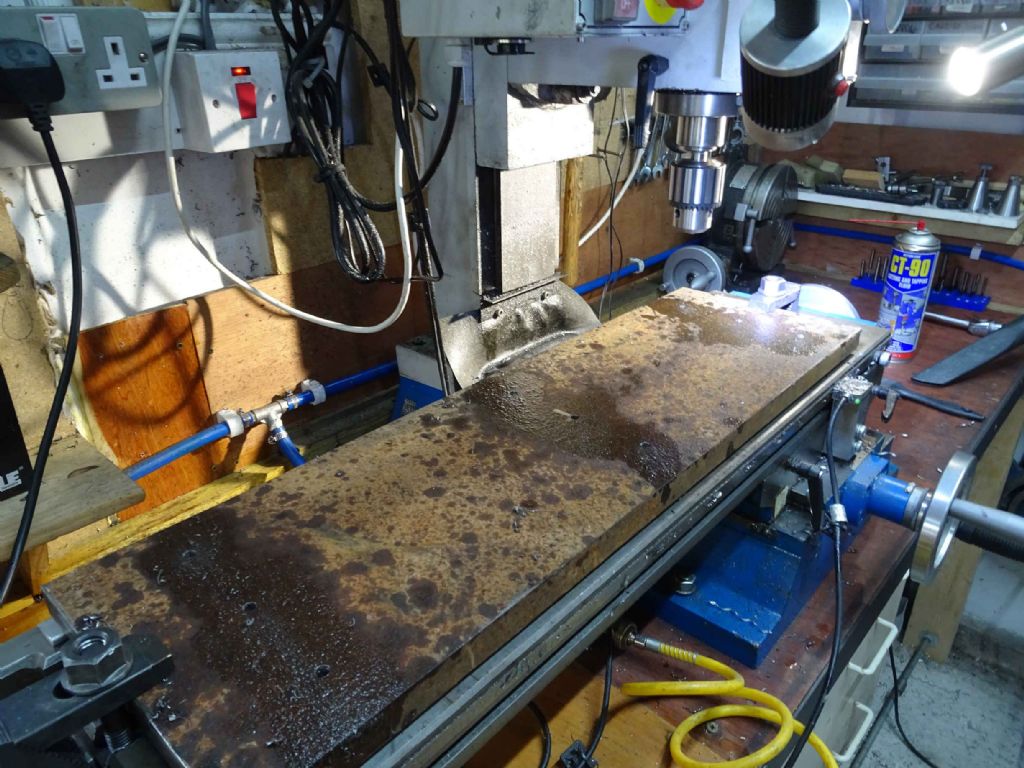
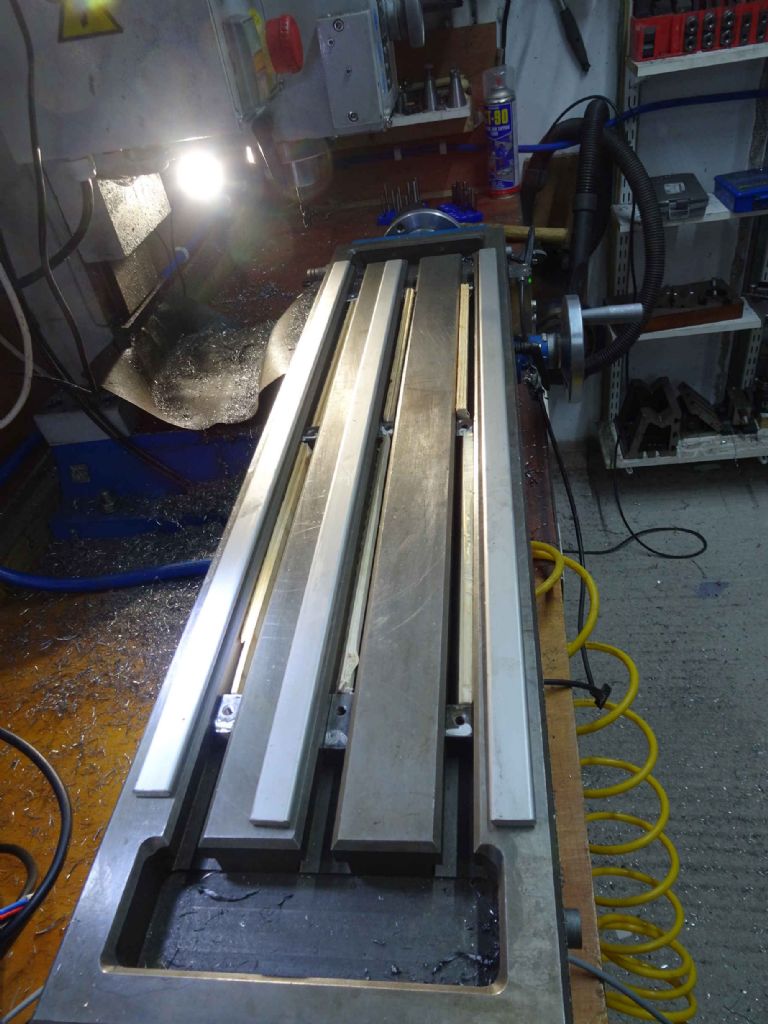
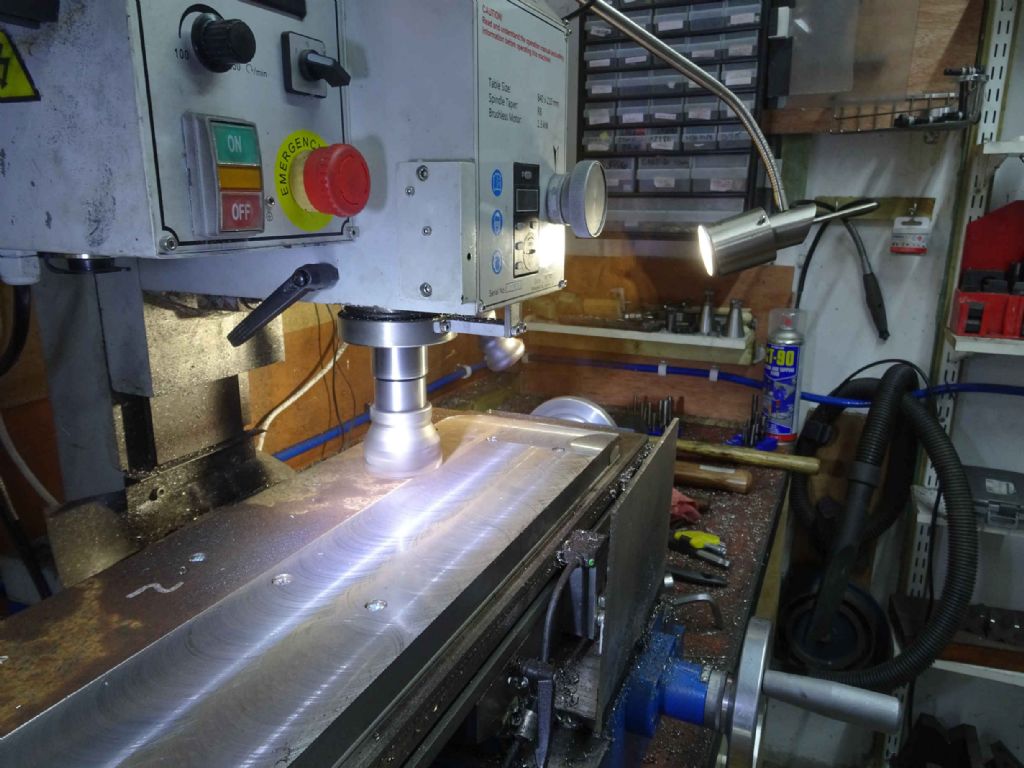
Now it's all very well having a nice piece of rusty scratched steel, but surely I want it cleaned up? Yup. Inside to the Mill. Well first a bit off the end to bring it near finally dimension. The thinner cutting blades have worked much better and I got the end cut off with only an inch or so of wear! Fortunately my mill (VM32L) is reasonably chunky and will (just, sort of) fit the base on. First trick was to drill and counterbore some 6 mm holes so I can secure it for face milling. I also squared up the back of the piece with a 10mm carbide end mill. It would have been nice to use the front, but there wasn't enough travel. Had I been clever I would have mounted the plate further back (5mm would have done) and I could have trued front and back at the same time. I wanted to true one side in this position so I could square it up with an indicator for future operations. When I'd done all this I realised that I'd no easy way to get the T slot nuts in the right place. I had to use bolts as my fixings couldn't be proud of the workpiece. The solution was to cut some bits of wood which match the distance the nuts would have to be as seen below. Then bolted down, square up (the machined edge now at the front) and on to the surface. A few passes and mostly it's done. There's a few mm at one end which I can't get to on the surface, but that will come off when I machine to size. There are also some bits at the ends I couldn't get to with the end mill and will need to move the plate around on the table to get access to them and the short ends as well.
Iain |
| 02/09/2023 12:24:03 |
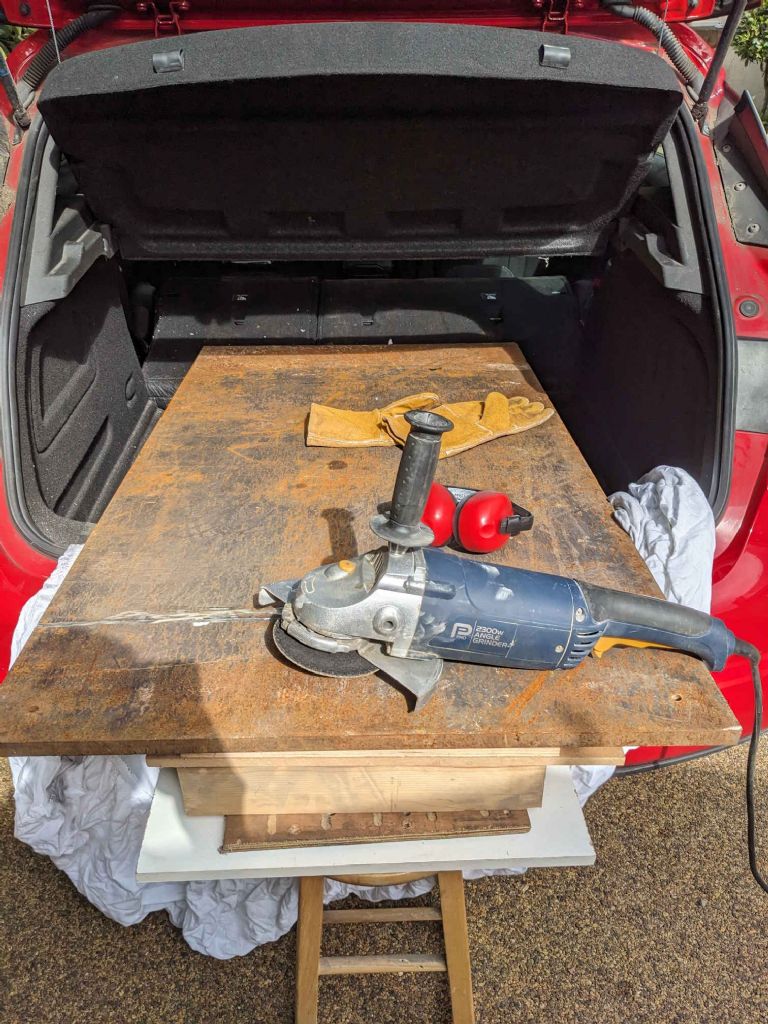
As mentioned above I have already started on this lunacy. First was to find some steel to make the base and baseplate from. A visit to the local scrap yard found a piece that was far too big, but I thought, 'what the hell - cheaper than buying a smaller new bit'. The piece in question is about 1.7m x 77cm and weighs about 170kg. I case you are wondering, this considerably exceeds my bench press capability! 2 strong you men and a forklift got it in the back of my car and I was sure I'd work out some way of getting it out! Yup - that's a big bit of steel! After panicing mildly for a while (to say nothing of the views of SWMBO) I got the end lifted up with the aid of my son and pulled out a bit. then I cut off the first 200mm (for the base) with a angle grinder (and several blades). Having done that I pulled out another 300mm (for the baseplate and cut that off). By now I'd burned through my 8 inch blades and was going through my small angle grinder! But in the end i got it off. This left a piece only (!) about 100kg and we were able to slip that off the boot onto the ground and then marched it over the end of my shed where it will stay until I can get round to chopping it up a bit more (I do have some ideas for it, in fact).
Iain |
| 02/09/2023 12:16:57 |
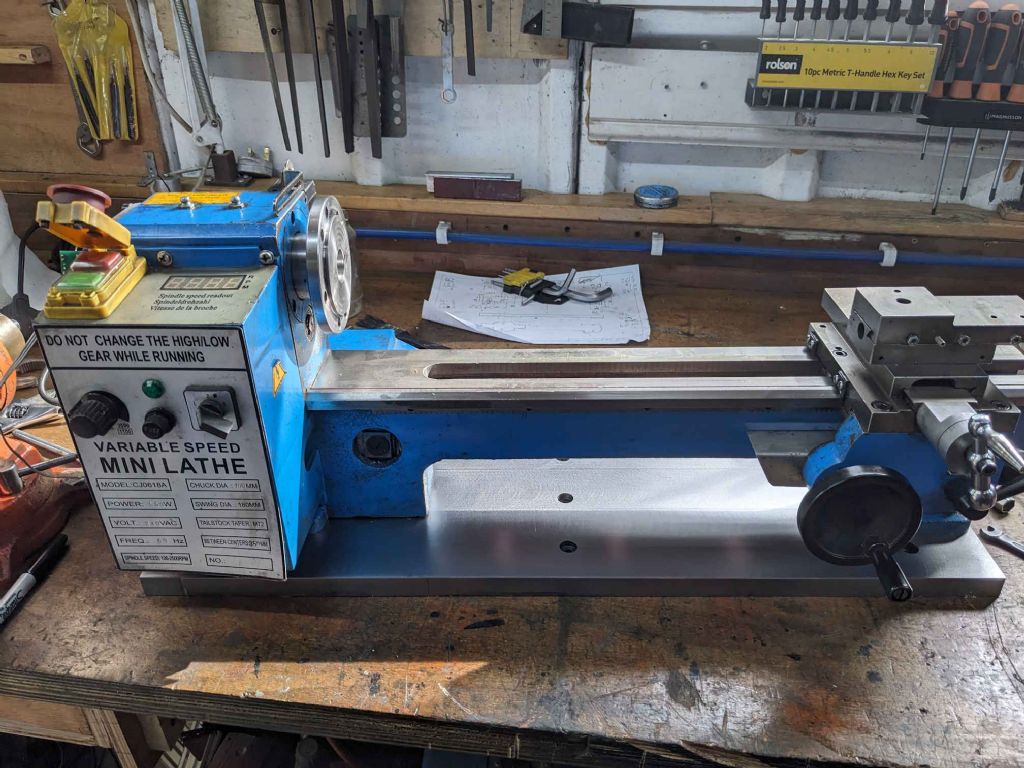
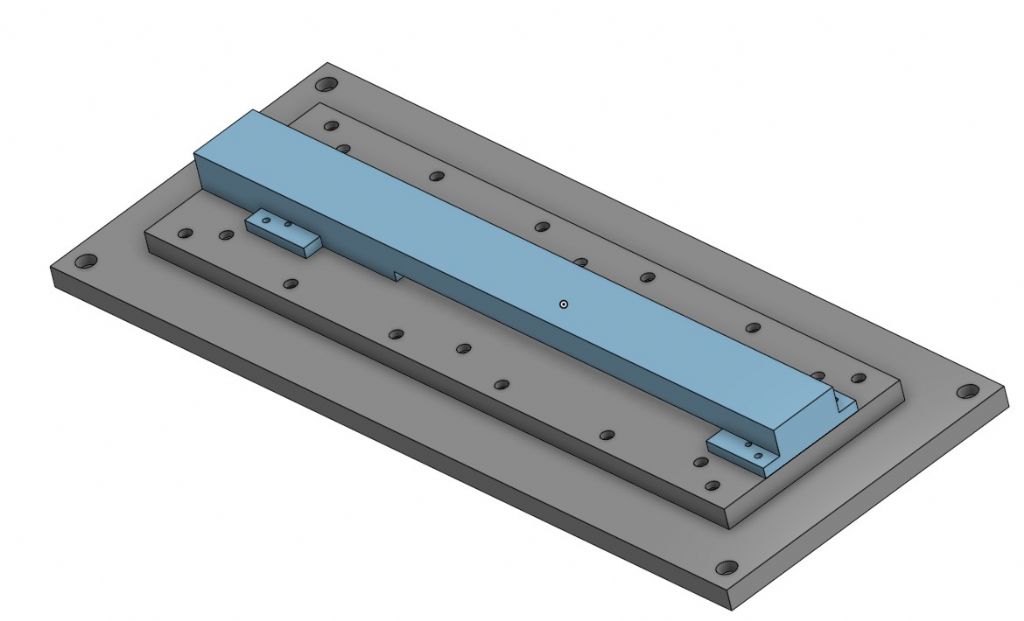
Recently, I've found that my lathe isn't turning parallel. In fact it's out by about 0.05mm (2 thou) over 30-40mm near the headstock. In a different post I tried to resolve this by shimming the headstock. Everyone told me to level the lathe. So I'm going to try. I have some ideas and I've started work on them, but before I go too far I wanted to see if I was totally mad! Oh - my lathe is a CJ618A a 7x14 minilathe pretty much the same as the SC3 (I think) This was my basic idea. The bit at the top represents the lathe bed. Obviously it's not that shape, but I just wanted to model the feet. Normally it's bolted to a thin tray through 4 M6 bolts which secure from underneath. My original (current?) thinking was to provide a baseplate (the bottom bit of steel) which I secure to the bench (home built wood) which I would level and then bolt the base (the middle plate) to. This would leave the base level and make it easier to level the lathe bed against it with shims. I thought that a simple base of 20mm steel may not be rigid enough to level against, but 2 lots of it would make the lathe (normally about 40k) far too heavy to move about for servicing, but I could probably cope with the extra 10k from the base. So the baseplate stays on the bench nice and level but I can remove the base and lathe without having worry about twist. I have two concerns. Firstly, my original (current?) plan was to put some m6 holes in the feet of the bed to bolt it to the base (with shims as needed). The problem with that is that the control box and motor make access to the feet at the headstock end difficult. I wondered if I should use the existing M6 threaded holes from underneath, but then I wouldn't be bolted down to the baseplate and that would lose some rigidity.. I'm also wondering if the baseplate is actually useful.. The recent article about levelling in MEW talks about straightening a lathe up without it being level (Dollies Dad.and so on). Any views welcome! Iain
|
| Thread: Power feed for a VM32L mill |
| 02/09/2023 11:58:32 |
It's been a while since my last post - nearly 3 years in fact! I got stuck at the UI phase for a long time - partly out of frustration and mainly stuck with an over-engineer head on (one of my weaknesses, I'm afraid). I took up the challenge once again more recently as I had a piece steel 20x200x660 mm to square up. The idea of turning handles to do this gave me the shivers, so I took up the torch again. I have sort of succeed - at least well enough for this project - but I've learned a lot of lessons. Here's what's happened. Firstly, I abandoned my motor driver code. It worked to a point, but I was struggling with the maths to make it speed up or slow down (from movement). My maths is greying with my hair. Instead, I swallowed my pride and used the FastAccelStepper library which did the trick perfectly well. Secondly, I abandoned my clever UI in favour of some buttons and a potentiometer. I can now move left and right and adjust the speed. My idea of cleverness here is to have a 2 way center off toggle switch so I can jog or set the movement to continuous. It works. Sort of. What have I learned (apart from humility)? POWER! The motor really isn't powerful enough. It's an act-motor 23HS2442J3 capable of 1.8 Nm at low speed, dropping off with speed. Even with no load the motor struggles to move the bed at all at the very end of travel. In the middle it will do 12 ish mm / sec (720mm/ min) which is fine, but I have to manually wind the last couple of inches and it won't cut at all there. I can (fairly) easily take a 1mm DOC with a side mill in 20mm steel by hand, but am limited to about 0.25mm with the power feed. I'm only running at 24V with a TB6600 controller which can take 40 and increasing the voltage would probably help, but I still think it's too weak. I don't think a stepper was a good choice. CLUTCH The dog clutch I made mainly works, but it's awkward to engage and disengage. I have to undo a grub screw and force the moving dog along the motor spindle. The keyway seems to want to choke up so I have to lever the dog back and fore. Not a good design. I will almost certainly be reworking this. In fact I will consider buying a commercial drive. It's fun to muck around, but I've probably spent a comparable amount to a commercial drive - ignoring the many hours of time I've put in! Thanks for all earlier comments!
Iain |
| Thread: High Speed Milling |
| 01/08/2023 11:26:27 |
HI, Ady. I was confused because the discussion was about slitting saws. The milling aspect seems rigid enough. Thanks for the suggestions Jason and Andrew. I'd need to cut out of a rectangular bar rather than a rod with a smaller diameter, but I think I have a piece of silver steel I can use. I'm going to recheck my spindle and collet run out first though. If they are out then a smaller saw may not be enough.
Iain |
Want the latest issue of Model Engineer or Model Engineers' Workshop? Use our magazine locator links to find your nearest stockist!
Sign up to our newsletter and get a free digital issue.
You can unsubscribe at anytime. View our privacy policy at www.mortons.co.uk/privacy
- *Oct 2023: FORUM MIGRATION TIMELINE*
05/10/2023 07:57:11 - Making ER11 collet chuck
05/10/2023 07:56:24 - What did you do today? 2023
05/10/2023 07:25:01 - Orrery
05/10/2023 06:00:41 - Wera hand-tools
05/10/2023 05:47:07 - New member
05/10/2023 04:40:11 - Problems with external pot on at1 vfd
05/10/2023 00:06:32 - Drain plug
04/10/2023 23:36:17 - digi phase converter for 10 machines.....
04/10/2023 23:13:48 - Winter Storage Of Locomotives
04/10/2023 21:02:11 - More Latest Posts...
- View All Topics
- Reeves** - Rebuilt Royal Scot by Martin Evans
by John Broughton
£300.00 - BRITANNIA 5" GAUGE James Perrier
by Jon Seabright 1
£2,500.00 - Drill Grinder - for restoration
by Nigel Graham 2
£0.00 - WARCO WM18 MILLING MACHINE
by Alex Chudley
£1,200.00 - MYFORD SUPER 7 LATHE
by Alex Chudley
£2,000.00 - More "For Sale" Ads...
- D1-3 backplate
by Michael Horley
Price Not Specified - fixed steady for a Colchester bantam mark1 800
by George Jervis
Price Not Specified - lbsc pansy
by JACK SIDEBOTHAM
Price Not Specified - Pratt Burnerd multifit chuck key.
by Tim Riome
Price Not Specified - BANDSAW BLADE WELDER
by HUGH
Price Not Specified - More "Wanted" Ads...
Do you want to contact the Model Engineer and Model Engineers' Workshop team?
You can contact us by phone, mail or email about the magazines including becoming a contributor, submitting reader's letters or making queries about articles. You can also get in touch about this website, advertising or other general issues.
Click THIS LINK for full contact details.
For subscription issues please see THIS LINK.
Model Engineer Magazine
- Percival Marshall
- M.E. History
- LittleLEC
- M.E. Clock
ME Workshop
- An Adcock
- & Shipley
- Horizontal
- Mill
Subscribe Now
- Great savings
- Delivered to your door
Pre-order your copy!
- Delivered to your doorstep!
- Free UK delivery!
 .
.


 Register
 Log-in


