Forum sponsored by:

The Workshop Progress Thread (2017)
Report your modeling and workshop progress here
| JasonB | 08/01/2017 17:46:10 |
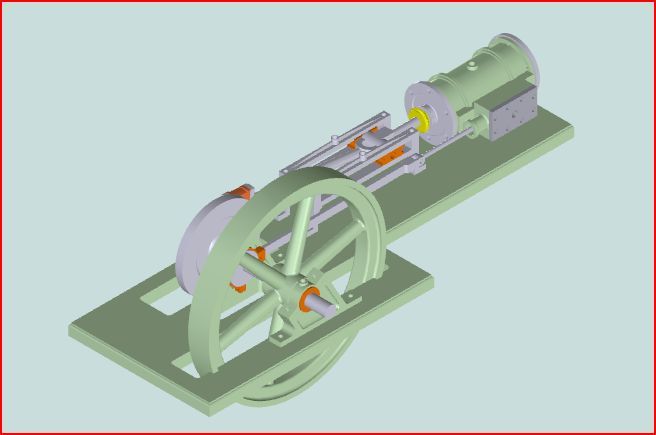
 25215 forum posts 3105 photos 1 articles | As well as working on the R&V engine I drew this out over Xmas/boxing day and have knocked up a few bits for it since then. Based on a general arrangement drawing that was in ME No4 of 1904 but made slightly smaller.
|
| Bob Rodgerson | 12/01/2017 12:39:57 |
| 612 forum posts 174 photos | Again Maybe should be posted on Motorcycles General discussion but of interest to anyone. |
| David Standing 1 | 12/01/2017 14:44:46 |
| 1297 forum posts 50 photos | With a bit of heaving, shoving, brute force and ignorance but surprisingly not any swearing, have just managed to shoehorn an oversize pallet into the last remaining bit of floor space in my workshop (until I build an extension......).
Strapped to the pallet is a Clarkson Mk II tool cutter grinder |
| Curtis Rutter | 12/01/2017 15:32:12 |
| 133 forum posts 14 photos | Finally got my lathe wired up and plugged in! Due to be serviced soon and off to the model engineers exhibition to buy some tooling on Sun 22nd! |
| David Standing 1 | 12/01/2017 20:11:30 |
| 1297 forum posts 50 photos | I also commissioned a lathe today. I picked up a bargain minter of a Super 7 back in October and took it to bits to get it home, as a friend gave me a plastic bush that he needed boring out yesterday, I thought it was time to put it back together This afternoon I put the toolslide back on, fitted my Dickson QCTP, refitted the motor, set the pulleys up parallel, wired the motor to the junction box, and away it went (well, after a bit of terminal swopping in the junction box). Bush sorted |
| Tony Marshall | 13/01/2017 00:26:19 |
 16 forum posts 38 photos | Just added a 'proper' saddle clamp to replace the old ring spanner that was always in the way or not there. |
| Bob Rodgerson | 13/01/2017 21:57:15 |
| 612 forum posts 174 photos | Tonight I got round to assembling the crank case, crankshaft and cylinder assembly complete with pistons to check for tight spots.
|
| JA | 15/01/2017 12:27:10 |
 1605 forum posts 83 photos | Reassembled regulator and everything appeared to run free with end float. Lubricated pivots and set in motion. The clock would not sustain with 6 lb driving weight on a single cord, that is without the pulley. Deeply disappointing. I am now trying to analyse the whole thing. I have decided that I will put any further postings on the clock in the “John Wilding Regulator” thread. JA |
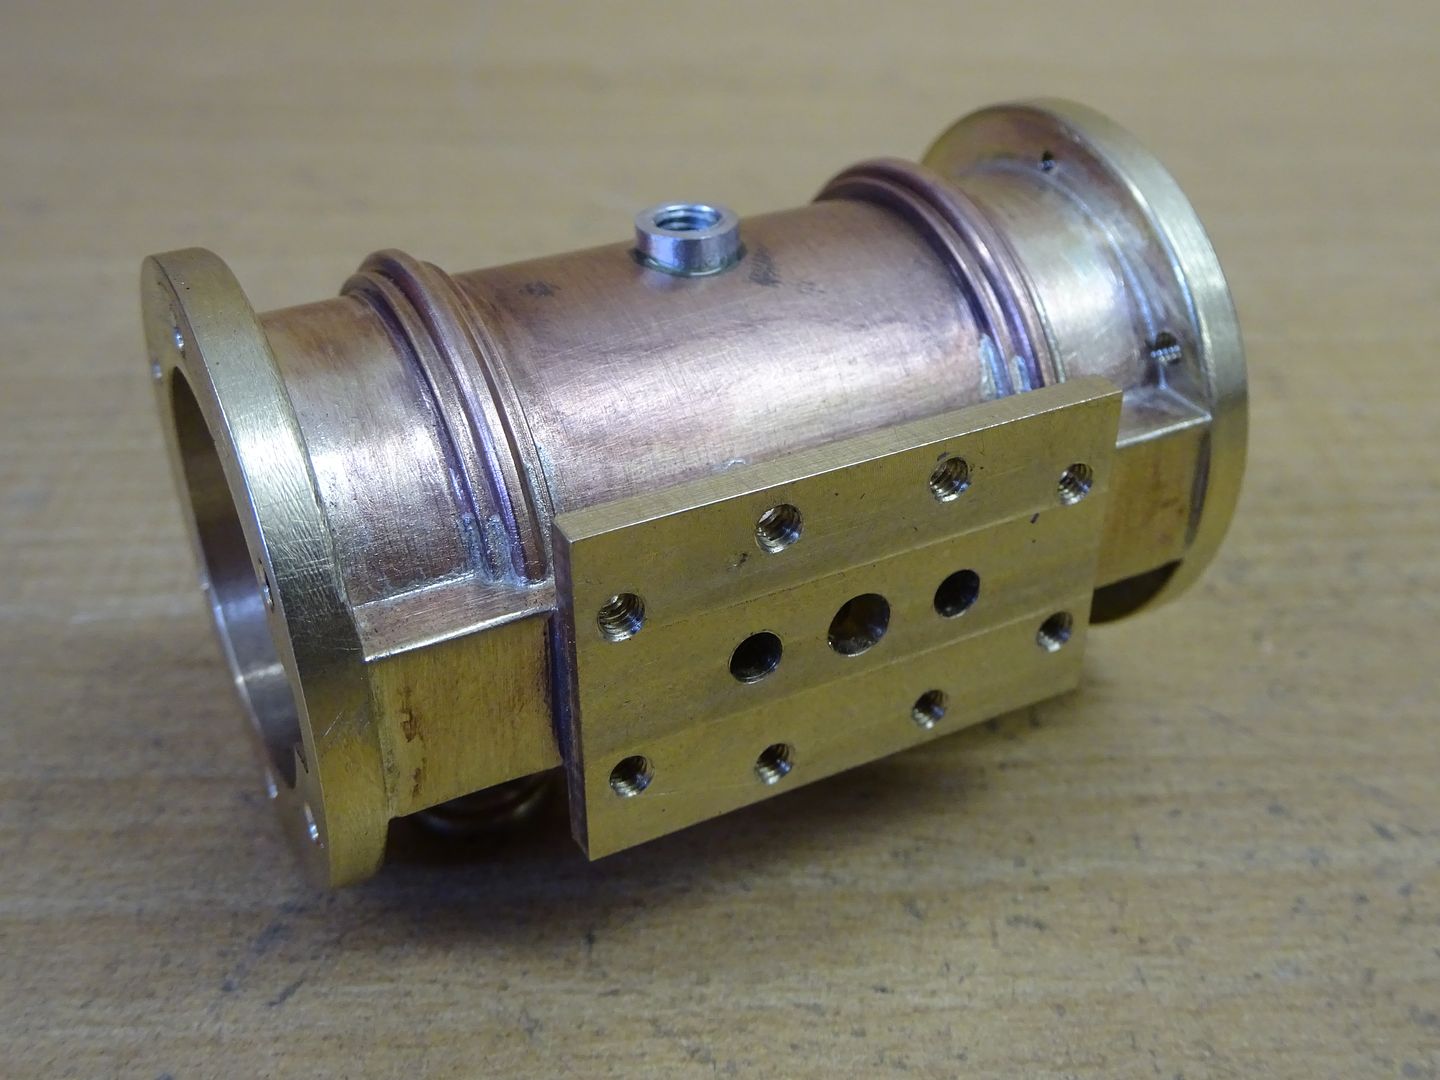
| JasonB | 15/01/2017 16:21:51 |
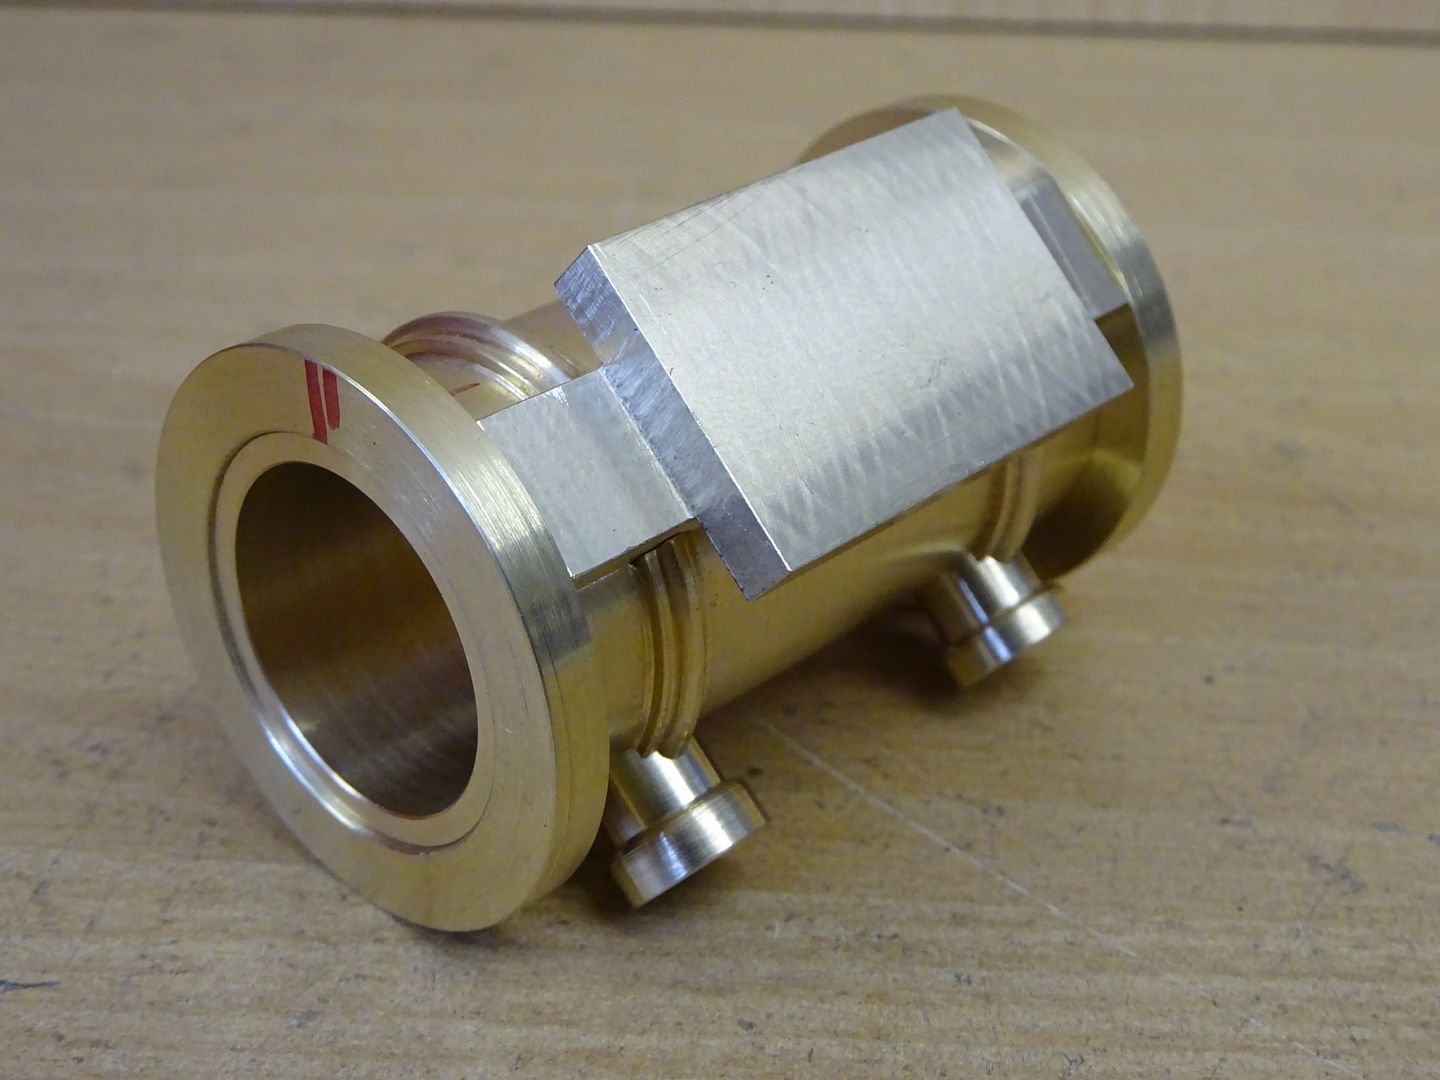
25215 forum posts 3105 photos 1 articles | I got the bearing supports finished off in the week
Then made a start on the cylinder and had all the bit sready to solder by Friday Evening.
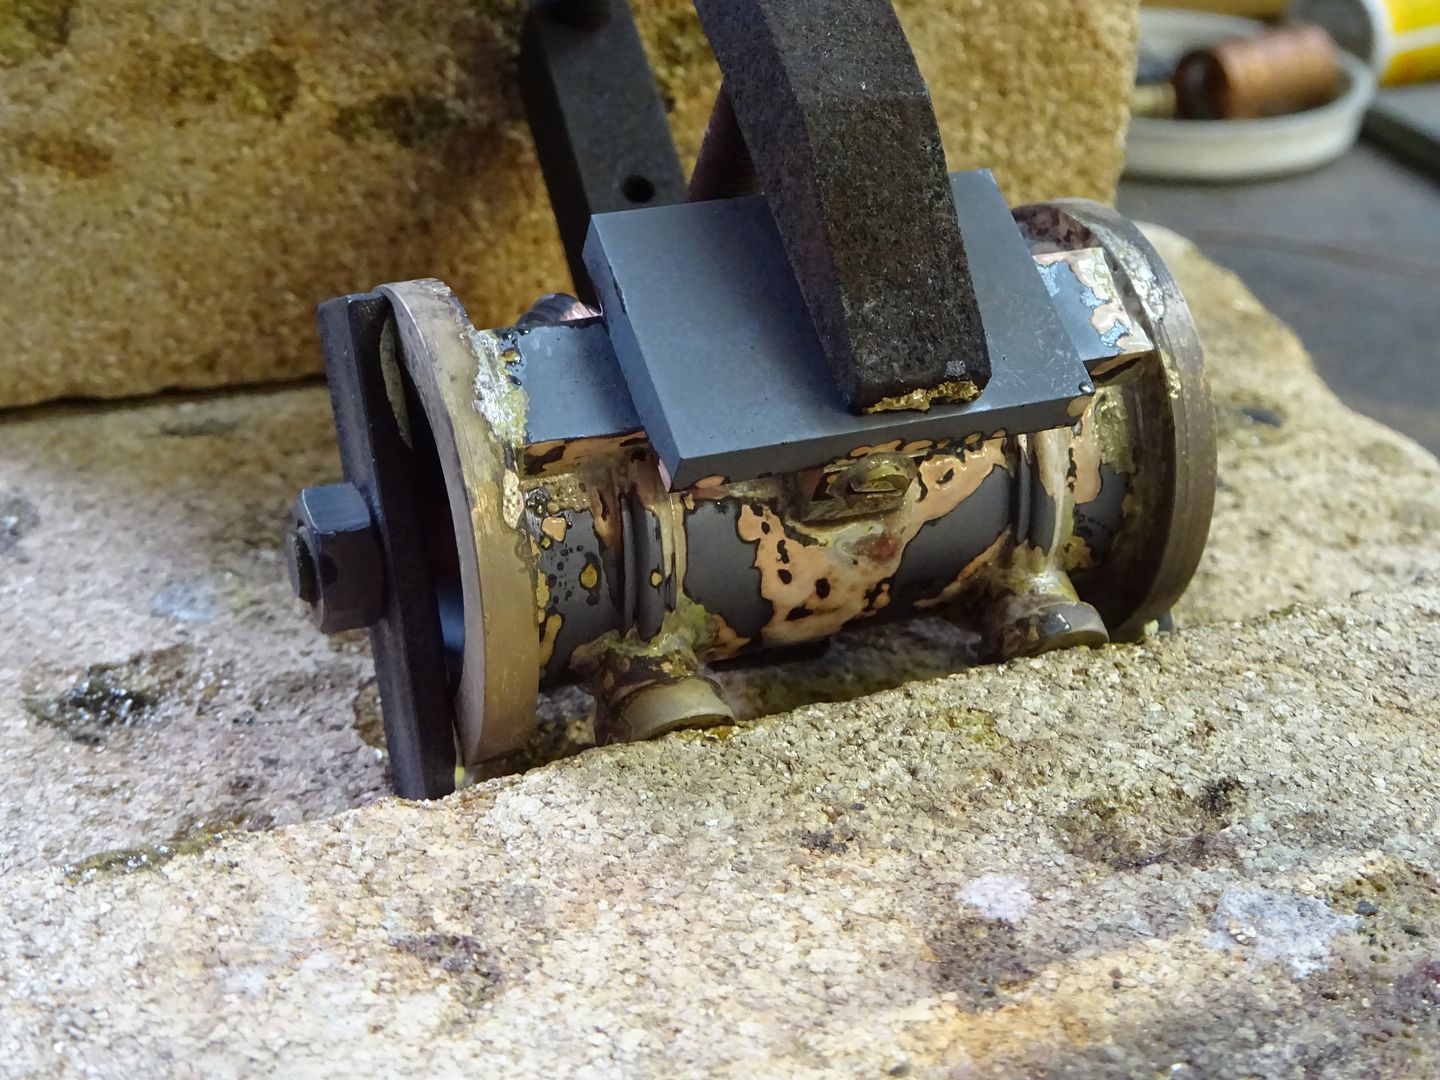
Stuck it together with some silver solder on Saturday morning
Then machined my "casting"
Finally bashed out a couple of dozen studs and tried a few bits together
J |
| mechman48 | 15/01/2017 22:49:46 |
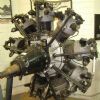
 2947 forum posts 468 photos | Just finished off my S10 OH & gave it a test run... **LINK**
Edited By mechman48 on 15/01/2017 22:51:47 Edited By JasonB on 16/01/2017 07:30:06 |
| Andrew Hutchinson | 16/01/2017 06:10:56 |
| 30 forum posts 15 photos | It took me a week but I got the Rexon RDM500M mill drill back together again and installed the vise at about 2:30AM this morning. Second time in a row I put the heavy end somewheres I couldn't reach it easily. Had to make a little ramp to ease it down as the driveway was never put in and what was is 8" below the concrete of the garage. Made my new little crane pretty useless. Getting the head up on top of the column was a bit dodgy but luckily it wasn't that heavy. I'll be happy to get back into making chips ASAP - hopefully tomorrow night. I forgot some belts and we ended up using plumbing strap in two places but got lucky and lost little or no paint. Should have thrown something under the strap but didn't think it through.
Andrew Hutchinson
|
| Curtis Rutter | 16/01/2017 11:09:18 |
| 133 forum posts 14 photos | Have ordered a new tool post for the ML7 as mine didn't have one. After hearing lots of good things went for a Dickson type from Lynham engineering. Once it arrives will measure up and order a tangential tool holder from eccentric....Now where's the best place to order material so I can start making Swarf! |
| Curtis Rutter | 16/01/2017 12:14:03 |
| 133 forum posts 14 photos | Should add I'm in Hertford, England |
| JasonB | 16/01/2017 12:33:49 |
25215 forum posts 3105 photos 1 articles | In no particular order |
| Roderick Jenkins | 16/01/2017 20:36:18 |
 2376 forum posts 800 photos | As well as the Linishing Disc, I got the kit for a wobble broach from Hemingway. There's a few designs for one of these. Jock Millar did one in MEW back in November 2009 but that's a bit chunky for me. Mike Cox has a nice simple one but the Hemingway one designed by Mircea Halmagiu incorporates 3 ball bearings including a nice thrust bearing.
The tool is offset from the centre line by 1 degree, which I set up using my Wixey. The cutter has 2.5 degrees relief and I was able to use the Wixey again to tilt the head of my mill to the appropriate angle. Seems to work very nicely, if somewhat unspectacular - it just feeds in!
That's a 5mm allen key snugly fitting in the socket.
I'm set up now to have a go at making some MiteeBite type fixings for my little CNC mill. Cheers, Rod |
| Neil Wyatt | 16/01/2017 20:47:07 |
 19226 forum posts 749 photos 86 articles | Might not look like it, but there is some traditional machine work in these suspension units. I still need to add the 1/8" rods through the middle of the springs etc. This is actually the inside as the nuts go on the outside. Neil
|
| Curtis Rutter | 16/01/2017 21:47:02 |
| 133 forum posts 14 photos | Cheers JasonB, will help pass time during tonight's shift Edited By Curtis Rutter on 16/01/2017 21:47:57 |
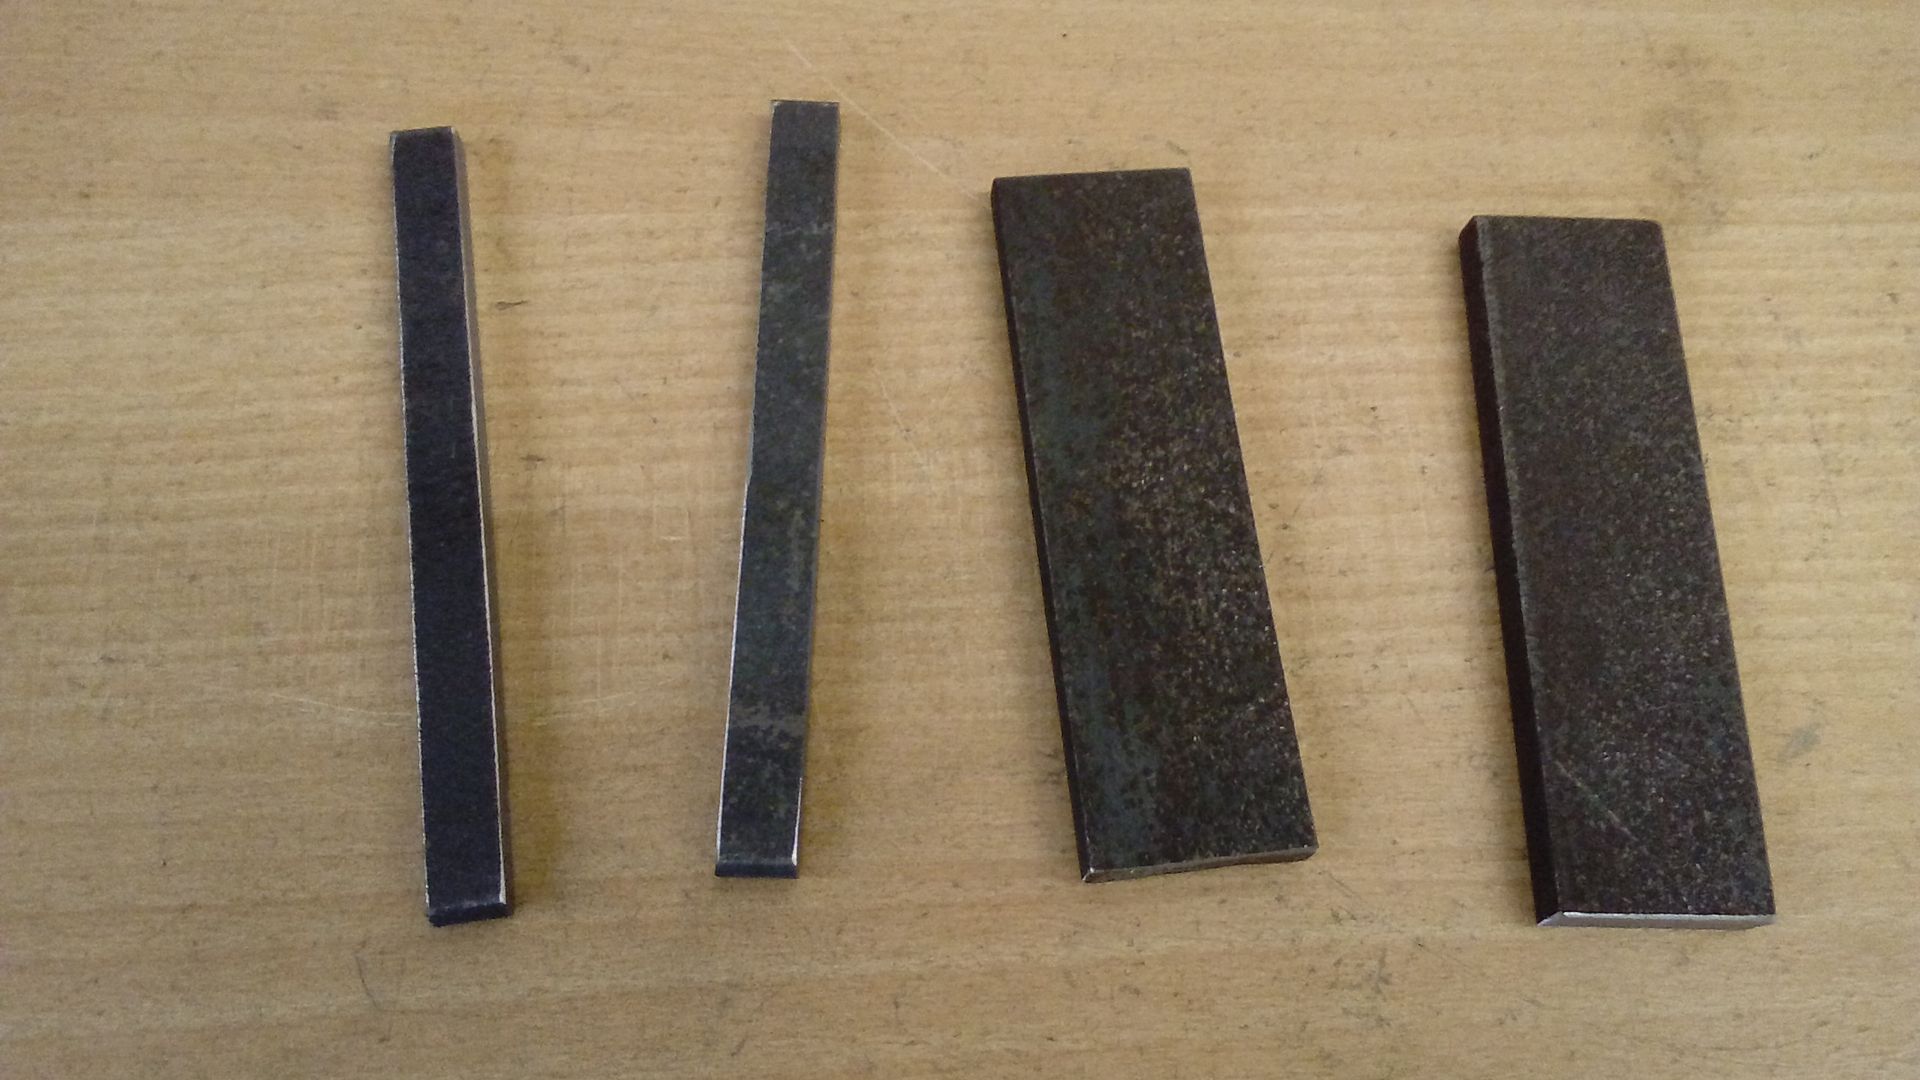
| JasonB | 22/01/2017 17:49:11 |
25215 forum posts 3105 photos 1 articles | On Tuesday I cut and pickled these four bits of 1/4"ish black bar for the crosshead guides on teh horizontal steam engine.
Did the machining on Wed & Friday evening and today finished them off by filing the curve to the stiffening webs and drawfiling the machining marks away. The extra work involved will milling the black bar down to size seems to have paid off as there does not seem to have been any unwanted movement.
J
|
| Muzzer | 22/01/2017 18:15:40 |
 2904 forum posts 448 photos | Nice work Rod. I've been watching Randy Richard making this Hemingway kit on his Youtube Channel. It's on my list to do, not least as they seem to cost hundreds of coupons to buy a commercial one. Simple enough concept. Did you buy the whole kit including materials - or just the drawings? I dunno how it works. Murray |
| Roderick Jenkins | 22/01/2017 20:17:46 |
2376 forum posts 800 photos | Hi Murray, I bought the whole thing - didn't really need the lumps of 7/8 and 1" steel but the 3 bearings and the screws are in the kit as well. BAZ, who posts on here from time to time, put me onto it. There is also a length of 8mm silver steel. I bored the the holder for the bits a nice snug fit and was very pleased with myself. Unfortunately, after hardening, the shank of the bits had swelled to 8.03mm so I had to put the holder back in a collet and bore it out again Cheers, Rod Edited By Roderick Jenkins on 22/01/2017 20:39:21 |


This thread is closed.
Magazine Locator
Want the latest issue of Model Engineer or Model Engineers' Workshop? Use our magazine locator links to find your nearest stockist!
Sign up to our Newsletter
Sign up to our newsletter and get a free digital issue.
You can unsubscribe at anytime. View our privacy policy at www.mortons.co.uk/privacy
Latest Forum Posts
- hemingway ball turner
04/07/2025 14:40:26 - *Oct 2023: FORUM MIGRATION TIMELINE*
05/10/2023 07:57:11 - Making ER11 collet chuck
05/10/2023 07:56:24 - What did you do today? 2023
05/10/2023 07:25:01 - Orrery
05/10/2023 06:00:41 - Wera hand-tools
05/10/2023 05:47:07 - New member
05/10/2023 04:40:11 - Problems with external pot on at1 vfd
05/10/2023 00:06:32 - Drain plug
04/10/2023 23:36:17 - digi phase converter for 10 machines.....
04/10/2023 23:13:48 - More Latest Posts...
- View All Topics
Support Our Partners


Shopping Partners
Subscription Offer

Latest "For Sale" Ads
- Reeves** - Rebuilt Royal Scot by Martin Evans
by John Broughton
£300.00 - BRITANNIA 5" GAUGE James Perrier
by Jon Seabright 1
£2,500.00 - Drill Grinder - for restoration
by Nigel Graham 2
£0.00 - WARCO WM18 MILLING MACHINE
by Alex Chudley
£1,200.00 - MYFORD SUPER 7 LATHE
by Alex Chudley
£2,000.00 - More "For Sale" Ads...
Latest "Wanted" Ads
- D1-3 backplate
by Michael Horley
Price Not Specified - fixed steady for a Colchester bantam mark1 800
by George Jervis
Price Not Specified - lbsc pansy
by JACK SIDEBOTHAM
Price Not Specified - Pratt Burnerd multifit chuck key.
by Tim Riome
Price Not Specified - BANDSAW BLADE WELDER
by HUGH
Price Not Specified - More "Wanted" Ads...
Get In Touch!
Do you want to contact the Model Engineer and Model Engineers' Workshop team?
You can contact us by phone, mail or email about the magazines including becoming a contributor, submitting reader's letters or making queries about articles. You can also get in touch about this website, advertising or other general issues.
Click THIS LINK for full contact details.
For subscription issues please see THIS LINK.
Digital Back Issues


Donate

 Register
 Log-in
Model Engineer Magazine
- Percival Marshall
- M.E. History
- LittleLEC
- M.E. Clock

ME Workshop
- An Adcock
- & Shipley
- Horizontal
- Mill

Subscribe Now
- Great savings
- Delivered to your door

Pre-order your copy!
- Delivered to your doorstep!
- Free UK delivery!
All Forum Topics > Work In Progress and completed items > The Workshop Progress Thread (2017)