A workholding question.
| Robin Graham | 22/10/2021 00:59:21 |
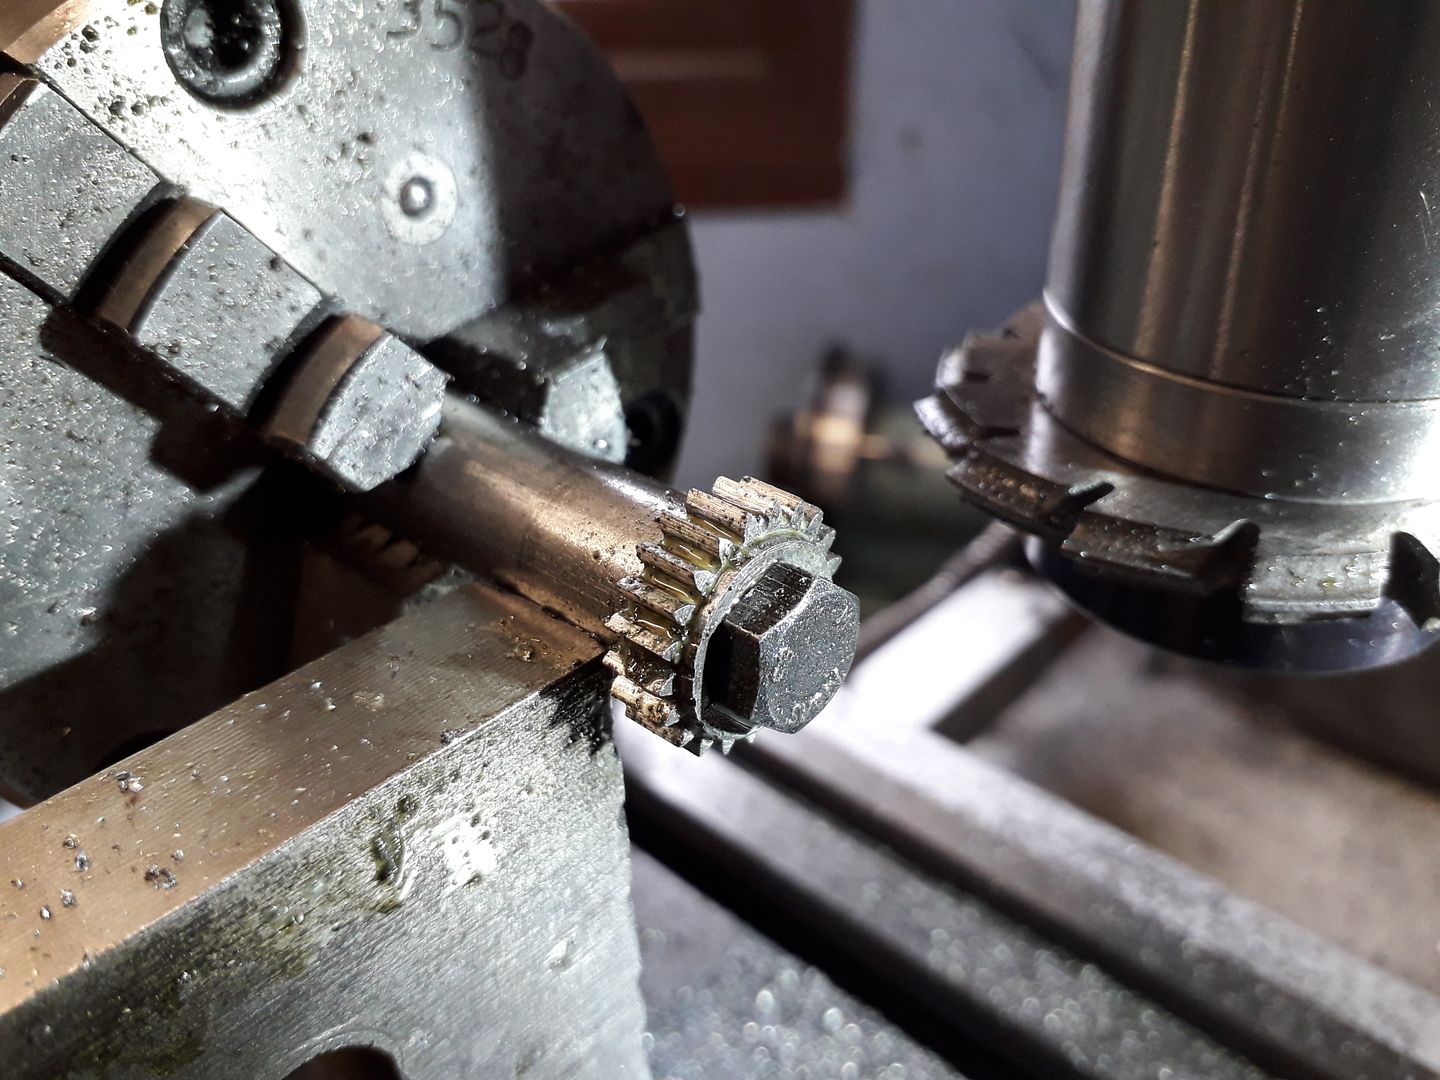
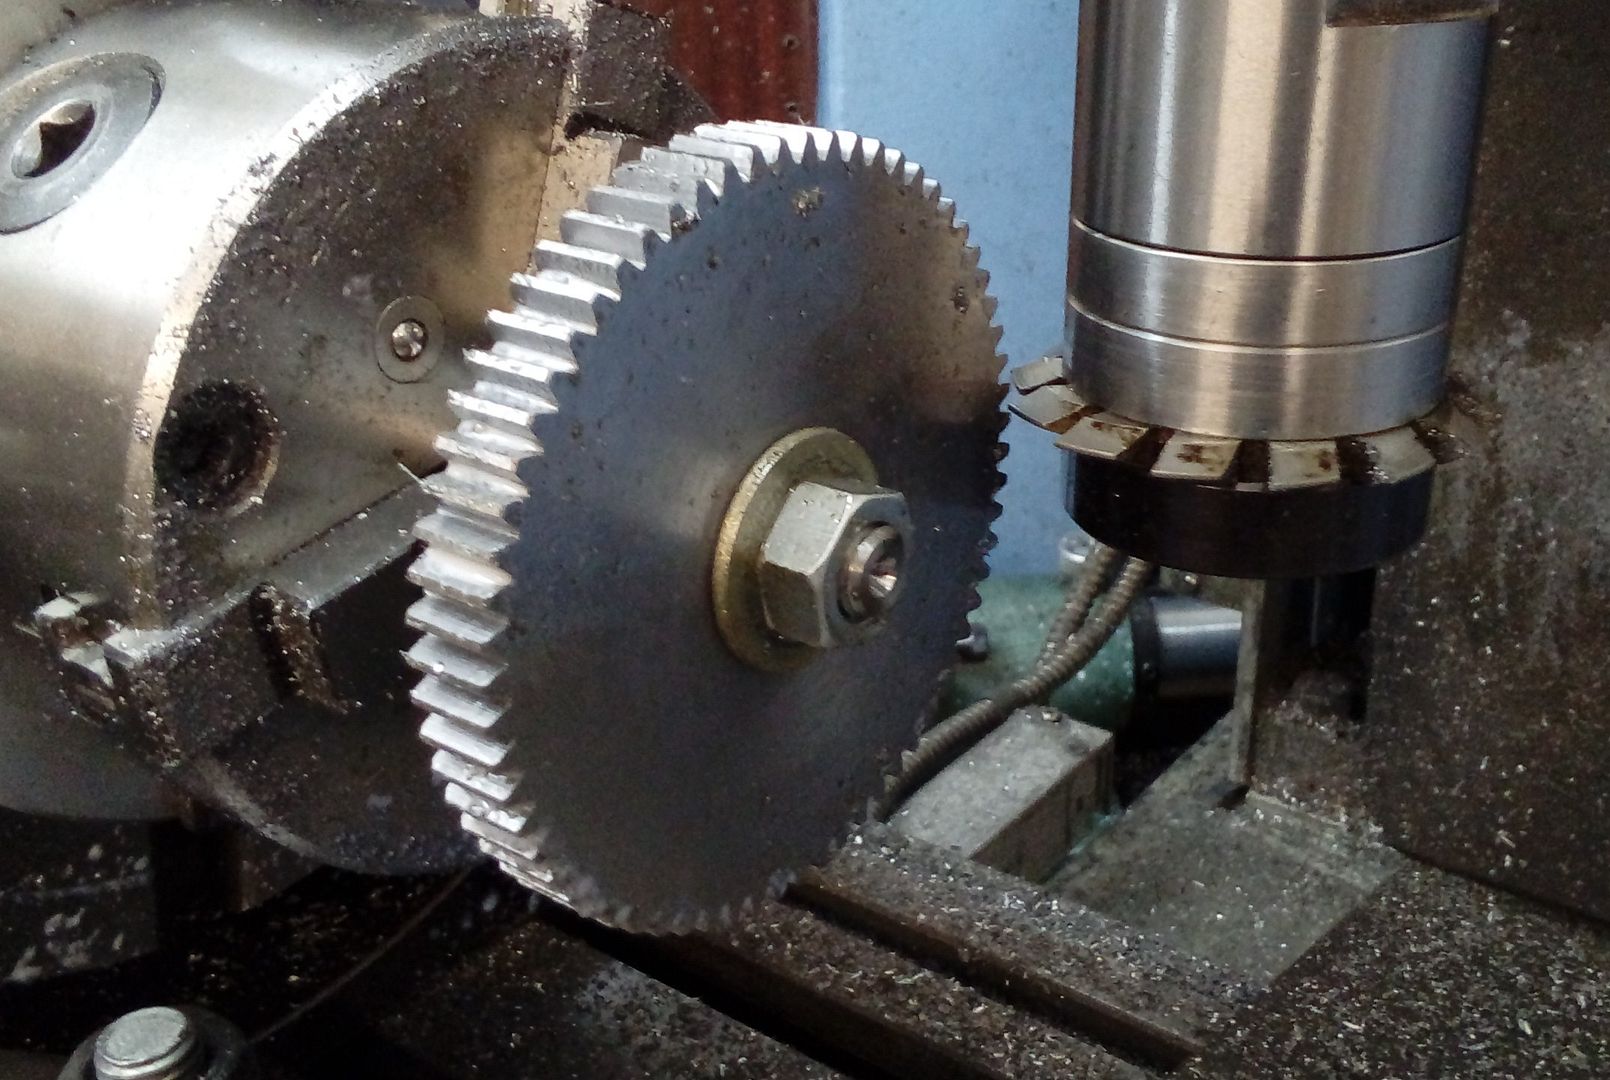
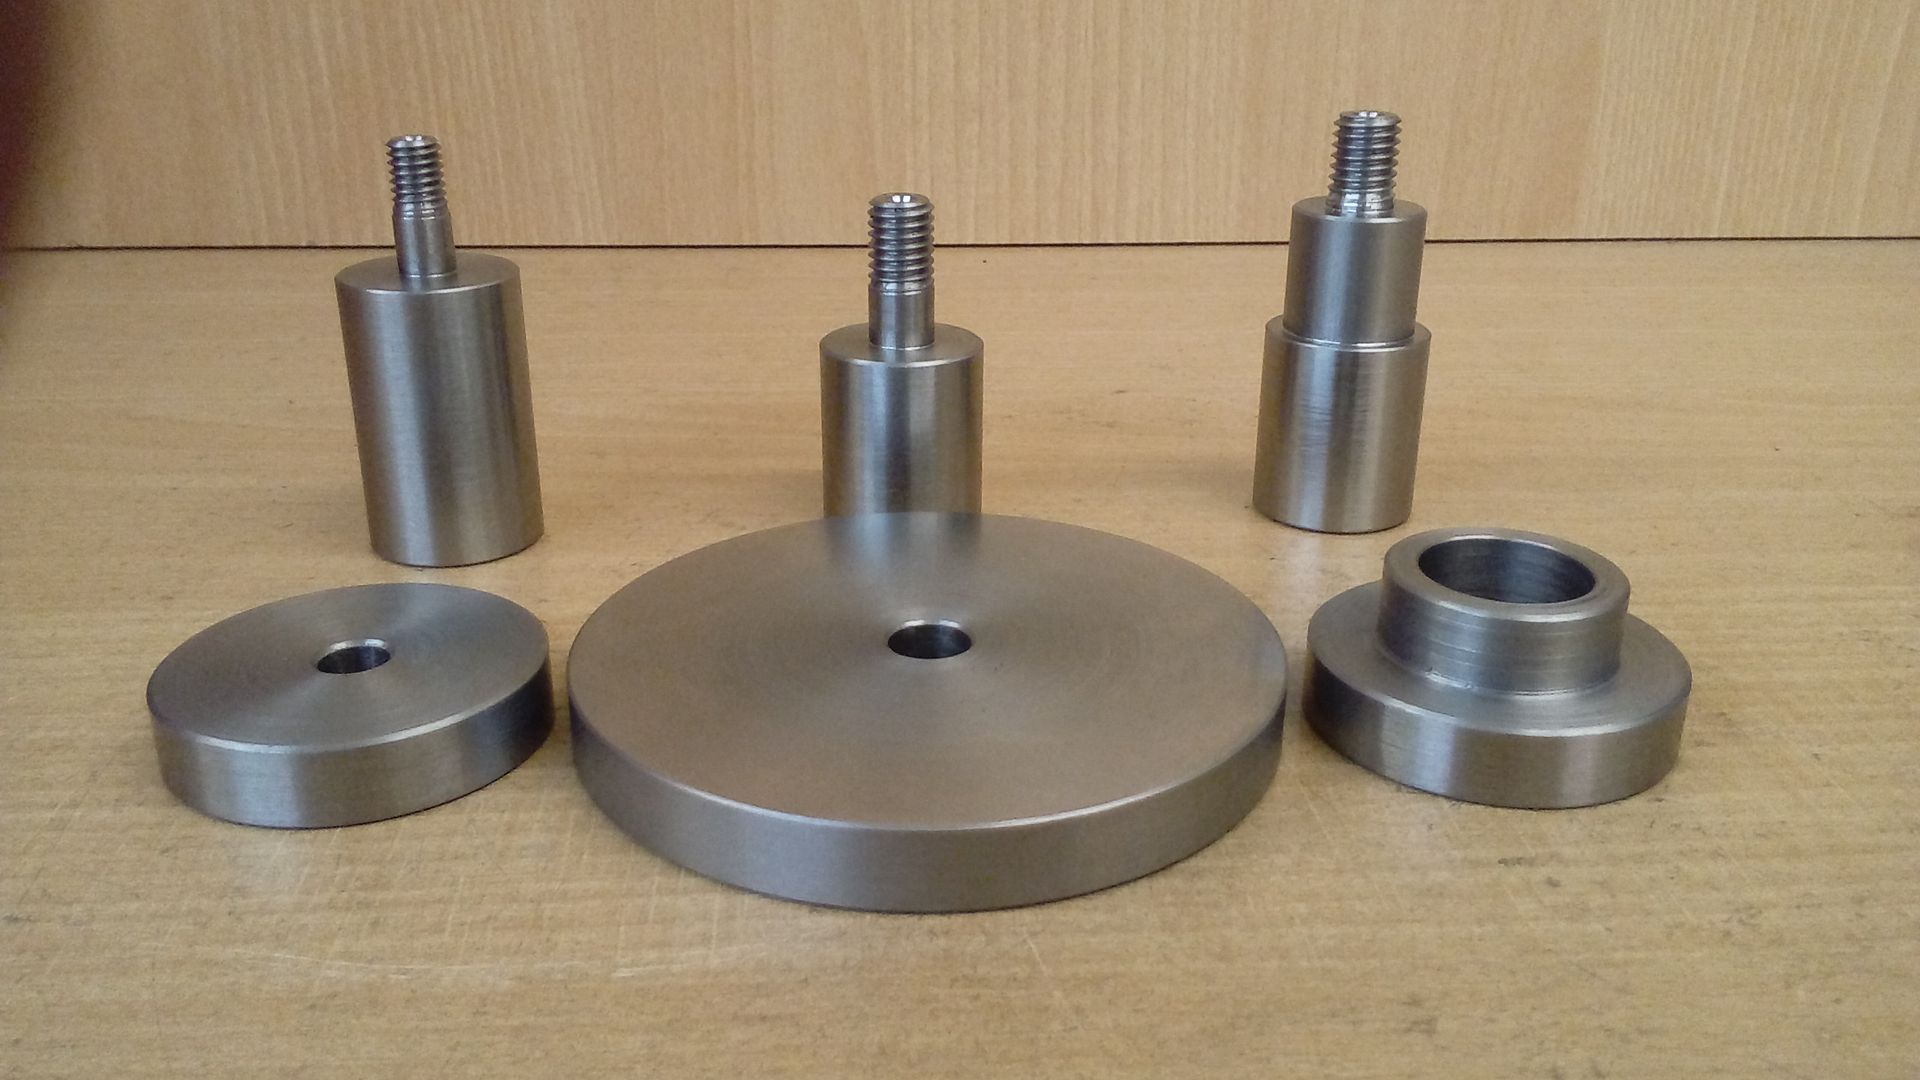
| 1089 forum posts 345 photos | I think I may know the answer to this, but would like to check before trashing any more brass. I want to make a number of hubs like this: That's a mess I know, but it was a proof of principle exercise, not intended to look pretty! I set up the 'proper job' to cut the 3/16" slots like this: The brass disc is held against the steel stub in the chuck by two sided adhesive tape and tailstock pressure. The work moved with consequent knackerment. There's no reason why I couldn't drill the disc through centrally to take an expanding mandrel, but I haven't got one and it would cost me 50 quid to buy. I think that if I just drill the disc and turn a close fitting mandrel with a shoulder and threaded end to allow me to clamp it down on the shoulder with a nut and washer, dispensing with tailstock support. it should work. But I'd like a sanity check before trashing any more (expensive) brass! Robin
Edited By Robin Graham on 22/10/2021 01:00:24 Edited By Robin Graham on 22/10/2021 01:03:10 |
| peak4 | 22/10/2021 01:58:10 |
2207 forum posts 210 photos | For a cheap and cheerful expanding mandrel, Bill |
| JasonB | 22/10/2021 07:03:46 |
25215 forum posts 3105 photos 1 articles | Does it even need to be an expanding one, just turn a short tight fitting spigot on the end of a bar and then tap for a cap head screw. Add a washer and fix blank to arbor, I've cut gears that way without problems. If you want to use tailstock support then just include a smaller dia spigot that can be threaded and use a nut.
Edited By JasonB on 22/10/2021 07:05:06 |
| Gary Wooding | 22/10/2021 07:44:26 |
| 1074 forum posts 290 photos | +1 for Bill's expanding mandrel. I've made several of different sizes and they all work fine. |
| DC31k | 22/10/2021 07:52:22 |
| 1186 forum posts 11 photos | Tin the brass parts and the steel stub with soft solder. Sweat them together. Cut all at once. Alternatively, superglue instead of solder. You did not say how (which direction) it moved. Are you cutting to compress the double-sided tape or to expand it? If it moved downwards or sideways, a flat stop in the appropriate direction will prevent this. To me, the steel stub looks a little on the small side. Something the same diameter as the brass would give more surface area for the glue. Clearly, you will cut into it the first time you use it. |
| Howard Lewis | 22/10/2021 08:10:57 |
| 7227 forum posts 21 photos | +1 for a close fitting arbor and clamping bolt / capscrew method, as illustrated by others. Alternatively, mount the disc vertically in the vice to mill the first two slots. Then make up a simple fixture to locate in the two slots to ensure alignment, and mill the second pair. Since you are making several, it would be worth making up a jig, which could also be used for drilling (and reaming? ) the holes for the rods.. With modification, it could also be used to hold the disc horizontally, for boring the bearing housing. Once made, the jig will save time on machining the discs Howard
|
| Martin Connelly | 22/10/2021 08:34:41 |
2549 forum posts 235 photos | +1 for vice and jig. Once the first two slots are cut on one side you have a spigot and two shoulders to position the part in a recess. You could make the recess so that it clamped the spigot as well if you wanted to. If it was something I was doing to make many I would use a piece of aluminium plate that supported the back and also had a few tapped holes to allow clamping then it could be used horizontally and vertically for both the second slotting process and the boring for the bearing. A few reference features would allow setting up if the work was interrupted or the tool was going to be used at some point in the future. This is what I was doing yesterday. I wanted to repeatedly position and hold a few bits of brass to machine down to 10mm square after cutting from some plate then add the final features without risking my vice jaws. A few scraps of aluminium and a dowel soon resulted in a throwaway jig. In use the block with the dowel in was supported on parallels and one end was held with a toolmaker's clamp which was then clamped to the bed of the mill to keep it in one place. The dowel acted as a stop in a known position and can be slipped out when not required. It can also be used to pick up the same point again if required in a few days time. Martin C Edited By Martin Connelly on 22/10/2021 08:50:30 |
| roy entwistle | 22/10/2021 11:05:58 |
| 1716 forum posts | I can never understand why people who have a lathe, never mind a mill, have to buy a thing like a mandrel Roy |
| bernard towers | 22/10/2021 17:40:20 |
| 1221 forum posts 161 photos | I have made all my expanding mandrels but I’m afraid Roy I drew the line at tapered bc mandrels, they are nice and hard and last for ever. On your Homemade mandrels if you fully thread them then internally cone with a LARGE centre drill, make a matching coned washer you get a good amount of outward pressure meaning you are able to remove significant amounts of material. |
| Richard Millington | 22/10/2021 18:27:28 |
| 101 forum posts 9 photos | I assume you don't want a bolt / washer as you don't seem to have a through hole. Ditch the double sided, it's probably causing more problems that solving. Make a spreader washer for the tailstock to spread the pressure out more and use Loctite, stud lock or bearing fit if needed. Heat up to remove.
|
| Chris Gunn | 22/10/2021 21:25:10 |
| 459 forum posts 28 photos | I may be missing something, but why not reverse the job in the chuck, hold the large diameter in the chuck, and support the little end with the centre, and machine the slots from the centre end to the recess in the middle or vice versa. If I were making 4 hubs I might well start with a length of bar long enough for 4 parts plus parting off, machine the profiles of the bobbins then hold the whole length between chuck and centres, then machine the slots in the small diameters along the bar, so all will be the same, and then part off the hubs and face the ends. Chris Gunn |
| not done it yet | 22/10/2021 22:55:11 |
| 7517 forum posts 20 photos | Posted by Richard Millington on 22/10/2021 18:27:28:
I assume you don't want a bolt / washer as you don't seem to have a through hole. Ditch the double sided, it's probably causing more problems that solving. Make a spreader washer for the tailstock to spread the pressure out more and use Loctite, stud lock or bearing fit if needed. Heat up to remove. Through holes are easily permanently filled? |
| Dave Halford | 23/10/2021 10:52:33 |
| 2536 forum posts 24 photos | Similar to Chris If it was me I would have left the disc's still in the bar, turned it to size on the lathe for the length of the total number of disc required + a mounting spigot + parting allowance. Bored though all for your bearing size. Make a steel tee shaped plug to fill the bore for the table tailstock. Then mounted it on your table as you have only with the spigot in the chuck to save marking the outside finish. Cut all the slots at once. Which means you only have 2 set overs to get the four slots right and not 8? Going back to the lathe, part off each disc etc. |
| Robin Graham | 24/10/2021 23:39:39 |
| 1089 forum posts 345 photos | Thanks for replies. This is what the slot looked like after the first pass (2mm DOC): It seems that the work wandered clockwise:
I was cutting away 'front to back' in this view with a 2-flute slot drill - so conventional milling on the left hand side of the slot. I guess that makes sense - the bit was trying to pull into the work. The reason that I tried this setup was that I'd used a similar arrangement for turning and facing on the lathe and that works well. Presumably that's because a it doesn't matter if the work slips a little around the rotational axis when the the cutting force is applied. A different result when milling though! From replies it looks that I don't need to buy or make an expanding mandrel, which is good news. The 'bolt on' approach should work. I can make a through hole, as I said in my original post. With the benefit of hindsight I should have done the milling before the turning/parting as suggested, It's not the first time I've painted myself into a corner and had to devise an escape route Robin.
Edited By Robin Graham on 24/10/2021 23:41:14 |
| not done it yet | 25/10/2021 10:18:59 |
| 7517 forum posts 20 photos | Fit a locating dowel through the disc and into the underlying back plate? Remove dowel before boring to size? The dowel would not only fix the part in relation to the rear support but also provide a datum point for any rotation required? Just a simple part of a jig. Edited By not done it yet on 25/10/2021 10:19:27 |
| Chris Gunn | 25/10/2021 11:54:39 |
| 459 forum posts 28 photos | Robin, now I have seen what you are trying to do, ie a disc with slots in, not a bobbin I imagined from your first pictures, then put a centre in a piece of bar to support the outside end, hold the bar in the chuck, and mill all the slots then part off and face. You will have to sacrifice a bit of bar in the process, but you should finish up with as many discs as you need all the same. Chris Gunn |
| Dave Halford | 25/10/2021 13:15:07 |
| 2536 forum posts 24 photos | Robin, Even with the through bolt mounting you will still have a significant off centre cutting force which will tend to rotate the disc as it tries to run away from the cutter. Also full width cut slots tend to wander especially if one side of the slot is deeper than the other like this. If you have a smaller cutter I suggest you use it |
| Robin Graham | 29/10/2021 23:10:48 |
| 1089 forum posts 345 photos | Thanks for further replies. I made a test with some scrap (actually the piece pictured, as that's what it is now is) with the intention of trying (a) a through bolt fixing with full width cutter, followed by (b) through bolt with a smaller cutter if that still moved, then (c) dowelling the work to the mandrel. (a) seems to work, so I'm happy for now, but shall keep (b) and (c) in mind. Chris Gunn - that would have been the way to do it I now realise, but I've lumbered myself with a pile of brass discs and don't want to start again. I'm self-taught and most of my effort has been directed towards (ahem) 'mastering' basic techniques . I'm pretty bad at planning machining sequences. Maybe that's the next thing. Robin |
| Dave S | 30/10/2021 08:50:30 |
| 433 forum posts 95 photos | From your new picture, assuming the front/back faces are parallel, I would clamp dial in the milling vice with enough sticking out to be able to cut the slots. Cut 2 slots. Then cut 2 lengths of a bar the same level both and long enough that when inserted into the slot they will touch down on a parallel without the part rocking. Ensure that they don't protrude past the face. Then setup the part the other way up in the vice on a suitable parallel (thus indexing 180) and cut the second pair of slots Dave |
Please login to post a reply.
Want the latest issue of Model Engineer or Model Engineers' Workshop? Use our magazine locator links to find your nearest stockist!
Sign up to our newsletter and get a free digital issue.
You can unsubscribe at anytime. View our privacy policy at www.mortons.co.uk/privacy
- *Oct 2023: FORUM MIGRATION TIMELINE*
05/10/2023 07:57:11 - Making ER11 collet chuck
05/10/2023 07:56:24 - What did you do today? 2023
05/10/2023 07:25:01 - Orrery
05/10/2023 06:00:41 - Wera hand-tools
05/10/2023 05:47:07 - New member
05/10/2023 04:40:11 - Problems with external pot on at1 vfd
05/10/2023 00:06:32 - Drain plug
04/10/2023 23:36:17 - digi phase converter for 10 machines.....
04/10/2023 23:13:48 - Winter Storage Of Locomotives
04/10/2023 21:02:11 - More Latest Posts...
- View All Topics
- Reeves** - Rebuilt Royal Scot by Martin Evans
by John Broughton
£300.00 - BRITANNIA 5" GAUGE James Perrier
by Jon Seabright 1
£2,500.00 - Drill Grinder - for restoration
by Nigel Graham 2
£0.00 - WARCO WM18 MILLING MACHINE
by Alex Chudley
£1,200.00 - MYFORD SUPER 7 LATHE
by Alex Chudley
£2,000.00 - More "For Sale" Ads...
- D1-3 backplate
by Michael Horley
Price Not Specified - fixed steady for a Colchester bantam mark1 800
by George Jervis
Price Not Specified - lbsc pansy
by JACK SIDEBOTHAM
Price Not Specified - Pratt Burnerd multifit chuck key.
by Tim Riome
Price Not Specified - BANDSAW BLADE WELDER
by HUGH
Price Not Specified - More "Wanted" Ads...
Do you want to contact the Model Engineer and Model Engineers' Workshop team?
You can contact us by phone, mail or email about the magazines including becoming a contributor, submitting reader's letters or making queries about articles. You can also get in touch about this website, advertising or other general issues.
Click THIS LINK for full contact details.
For subscription issues please see THIS LINK.
Model Engineer Magazine
- Percival Marshall
- M.E. History
- LittleLEC
- M.E. Clock
ME Workshop
- An Adcock
- & Shipley
- Horizontal
- Mill
Subscribe Now
- Great savings
- Delivered to your door
Pre-order your copy!
- Delivered to your doorstep!
- Free UK delivery!


 Register
 Log-in


