Forum sponsored by:

Cylinder Head Combustion Chamber Template
| William Harvey 1 | 13/09/2021 20:43:15 |
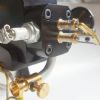
| 176 forum posts | Hi, I have been scratching my head in the garage and thought I'd pose the question on here. I am modifying an A Series Cylinder Head and need to make a template of the modified cylinder head chamber profile so that I can easily scribe it to chambers ready for grinding. Here is my modified chamber:
It's easy enough to make a template using thin card, but I need to be able to precisely re-locate the template on the other chambers. In Vizards book "Theory and practice of cylinder head modification" he suggests that the only reliable method of locating the template is to use the valve guides. He shows a picture of a template and suggests making two holes that correspond to the centre distances of the valves.
What it doesn't show is how to achieve this and I am really struggling to some up with a method of doing this. If I make the template first, how on earth do I ensure the holes for the valves are correctly located? If I start by getting a sheet of template material and drilling two holes with centres corresponding to the valve centres, which I believe is 1.343"? How do I them transfer the template shape onto this accurately, ensuring that the valve centre holes are correctly located on the template. Stumped......
|
| Jeff Dayman | 13/09/2021 21:03:45 |
| 2356 forum posts 47 photos | I suggest a 3D template rather than just a 2D cutout template will be needed to get all cavities the same. If you apply a mould release paste, or paste wax, then pour in a low shrinkage two part urethane casting resin, an accurate hard resin "plug" can be made. This can be used to duplicate the chamber exactly, with a duplicating mill, or digitized with a scanner or CMM to get data for CNC programming a CNC mill, Even plaster of Paris can work if a low shrinkage grade is used. If you pour the impression through a "deck plate" with holes lining up with machined holes in the head, and a centre hole for pouring in the impression material, the impression can be located properly to the head. If you do want to use the valve guides to locate it, you could plug the ports with plasticiene and use a couple of cut off scrap valve stems in the guides, cast into the impression, to locate it that way - but that is much more work for not much benefit or increased accuracy. Probably not needed unless you are tuning a formula one race engine. |
| Michael Gilligan | 13/09/2021 21:31:30 |
 23121 forum posts 1360 photos | Posted by William Harvey 1 on 13/09/2021 20:43:15:
Hi, I have been scratching my head in the garage and thought I'd pose the question on here. […] If I start by getting a sheet of template material and drilling two holes with centres corresponding to the valve centres, which I believe is 1.343"? How do I them transfer the template shape onto this accurately, ensuring that the valve centre holes are correctly located on the template. Stumped......
.
Then remove the card and cut round the outline. … Similar to making paper gaskets from scratch. MichaelG. Edited By Michael Gilligan on 13/09/2021 21:32:38 |
| William Harvey 1 | 13/09/2021 21:45:20 |
| 176 forum posts | Posted by Jeff Dayman on 13/09/2021 21:03:45:
I suggest a 3D template rather than just a 2D cutout template will be needed to get all cavities the same. If you apply a mould release paste, or paste wax, then pour in a low shrinkage two part urethane casting resin, an accurate hard resin "plug" can be made. This can be used to duplicate the chamber exactly, with a duplicating mill, or digitized with a scanner or CMM to get data for CNC programming a CNC mill, Even plaster of Paris can work if a low shrinkage grade is used. If you pour the impression through a "deck plate" with holes lining up with machined holes in the head, and a centre hole for pouring in the impression material, the impression can be located properly to the head. If you do want to use the valve guides to locate it, you could plug the ports with plasticiene and use a couple of cut off scrap valve stems in the guides, cast into the impression, to locate it that way - but that is much more work for not much benefit or increased accuracy. Probably not needed unless you are tuning a formula one race engine. What about body filler (P38) I’ve got a tub full? |
| William Harvey 1 | 13/09/2021 21:46:28 |
| 176 forum posts | Posted by Michael Gilligan on 13/09/2021 21:31:30:
Posted by William Harvey 1 on 13/09/2021 20:43:15:
Hi, I have been scratching my head in the garage and thought I'd pose the question on here. […] If I start by getting a sheet of template material and drilling two holes with centres corresponding to the valve centres, which I believe is 1.343"? How do I them transfer the template shape onto this accurately, ensuring that the valve centre holes are correctly located on the template. Stumped......
.
Then remove the card and cut round the outline. … Similar to making paper gaskets from scratch. MichaelG. Edited By Michael Gilligan on 13/09/2021 21:32:38 I’m happy with how to make the template, what is the issue is how to ensure the holes for the valves are in the correct place to enable positioning it correctly? |
| Michael Gilligan | 13/09/2021 22:03:56 |
23121 forum posts 1360 photos | Posted by William Harvey 1 on 13/09/2021 21:46:28: […] I’m happy with how to make the template, what is the issue is how to ensure the holes for the valves are in the correct place to enable positioning it correctly? . Sorry … I thought that bit was obvious when you wrote: If I start by getting a sheet of template material and drilling two holes with centres corresponding to the valve centres It appears that you have already done one chamber: so I assumed that you would copy the outline from that. … if I have missed some important point, please excuse me. MichaelG. |
| Michael Gilligan | 13/09/2021 22:06:47 |
23121 forum posts 1360 photos | Posted by William Harvey 1 on 13/09/2021 20:43:15:
. Here is my modified chamber:
It's easy enough to make a template using thin card, but I need to be able to precisely re-locate the template on the other chambers. In Vizards book "Theory and practice of cylinder head modification" he suggests that the only reliable method of locating the template is to use the valve guides. He shows a picture of a template […] ^^^ |
| William Harvey 1 | 13/09/2021 22:13:22 |
| 176 forum posts | I needed to work out how to ensure the template could be lined up on each chamber using a couple of valves. Someone on another forum has suggested turning the head over and tapping the template material on the tops of the valve guides. Once the valve guide holes are marked on the template, place the template on the chamber and drop two valve me through the holes to hold it in place. This will produce a template with holes corresponding to the valve guides. This template can then be placed on a chamber to be marked out. |
| Ady1 | 13/09/2021 22:49:01 |
 6137 forum posts 893 photos | Perhaps you need a third reference point, like that hole on the left hand side 3 points are better than 2 Edited By Ady1 on 13/09/2021 22:51:15 |
| Michael Gilligan | 13/09/2021 23:46:33 |
23121 forum posts 1360 photos | Posted by Ady1 on 13/09/2021 22:49:01:
Perhaps you need a third reference point, like that hole on the left hand side 3 points are better than 2 Edited By Ady1 on 13/09/2021 22:51:15 . Only if each group is identically configured … that third hole is amost certainly not as accurately sized/positioned as the valve guides … If using two valve stems was good enough for DV, it would be good enough for me. MichaelG. |
| Nimble | 14/09/2021 04:25:54 |
 66 forum posts 6 photos | Hi William, How about a commercial 3d scan and have them output a file of the flat surface of the head, .this could then be output possibly to a sign-writers stencil cutter. This is food for thought for myself when I need to re-do a head gasket for my1926 Renault, as the previous gaskets re-cut from old gaskets and do not necessarily pass over the head studs. Regards, Nimble Neil. |
| Pete Rimmer | 14/09/2021 06:50:33 |
| 1486 forum posts 105 photos | My Herbert 0V milling machine has a page in the manual for doing this very thing (actually for copying dies, but it's the same principle). It describes using a ball-ended cutter and an identical probe (just a metal rod with a round end the same diameter as the cutter) set over the pattern. It has a fast-travel x-axis screw too (2.5tpi) to facilitate the work. The cutter and probe are set up over their respective parts, the operator keeps weight on the quill handle and uses the traverse to run the proble over the die to be copied. The cutter follows the path of the probe and makes an identical pocket needing only minor finishing. A bit like a lathe hydraulic copying attachment except fully manual and producing 3-dimensional copies rather than the lathe's 2-D. |
| Michael Gilligan | 14/09/2021 07:56:37 |
23121 forum posts 1360 photos | Obviously the better ‘engineering’ approach, Pete MichaelG. |
| Andy_G | 14/09/2021 08:02:31 |
 260 forum posts | “If I make the template first, how on earth do I ensure the holes for the valves are correctly located?” Can’t you poke a (suitably sized) pointed rod through the valve guides to mark the rear of the template when it is held in the correct position? (Then create holes at the marked positions). |
| John P | 14/09/2021 11:22:33 |
| 451 forum posts 268 photos | Posted by William Harvey 1 13 / 09 2021 20:43:15 What it doesn't show is how to achieve this and I am really struggling to some up with a If I make the template first, how on earth do I ensure the holes for the If I start by getting a sheet of template material and drilling two Stumped.....
------------------- I faced a similar problem in locating matching holes in a blind plate, It is useful to have a milling machine to do this sort of thing ,as you have
|
| Hillclimber | 14/09/2021 11:35:29 |
 215 forum posts 51 photos | Simples. Use a transfer punch of the correct diameter inserted down the valve guides. If you dont have a range of punches. Grind a point on the end of an old valve, and use that. This assumes that your template is a positive (a plate the shape of the chamber) and not a negative (a hole the shape of a chamber). Cheers, Colin |
| Alistair Robertson 1 | 14/09/2021 12:25:42 |
| 154 forum posts 6 photos | The way I used to do it was by making a pattern from about 1mm aluminiun and filing it to fit in to the profile so that the top surface is level with the head surface. Drill the two holes through the valve guides. Drop the valves through the pattern and into the guides. Mark the head surface using the outside of the profile and machine/grind the chamber until the pattern is flush with the head surface. Using this method all the chambers can be very accurately ground to the final size. I found over the years that I didn't have to do any more fettling to achieve accurate matching. I haven't flowed a head for more than 20 years but I have never got all the cast iron dust out of my hands! |
| Pete Rimmer | 16/09/2021 22:11:34 |
| 1486 forum posts 105 photos | Here's the page from the Herbert manual, if it's of any use.
Regards Pete. |
| Martin Kyte | 16/09/2021 22:30:25 |
 3445 forum posts 62 photos | Posted by William Harvey 1 on 13/09/2021 20:43:15: If I make the template first, how on earth do I ensure the holes for the valves are correctly located? You clearly need to make the holes first then. It should be a simple task to find the valve guide separation. Create identically spaced holes on your template material then form the outside profile. If you use thin perspex sheet you can see through to pick up the original profile. regards Martin |
| Nick Wheeler | 16/09/2021 22:40:57 |
| 1227 forum posts 101 photos | Don't forget that you need to turn the pattern over for adjacent cylinders. Which to me means holes in the pattern to match the valve guides. |


Please login to post a reply.
Magazine Locator
Want the latest issue of Model Engineer or Model Engineers' Workshop? Use our magazine locator links to find your nearest stockist!
Sign up to our Newsletter
Sign up to our newsletter and get a free digital issue.
You can unsubscribe at anytime. View our privacy policy at www.mortons.co.uk/privacy
Latest Forum Posts
- *Oct 2023: FORUM MIGRATION TIMELINE*
05/10/2023 07:57:11 - Making ER11 collet chuck
05/10/2023 07:56:24 - What did you do today? 2023
05/10/2023 07:25:01 - Orrery
05/10/2023 06:00:41 - Wera hand-tools
05/10/2023 05:47:07 - New member
05/10/2023 04:40:11 - Problems with external pot on at1 vfd
05/10/2023 00:06:32 - Drain plug
04/10/2023 23:36:17 - digi phase converter for 10 machines.....
04/10/2023 23:13:48 - Winter Storage Of Locomotives
04/10/2023 21:02:11 - More Latest Posts...
- View All Topics
Support Our Partners


Shopping Partners
Subscription Offer

Latest "For Sale" Ads
- Reeves** - Rebuilt Royal Scot by Martin Evans
by John Broughton
£300.00 - BRITANNIA 5" GAUGE James Perrier
by Jon Seabright 1
£2,500.00 - Drill Grinder - for restoration
by Nigel Graham 2
£0.00 - WARCO WM18 MILLING MACHINE
by Alex Chudley
£1,200.00 - MYFORD SUPER 7 LATHE
by Alex Chudley
£2,000.00 - More "For Sale" Ads...
Latest "Wanted" Ads
- D1-3 backplate
by Michael Horley
Price Not Specified - fixed steady for a Colchester bantam mark1 800
by George Jervis
Price Not Specified - lbsc pansy
by JACK SIDEBOTHAM
Price Not Specified - Pratt Burnerd multifit chuck key.
by Tim Riome
Price Not Specified - BANDSAW BLADE WELDER
by HUGH
Price Not Specified - More "Wanted" Ads...
Get In Touch!
Do you want to contact the Model Engineer and Model Engineers' Workshop team?
You can contact us by phone, mail or email about the magazines including becoming a contributor, submitting reader's letters or making queries about articles. You can also get in touch about this website, advertising or other general issues.
Click THIS LINK for full contact details.
For subscription issues please see THIS LINK.
Digital Back Issues


Donate

 Register
 Log-in
Model Engineer Magazine
- Percival Marshall
- M.E. History
- LittleLEC
- M.E. Clock

ME Workshop
- An Adcock
- & Shipley
- Horizontal
- Mill

Subscribe Now
- Great savings
- Delivered to your door

Pre-order your copy!
- Delivered to your doorstep!
- Free UK delivery!
All Forum Topics > General Questions > Cylinder Head Combustion Chamber Template