Welding square tubing - Warping!
| ChrisB | 22/07/2017 10:28:25 |
| 671 forum posts 212 photos | Hi guys, this week I finally started the summer project of building a workbench and a couple of stands for the lathe and mill. Cut all the material to size and started welding the frames up. I'm using 50x50x2mm square tubing for all three benches. I tacked all the pieces together all round the corners (I'm tig welding) - so far so good every thing nice and square, then I started doing the full welds, and that's were it started going wrong...I tried to balance the welds doing opposite runs but still ended with a limp bench ( three legs touch the floor and one is 5mm short) Still have two benches to go, is there anything I can do to limit warping? Edited By ChrisB on 22/07/2017 10:33:48 |
| mechman48 | 22/07/2017 10:35:30 |
2947 forum posts 468 photos | FWIW... have you tried triangular fillet pieces across all corners ?... |
| John Stevenson | 22/07/2017 10:38:10 |
5068 forum posts 3 photos | Chris, probably not what you want to hear but 50*50*2 is roughly twice as flexible as 40*40*3 Using 40*40 gives you a far more rigid frame, less liable to warp and also allows larger door and shelf areas |
| ChrisB | 22/07/2017 13:09:26 |
| 671 forum posts 212 photos | Posted by John Stevenson on 22/07/2017 10:38:10:
Chris, probably not what you want to hear but 50*50*2 is roughly twice as flexible as 40*40*3 Using 40*40 gives you a far more rigid frame, less liable to warp and also allows larger door and shelf areas Good to know for any future projects! Will have to make do with what I have now that the rest of the material is cut and tacked! Posted by mechman48 on 22/07/2017 10:35:30:
FWIW... have you tried triangular fillet pieces across all corners ?... Did not, thought about it tbh, but I reasoned the more welds I put the more heat so more chances of warping. When I tacked the whole bench together all the angles were right and it was pretty rigid. Problems started when I did the full welds. Don't know, maybe there's a sequence of how and where to weld. I think for the next benches I will not weld all round the tube, will do but joints only and leave the corner welds out where possible as those seem to take the most heat to weld. Edited By ChrisB on 22/07/2017 13:09:45 |
| larry Phelan | 22/07/2017 13:39:22 |
544 forum posts 17 photos | Welcome to the club ! Been there,done that,ruined a good tee shirt ! |
| Spurry | 22/07/2017 14:21:38 |
| 227 forum posts 72 photos | When I made my welding trolley, opposite sides were clamped to the substantial steel plate, that would end up on top when finished. Sash clamps were then used to hold the two sides whilst the inter-connecting pieces were installed. This seemed to minimise the amount of distortion. At least all the wheels touch the floor, (if I find a level bit Pete |
| peak4 | 22/07/2017 14:37:42 |
2207 forum posts 210 photos | Posted by John Stevenson on 22/07/2017 10:38:10:
Chris, probably not what you want to hear but 50*50*2 is roughly twice as flexible as 40*40*3 Using 40*40 gives you a far more rigid frame, less liable to warp and also allows larger door and shelf areas I was given a bare 40mm box frame, effectively 4 legs going up to a pair of parallel 40mm box bars, which presumably at one time, would have held a wooden top. It's actually very versatile left without the worktop, as I've a selection of short bits of Unistrut and associated brackets. Since I have limited space, I've effectively got a big boys Meccano skeleton bench, to which I can attach a metal plate as an anvil, a flypress, a big vice, hydraulic ram, etc. |
| vintagengineer | 22/07/2017 20:55:29 |
469 forum posts 6 photos | When you weld box section on one side only, it will pull out of shape. If you need to weld on one side only, it is best to clamp the box section to a steel beam with a packing piece under the middle of the box section so when its welded it will pull straight.
|
| John Reese | 22/07/2017 21:17:39 |
1071 forum posts | Preventing distortion is one of the biggest problems in making a weldment. Location and sequence of welding have a lot to do with how the parts will move. Unfortunately you will not know if you got it right until you are finished. If I were to make the same weldment I would add temporary diagonal bracing to prevent racking. When I put on diagonals use a small angle. Probable 1" for the size weldment you did. I would attach it with short welds, say 1" long along one leg of the angle. Even with the bracing you need to plan the sequence of welding so nthat each weld tends to distort equal and opposite to the previous weld. Once all welds are done use a crescent wrench (adjustable spanner) to twist the angle iron to break the welds. When you twist it to put the root of the wels in tension it breaks quite easily. |
| Andrew Johnston | 22/07/2017 21:41:15 |
7061 forum posts 719 photos | When I welded up the stand for my Tormach CNC mill I used 50x50x2. Irrepective of possible distortion adding some diagonals to your frame will effectively make the sides a truss and will considerable stiffen the frame. That means you can probably miss out some of the welds, further helping with distortion. Andrew |
| Peter Sansom | 23/07/2017 12:33:03 |
| 125 forum posts 4 photos | You have the number 1 problem problem with welding, distortion caused by the heat from welding. Tack weld the frame first, getting it square as you tack. Then weld it in small sections to minimize heat distortion, welding opposite corners, allowing each welding area to cool, before doing any more welding in that area. The lighter weight the steel the greater the distortion. You will see distortion in welding steel any size. It is a Boilermakers art to minimize distoration. This may be followed by heat treatment to minimize the stresses. Just don't rush. Peter |
| John Reese | 23/07/2017 17:41:29 |
1071 forum posts | Provide levelling feet. You can say they are there to account for an irregular floor. You won't have to admit to a warped weldment. |
| Nick Hulme | 23/07/2017 17:48:57 |
| 750 forum posts 37 photos | Without triangulation a welded rectangular structure is very likely to distort during welding, break out the tape measure and Porto-Power and straighten it afterwards |
| ChrisB | 23/07/2017 21:21:44 |
| 671 forum posts 212 photos |
Thanks all for the advice, tomorrow will go at it again and do some cross bracing and take my time welding it, maybe I'll do a bench over two days rather than in one day like I did the first. I'll have to remember to wear long sleeves next time - tig gave me quite a nasty sunburn on my arms...and the torch, it gets real hot after continuous use, so might as well let it cool down and the welds as well - should help reducing distortion! Not having had any experience with tig welding before I found it relatively easy when compared to stick or mig to produce a neat weld - I'm happy with the results so far. Added feet to the bench afterwards, so at least the bench is no longer wobbly Edited By ChrisB on 23/07/2017 21:31:57 Edited By ChrisB on 23/07/2017 21:35:13 |
| C T | 24/07/2017 15:35:19 |
74 forum posts 2 photos | ChrisB,A number of guys mostly American produce videos on welding processes. You say you are Tig welding and using box section you may find this video useful. http://www.weldingtipsandtricks.com/welding-distortion-tips.html This guy has many videos which some have been useful to me.
Carl
|
| John Stevenson | 24/07/2017 21:09:42 |
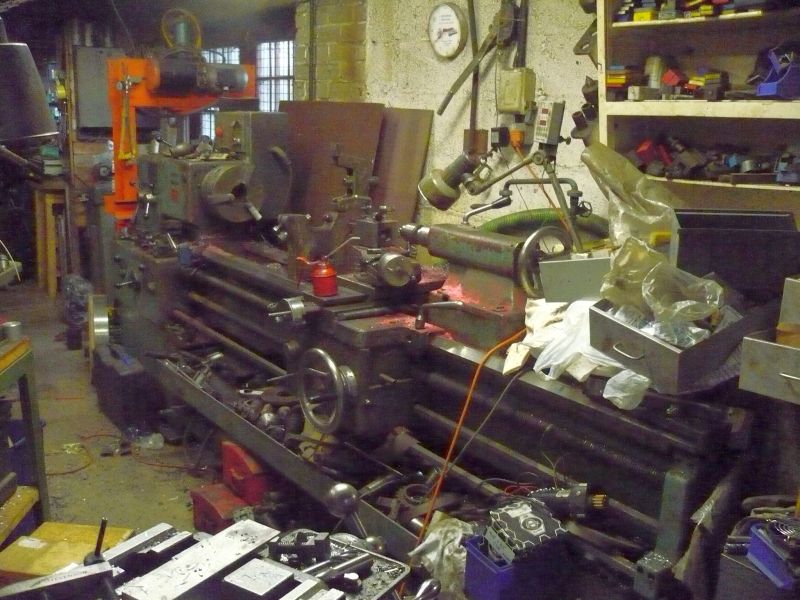
5068 forum posts 3 photos | Found the pics I wanted, Back in 2012 I decided to scrap a 2 meters between centers TOS lathe for a few reasons the main ones being it was taking a lot of space up, it had some wear and it was attracting the wrong sort of work [ 1 tonne armatures etc ] when it was working which wasn't often.
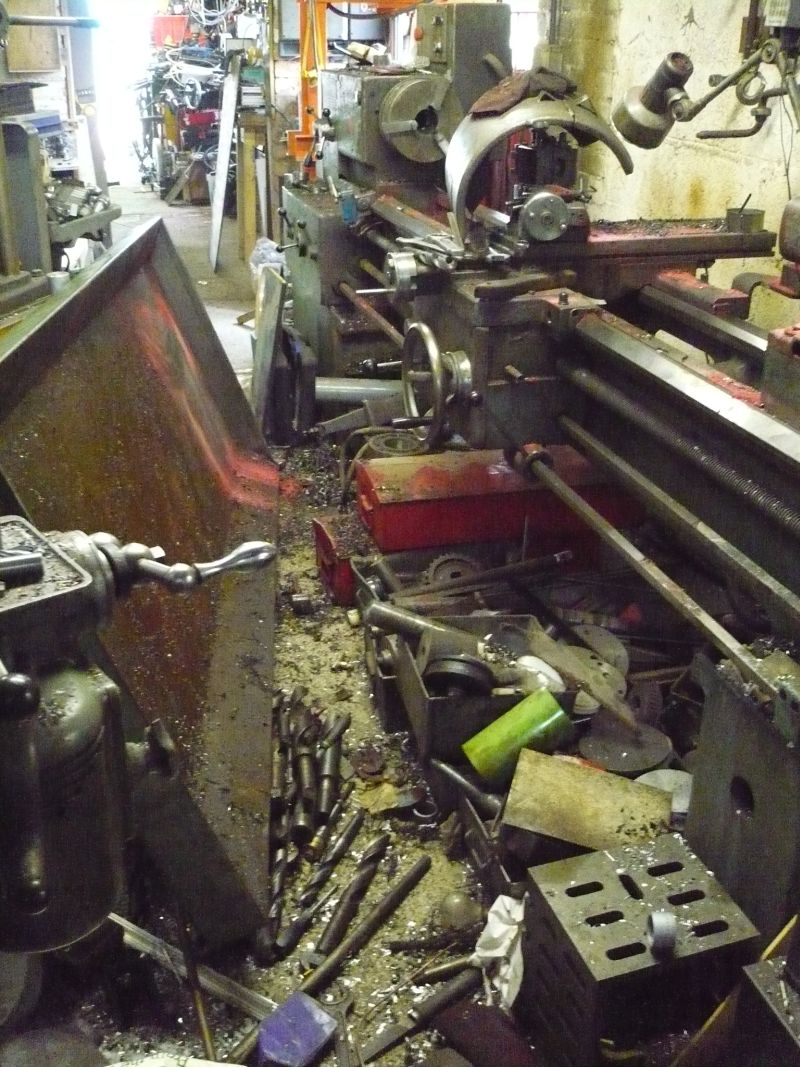
Once I had started on the project it soon became obvious what the "it will come in handy one day" was.
Virtually all this had been there that long I had no idea it was there so it got skipped.
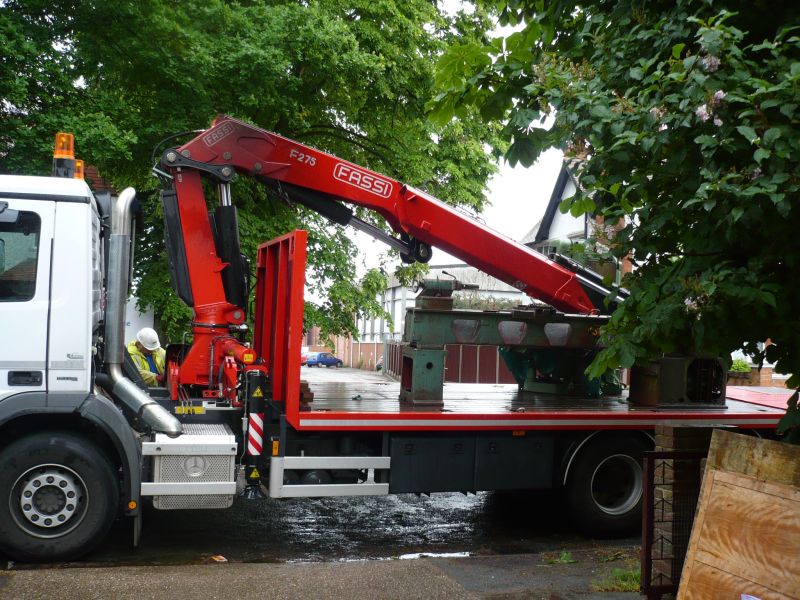
Machine dragged out and loaded up for a trip to its new home.
The scrapyard.
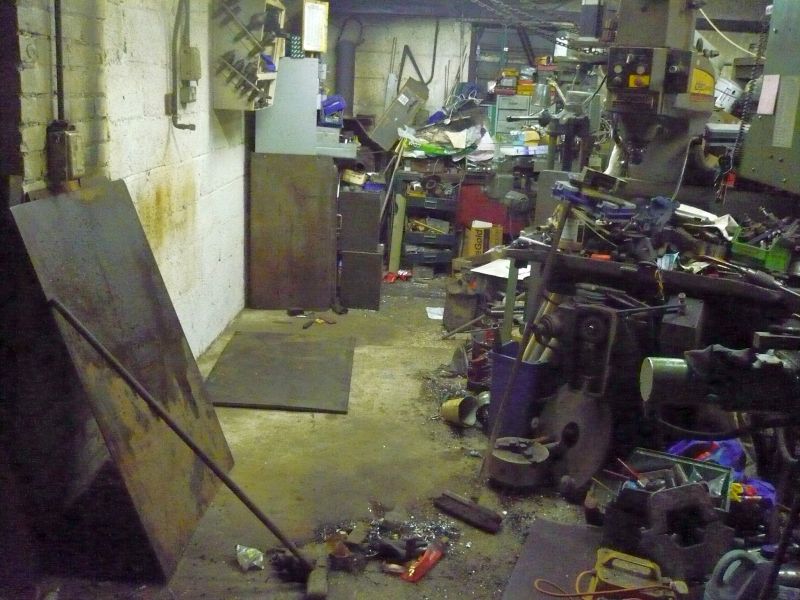
Which left this.
So once the cupboards had been scrapped, racks moved, we got to the relevant part for this post.
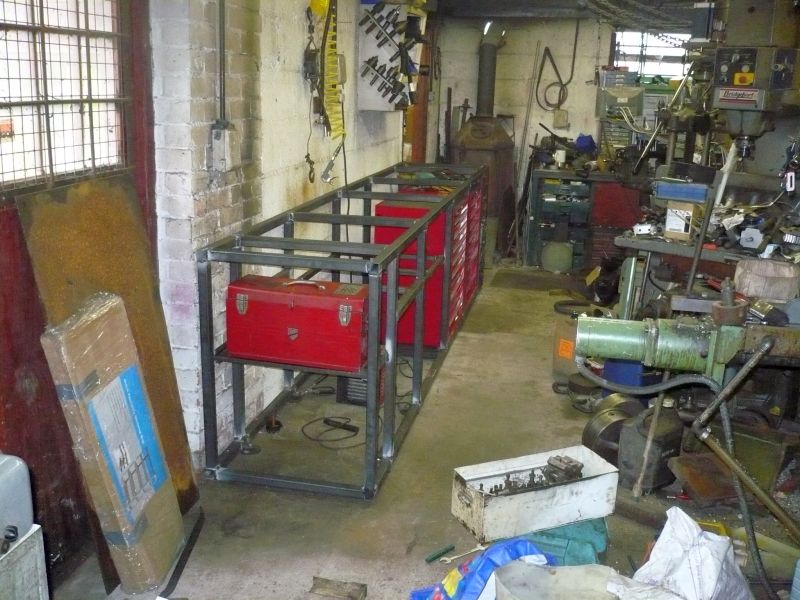
3 metre long bench out of 40 x 40 x 3 stick welded with a crappy buzzbox as I couldn't get any of the hard wired Migs into this shop.
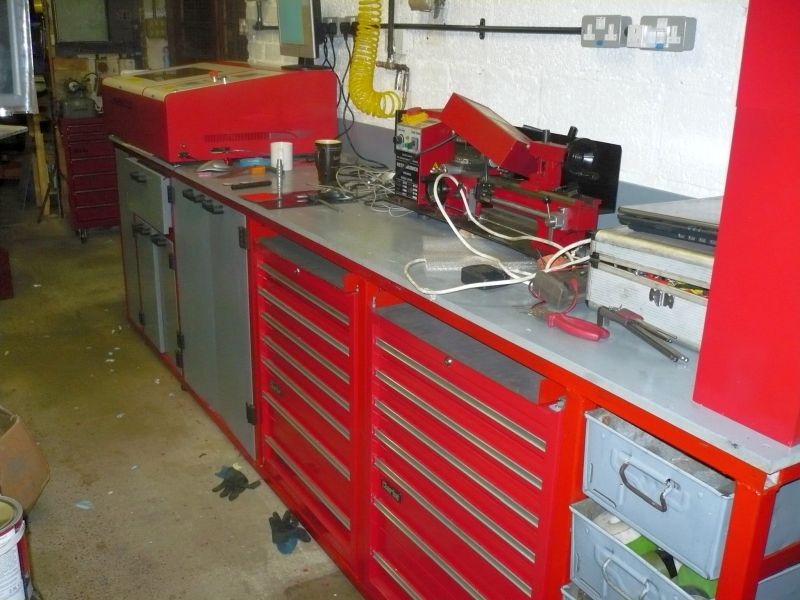
And I finished up with this, Laser cutter on one end, bolt rack on the other and space for two working small CNC's with the keyboards on slide out trays on top of the toolboxes. Various metal short end drawers at one end, wall painted and all new electrics plumbed in. Unfortunately it has got to come out in the grand down size and it won't go in the new shed in one piece so I reckon a quick chop with a 1mm slitting wheel where it changes from cupboards to open space where the tool boxes fit, move in two pieces and stitch back together again and a swift repaint to credit a brand new workshop
Edited By John Stevenson on 24/07/2017 21:13:14 |
| Grizzly bear | 24/07/2017 21:33:10 |
| 337 forum posts 8 photos | John, Why have your pictures been censored? bear.. |
| ChrisB | 24/07/2017 21:36:28 |
| 671 forum posts 212 photos | Nice work there John, hope mine will look something similar when ready! Took a day off the workshop today - too hot to work with 34+ temperatures (now how am I to convince the miss we need ac in the garage! Good tips on that clip Carl will definitely take them on. At the moment I don't have much to work with, the workshop/garage is empty so I'm working on a make shift bench (aka Lidl foldable ladders) and basic tooling. Although the first bench warped a bit, I'm not to worried about it as its just the workbench, but the others will take the lathe and mill, so I'd like to keep distortion to a minimum, hopefully I'll manage if I do it slowly and space out the welds. A question re Tig, on most photos I see shiny nice welds, where as mine are all dull blue grey in colour, am I doing something wrong? I'm using 1.6mm red tungsten with a no 6 nozzle at 7L/m argon flow and a 2mm filler rod where the gap is a bit wide. Where there's no gap I just fuse the base metals. |
| ChrisB | 24/07/2017 21:36:29 |
| 671 forum posts 212 photos | Posted by Grizzly bear on 24/07/2017 21:33:10:
John, Why have your pictures been censored? bear.. I can see them pictures... Edited By ChrisB on 24/07/2017 21:38:33 |
| David Standing 1 | 24/07/2017 22:24:45 |
| 1297 forum posts 50 photos | Posted by ChrisB on 24/07/2017 21:36:29:
Posted by Grizzly bear on 24/07/2017 21:33:10:
John, Why have your pictures been censored? bear.. I can see them pictures...
So can I, I reckon Grizzly bear has done himself a favour if he can't |
Please login to post a reply.
Want the latest issue of Model Engineer or Model Engineers' Workshop? Use our magazine locator links to find your nearest stockist!
Sign up to our newsletter and get a free digital issue.
You can unsubscribe at anytime. View our privacy policy at www.mortons.co.uk/privacy
- hemingway ball turner
04/07/2025 14:40:26 - *Oct 2023: FORUM MIGRATION TIMELINE*
05/10/2023 07:57:11 - Making ER11 collet chuck
05/10/2023 07:56:24 - What did you do today? 2023
05/10/2023 07:25:01 - Orrery
05/10/2023 06:00:41 - Wera hand-tools
05/10/2023 05:47:07 - New member
05/10/2023 04:40:11 - Problems with external pot on at1 vfd
05/10/2023 00:06:32 - Drain plug
04/10/2023 23:36:17 - digi phase converter for 10 machines.....
04/10/2023 23:13:48 - More Latest Posts...
- View All Topics
- Reeves** - Rebuilt Royal Scot by Martin Evans
by John Broughton
£300.00 - BRITANNIA 5" GAUGE James Perrier
by Jon Seabright 1
£2,500.00 - Drill Grinder - for restoration
by Nigel Graham 2
£0.00 - WARCO WM18 MILLING MACHINE
by Alex Chudley
£1,200.00 - MYFORD SUPER 7 LATHE
by Alex Chudley
£2,000.00 - More "For Sale" Ads...
- D1-3 backplate
by Michael Horley
Price Not Specified - fixed steady for a Colchester bantam mark1 800
by George Jervis
Price Not Specified - lbsc pansy
by JACK SIDEBOTHAM
Price Not Specified - Pratt Burnerd multifit chuck key.
by Tim Riome
Price Not Specified - BANDSAW BLADE WELDER
by HUGH
Price Not Specified - More "Wanted" Ads...
Do you want to contact the Model Engineer and Model Engineers' Workshop team?
You can contact us by phone, mail or email about the magazines including becoming a contributor, submitting reader's letters or making queries about articles. You can also get in touch about this website, advertising or other general issues.
Click THIS LINK for full contact details.
For subscription issues please see THIS LINK.
Model Engineer Magazine
- Percival Marshall
- M.E. History
- LittleLEC
- M.E. Clock
ME Workshop
- An Adcock
- & Shipley
- Horizontal
- Mill
Subscribe Now
- Great savings
- Delivered to your door
Pre-order your copy!
- Delivered to your doorstep!
- Free UK delivery!




 Register
 Log-in


