Reading a drawing - Radius
| Bruce Edney | 21/04/2015 09:48:27 |
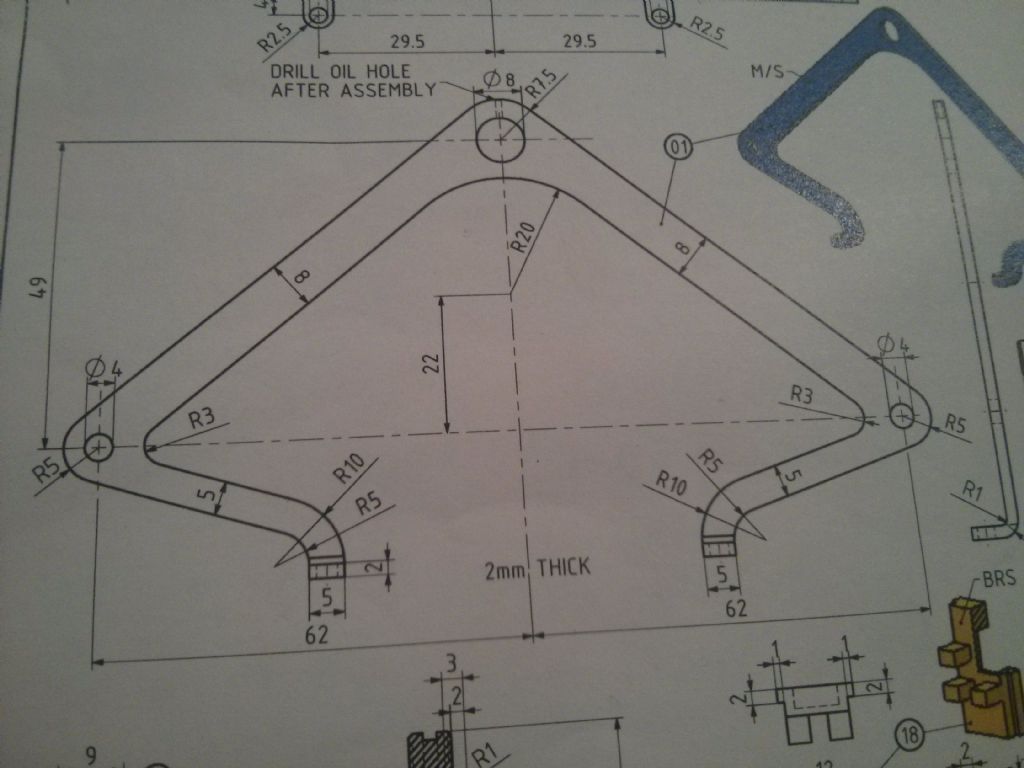
167 forum posts 53 photos | Hi As a newbie I am having a little trouble marking out this part. I can work out from the top down to the lower datum line (I think that is what it called) but I am wondering if the drawing is missing some dimensions for the lower section. How does one work out the centre points of the R3, R10 & R5 radii? I have emailed the author of the drawings but I am just wondering if I am missing something. |
| Ian P | 21/04/2015 10:02:50 |
2747 forum posts 123 photos | Depending on how you are going to make the part you might not need to know those particular dimensions. If you have any CAD drawing software you could redraw the part using all the shown dimension and then you could measure off all the missing coordinates. Is the part visible at the top of the picture the same item? if so then its 59mm to the centres of the two bottom features, knowing thet you can work back to find the missing radii. The bit that intrigues me is the oil hole at the top! supposedly drilled through the edge of 2mm thick material it would take strength away (presumably) just where its needed, not that I the faintest idea what the part does. Ian P |
| JasonB | 21/04/2015 10:09:56 |
25215 forum posts 3105 photos 1 articles | Looks like you really need a distance from the datum to the bottom of the bends. To place the centers of the arcs you can either draw parallel lines to the sides that are the radius away, where the lines meet will be your ctr point. Or they can be done using dividers set to the radius to bisect the angle and then measure bnack from there. First method will be easiest. I would suggest the legs are left long until after you have bent them.
Edited By JasonB on 21/04/2015 10:20:45 |
| Bruce Edney | 21/04/2015 10:15:04 |
167 forum posts 53 photos | That's what I thought Jason Thanks for your advice Jason & Ian |
| Circlip | 21/04/2015 10:49:23 |
| 1723 forum posts | Looks like the drawing was done using either AutoCAD or one of its clones. Pity it wasn't checked before publication. A failing of the drawing programmes, they get everything in the right place but still need telling where to put dimension lines.
Regards Ian |
| Capstan Speaking | 21/04/2015 11:02:53 |
177 forum posts 14 photos | While there is no excuse, many times I have seen drawings where the critical fits were specified and the cosmetic areas were left to discretion. If this was given to commercial machinists they would decline to take it on. |
| Paul Lousick | 21/04/2015 11:18:07 |
| 2276 forum posts 801 photos | Not a failing of the drawing program but one of operator error. CAD is only another tool and still requires the input from the drafter. Some packages can automatically dimension a part but it is normally left to the operator to correctly layout the drawing and dimensions. (Missing dimensions can also exist on hand made drawings.) This is one of the common problems with drawings, especially for model engines which are made by un-experienced operators. You may be able to obtain the missing dimensions by using the mating parts. Paul. |
| Circlip | 21/04/2015 11:26:44 |
| 1723 forum posts | Can't think of any CAD programme that doesn't "Automatically" know the dimension, but does rely on "Someone" to tell it where to start and where to finish between two points. Wonder if the originator or seller of the design will issue an amendment sheet or modify the plans? Ooops, been down this road before.
Regards Ian.
( Many years as a Draughty) |
| Nick Wheeler | 21/04/2015 11:37:38 |
| 1227 forum posts 101 photos | Perhaps it's my inexperience showing, but where are any of the dimensions for the legs? Not having the centres for the largely decorative radii is pretty trivial by comparison. |
| John Bell 2 | 21/04/2015 12:54:41 |
| 2 forum posts | I think R3 means 3mm Radius, R10 means 10mm radius etc.. |
| Paul Lousick | 21/04/2015 13:21:41 |
| 2276 forum posts 801 photos | Hi Nicholas, That is what we are saying. The dimensions for the legs are missing and have not been dimensioned by whoever made the drawing. In Autocad I have to click on all of points than need dimensioning. In Solidworks I can automatically add all of the dimensions but the software does not always position the dimensions where I would like them and therefore prefer to do this manually. Yes, R3 = 3mm radius Paul. Edited By Paul Lousick on 21/04/2015 13:23:28 |
| JasonB | 21/04/2015 13:34:21 |
25215 forum posts 3105 photos 1 articles | I thought it looked like one of Julius' designs and indeed it is. He does have a tendancy to try and cram a lot of parts onto the sheet It would be possible to calculate where the bottom of the legs should be in relation to the datum but a bit of a pain to do so, If he does not come back to you let me know and I'll work it out. Probably 17mm, if you take the crank at 39mm plus say 1mm as he seems to have the pins above the middle of the 4mm long slot you get 40mm. Take away distance from cyl centre line to top of cylinder (20mm) and the thickness of the top cover (3mm) thats 23 from 40 =17mm Looks an interesting engine, please keep us posted with updates of your progress.
J Edited By JasonB on 21/04/2015 13:39:58 |
| Neil Wyatt | 21/04/2015 14:26:42 |
19226 forum posts 749 photos 86 articles | On a paper drawing a set of circlce templates would be used to draw in the curves and the actual centres would not be calculated. You'd be expected to use templates and scribe them in tangential to the straight lines. Its the lack of detail of the lengths or angle of the lower legs that would worry me - does it match with another, dimensioned, part? Neil |
| David Griffiths 5 | 21/04/2015 14:31:47 |
| 4 forum posts | Looks maybe to me like the R3 rad centre is 52.67 off the vertical centre line and the R10 and R5 rad centre is 48.92 off the vertical centre line and 15 down. |
| Capstan Speaking | 21/04/2015 15:08:44 |
177 forum posts 14 photos | I've just had a dabble and from that elevation alone it cannot be reconstructed let alone made. The geometry doesn't match those dimensions either so I expect that having no decimal places is hiding a multitude of sins. Perhaps it's an initiative test |
| Gordon W | 21/04/2015 16:00:35 |
| 2011 forum posts | It does look as if the cut-off drg. at the top is another view and gives what I assume is the critical dimns. If so it should be stated somewhere. But as shown on this forum it should not be made, critical dimns. should not need caculating. |
| JasonB | 21/04/2015 16:09:36 |
25215 forum posts 3105 photos 1 articles | The bit of the drawing at the top goes no further, all it gives is the spacing between the two feet, armed with the 17mm I calculated the part can be made. Its a free plan so you can't really complain, at least Julius has been kind enough to produce this engine drawing and a whole bunch of others so maybe go easy on the critisisum unless you want to offer some engine designs of your own |
| Gordon W | 21/04/2015 16:22:00 |
| 2011 forum posts | I'm not complaining! Just saying. |
| JasonB | 21/04/2015 16:42:48 |
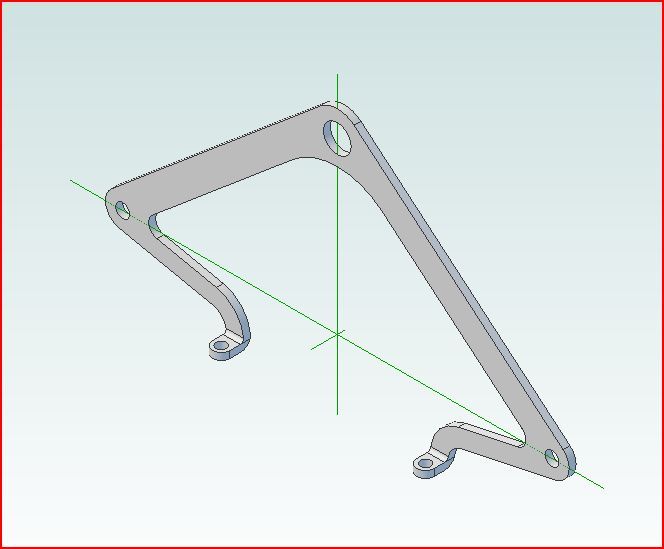
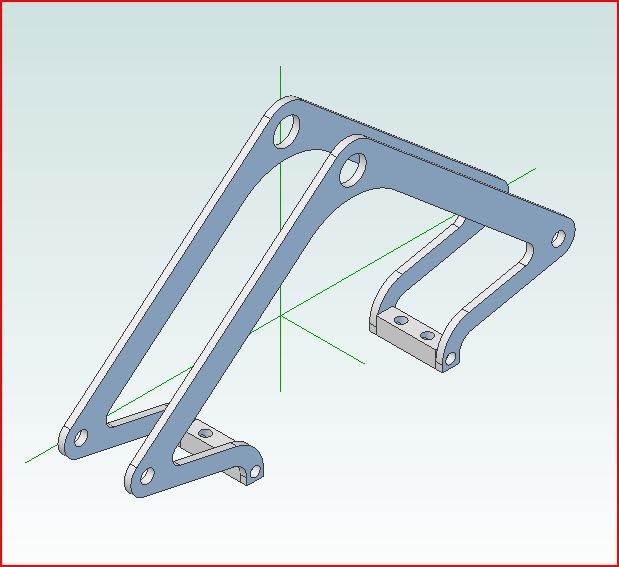
25215 forum posts 3105 photos 1 articles | Here you go, having had a closer look I have decided 17.5mm would looks more liek the assembled drawing but really anywhere between 17 or 18 would work. If it can be drawn it can be made And a few setting out dimensions, click to get a larger image If you don't fancy doing the bends, then a couple of blocks the same length as the round spacers may be easier - something like this maybe
Edited By JasonB on 21/04/2015 17:04:20 |
| Ed Duffner | 21/04/2015 17:15:11 |
| 863 forum posts 104 photos | I just had a play with this in CorelDraw and got a measurement of 20.98 (21mm) where your 17.5mm is Jason. I struck a line between the centre of the 4mm hole and the tangent of R3 to give the angle and then more tangents off that line to determine the vertical position of the 2mm foot. The centre of R3 was taken as being the centre line through both M4 holes. I'm probably wrong! Ed.
Edited By Ed Duffner on 21/04/2015 17:16:31 |
Please login to post a reply.
Want the latest issue of Model Engineer or Model Engineers' Workshop? Use our magazine locator links to find your nearest stockist!
Sign up to our newsletter and get a free digital issue.
You can unsubscribe at anytime. View our privacy policy at www.mortons.co.uk/privacy
- hemingway ball turner
04/07/2025 14:40:26 - *Oct 2023: FORUM MIGRATION TIMELINE*
05/10/2023 07:57:11 - Making ER11 collet chuck
05/10/2023 07:56:24 - What did you do today? 2023
05/10/2023 07:25:01 - Orrery
05/10/2023 06:00:41 - Wera hand-tools
05/10/2023 05:47:07 - New member
05/10/2023 04:40:11 - Problems with external pot on at1 vfd
05/10/2023 00:06:32 - Drain plug
04/10/2023 23:36:17 - digi phase converter for 10 machines.....
04/10/2023 23:13:48 - More Latest Posts...
- View All Topics
- Reeves** - Rebuilt Royal Scot by Martin Evans
by John Broughton
£300.00 - BRITANNIA 5" GAUGE James Perrier
by Jon Seabright 1
£2,500.00 - Drill Grinder - for restoration
by Nigel Graham 2
£0.00 - WARCO WM18 MILLING MACHINE
by Alex Chudley
£1,200.00 - MYFORD SUPER 7 LATHE
by Alex Chudley
£2,000.00 - More "For Sale" Ads...
- D1-3 backplate
by Michael Horley
Price Not Specified - fixed steady for a Colchester bantam mark1 800
by George Jervis
Price Not Specified - lbsc pansy
by JACK SIDEBOTHAM
Price Not Specified - Pratt Burnerd multifit chuck key.
by Tim Riome
Price Not Specified - BANDSAW BLADE WELDER
by HUGH
Price Not Specified - More "Wanted" Ads...
Do you want to contact the Model Engineer and Model Engineers' Workshop team?
You can contact us by phone, mail or email about the magazines including becoming a contributor, submitting reader's letters or making queries about articles. You can also get in touch about this website, advertising or other general issues.
Click THIS LINK for full contact details.
For subscription issues please see THIS LINK.
Model Engineer Magazine
- Percival Marshall
- M.E. History
- LittleLEC
- M.E. Clock
ME Workshop
- An Adcock
- & Shipley
- Horizontal
- Mill
Subscribe Now
- Great savings
- Delivered to your door
Pre-order your copy!
- Delivered to your doorstep!
- Free UK delivery!


 Register
 Log-in


