Forum sponsored by:

Stuart 10V Build Log - Complete Beginner...
| Dr_GMJN | 22/07/2020 22:37:16 |
 1602 forum posts | So I tried to find a sleeve of about the right size, but no luck. I also considered making a Pre-drilled bush to press in, and drill to size when fitted, but a) A small enough drill was very flexible and b) The very thin wall might collapse on fitting. |
| Dr_GMJN | 23/07/2020 08:55:40 |
1602 forum posts | Presumably the 3.1mm diameter valve rod is a suitable diameter for a 5BA thread? From what I can find, the O/D on a 5BA thread should be 3.2mm, so a 0.1mm undersize should be safe in terms of threading (but maybe a bit sloppy? Cheers. |
| Mick B1 | 23/07/2020 09:16:59 |
| 2444 forum posts 139 photos | Posted by Dr_GMJN on 23/07/2020 08:55:40:
Presumably the 3.1mm diameter valve rod is a suitable diameter for a 5BA thread? From what I can find, the O/D on a 5BA thread should be 3.2mm, so a 0.1mm undersize should be safe in terms of threading (but maybe a bit sloppy? Cheers. The fit of the flanks matters more than the o/d. 3,1 should be fine. With a normal split die you can adjust how much you tighten down the two screws that bear on the free ends of the arc, in tandem with the centre screw that opposes them. start with the die slightly open, test the result, then tighten it down if necessary by a few degrees turn on the screws, and test again till you get a light friction fit. But if you go a little too far, a bit of slop's unlikely to affect function. My 10V's a crude job in comparison with yours, but it's worked very nicely for 25 years.
Edited By Mick B1 on 23/07/2020 09:21:42 |
| Dr_GMJN | 23/07/2020 09:24:55 |
1602 forum posts | Posted by Mick B1 on 23/07/2020 09:16:59:
Posted by Dr_GMJN on 23/07/2020 08:55:40:
Presumably the 3.1mm diameter valve rod is a suitable diameter for a 5BA thread? From what I can find, the O/D on a 5BA thread should be 3.2mm, so a 0.1mm undersize should be safe in terms of threading (but maybe a bit sloppy? Cheers. The fit of the flanks matters more than the o/d. 3,1 should be fine. With a normal split die you can adjust how much you tighten down the two screws that bear on the free ends of the arc, in tandem with the centre screw that opposes them. start with the die slightly open, test the result, then tighten it down if necessary by a few degrees turn on the screws, and test again till you get a light friction fit. But if you go a little too far, a bit of slop's unlikely to affect function. My 10V's a crude job in comparison with yours, but it's worked very nicely for 25 years.
Edited By Mick B1 on 23/07/2020 09:21:42 Thanks Mick - I'll do that with the die. Your 10V looks fine to me, I'd be more than happy with that, the main thing is that it runs well. |
| Mick B1 | 23/07/2020 10:57:03 |
| 2444 forum posts 139 photos | Posted by Dr_GMJN on 23/07/2020 09:24:55: ... Your 10V looks fine to me, I'd be more than happy with that, the main thing is that it runs well. Wing and prayer job, really - with a Unimat 3 and a cheap Chinese bench drill I still use. Couldn't swing the eccentric with its arm in the tiny Unimat for boring, so I had to cut it off and attach a separate turned arm instead. I interference-fitted a bronze tyre to the flywheel - but I can't remember all the other dodges I used. Edited By Mick B1 on 23/07/2020 11:00:06 |
| JasonB | 23/07/2020 12:19:25 |
 25215 forum posts 3105 photos 1 articles | It is very common to use a 5BA thread straight onto 1/8" nominal stock (which can be a bit under size) and I expect just about all the 10V & H engines built do that, 2BA also goes onto 3/16" nominal and 7BA onto 3/32" even though they sizes are not what you will find on most charts. |
| Cabinet Enforcer | 23/07/2020 15:09:09 |
| 121 forum posts 4 photos | Hi Dr_GMJN, I was sure your username rung a bell when you started posting but I couldn't place it, didn't realise it was from PH until I saw the Stuart build thread pop up in recent posts there. Nice engine build so far, hopefully she'll run like a chipped 330D
Re your post on the previous page about indexing, would highly recommend getting both hex and square Stevenson collet blocks from Arceuro, makes jobs like that really easy.
|
| Dr_GMJN | 23/07/2020 21:36:13 |
1602 forum posts | Posted by Cabinet Enforcer on 23/07/2020 15:09:09:
Hi Dr_GMJN, I was sure your username rung a bell when you started posting but I couldn't place it, didn't realise it was from PH until I saw the Stuart build thread pop up in recent posts there. Nice engine build so far, hopefully she'll run like a chipped 330D
Re your post on the previous page about indexing, would highly recommend getting both hex and square Stevenson collet blocks from Arceuro, makes jobs like that really easy.
Thanks, yes those blocks look good. Spending money is going to be a bit tight next month unfortunately though! |
| Dr_GMJN | 23/07/2020 22:14:10 |
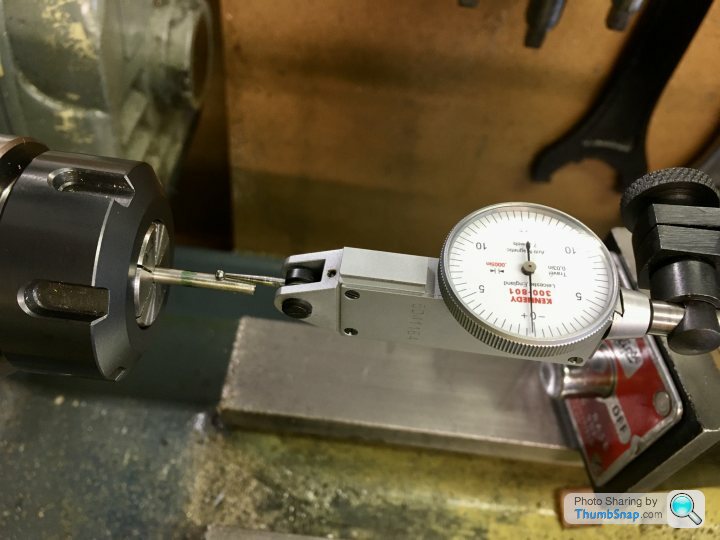
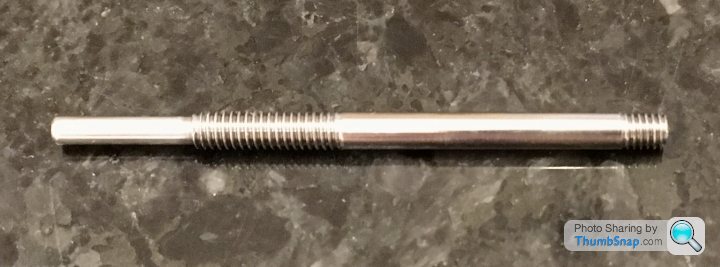
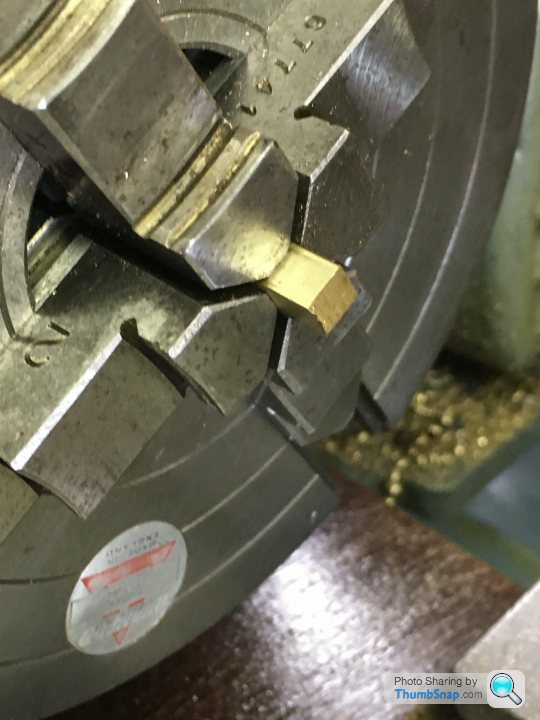
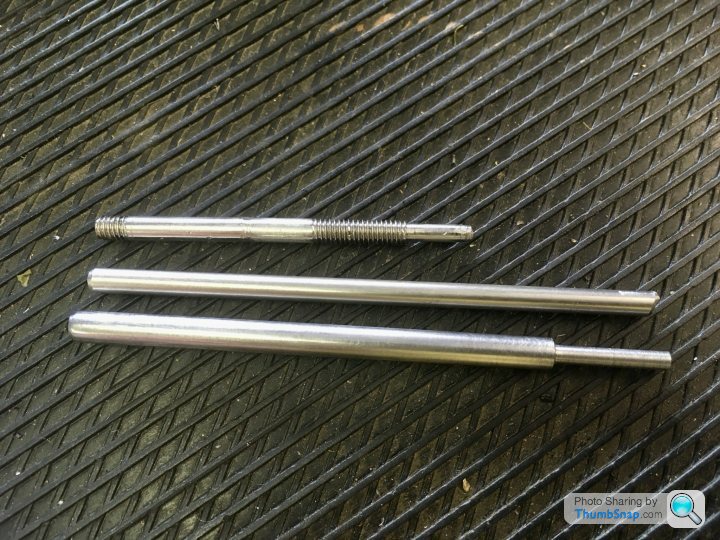
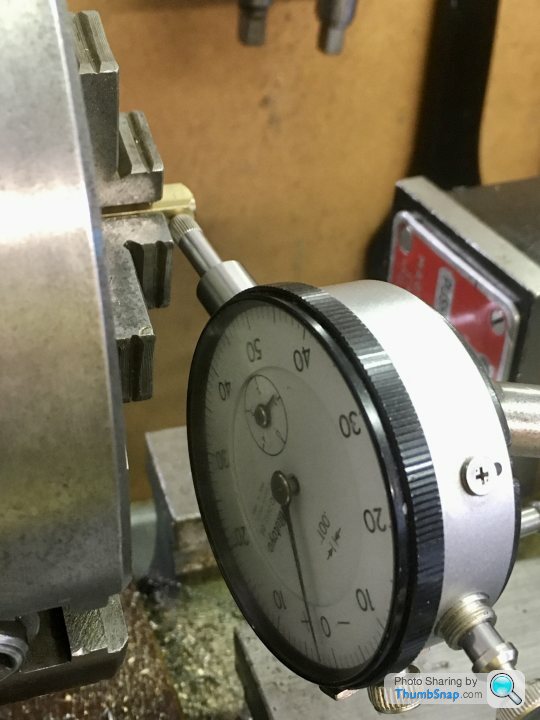
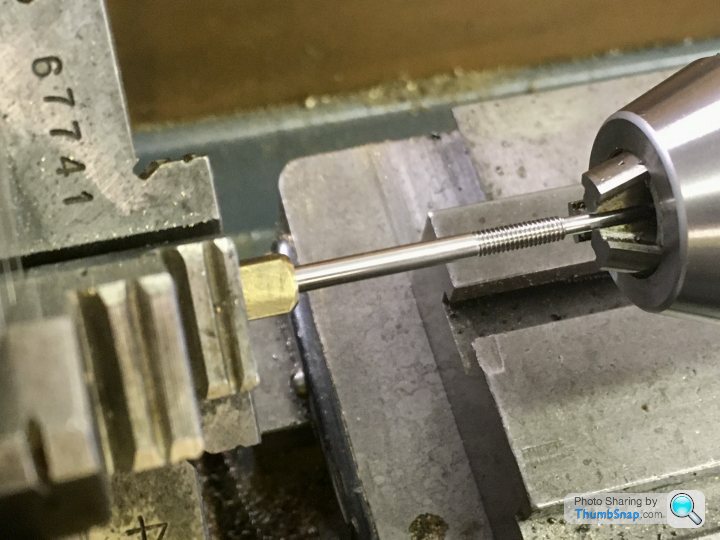
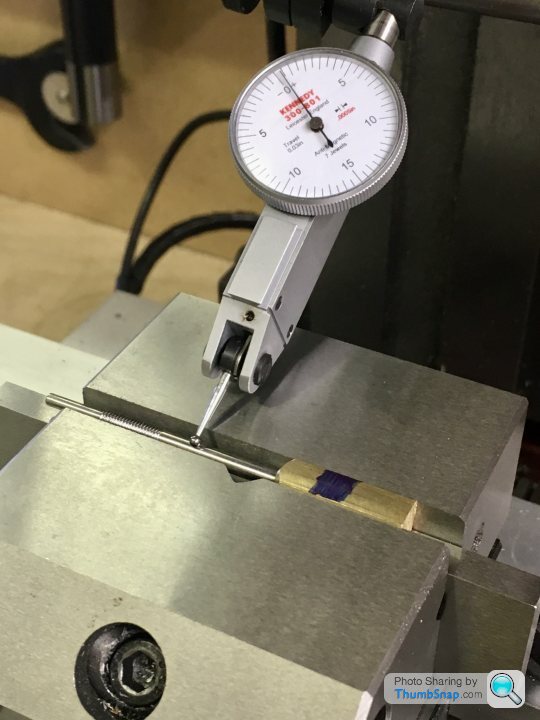
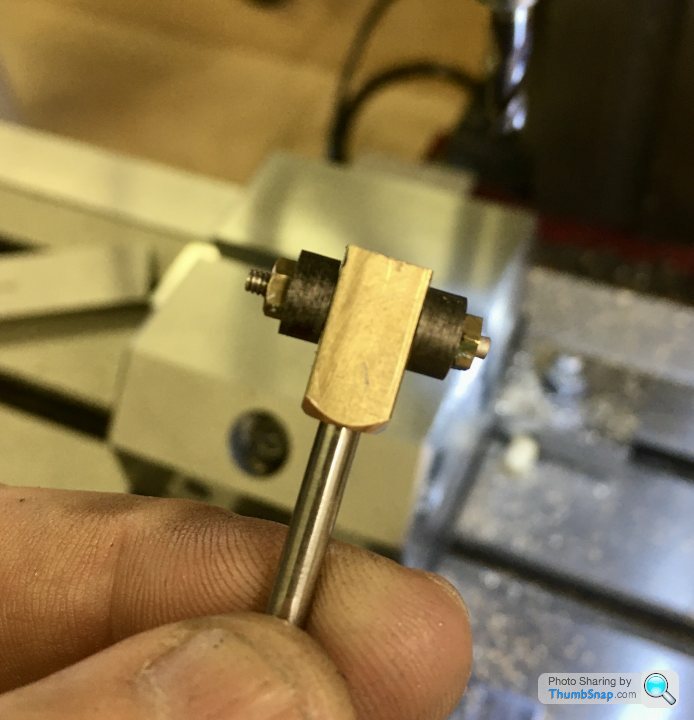
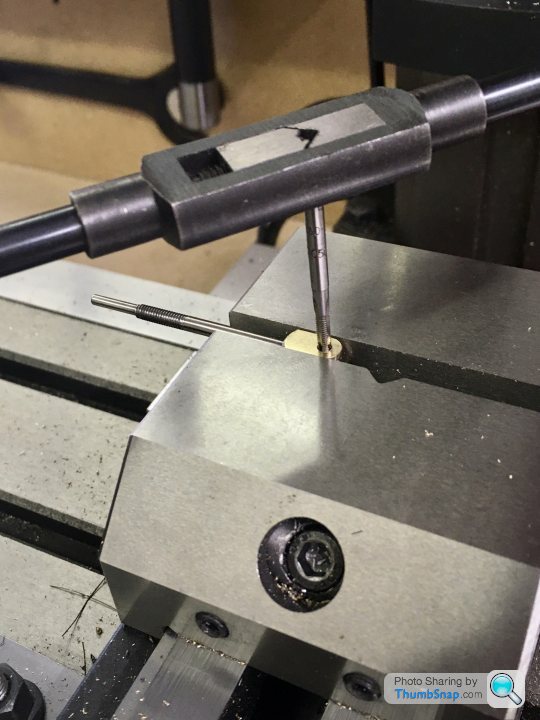
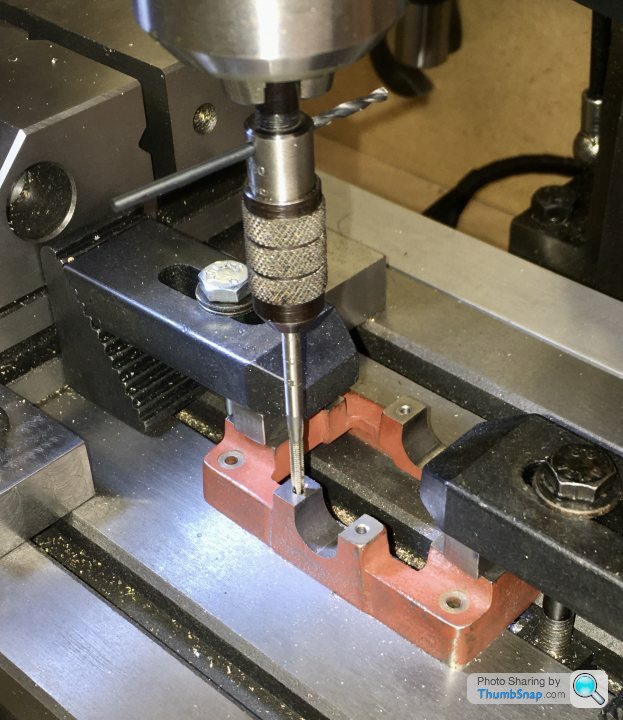
1602 forum posts | So tonight I re-set the scrap valve rod in the lathe and sawed the threaded end off. I found that putting it in a collet gave me 0.0015” runout, so I stuck with that rather than messing about with the split bush and 3-jaw chuck: |
| Dr_GMJN | 26/07/2020 11:59:09 |
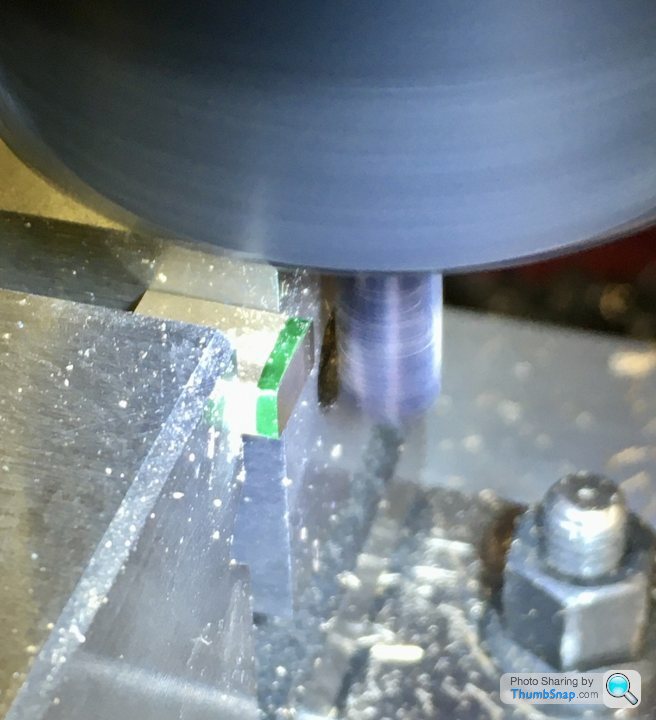
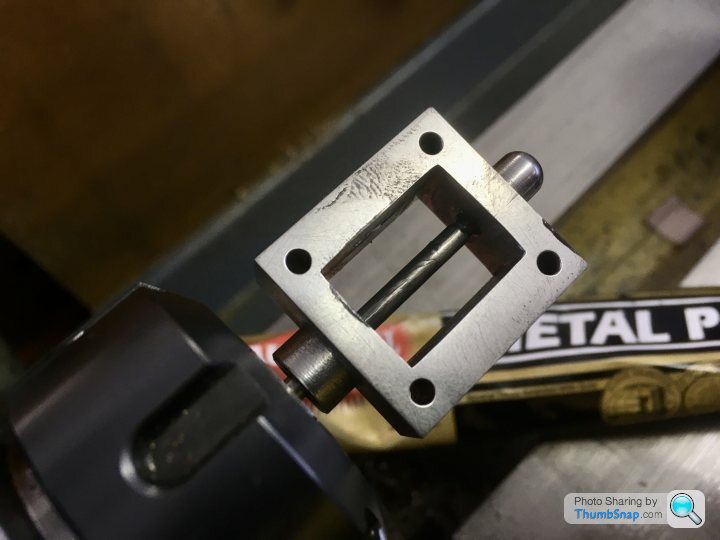
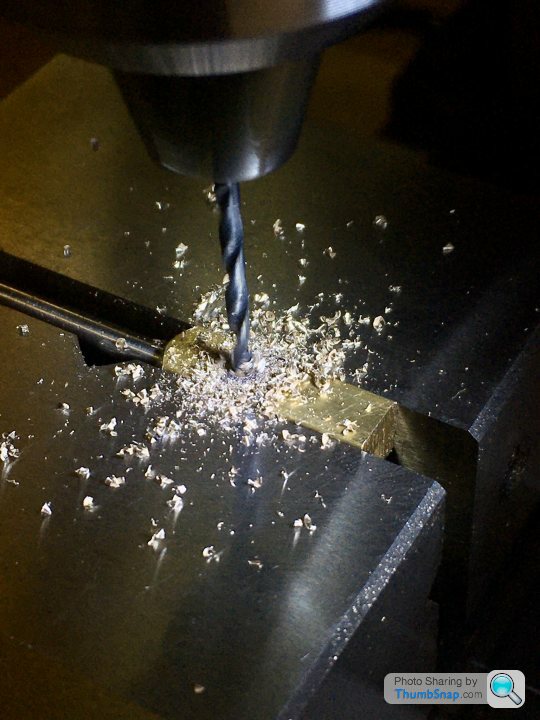
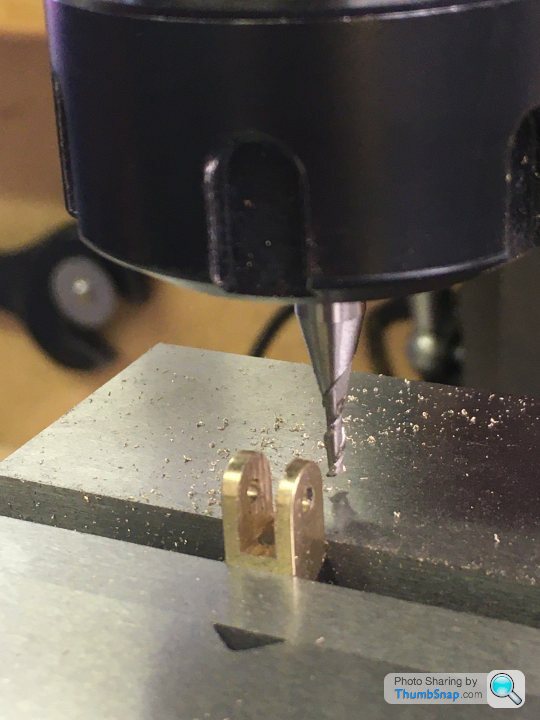
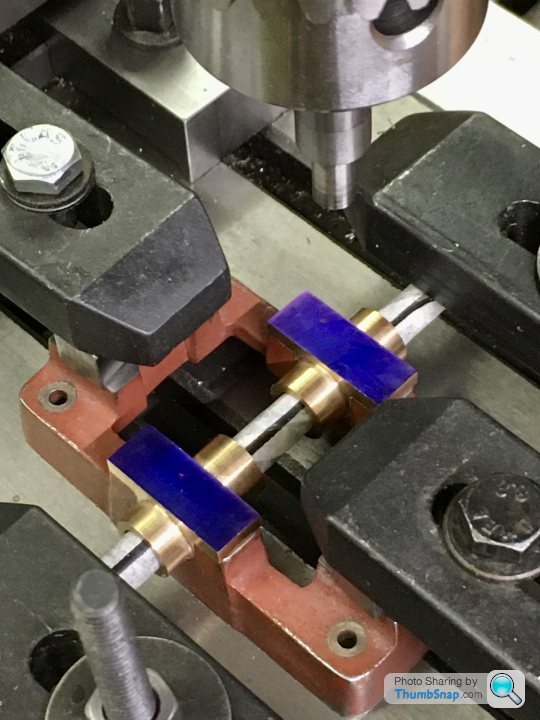
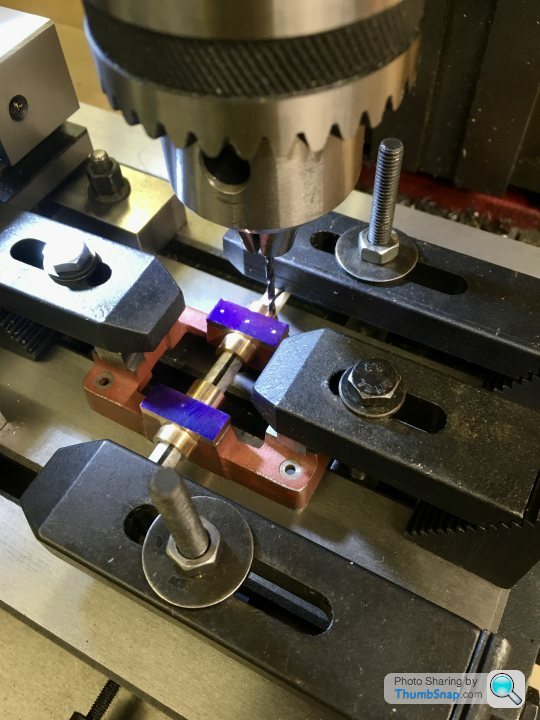
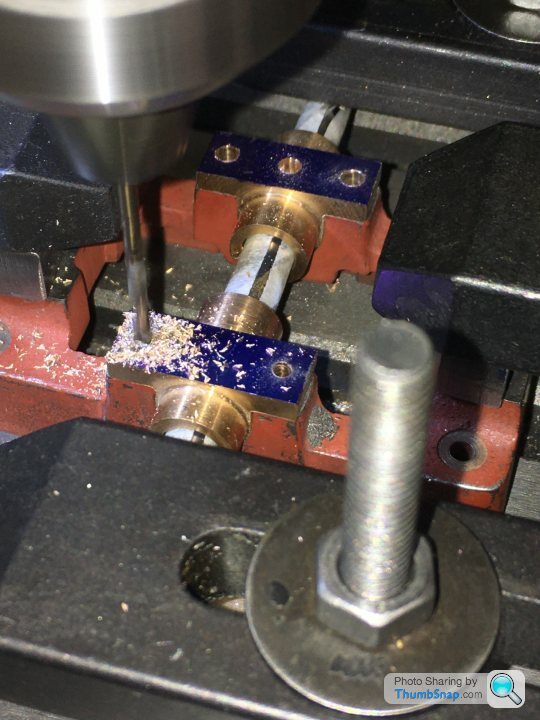
1602 forum posts | So I made a start on the valve rod fork end:
|
| Mick B1 | 26/07/2020 12:15:48 |
| 2444 forum posts 139 photos | Posted by Dr_GMJN on 26/07/2020 11:59:09:
.... No. This is Victorian tech, so do what they did when they fell orf their 'orse. Get straight on again, and ride!
|
| Dr_GMJN | 26/07/2020 13:54:02 |
1602 forum posts | Posted by Mick B1 on 26/07/2020 12:15:48:
Posted by Dr_GMJN on 26/07/2020 11:59:09:
.... No. This is Victorian tech, so do what they did when they fell orf their 'orse. Get straight on again, and ride!
If I had any spare rod I would! I was still congratulating myself on saving the first screw-up (by about 1mm). Ill send for another rod next week. I have a rule when modelling or whatever, that I correct screw-ups before moving on.
|
| mechman48 | 26/07/2020 15:12:26 |
 2947 forum posts 468 photos | Hi Dr_GMJN , it's looking good. have a look in my album for some pics of my build, also my final run video.. George |
| Dr_GMJN | 26/07/2020 16:33:14 |
1602 forum posts | Posted by mechman48 on 26/07/2020 15:12:26:
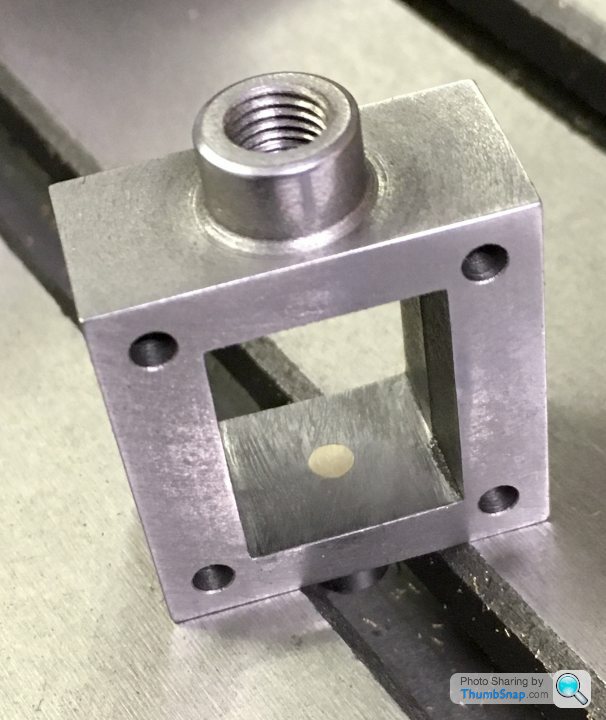
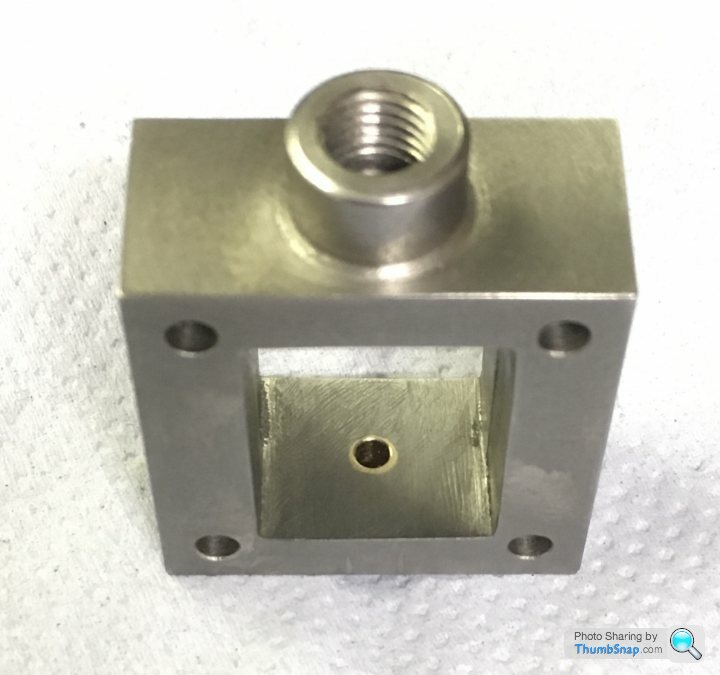
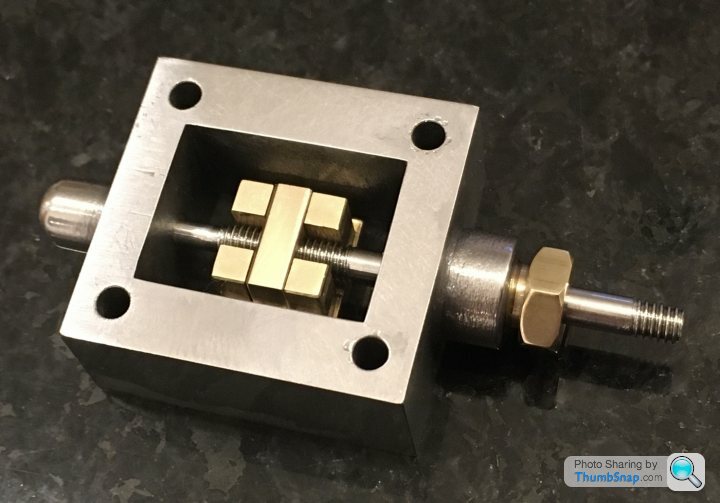
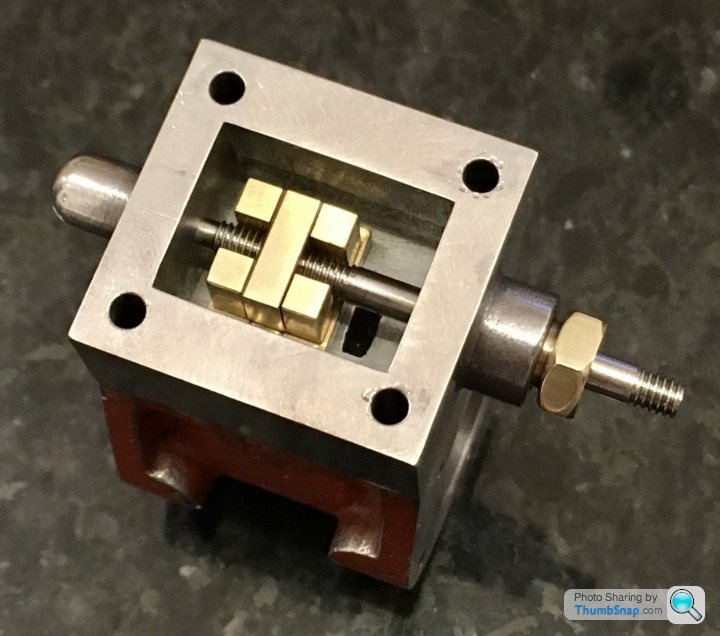
Hi Dr_GMJN , it's looking good. have a look in my album for some pics of my build, also my final run video.. George Thanks George, your 10V looks beautiful and runs as well as it looks. One question though - unless I've misunderstood the concept of how the slide valve works (which is quite possible), I thought it needed positive pressure in the valve chest, ie the air/steam feed would go into the valve block, to keep the sliding faces together, but you've got the exhaust there. Is this correct - does the valve work with the inlet either side? I'd have thought the positive pressure acting on the pocketed side of the slider would tend to push it away from the valve port face, causing leakage?
Cheers.
|
| mechman48 | 26/07/2020 18:13:59 |
2947 forum posts 468 photos | I would have to look at the drawing again to clarify what 'guzinta' & what comes 'outa' where. My grey matter is decidedly slower than it was when I built it. I'm just pleased it still runs great. George. |
| Dr_GMJN | 30/07/2020 09:06:23 |
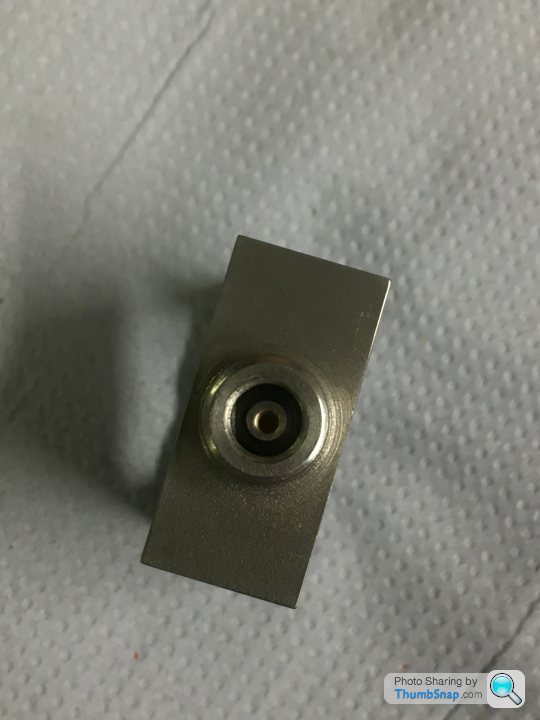
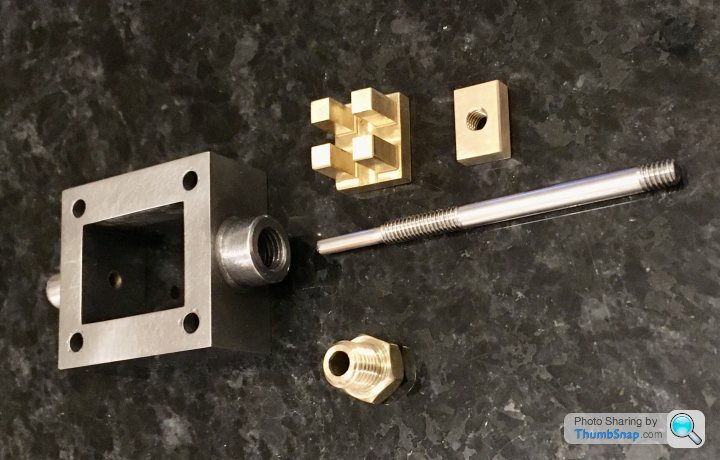
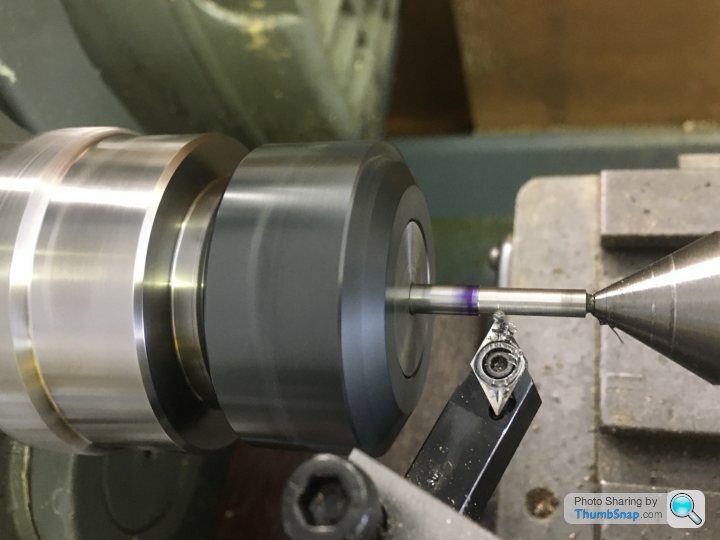
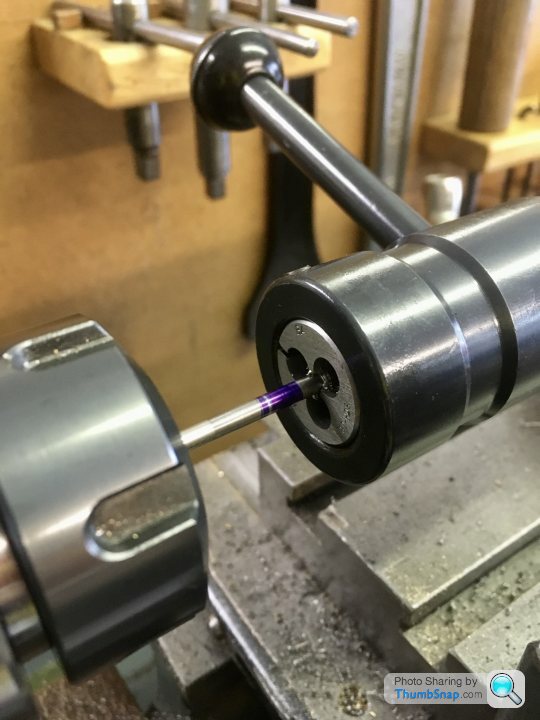
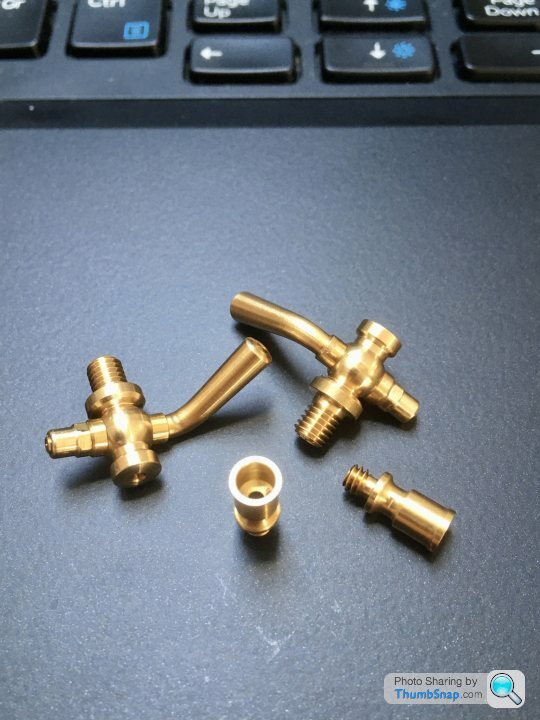
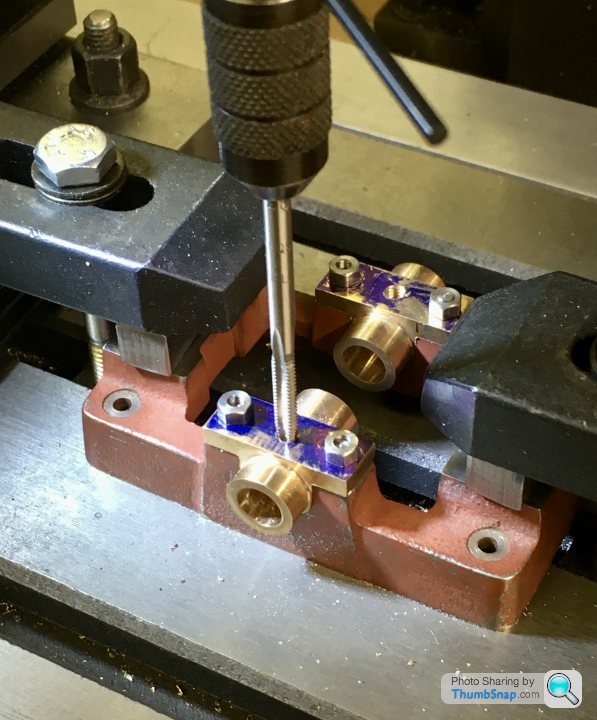
1602 forum posts | Yesterday morning I got a new rod (and some oilers and drain cocks from Stuart Models) and put it in the parts box. This evening took it out and started to machine it. Then test fitted it to the valve block and found I’d picked up the piston rod stock by mistake, which is too thick for the sealing gland. So started for the third time, this time on the right stock. Turned, lapped, threaded and re-set into the brass block. I didn’t turn the chuck this time. So back to where I was on Sunday. |
| Neil Wyatt | 30/07/2020 22:04:57 |
 19226 forum posts 749 photos 86 articles | Posted by Mick B1 on 23/07/2020 09:16:59:
My 10V's a crude job in comparison with yours, but it's worked very nicely for 25 years.
Crumbs! It's a shock to realise mine is 20! Neil |
| Mick B1 | 30/07/2020 22:25:43 |
| 2444 forum posts 139 photos | Posted by Neil Wyatt on 30/07/2020 22:04:57:
Posted by Mick B1 on 23/07/2020 09:16:59:
My 10V's a crude job in comparison with yours, but it's worked very nicely for 25 years.
Crumbs! It's a shock to realise mine is 20! Neil Creeps up on yer, don't it? |
| Dr_GMJN | 01/08/2020 13:44:45 |
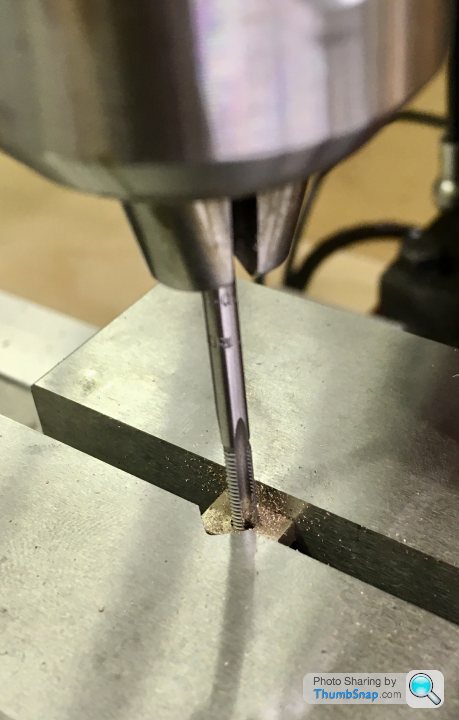
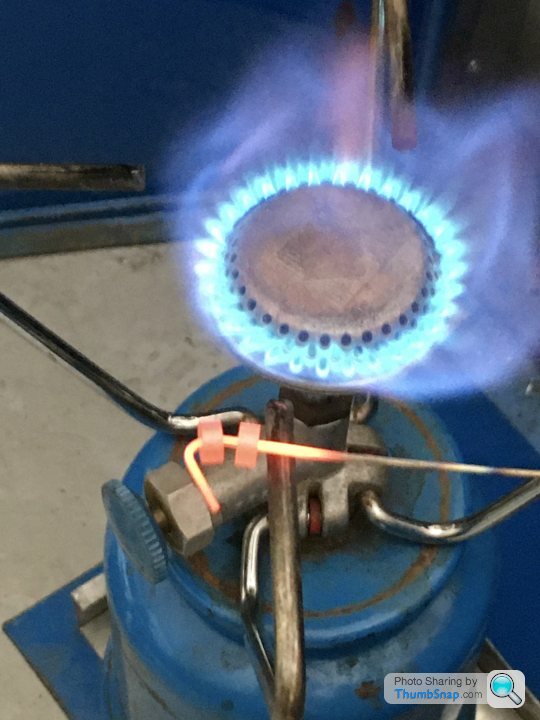
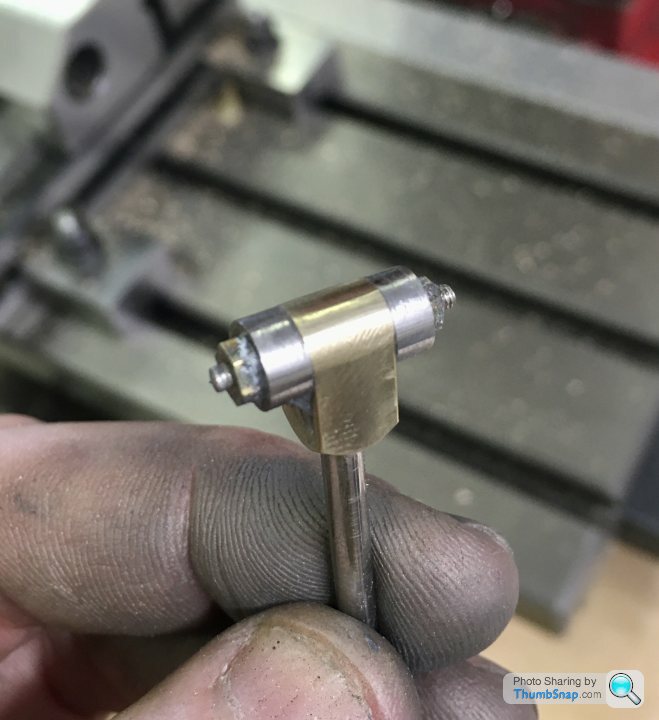
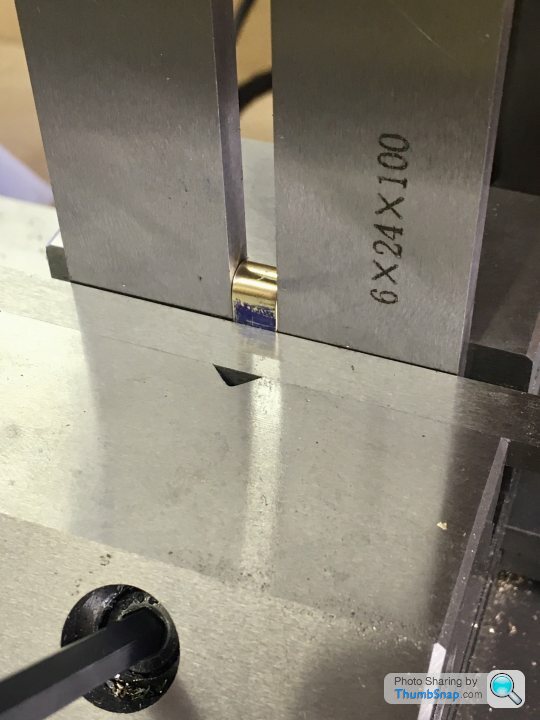
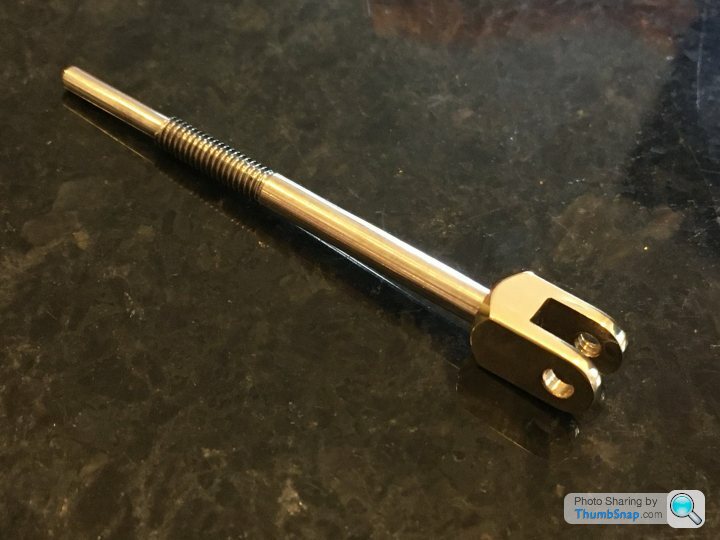
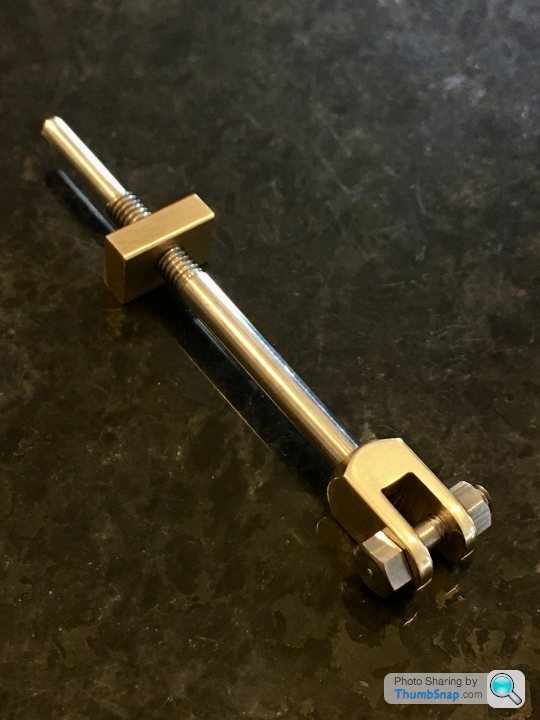
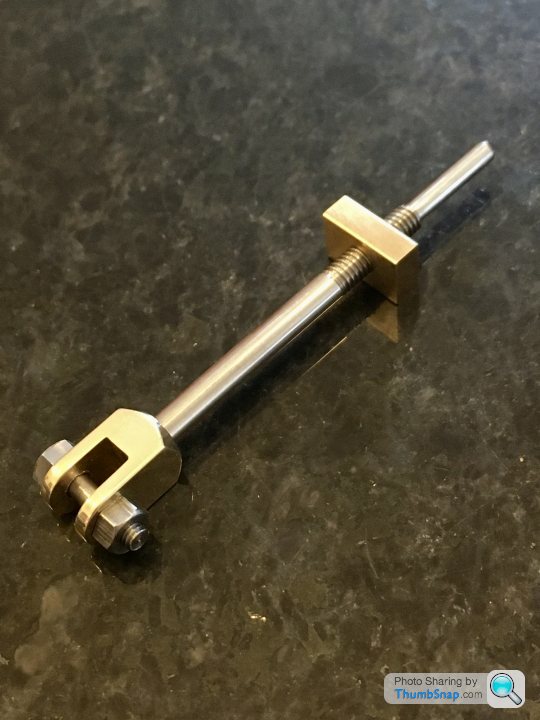
1602 forum posts | Valve rod forked end finished at last. I made some Hardened filing buttons to profile the end. Worked a treat: |
| Dr_GMJN | 05/09/2020 18:55:01 |
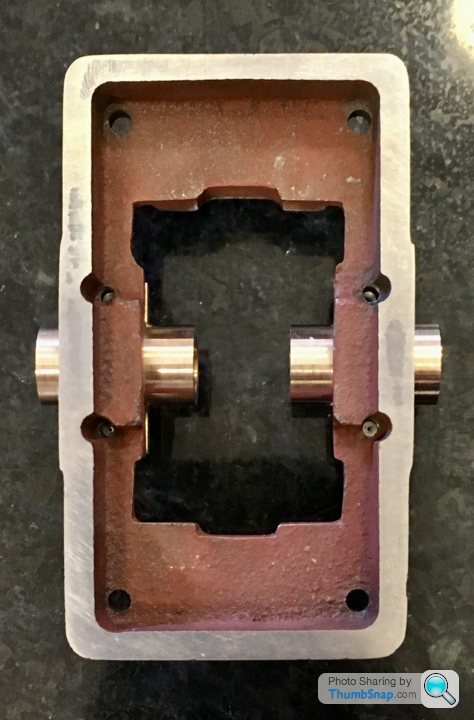
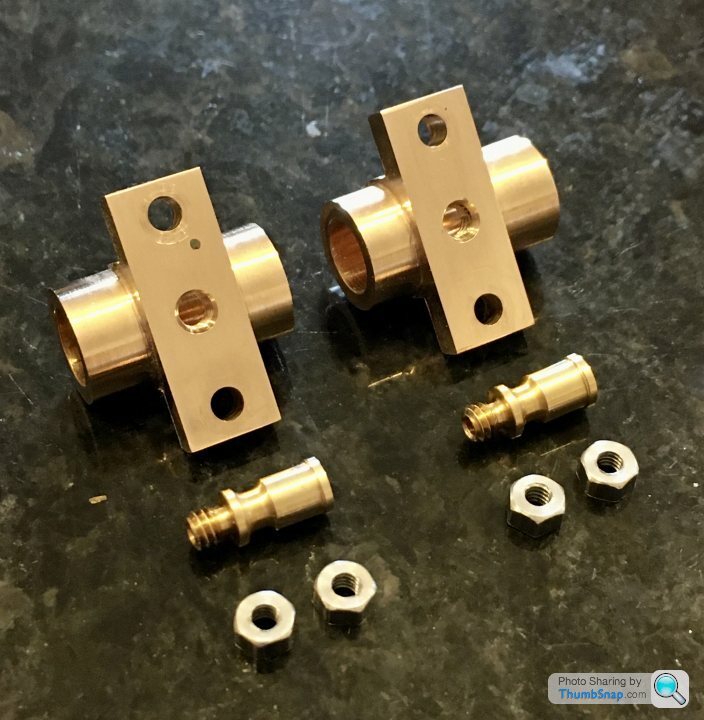
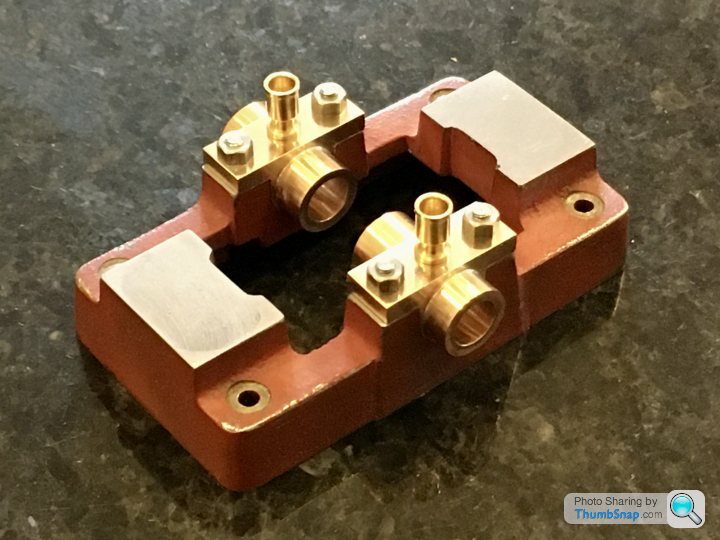
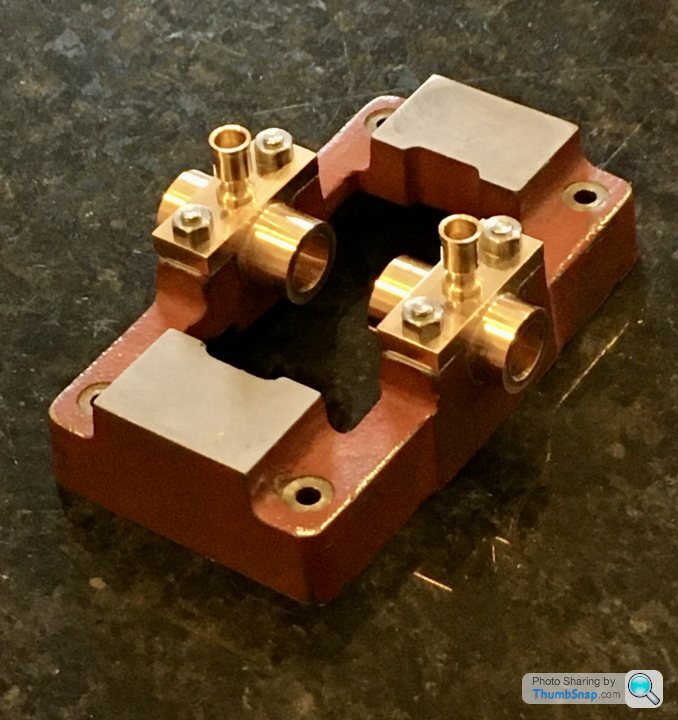
1602 forum posts | I got a bit distracted with other projects recently, but today I fitted the main bearings to the sole plate. |


Please login to post a reply.
Magazine Locator
Want the latest issue of Model Engineer or Model Engineers' Workshop? Use our magazine locator links to find your nearest stockist!
Sign up to our Newsletter
Sign up to our newsletter and get a free digital issue.
You can unsubscribe at anytime. View our privacy policy at www.mortons.co.uk/privacy
Latest Forum Posts
- *Oct 2023: FORUM MIGRATION TIMELINE*
05/10/2023 07:57:11 - Making ER11 collet chuck
05/10/2023 07:56:24 - What did you do today? 2023
05/10/2023 07:25:01 - Orrery
05/10/2023 06:00:41 - Wera hand-tools
05/10/2023 05:47:07 - New member
05/10/2023 04:40:11 - Problems with external pot on at1 vfd
05/10/2023 00:06:32 - Drain plug
04/10/2023 23:36:17 - digi phase converter for 10 machines.....
04/10/2023 23:13:48 - Winter Storage Of Locomotives
04/10/2023 21:02:11 - More Latest Posts...
- View All Topics
Support Our Partners


Shopping Partners
Subscription Offer

Latest "For Sale" Ads
- Reeves** - Rebuilt Royal Scot by Martin Evans
by John Broughton
£300.00 - BRITANNIA 5" GAUGE James Perrier
by Jon Seabright 1
£2,500.00 - Drill Grinder - for restoration
by Nigel Graham 2
£0.00 - WARCO WM18 MILLING MACHINE
by Alex Chudley
£1,200.00 - MYFORD SUPER 7 LATHE
by Alex Chudley
£2,000.00 - More "For Sale" Ads...
Latest "Wanted" Ads
- D1-3 backplate
by Michael Horley
Price Not Specified - fixed steady for a Colchester bantam mark1 800
by George Jervis
Price Not Specified - lbsc pansy
by JACK SIDEBOTHAM
Price Not Specified - Pratt Burnerd multifit chuck key.
by Tim Riome
Price Not Specified - BANDSAW BLADE WELDER
by HUGH
Price Not Specified - More "Wanted" Ads...
Get In Touch!
Do you want to contact the Model Engineer and Model Engineers' Workshop team?
You can contact us by phone, mail or email about the magazines including becoming a contributor, submitting reader's letters or making queries about articles. You can also get in touch about this website, advertising or other general issues.
Click THIS LINK for full contact details.
For subscription issues please see THIS LINK.
Digital Back Issues


Donate

 Register
 Log-in
Model Engineer Magazine
- Percival Marshall
- M.E. History
- LittleLEC
- M.E. Clock

ME Workshop
- An Adcock
- & Shipley
- Horizontal
- Mill

Subscribe Now
- Great savings
- Delivered to your door

Pre-order your copy!
- Delivered to your doorstep!
- Free UK delivery!
All Forum Topics > Work In Progress and completed items > Stuart 10V Build Log - Complete Beginner...