Forum sponsored by:

R8 Help me please!
| Terry Kirkup | 26/05/2021 13:33:09 |
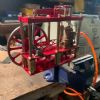
 108 forum posts 82 photos | I tried out my new Warco WM18B mill last night shaving a few chunks of mild steel angle to make hold-downs for Arc's Type 2 vise. That went fine, machine seems nice although I find it a trifle disconcerting that nothing happens for what seems an age after switching on until the spindle runs up. Scary. (why is that?). Anyway, I've just tried to get my R8 ER32 collet chuck mounted and it won't! Pretty pleez take a look at this pic and tell me which keyway is correct, new chuck on the left or Warco supplied arbour on the right (which does go in the quill). There's a good old difference in depth there. All I can feel about 60mm up inside the quill is a single pip, not a key as such. I suppose I could get a file up there but should I?
Edited By Terry Kirkup on 26/05/2021 13:35:00 |
| JasonB | 26/05/2021 13:36:36 |
 25215 forum posts 3105 photos 1 articles | Pip is the end of a grub screw, try unscrewing it slightly as your ER32 shank looks to have a shallower slot. |
| Andrew Johnston | 26/05/2021 13:40:23 |
 7061 forum posts 719 photos | The "pip" is a dog point screw; it isn't a key. It's purpose is to stop the R8 taper turning while the drawbar is tightened. It's more trouble than it's worth. If possible take the screw out and recycle it. In my experience import R8 tapers often have problems with the keyway not being correct. Andrew |
| Emgee | 26/05/2021 13:44:27 |
| 2610 forum posts 312 photos | Terry I believe the R8 groove spec calls for .094" depth, but isn't it possible to unscrew the peg to allow the shallower groove depth tooling to be used. ? Emgee 2 answers while I am typing !!!! Edited By Emgee on 26/05/2021 13:46:24 |
| Samsaranda | 26/05/2021 13:46:23 |
 1688 forum posts 16 photos | Keyway depths appear different, if the ER32 was same depth I doubt there would be a problem. Dave W |
| JasonB | 26/05/2021 14:11:53 |
25215 forum posts 3105 photos 1 articles | Hardinge have the groove at 0.065" to 0.070" deep
Edited By JasonB on 26/05/2021 14:12:49 |
| Terry Kirkup | 26/05/2021 15:02:53 |
108 forum posts 82 photos | Wow, thank you All gentlemen for the very prompt responses. I didn't have a clue what was up the spout, so I'll go and see if I can unscrew it now. Once again I am deeply impressed by the help available on here. |
| KWIL | 26/05/2021 15:26:22 |
| 3681 forum posts 70 photos | The dog pointed grub screw has a hex key threaded ring behind it to lock grub screw in place in place in the oruginal Hardinge setup on Bridgeports. Do not know about the Warco. |
| alan ord 2 | 26/05/2021 15:31:05 |
 145 forum posts 41 photos | +1 for Andrew. I took the grub screw out of my mill a few years ago. Never had a problem.
Alan. |
| old mart | 26/05/2021 18:57:26 |
| 4655 forum posts 304 photos | Since reaching the screw to adjust the stickout could entail removing the spindle, it might be easier to carefully reach it from inside the spindle and file it shorter. A Dremel might take a little off the end, say 0.004", 0.1mm at a time until the new tool fits. Make sure any filings are cleaned out very well afterwards. I purposly left the R8 conversion for the Tom Senior light vertical unfinished, the hole for the pin/screw was not drilled right through into the bore. This is better and the only time it can cause problems is when an R8 collet is used, because there is nothing to get hold of. As long as the threads for the drawbar and all the threads in tooling are free running and lubricated, there is no problem. Without the pin, you can clean the taper section of the spindle with a BT30 cleaning wand. |
| Douglas Johnston | 26/05/2021 18:57:26 |
 814 forum posts 36 photos | Also check the diameter of the plain section at the top of the R8 (0.9495" in drawing above ) . I have bought a few R8 collets that would not go in my mill because that part was just a tad oversize for my machine (although still within the R8 spec ). Removing about 0.0005" from the diameter cured the problem. Doug |
| peter smith 5 | 26/05/2021 20:36:06 |
| 93 forum posts | Your starting problem?? my Warco was 3ph from converter and 2 speed motor. Always start in low until it runs then switch to high speed. Draws less current and does not get hot. |
| Nigel Graham 2 | 26/05/2021 20:59:13 |
| 3293 forum posts 112 photos | Digressing a little, does the Myford VMC mill have a similar grub-screw as peg for its R8 tooling? It is not clear from the parts drawing, but some of the tools I have are very awkward to fit, and this thread has shown me a possible reason. If so, whether I can adjust it, is another matter. The machine also suffers from a very stiff quill making drilling small diameters rather fraught, but nothing is accessible for servicing. |
| old mart | 26/05/2021 21:07:52 |
| 4655 forum posts 304 photos | It would also be possible to hold the tool shank in a vise, with some shim to make up for the middle section being slightly smaller and take a small cut along the slot to deepen it slightly. |
| Terry Kirkup | 27/05/2021 09:26:05 |
108 forum posts 82 photos | Thank you all again! The grub screw is easily reached through the vertical slot in the quill. I've left it in but withdrawn enough to get it out of the way. However, at first I still couldn't get the final 12mm or so of the R8 chuck pushed up to its seat! Douglas Johnston, spot on my friend, I had to do exactly the same, the top of it was slightly oversized! Peter Smith 5, not really a problem, just feels a bit iffy to me. I expected it to run up immediately just as the lathe does, and not this eerie creep up to its lowest speed. On that subject, should I also be reducing the speed to minimum before switching off? |
| Martin Connelly | 27/05/2021 10:45:38 |
 2549 forum posts 235 photos | I believe this is a variable speed machine. There will be a ramp up and ramp down built in to the system to keep the starting current from stressing the electronics. Compared to the motors that are given full power from stationary most people who have it learn to appreciate it so long as it does not take more than a few seconds to get up to speed. With all the VFDs I have had there has been a setting for ramp up and ramp down so you cam set it to what suits you and your machine. I don't know if there is any way to adjust what you have but I suspect that the electronics board has some small adjusting potentiometers on it. Unless it is actually taking a really long time it is probably factory set to a value that keeps starting current in an area they think is best. Time it from switching on to full speed and let us know what time it takes, someone else will then be able to tell you how it compares to their machine (hopefully) or speak to the suppliers so you know if it needs adjustment and can be adjusted. I think my machines take about 3 seconds to get up to full speed but they are VFD powered so I have that set to what suits me. Martin C |
| John Reese | 07/06/2021 02:34:16 |
 1071 forum posts | I had problems with R8 tooling that would not go into the spindle. They had been bumped on the end that raised a small burr. Once I had stoned off the burr they went in just fine. |


Please login to post a reply.
Magazine Locator
Want the latest issue of Model Engineer or Model Engineers' Workshop? Use our magazine locator links to find your nearest stockist!
Sign up to our Newsletter
Sign up to our newsletter and get a free digital issue.
You can unsubscribe at anytime. View our privacy policy at www.mortons.co.uk/privacy
Latest Forum Posts
- hemingway ball turner
04/07/2025 14:40:26 - *Oct 2023: FORUM MIGRATION TIMELINE*
05/10/2023 07:57:11 - Making ER11 collet chuck
05/10/2023 07:56:24 - What did you do today? 2023
05/10/2023 07:25:01 - Orrery
05/10/2023 06:00:41 - Wera hand-tools
05/10/2023 05:47:07 - New member
05/10/2023 04:40:11 - Problems with external pot on at1 vfd
05/10/2023 00:06:32 - Drain plug
04/10/2023 23:36:17 - digi phase converter for 10 machines.....
04/10/2023 23:13:48 - More Latest Posts...
- View All Topics
Support Our Partners


Shopping Partners
Subscription Offer

Latest "For Sale" Ads
- Reeves** - Rebuilt Royal Scot by Martin Evans
by John Broughton
£300.00 - BRITANNIA 5" GAUGE James Perrier
by Jon Seabright 1
£2,500.00 - Drill Grinder - for restoration
by Nigel Graham 2
£0.00 - WARCO WM18 MILLING MACHINE
by Alex Chudley
£1,200.00 - MYFORD SUPER 7 LATHE
by Alex Chudley
£2,000.00 - More "For Sale" Ads...
Latest "Wanted" Ads
- D1-3 backplate
by Michael Horley
Price Not Specified - fixed steady for a Colchester bantam mark1 800
by George Jervis
Price Not Specified - lbsc pansy
by JACK SIDEBOTHAM
Price Not Specified - Pratt Burnerd multifit chuck key.
by Tim Riome
Price Not Specified - BANDSAW BLADE WELDER
by HUGH
Price Not Specified - More "Wanted" Ads...
Get In Touch!
Do you want to contact the Model Engineer and Model Engineers' Workshop team?
You can contact us by phone, mail or email about the magazines including becoming a contributor, submitting reader's letters or making queries about articles. You can also get in touch about this website, advertising or other general issues.
Click THIS LINK for full contact details.
For subscription issues please see THIS LINK.
Digital Back Issues


Donate

 Register
 Log-in
Model Engineer Magazine
- Percival Marshall
- M.E. History
- LittleLEC
- M.E. Clock

ME Workshop
- An Adcock
- & Shipley
- Horizontal
- Mill

Subscribe Now
- Great savings
- Delivered to your door

Pre-order your copy!
- Delivered to your doorstep!
- Free UK delivery!
All Forum Topics > Beginners questions > R8 Help me please!