Forum sponsored by:

The Workshop Progress Thread (2017)
Report your modeling and workshop progress here
| JasonB | 01/01/2017 07:27:09 |
 25215 forum posts 3105 photos 1 articles | Report your modelling and workshop milestones in this thread. Anything else should go into the What Did You Do Thread 2016 posts can be found in this thread
Edited By JasonB on 02/01/2017 20:28:03 |
| Hopper | 01/01/2017 09:23:10 |
 7881 forum posts 397 photos | I made a round nut. 1/4"UNF thread, 5/8 OD, 5/32" thick with two 3/32" holes drilled in it 7/16" apart. Sum total of my day's work. Actually, two days' work. I drilled the hole and tapped the thread yesterday. Drilled the two 3/32" holes for the pin spanner and parted it off today. All to hold the micro-adjustment dial attachment on the fabricated GHT's dividing head. Got so busy with it all I forgot to take pics. Hopefully I will get this project finished in 2017. Been working on it all year long in 2016! Will take a pic of it tomorrow if I get time. Will be busy making the pin spanner to fit the nut. |
| Bob Rodgerson | 01/01/2017 09:50:01 |
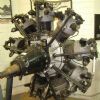
| 612 forum posts 174 photos | Happy New Year all. Maybe one for motorcycles general discussion but also of interest in general (I hope). Last night I got round to machining the cylinder bores to take a liner in a BSA Motorcycle engine cylinder casting.
|
| Muzzer | 01/01/2017 15:48:24 |
 2904 forum posts 448 photos | Well it's called "workshop progress", so I can report recent progress on the build of the.....workshop. Now fully insulated, windows and doors in, half plastered (since these pcs taken), first fix water, heating and electrical completed. The sun lounge / dining room / utility room are painted and heated, so we were able to host Xmas and NY dinners. Yes, 1/4 of the extension was conceded to household use in the interests of domestic politics. Even so, with basic internal dimensions of 6.5m x 15m, that still leaves a fair bit for machines. Should be finished in a couple of weeks, apart from the second fix electrical, heating and plumbing (my task). Looking forward to being released from the armchair workshop and getting my hands dirty again. It's been like living in an open prison (I imagine) - personal freedom but no workshop.
Not looking forward to applying two coats of paint to this little lot..... Murray |
| David Colwill | 01/01/2017 15:54:14 |
| 782 forum posts 40 photos | Murray, It looks like there is a useful 2 storey building at the end of your new workshop that could be incorporated into the new build to give that all important extra space that you are bound to need sometime. Apart from that it looks excellent. David. |
| JA | 01/01/2017 17:24:56 |
 1605 forum posts 83 photos | My workshop is heated by a 2kW oil filled radiator. As long as the outside temperature is above 6 degrees C I can get the workshop up to 10+ degrees. When the outside temperature is below 6 I abandon the workshop except for short periods. With the cool period looking as if it is going to continue I have postponed the manufacture of 150+ square headed small nuts and bolts and gone back to an old project - John Wilding's English Regulator.
I gave up trying to get it to work about ten years ago and packed it away for a future date. I have found all the bits (I think) and taken them to the office. Thinking that I can now know what the problem is I can spend the next few weeks getting it to work. Then I will have to finish it. JA |
| Andrew Johnston | 01/01/2017 18:15:50 |
 7061 forum posts 719 photos | Good grief Muzzer that's a workshop and a half. We expect some serious willy waving when you get the rest of the machines installed and the CNC beast running. And we also expect to see some serious lumps of metal being machined. Andrew |
| Muzzer | 01/01/2017 19:43:42 |
2904 forum posts 448 photos | Andrew - haha it's been such a long time I worry I may have forgotten how to use them. I hope I haven't become welded to the armchair - it seems to be quite a risk. It's getting there slowly but there is still a fair bit of work to be done. David - you are correct of course but I'll have to think carefully about how to frame that concept for my wife's consumption. We have planning permission to convert the loft already, although we don't have enough beer tokens to get started right now. Obviously it's vital to avoid valuable workshop space being wasted on storing household possessions. And it goes without saying that no vehicle will cross the threshold. It's a workshop, not a garage..... Merry |
| Andrew Johnston | 02/01/2017 11:53:50 |
7061 forum posts 719 photos | Posted by Muzzer on 01/01/2017 19:43:42:
Andrew - haha it's been such a long time I worry I may have forgotten how to use them. I don't think you need worry about that; it's like falling off a bike, not something you forget how to do. Andrew |
| Alan Waddington 2 | 02/01/2017 19:40:20 |
| 537 forum posts 88 photos | Like many home workshops, mine has to have space related compromises, however the corner where the lathe and mill live just didn't "feel right" at all.......so today i got stuck in. Still many compromises but feels so much nicer already.
|
| Roderick Jenkins | 05/01/2017 17:10:26 |
 2376 forum posts 800 photos | Made the Hemingway linishing disc to go on my Worden, just a couple of hours work. I altered the design slightly: My 11mm reamer gives a fairly tight fit on the motor shaft so it really needs an extractor, which is just an M6 thread down the middle so a screw can push on the end of the shaft. I made a short 1/2"BSF stud and screwed this into the disc centre with Loctite retainer and then drilled and tapped for M6.
Performance is actually quite impressive.
The supplied 80 grit discs are a bit coarse for finishing but seem to be very good for roughing out HSS. Can anybody recommend a source for some finer self adhesive 6" discs. Jason: You'll note that I've now got some tapping fluid Cheers, Rod |
| JasonB | 05/01/2017 17:15:39 |
25215 forum posts 3105 photos 1 articles | Posted by Roderick Jenkins on 05/01/2017 17:10:26:
Jason: You'll note that I've now got some tapping fluid Cheers, Don't drink it all at once |
| JasonB | 06/01/2017 20:01:36 |
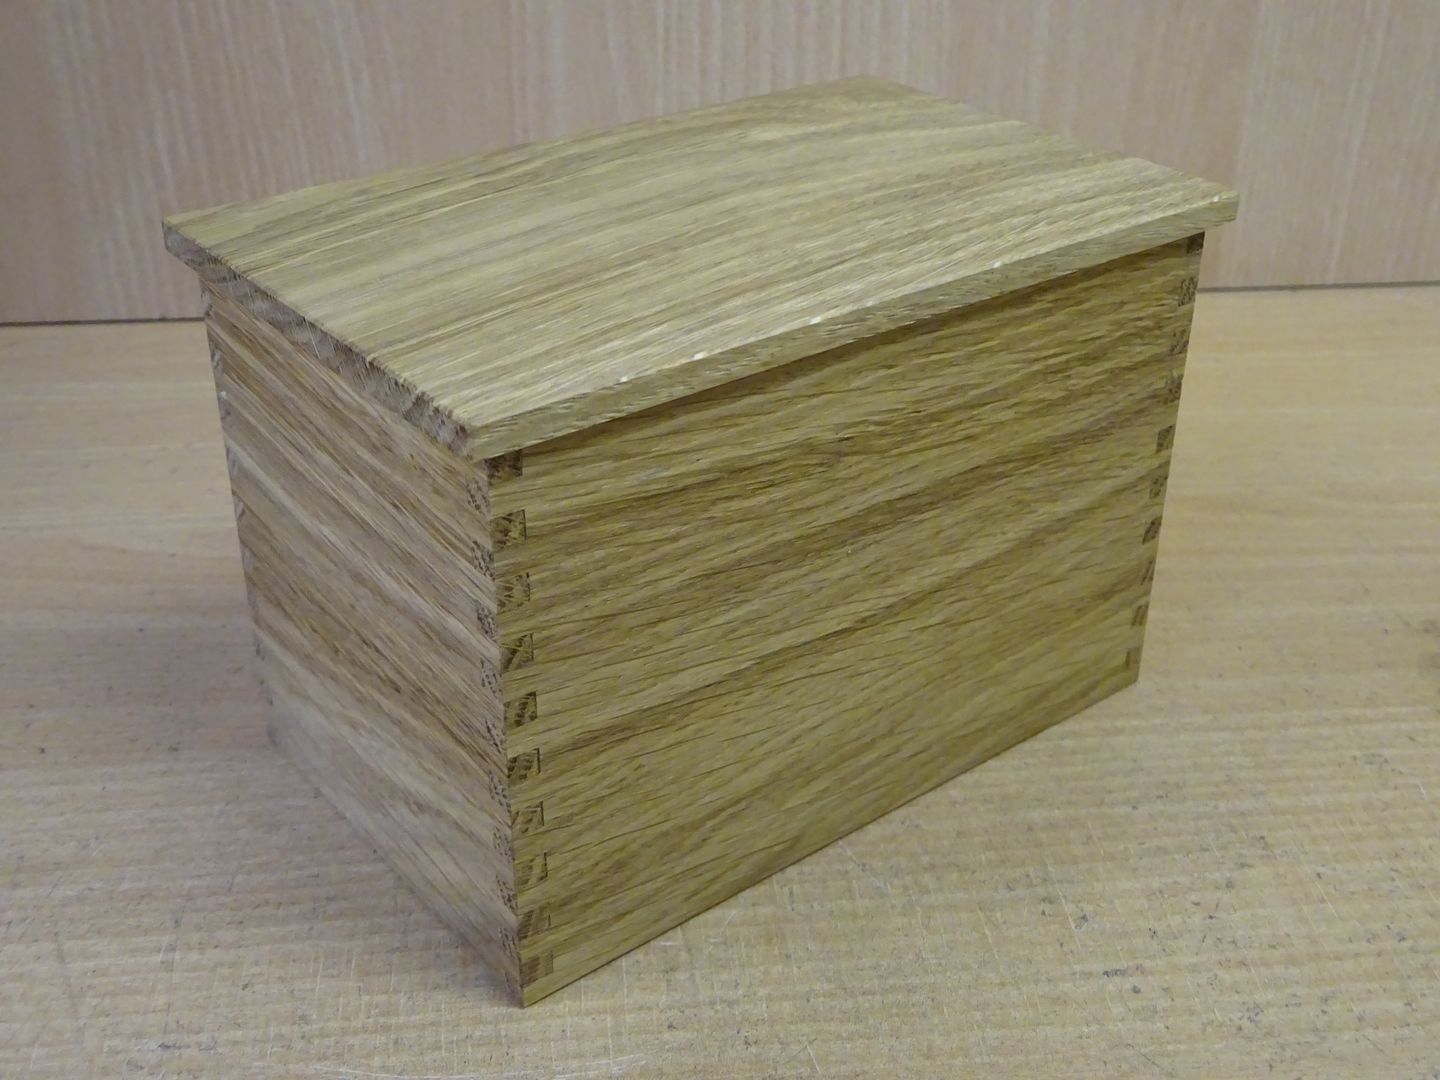
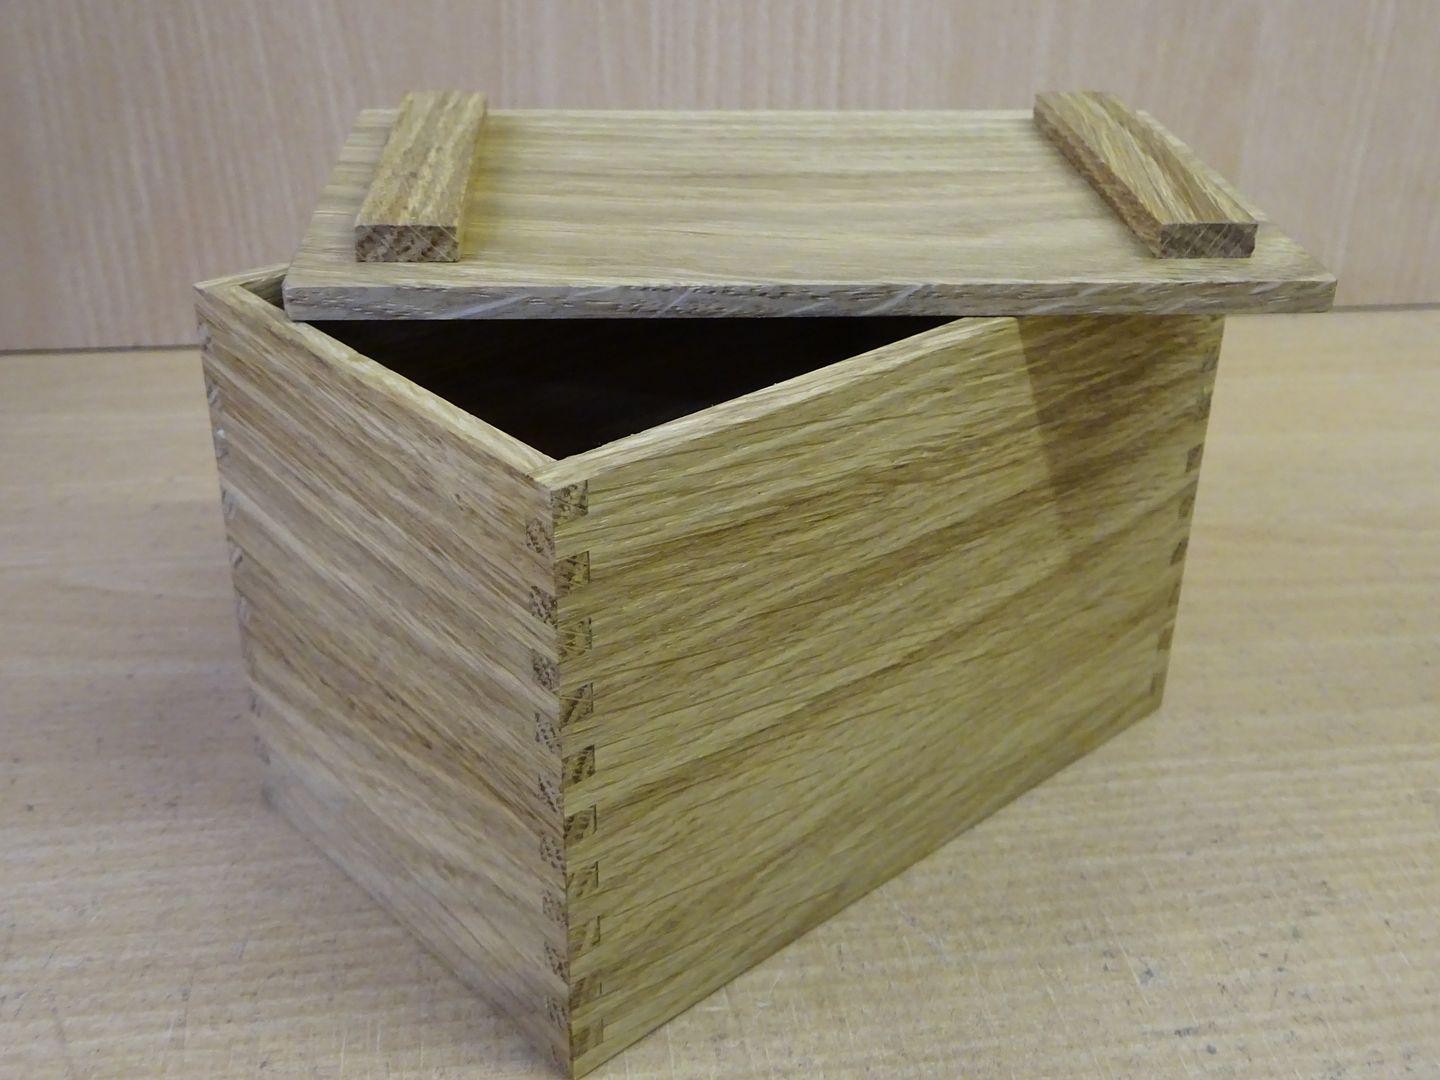
25215 forum posts 3105 photos 1 articles | I borrowed a friends hydralic press to push my broach through the R&V flywheels, gear and pully to cut the keyways (tapered in the flywheels) and also milled out the balancing grooves with a 1/2" bull nose cutter. Then made and fitted the tapered keys to suit.
Also got the battery box knocked up from some off cuts of oak, this will sit on the front of the cart and hide the battery and LT coil.
|
| MW | 06/01/2017 20:18:10 |
 2052 forum posts 56 photos | sted by Roderick Jenkins on 05/01/2017 17:10:26
The supplied 80 grit discs are a bit coarse for finishing but seem to be very good for roughing out HSS. Can anybody recommend a source for some finer self adhesive 6" discs.
Looking good, Rod. You can get some fine 6" discs from machine mart, by Clarke. I don't use them for cutting as such but giving an even surface finish to a part. Michael W |
| John Haine | 07/01/2017 17:20:10 |
| 5563 forum posts 322 photos | Inspired by a previous enquiry on here about making nameplates for a Tich I've spend a while working out how to engrave them on my Novamill, and made a couple for the OP. I created the G-code using an excellent program called F-Engrave, which allows to to do text or "V-Carve" from a bitmap image. I created the image in MS Powerpoint and used the "right-click save as image" option to save as a .bmp file. Here are some photos of the process.
The starting image used by F-Engrave. This translated to about 7000 lines of G-code for the cutting operation (which outlines the letters) and the cleaning operation. Everything black will be cut away to a depth of 1.5mm (3 mm parent material, engraving brass). I used a 1mm diameter TC coated end mill from Arc, which worked out brilliantly, I ordered two cutters and didn't break any! My max spindle speed was ~5000 rpm so I limited the feedrate so it took a long time, about 4 hours per plate.
Setting the tool height so zero is on the top of the plate. I run a macro which lowers the tool until it touches the top of my height setter, backs off, then lowers very slowly 'til it touches again, the raises the tool up to 50mm above the surface the setter is sitting on.
Cutting in progress for the first nameplate.
One down, one to go.
Both plates done, ready for sawing out, cleaning up and painting. I know a lot more about engraving now, but I don't think I'll go into the nameplate business! |
| Martin Connelly | 07/01/2017 18:44:52 |
 2549 forum posts 235 photos |
Moulding assemblies for rubber bushed axle blocks for this year's "Trojan" monowheel. Martin |
| Neil Wyatt | 07/01/2017 22:23:13 |
 19226 forum posts 749 photos 86 articles | Wowser! The 3/8" brass tube arrived yesterday. I have no idea of the spec, but it's a the toughest machining brass I've ever come across, it should make excellent bearing bushes! |
| JA | 07/01/2017 22:55:04 |
1605 forum posts 83 photos | The weather has got a little warmer and I have been able to get back into the workshop to continue manufacturing square nuts and square headed bolts. So here is an update on the regulator. The problem was an occasional locking of the Third Wheel assembly. When I put the regulator away back in 2005 I believed the cause was a misshaped tooth on the wheel which I could not see. During the intervening years I have puzzled of this and from the thread on the John Wilding Regulator learnt more. The puzzle was why beginners, new to model engineering, had no problems getting the clock going while those experienced, but without clock experience, appeared to have difficulties. The answer seemed to be that the experienced tried to keep the fit of the pivots in the plate on the tight side. With this in mind I re-assembled the train and gently ran it. Whenever it locked the offending items were found by moving each wheel assembly axially on the end float. Where a pinion and the mating wheel moved together one of the adjacent pivot holes was opened up very slightly with a broach. Once I had a free running train the holes were re-polished and tested. Dry, without oil, it meets John Wilding test with a pin vice. The starting force, single cord without the weight pulley, is 2.5N (0.55lbf) and the running force is 1.8N (0.40lbf). I am happy with this result. It has now been put aside until the next cold spell, forecast for later this week. JA |
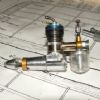
| Bob Rodgerson | 07/01/2017 22:58:33 |
| 612 forum posts 174 photos | I have made a bit more progress on the BSA. |
| Danny M2Z | 08/01/2017 11:06:43 |
 963 forum posts 2 photos | Made .22 rimfire cartridge effective length gauge #16 today - This one is off to the IBU (International Biathlon Union) world championships in February. I have been asked to quote on 50 so it might be time to farm the blocks out to a CNC facility. Fortunately I have the CAD drawings. * Danny M *
|


This thread is closed.
Magazine Locator
Want the latest issue of Model Engineer or Model Engineers' Workshop? Use our magazine locator links to find your nearest stockist!
Sign up to our Newsletter
Sign up to our newsletter and get a free digital issue.
You can unsubscribe at anytime. View our privacy policy at www.mortons.co.uk/privacy
Latest Forum Posts
- hemingway ball turner
04/07/2025 14:40:26 - *Oct 2023: FORUM MIGRATION TIMELINE*
05/10/2023 07:57:11 - Making ER11 collet chuck
05/10/2023 07:56:24 - What did you do today? 2023
05/10/2023 07:25:01 - Orrery
05/10/2023 06:00:41 - Wera hand-tools
05/10/2023 05:47:07 - New member
05/10/2023 04:40:11 - Problems with external pot on at1 vfd
05/10/2023 00:06:32 - Drain plug
04/10/2023 23:36:17 - digi phase converter for 10 machines.....
04/10/2023 23:13:48 - More Latest Posts...
- View All Topics
Support Our Partners


Shopping Partners
Subscription Offer

Latest "For Sale" Ads
- Reeves** - Rebuilt Royal Scot by Martin Evans
by John Broughton
£300.00 - BRITANNIA 5" GAUGE James Perrier
by Jon Seabright 1
£2,500.00 - Drill Grinder - for restoration
by Nigel Graham 2
£0.00 - WARCO WM18 MILLING MACHINE
by Alex Chudley
£1,200.00 - MYFORD SUPER 7 LATHE
by Alex Chudley
£2,000.00 - More "For Sale" Ads...
Latest "Wanted" Ads
- D1-3 backplate
by Michael Horley
Price Not Specified - fixed steady for a Colchester bantam mark1 800
by George Jervis
Price Not Specified - lbsc pansy
by JACK SIDEBOTHAM
Price Not Specified - Pratt Burnerd multifit chuck key.
by Tim Riome
Price Not Specified - BANDSAW BLADE WELDER
by HUGH
Price Not Specified - More "Wanted" Ads...
Get In Touch!
Do you want to contact the Model Engineer and Model Engineers' Workshop team?
You can contact us by phone, mail or email about the magazines including becoming a contributor, submitting reader's letters or making queries about articles. You can also get in touch about this website, advertising or other general issues.
Click THIS LINK for full contact details.
For subscription issues please see THIS LINK.
Digital Back Issues


Donate

 Register
 Log-in
Model Engineer Magazine
- Percival Marshall
- M.E. History
- LittleLEC
- M.E. Clock

ME Workshop
- An Adcock
- & Shipley
- Horizontal
- Mill

Subscribe Now
- Great savings
- Delivered to your door

Pre-order your copy!
- Delivered to your doorstep!
- Free UK delivery!
All Forum Topics > Work In Progress and completed items > The Workshop Progress Thread (2017)