Forum sponsored by:

Lathe design not keeping up
| Gray62 | 29/06/2015 19:22:54 |
| 1058 forum posts 16 photos | The magnetic read heads I used (Machine-dro) are rated IP67 so no issues with foreign body or coolant ingress unless you are planning to use the machine at a depth of 1 metre for more than 30 minutes. (that would be serious 'flood' coolant) I've been considering fitting one under the cross slide instead of on the side as it is now, the cross slide needs to come off sometime soon so that may well happen at the same time. |
| Jon | 29/06/2015 21:20:06 |
| 1001 forum posts 49 photos | Should have had a look at mine Johnny done 5 yrs ago, Harrison M300 and M400 use same parts since part of 600 Group. Magnetic wont fit in the back recess unless fouling the cross slide dovetail often needed, might be last picky showing and rear mount toolpost fitted off it. Remedy mill out and sink scale lower and hang out the back with bracing. Lost 7.2mm where tailstock butts up. **LINK** Used in a small scale heavy production environment daily, about 30 yrs use of diyer. Coolant used and wipers not needed. Would only recommend the 1 micron read heads not about at the time, the 5 micron I have cause some grief for fine threading and repeatability.
|
| S.D.L. | 29/06/2015 21:58:33 |
| 236 forum posts 37 photos |
Posted by John Stevenson on 29/06/2015 14:08:02: Good point Steve. You have now got me thinking. I assumed [ yes we all know the saying ] it was Whit as this machine also has a load of 3/16" on it but checking as not familiar with numbered unified threads there is a #10 at 0.190 x 24 which is only a couple of thou up on 3/13" whit.
So far I haven't found any fine threads on this machine but I'm working at casting level which is ideal for course threads.
A quick check on some non cleaned up holes with a 1/4" whit and 1/4" UNC cap screw and both go in with the same fit. I know they shouldn't because of pitch angle but most screws are very loose on tolerance.
I need to find some fine threads to see the difference. However any extra bolts going into cleaned up tapped holes will be 1/4" whit as I have boxes and boxes of these but only a very few UNC's Tapped holes on the DRO brackets will be metric as the rest of the DRO's are all metric.
[ EDIT ]
Found a large course grub screw that sets the end float on the start / stop shaft 1/2 x 13 so it is a UNC machine. Thanks Steve Edited By John Stevenson on 29/06/2015 15:55:57 Just checked my Manual all 1/4 & 5/16 screws are UNC The number ones are all 10-24 guess yours will be similar Steve |
| Muzzer | 14/07/2015 17:32:20 |
 2904 forum posts 448 photos | John - have you finished upgrading the Bantam yet? Wondering what other enhancements you ended up with in the end. Murray |
| mike mcdermid | 14/07/2015 20:32:37 |
| 97 forum posts | Posted by John Stevenson on 28/06/2015 13:14:32:
Collective answers and questions.
Mike, Never thought about magnetic strips, how do these cope with flood coolant ? Plus I already had this DRO setup. Neil, 2 M4 cap heads supplied with the scale, didn't realise you could TiG weld alloy to cast ?
Murray, I'll get some pics from the back later today and post them. Yes the read head is at the rear and again mounts to two existing 1/4" Whit tapped holes in the carriage. I used a slice sawn off a generic scale bracket left over from fitting another kit.
Saddle comes off easy and just as you say. Bracket off, the two dowels are tapped 2BA for an extractor, screws out, they just pull thru. Apron is secured by 4 cap screws, two front, two rear in the 'top wings ' of the apron and it drops clear. Then the saddle slides off the back and you can upend it to remove the retainers if needed.
Long scale will fit where the taper turning should fit which for me isn't a problem as I never use one, much prefering to use a boring head offset in the tailstock. That should be uneventful except for making a read head bracket that mimics the angle of the bed where the TT should sit.
Next job will be bed wipers. Apparently these are available from the 600 group at around £110 to £120 for the 4 plasticy / rubber bits which in my book is a bit excessive. Toyed with 3D printing the wipers but not sure if there is a suitable filament ? Perhaps someone knows ? Even buying a full spool will be cheaper and some could be sold on.
Alternative is to think outside the box and redesign them taking off the shelf components so any future replacements cost pence. More on this later plus the rear photo's.
Grass cutting and brick laying calls. Pretty similar story i just had the magnetic one lying about from another As other said they are Ip 67 so cooland doesnt affect them When i schemed it out for the bloke it too had the Glass scale hung off the back on the cross slide though i made some clamps to clamp grip the rear flat guideway thus eliminating the 15 degree slant
|
| Boiler Bri | 14/07/2015 21:39:16 |
 856 forum posts 212 photos |
I keep looking at uni mats on eBay. I like the size as I could have one on the dining table and make small parts for my engines. Wife should be happy as I am only in the next room and not at the outside workshop ( garage), I also know how to work the vacuum thing To clean up. HOWEVER they are so expensive for second hand ones. ⚡️I have some 25mm linear slides, why not make a lathe for the dining table, it would look cool at the side of the "plant" on the table😉. So I have started to draw me a home made lathe for domestic use age next to the 🌿. I will use a Panasonic motor, just cos I have one. Spindle nose will suit unimat chucks etc. Slow project so don't expect regular updates. Bri |
| John Stevenson | 15/07/2015 20:55:11 |
 5068 forum posts 3 photos | Posted by Muzzer on 14/07/2015 17:32:20:
John - have you finished upgrading the Bantam yet? Wondering what other enhancements you ended up with in the end. Murray .
Had to take back seat for a while, been away for two weeks and now playing catch up. Still need to finish the rear DRO mounting and then the wipers are next but had a brilliant out of the box thought about these. Watch this space but will be next week now.
Things left to do are the modify the two steadies I just located to fit, they are 1" too high but other than that fit perfect. Fit one of the I-Gauging scales to the tailstock and then just a reassembly of the machine. |
| Muzzer | 15/07/2015 22:41:21 |
2904 forum posts 448 photos | In terms of wipers, what function do you think they should do? I can't completely convince myself quite what the ideal mechanism is. Should they be completely wiping the ways clear each time they pass, rather like a squeegee? Or leaving the oil but pushing the swarf out of the way? Or sweeping swarf out of the way and actively spreading oil on the ways? I would think the middle way myself but it's rather critical to decide which is best. The wipers that I removed had gone hard and possibly shrivelled, so difficult to draw any conclusions. Looking through some photos earlier I came across a couple of photos of the wipers I made using felt and a set of wood chisels and hole punches. To my mind they clear swarf but leave a film of oil. Murray
|
| Ady1 | 16/07/2015 01:23:52 |
 6137 forum posts 893 photos | Looking through some photos earlier I came across a couple of photos of the wipers I made using felt and a set of wood chisels and hole punches. To my mind they clear swarf but leave a film of oil. Getting a bit boring I suppose but if you want to clean out your ways use your favourite oil mixed with colloidal graphite The crap just drops out, it doesn't allow anything to stick to anything Wipe the residue off your ways with a tissue and drop on a bit more CG impregnated oil We've all heard of penetrating oil over the decades, well this stuff actually penetrates |
| JasonB | 16/07/2015 07:34:45 |
 25215 forum posts 3105 photos 1 articles | Posted by John Stevenson on 15/07/2015 20:55:11:
Things left to do are the modify the two steadies I just located to fit, they are 1" too high but other than that fit perfect. Owners of the Bantam 2000 with its 1" higher centre height won't thank you for that |
| John Stevenson | 17/07/2015 00:22:56 |
5068 forum posts 3 photos | Thanks for that Jason, I wondered what they were off. I know they weren't Student as the bed is wider. Still going to modify them as steadies for a 1600 are quite rare, start at £120 and go upwards and these two were free.
Whilst we are on the "What does it fit ? "
I have a faceplate, 16" diameter on a D1-3 fitting. Seems a very small fitting for a large plate and what lathe that has D1-3 has a gap that big to take this ? |
| JasonB | 17/07/2015 07:25:52 |
25215 forum posts 3105 photos 1 articles | Some of the 2000s also had a gap bed!! |
| John Stevenson | 14/11/2015 21:48:49 |
5068 forum posts 3 photos | OK was in two minds whether to post this in the Bodgers Lodge thread or not, it's borderline so anyone of a nervous disposition need not continue further.
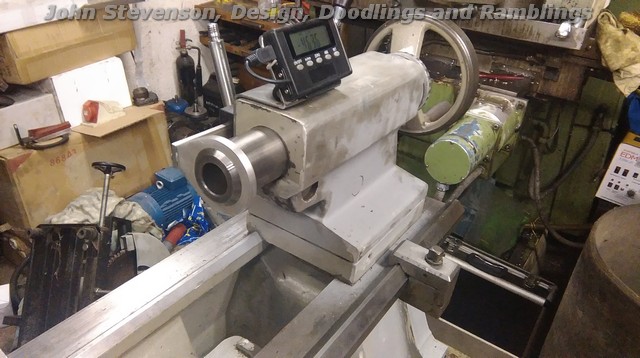
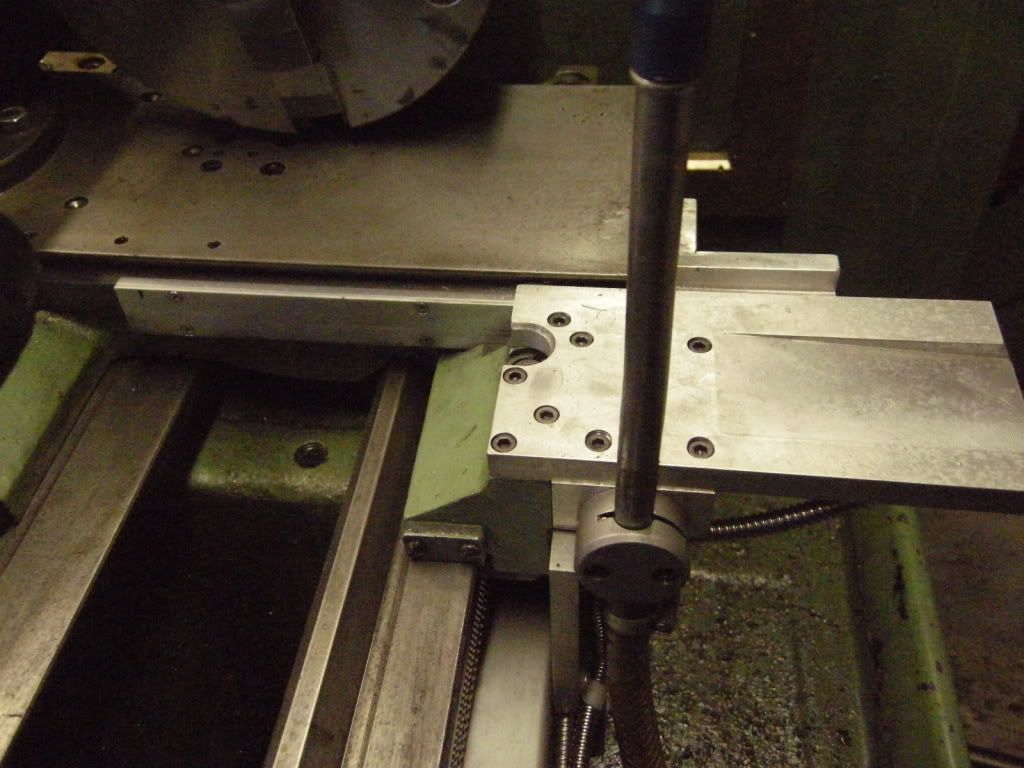
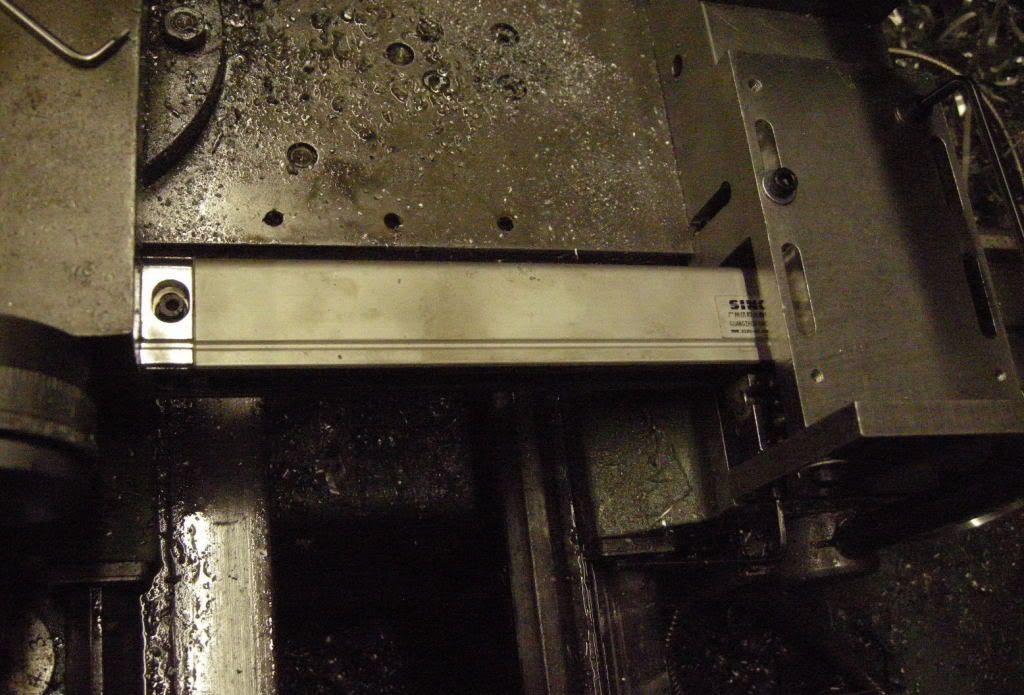
Rear DRO mounting finished and tested, no pictures unless needed as very basic. Next job is to fit one of the iGauging scales to the tailstock. Got these on the other 3 lathes and could not do without. Tailstock on the Bantam is squarish at the top so choice of 3 sides to mount it. Front mounted gets in the way of the top slide. Top mounted leaves it quite vulnerable so rear mounted looks the best and all the others are rear mounted as well and work well and out the way.
One problem on the Bantam is the barrel lock has a vertical spindle and there isn't enough room between to get the scale, so warm the spindle up at the bottom and give a slight tweak, better but still not enough and also the shape of the casting is not conductive to the scale following on.
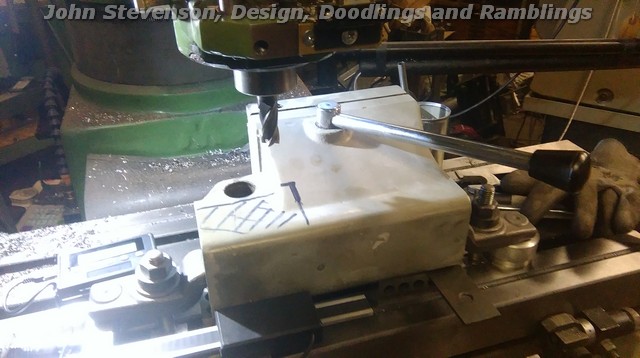
SO, stick it on the mill and after careful and very, very accurately marking out, remove the bit in the way.
Mill enough away so that the read head fits. Then follow up with clearance for the scale.
Offer it up for a test and jobs a good un. That broken bolt BTW is just holding the read head down so it doesn't tip. Plenty of clearance now.
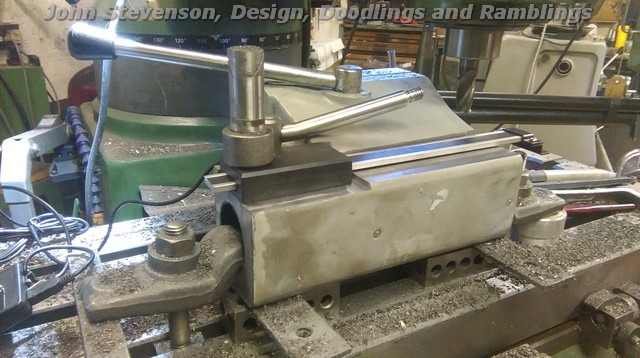
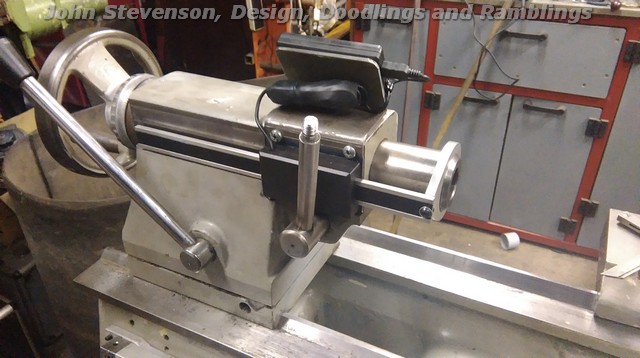
Bit of a plate bracket and shot from the back.
And from the front.
That's as far as I got tonight as a hungry dog stopped play. Just need the clamp to go round the barrel and connect to the scale and poke the surplus of wire into a heat shrink sleeve and warm it up.
The whole lathe is also in for a repaint so all these mods will soon blend in.
Edited By John Stevenson on 14/11/2015 21:53:45 |
| Hillclimber | 15/11/2015 07:35:03 |
 215 forum posts 51 photos | Repaint eh? Let's see what kind of crowd that draws..... Thanks for these posts. Cheers, Colin |
| John Stevenson | 15/11/2015 22:12:10 |
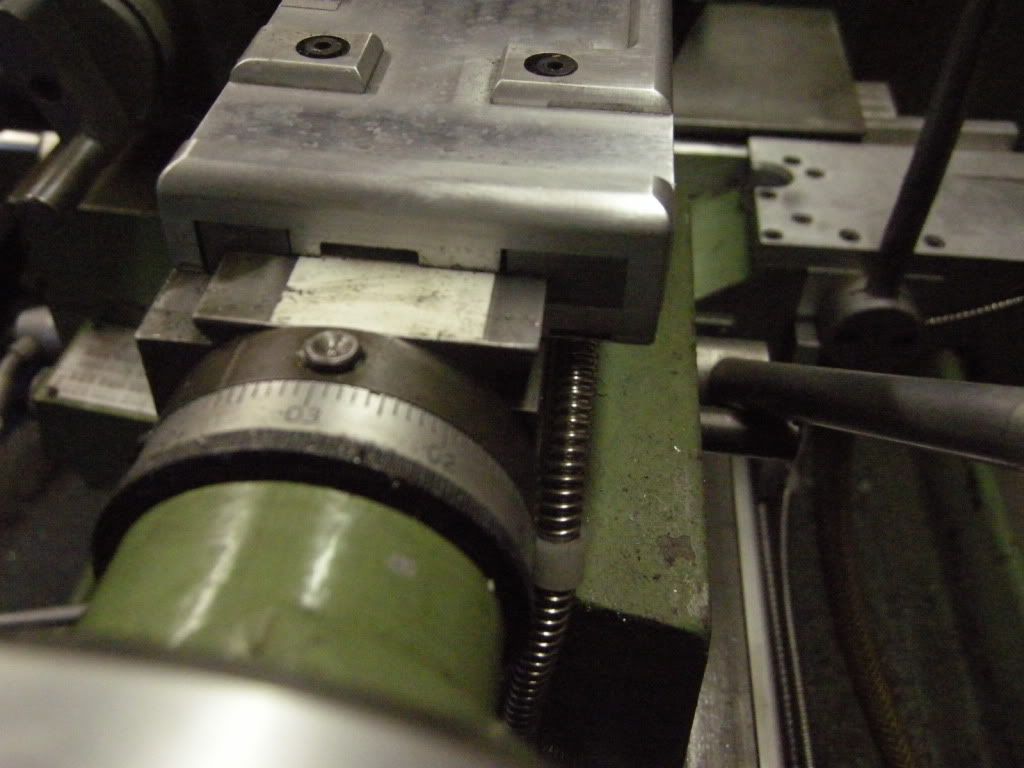
5068 forum posts 3 photos | Only managed to get a bit done to the Phantom Bantam today but got the tailstock finished.
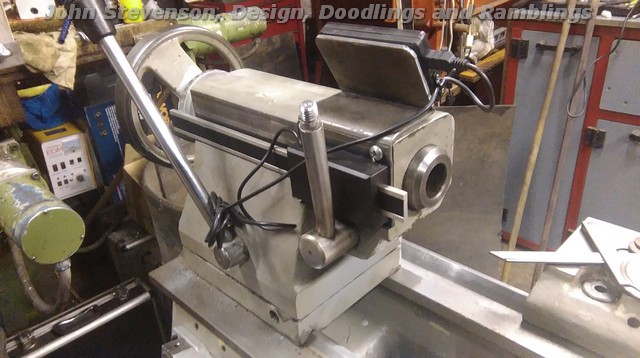
Front view:-
Rear view with the wiring in heat shrink.
The bracket is drilled and once painted the cable bunch will be held with two cable ties for neatness.
Next on the agenda are the wipers.
The 600 group has these for £125 the set of 4. They are obviously that proud of them it would be shame to force them to part with them. Got an idea but if it works it will be an article for Neil. If it doesn't work it will be felt seals
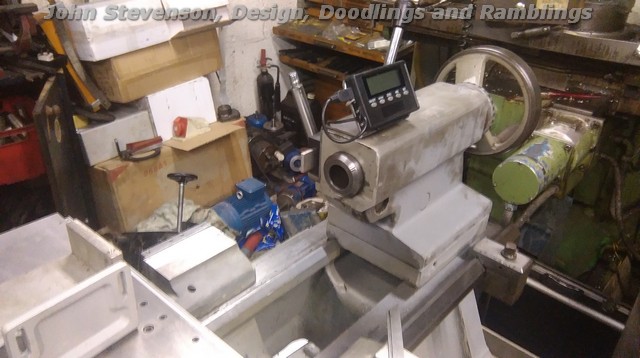
Just noticed looking at the last picture I have not drilled the cross slide for ball oilers, done the saddle and increased then from two small to 4 large but for some reason the cross slide has no method of oiling other than a squirt on the ways ??? Edited By John Stevenson on 15/11/2015 22:14:33 |
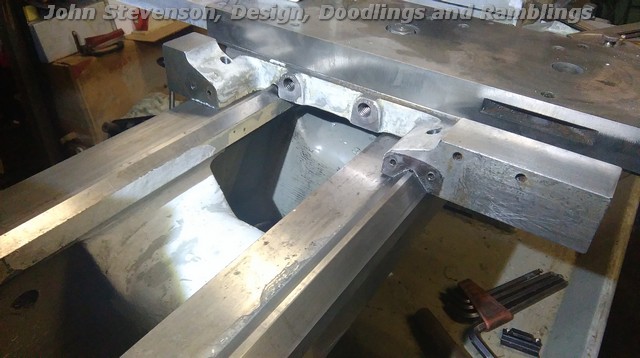
| John Stevenson | 18/11/2015 23:39:48 |
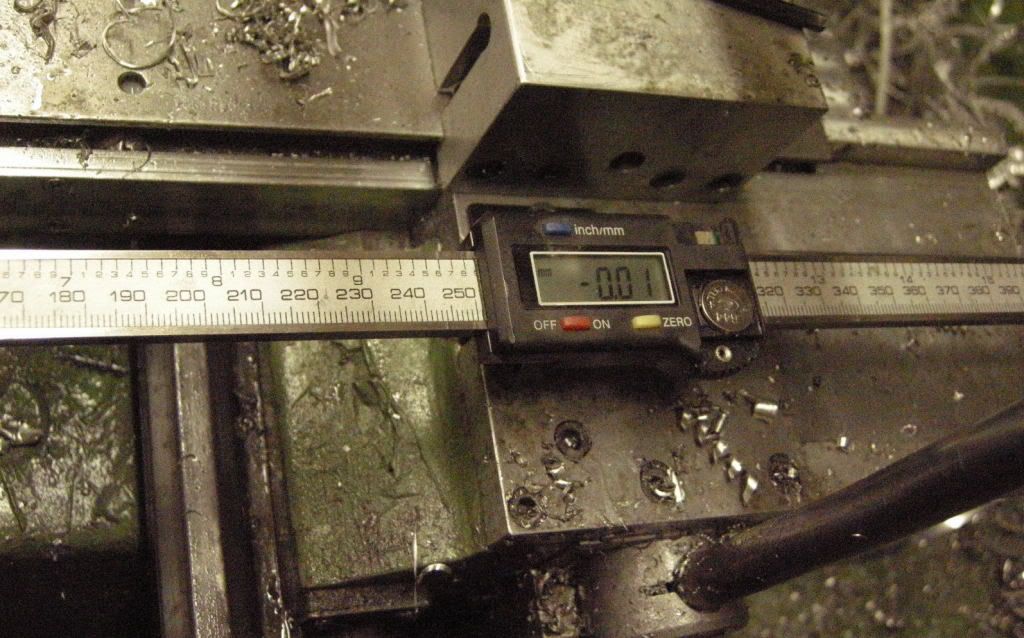
5068 forum posts 3 photos | So a bit disgusted tonight. Pulled the cross slide off to fit some ball oilers and this is what I see.
Nothing.
No oil ways, no method of getting oil onto the slides at all.
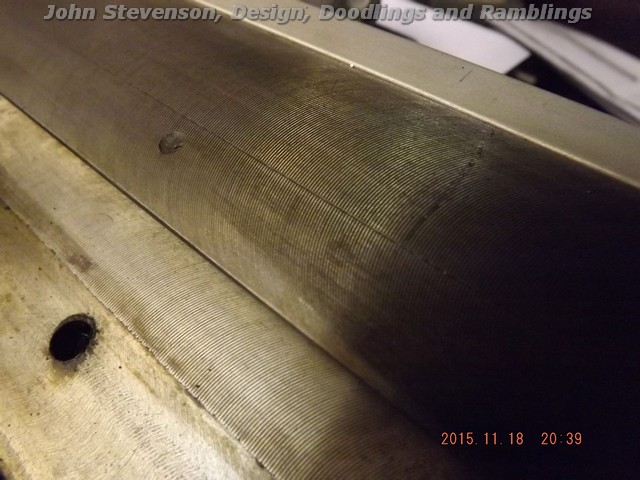
Then to add insult to injury this is close up.
Just a fly cut finish, no grinding, no scraping and the mating face is the same. I was under the impression that these were a class machine, far more attention to detail than the cheap imports ? Sorry, colour me pi$$ed off. Even a SC3 or a C3 has ground slides and ball oilers. So now got to spent the best part of a night scraping this in when it should not be necessary. EDIT. I suppose someone will say the fly cutting marks will hold oil and I must agree IF it was able to get oil under the slide in the first place Edited By John Stevenson on 18/11/2015 23:43:31 |


Please login to post a reply.
Magazine Locator
Want the latest issue of Model Engineer or Model Engineers' Workshop? Use our magazine locator links to find your nearest stockist!
Sign up to our Newsletter
Sign up to our newsletter and get a free digital issue.
You can unsubscribe at anytime. View our privacy policy at www.mortons.co.uk/privacy
Latest Forum Posts
- *Oct 2023: FORUM MIGRATION TIMELINE*
05/10/2023 07:57:11 - Making ER11 collet chuck
05/10/2023 07:56:24 - What did you do today? 2023
05/10/2023 07:25:01 - Orrery
05/10/2023 06:00:41 - Wera hand-tools
05/10/2023 05:47:07 - New member
05/10/2023 04:40:11 - Problems with external pot on at1 vfd
05/10/2023 00:06:32 - Drain plug
04/10/2023 23:36:17 - digi phase converter for 10 machines.....
04/10/2023 23:13:48 - Winter Storage Of Locomotives
04/10/2023 21:02:11 - More Latest Posts...
- View All Topics
Support Our Partners


Shopping Partners
Subscription Offer

Latest "For Sale" Ads
- Reeves** - Rebuilt Royal Scot by Martin Evans
by John Broughton
£300.00 - BRITANNIA 5" GAUGE James Perrier
by Jon Seabright 1
£2,500.00 - Drill Grinder - for restoration
by Nigel Graham 2
£0.00 - WARCO WM18 MILLING MACHINE
by Alex Chudley
£1,200.00 - MYFORD SUPER 7 LATHE
by Alex Chudley
£2,000.00 - More "For Sale" Ads...
Latest "Wanted" Ads
- D1-3 backplate
by Michael Horley
Price Not Specified - fixed steady for a Colchester bantam mark1 800
by George Jervis
Price Not Specified - lbsc pansy
by JACK SIDEBOTHAM
Price Not Specified - Pratt Burnerd multifit chuck key.
by Tim Riome
Price Not Specified - BANDSAW BLADE WELDER
by HUGH
Price Not Specified - More "Wanted" Ads...
Get In Touch!
Do you want to contact the Model Engineer and Model Engineers' Workshop team?
You can contact us by phone, mail or email about the magazines including becoming a contributor, submitting reader's letters or making queries about articles. You can also get in touch about this website, advertising or other general issues.
Click THIS LINK for full contact details.
For subscription issues please see THIS LINK.
Digital Back Issues


Donate

 Register
 Log-in
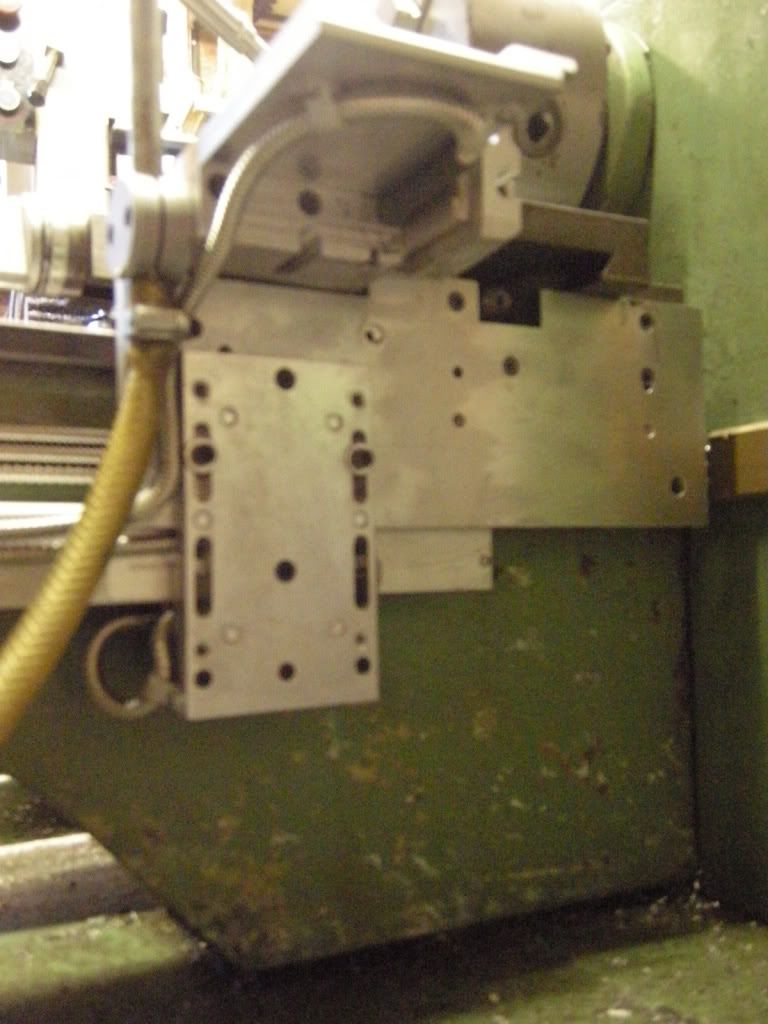
Model Engineer Magazine
- Percival Marshall
- M.E. History
- LittleLEC
- M.E. Clock

ME Workshop
- An Adcock
- & Shipley
- Horizontal
- Mill

Subscribe Now
- Great savings
- Delivered to your door

Pre-order your copy!
- Delivered to your doorstep!
- Free UK delivery!
All Forum Topics > Manual machine tools > Lathe design not keeping up