How to measure bores
| Peter G. Shaw | 08/05/2015 19:35:53 |
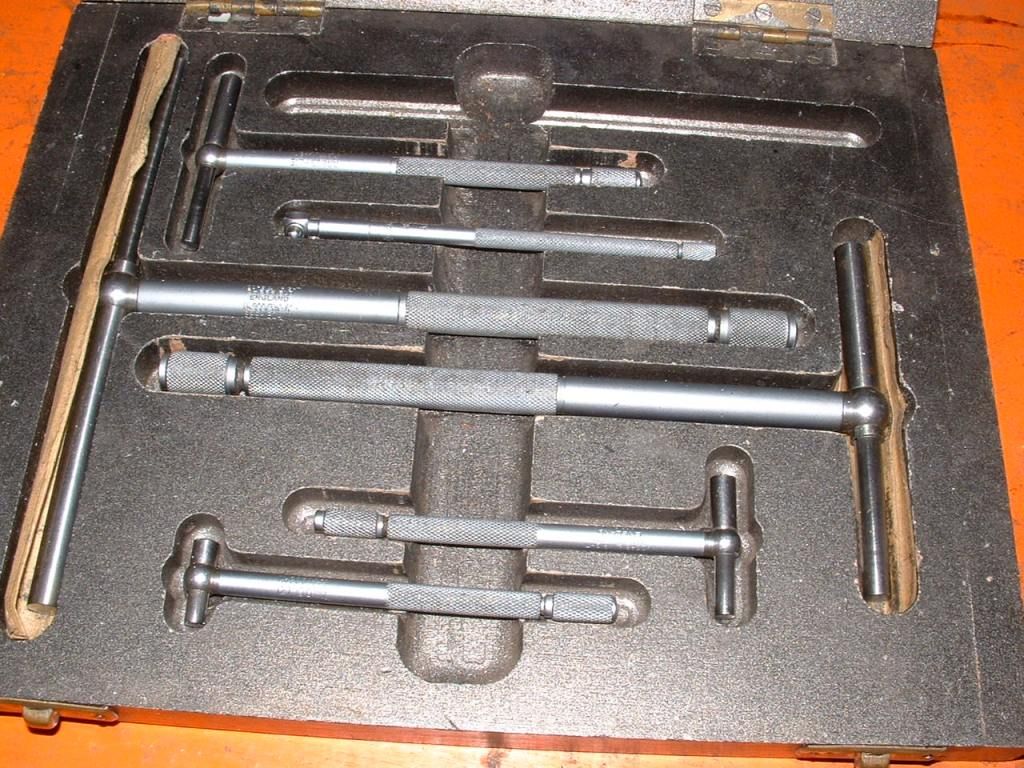
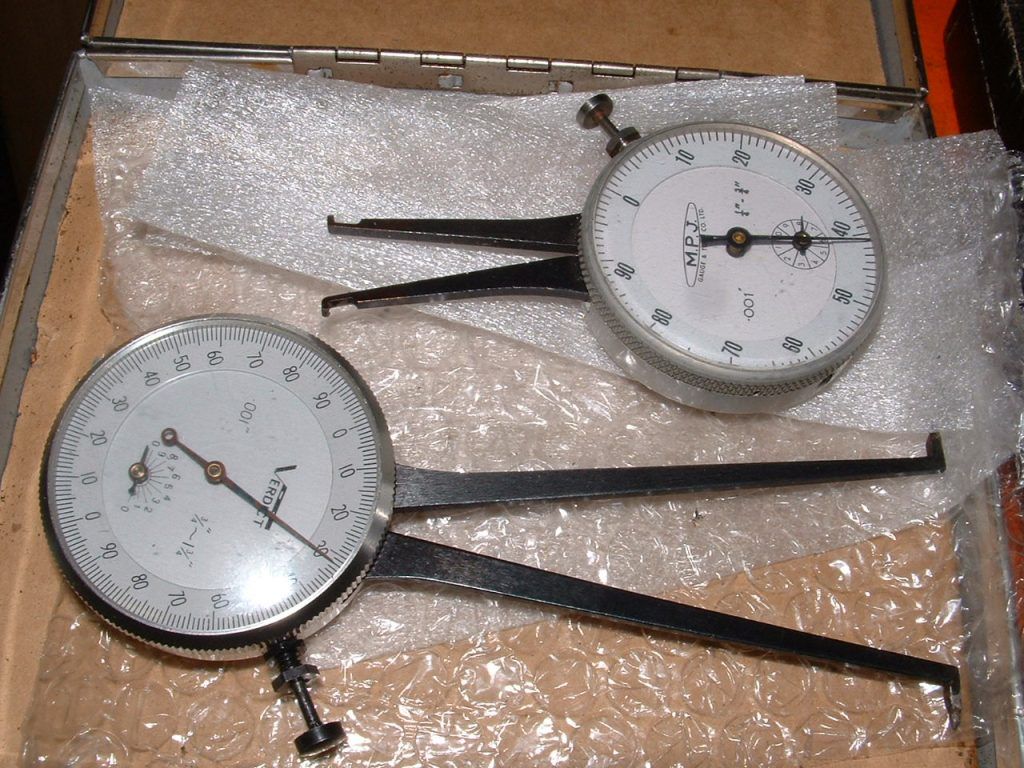
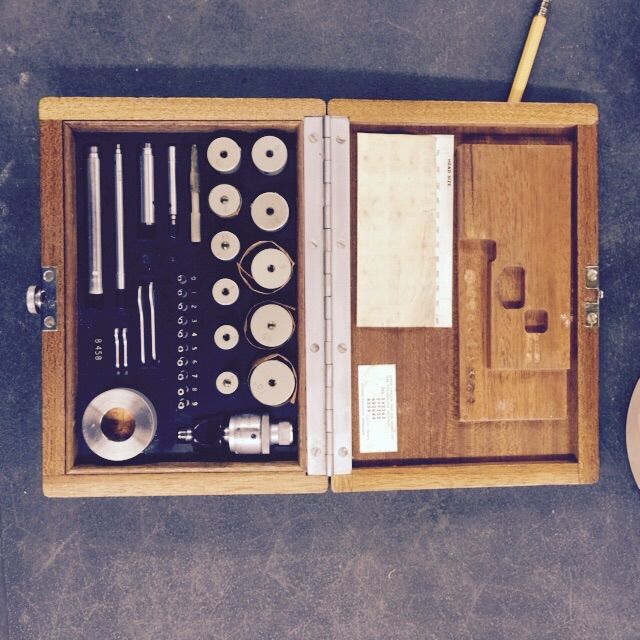
1531 forum posts 44 photos | Hi folks, I am attempting to produce a part with a bore of 13.98mm diameter x about 22mm long. As you would expect, I am producing this on the lathe but am experiencing difficulties measuring it. First choice was an internal caliper, but mine has a minimum capacity of 15mm. 2nd choice was a 100mm dial caliper with a resolution of 0.02mm Although I specifically bought this tool because of its size for use on the lathe, I have found it awkward to use for measuring bores, due, I think, to the shortness of the internal jaws, together with difficulty in determining accurate location across the diameter. Third choice was Starrett 150mm dial caliper with a resolution of 0.01mm. This was, much to my surprise, much easier to use than the 100mm dial caliper, but even so, there were problems determining accurate location across the diameter. Furthermore, neither caliper would reach very far down the bore. In the end, I produced a set of Go/NoGo gauges and these did the job. I'm now wondering about a set of "Small Hole Gauges" covering the range 3mm - 13mm and a set of Telescopic Gauges covering the range 8 - 150mm. such as those sold by Arc Euro Trade. Does anyone have any thoughts about these items? Problems with their use? Things to look out for? Not specifically Arc's items, but these tools in general. Regards, Peter G. Shaw |
| Michael Gilligan | 08/05/2015 19:45:10 |
23121 forum posts 1360 photos | Posted by Peter G. Shaw on 08/05/2015 19:35:53:
Does anyone have any thoughts about these items? Problems with their use? Things to look out for? Not specifically Arc's items, but these tools in general. . Thought 1. ... They'e made for the job. Thought 2. ... You need to develop a 'feel' for using them. Thought 3. ... Good Quality and Good Condition are both helpful. MichaelG. |
| Andrew Johnston | 08/05/2015 19:57:56 |
7061 forum posts 719 photos | I have both sets. I use the small hole gauge set (Mitutoyo) on occasion; it seems reasonably accurate. As for the telescopic gauges I can't remember where they are, ie, I never use them. They're certainly no better, and probably worse, than internal micrometers. Anything over an 1" and non-critical I use an internal micrometer. For anything accurate I make a gauge, usually stepped 5 thou under, 1 thou under and on size, as best as I can measure. As you have discovered accurate bore measurement is non-trivial, and may require expensive bore micrometers to do properly. Andrew |
| Nigel McBurney 1 | 08/05/2015 20:04:50 |
1101 forum posts 3 photos | A set of telescope gauges is a useful and economical way to measure bores, first of all they must be be from a good quality manufacturer, Moore and Wright used to make very good ones (made in UK many years ago) Mitutoyo are nearly as good I have examples from both makes.The skill is keeping the telescopic part square to the bore and then keep it square again again when measuring it with a micrometer, for fine limits always use a micrometer not a vernier.I also have a M & W set of small hole gauges they are good for bores under half an inch, An older type of vernier with jaw about 5mm thick and a direct scale reading vernier,and have the internal jaws with a radius so that they will go into holes from 1/4 inch upwards, these can only measure about 3/8 into the bore. they can be very accurate if the vernier jaws are rigid and in good condition,the actual measurement can be taken by measuring across the jaws with a micrometer, if you are measuring to less than a thou a micrometer reading will always be more accurate than a vernier reading, if the mating shaft is measured with the same micrometer then you do not have the possible inaccuracy introduced by two measuring instruments . Essentially the vernier is being used as a sliding gauge,but it does gives good results, my vernier a Swiss Roche Etalon was a gift from the company on completion of my apprenticeship,when the boss gave it to me he said "never lend your vernier to anyone,if its dropped its ruined" I have found that the repeatabilty of readings is not so good with more modern verniers having knife edge jaws,particularly when machining bores for light fits for bearings,cheating with loctite only came into general use after I finished my training. |
| Emgee | 08/05/2015 20:34:29 |
| 2610 forum posts 312 photos | Peter My choice would be a telescopic gauge set in the bore and when removed from the bore measured across the tips with a micrometer. As has already been stated a certain 'feel' is required when using this method. To confirm bore is parallel use a dial caliper as below, you could also use this method to measure the bore by setting mic to desired setting and compare with caliper reading when in the bore. There are numerous methods used by engineers and we use the method for which we have the tools, if cost isn't a consideration there are many more choices, see my album for some more bore measuring tools. Emgee |
| Neil Wyatt | 08/05/2015 21:34:49 |
19226 forum posts 749 photos 86 articles | I have a Chronos set of telescoping gauges, used with care they have always worked fine for me. I set them slightly oversize and not to tight so 'rocking' them squeezes the gauge down to bore size. Have to be careful not to squash them closed a bit more with the mike. Neil |
| ANDY CAWLEY | 08/05/2015 22:25:13 |
| 190 forum posts 50 photos |
Look for one of these on eBay it is a Coventry Gauge Micro Maag.. Believe it or not I paid about 40 quid!!!
Edited By ANDY CAWLEY on 08/05/2015 22:26:55 Edited By ANDY CAWLEY on 08/05/2015 22:31:47 |
| websnail | 08/05/2015 22:40:04 |
| 62 forum posts | 1st go/no go gauges 2nd Internal mics 3rd (money no object) air gauge **LINK** |
| steamdave | 08/05/2015 23:28:42 |
| 526 forum posts 45 photos | Posted by Michael Gilligan on 08/05/2015 19:45:10:
Posted by Peter G. Shaw on 08/05/2015 19:35:53:
Does anyone have any thoughts about these items? Problems with their use? Things to look out for? Not specifically Arc's items, but these tools in general.
Thought 2. ... You need to develop a 'feel' for using them.
MichaelG. No-one has explained how to get the feel for using these gauges. Insert the gauge in the bore at an angle and lightly nip up the tips. Now swing the gauge past the true diameter thus reducing the span of the tips. The tips, being lightly nipped should not slip out when they are swung past the true diameter. Remove gauge from the bore and tighten up before using your measuring instrument of choice. There may be other ways I admit, but this is how I do it and within the limits of my mediocre machining ability, works for me. Dave |
| John Ockleshaw 1 | 09/05/2015 02:01:01 |
56 forum posts 7 photos | Hello All, If you have a deep pocket the Brown & Sharpe "Intrimiks" style of bore gauge are friendly to use and repeatable. They have 3 points of contact, can reach down deep holes and to within 0.050" of the bottom in a blind hole. Each one only has a limited range, you need 11 of them to cover the range 0.235" to 2.000" John |
| Paul Lousick | 09/05/2015 11:08:40 |
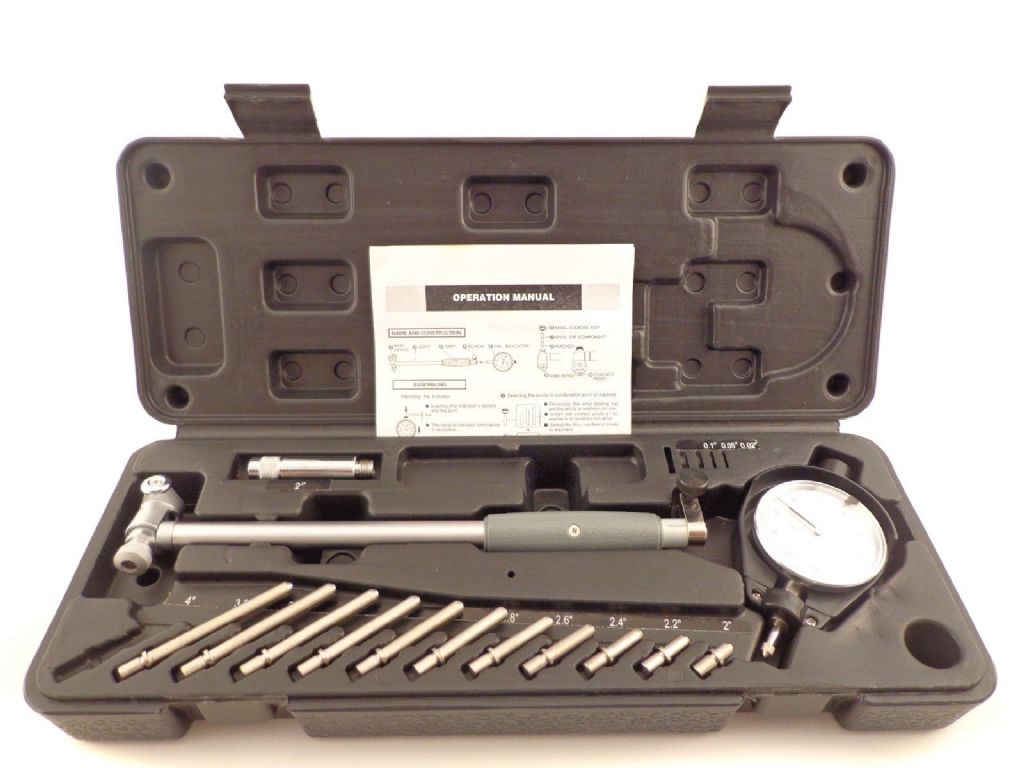
| 2276 forum posts 801 photos | Another option to telescopic gauges is a dial bore gauge. Available in different ranges and comes with a dial indicator. |
| Peter G. Shaw | 09/05/2015 20:48:32 |
1531 forum posts 44 photos | Thanks for all the replies. They make interesting reading, and as usual with me, have served to spark off other thoughts. And for that alone I am grateful. Originally, I was thinking about both the small hole gauge set which covers 3-13mm (which would not be enough for the present project) together with the telescopic gauge set covering 8 to 150mm. But then I realised that as this is the first time in a goodly number of years that I have hit this problem (which says much about my capabilities and usage, does it not), then perhaps I should rethink the problem. In addition measuring capability of 150mm? Do I really need that? Then it dawned on me that the main reason was that I couldn't get the internal calipers down far enough, so for this project, why not file 1.5mm of the inside of each leg thus achieving a minimum of 12mm. These are, or were, cheap calipers picked up somewhere and could be replaced if I made a mess of them. And so, inexorably, I'm now looking at a set of 100mm internal calipers together with the small hole gauge set. In respect of feel, and how to use internal calipers, I have used them and found them relatively easy to use, and do indeed know about anchoring one leg against the internal wall, and rocking and adjusting the other leg until there is a minimum of rock. So that, at present, looks like the way I shall go. Regards, Peter G. Shaw
|
Please login to post a reply.
Want the latest issue of Model Engineer or Model Engineers' Workshop? Use our magazine locator links to find your nearest stockist!
Sign up to our newsletter and get a free digital issue.
You can unsubscribe at anytime. View our privacy policy at www.mortons.co.uk/privacy
- *Oct 2023: FORUM MIGRATION TIMELINE*
05/10/2023 07:57:11 - Making ER11 collet chuck
05/10/2023 07:56:24 - What did you do today? 2023
05/10/2023 07:25:01 - Orrery
05/10/2023 06:00:41 - Wera hand-tools
05/10/2023 05:47:07 - New member
05/10/2023 04:40:11 - Problems with external pot on at1 vfd
05/10/2023 00:06:32 - Drain plug
04/10/2023 23:36:17 - digi phase converter for 10 machines.....
04/10/2023 23:13:48 - Winter Storage Of Locomotives
04/10/2023 21:02:11 - More Latest Posts...
- View All Topics
- Reeves** - Rebuilt Royal Scot by Martin Evans
by John Broughton
£300.00 - BRITANNIA 5" GAUGE James Perrier
by Jon Seabright 1
£2,500.00 - Drill Grinder - for restoration
by Nigel Graham 2
£0.00 - WARCO WM18 MILLING MACHINE
by Alex Chudley
£1,200.00 - MYFORD SUPER 7 LATHE
by Alex Chudley
£2,000.00 - More "For Sale" Ads...
- D1-3 backplate
by Michael Horley
Price Not Specified - fixed steady for a Colchester bantam mark1 800
by George Jervis
Price Not Specified - lbsc pansy
by JACK SIDEBOTHAM
Price Not Specified - Pratt Burnerd multifit chuck key.
by Tim Riome
Price Not Specified - BANDSAW BLADE WELDER
by HUGH
Price Not Specified - More "Wanted" Ads...
Do you want to contact the Model Engineer and Model Engineers' Workshop team?
You can contact us by phone, mail or email about the magazines including becoming a contributor, submitting reader's letters or making queries about articles. You can also get in touch about this website, advertising or other general issues.
Click THIS LINK for full contact details.
For subscription issues please see THIS LINK.
Model Engineer Magazine
- Percival Marshall
- M.E. History
- LittleLEC
- M.E. Clock
ME Workshop
- An Adcock
- & Shipley
- Horizontal
- Mill
Subscribe Now
- Great savings
- Delivered to your door
Pre-order your copy!
- Delivered to your doorstep!
- Free UK delivery!


 Register
 Log-in


