Forum sponsored by:

The Workshop Progress thread 2018
| Another JohnS | 05/03/2018 21:50:15 |
| 842 forum posts 56 photos | Posted by Neil Wyatt on 05/03/2018 20:43:20:
Well done John, looks great. How long did it take you? Neil In terms of hours or the passage of time? Passage of time - life gets in the way, and people (especially kids) come first. Workshop progress dropped to almost nothing for quite a while. Lets say, 20 years start to finish. Recently, some parts of it can be seen in the couple of ME articles I wrote regarding CNC machining. I'm hoping my long-dormant "Ivatt" 2-6-0 (also in 3-1/2" gauge) will be running in 2019; the remaining big items are the cylinders and running gear. We'll see; crossing fingers that life keeps being stable for a while!
|
| Neil Wyatt | 06/03/2018 09:28:31 |
 19226 forum posts 749 photos 86 articles | I had a feeling 'A fun project!' was a bit of a simplification Rewarding to reach the end point on such long project, |
| mechman48 | 08/03/2018 21:57:32 |
 2947 forum posts 468 photos | Caught up with my Vertical cross engine. made the base with some MDF offcut & 10mm pine. trial assembled, starting to look like some thing now, still a lot to do, any help with polishing aluminium top plate would be appreciated, I do have wet & dry emery paper plus a couple of buffing wheels & polish, just enquiring about other methods... |
| Jim Nic | 09/03/2018 12:11:01 |
 406 forum posts 235 photos | Indeed looking like summat now George. Can't offer any advice re polishing the ali top plate, for my Popcorn I engine turned the base and then laquered it for protection. Seems to be working to keep it shiny and easy to wipe away dust and oil so I would certainly recommend a coat of laquer. How are you going to connect the air (or steam) to it? It appears you have a hollow wood base so a connection in the side of the wood and then up through the MDF to the inlet valve would look neat.
This is just a brass turning with an M6 threaded hole for the connector glued in to a hole in the brown stuff and piped to the connector in the ali base. Jim |
| mechman48 | 09/03/2018 14:36:28 |
2947 forum posts 468 photos | Jim That's precisely what I'm going to do... |
| mechman48 | 11/03/2018 00:47:27 |
2947 forum posts 468 photos | Did a bit more on the vertical cross engine, mainly the base, but am having second thoughts on the colour scheme... Edited By mechman48 on 11/03/2018 00:49:01 Edited By mechman48 on 11/03/2018 00:50:20 |
| JasonB | 11/03/2018 07:31:23 |
 25215 forum posts 3105 photos 1 articles | I think some thin flat wood or the Brick/Stone on the sides may tone things down a bit particularly if you are still intending to polish the entablature. |
| Jim Nic | 11/03/2018 11:19:50 |
406 forum posts 235 photos | Bricks, for sure. Jim |
| mechman48 | 11/03/2018 12:09:38 |
2947 forum posts 468 photos |
Edited By mechman48 on 11/03/2018 12:30:47 |
| JasonB | 11/03/2018 17:42:20 |
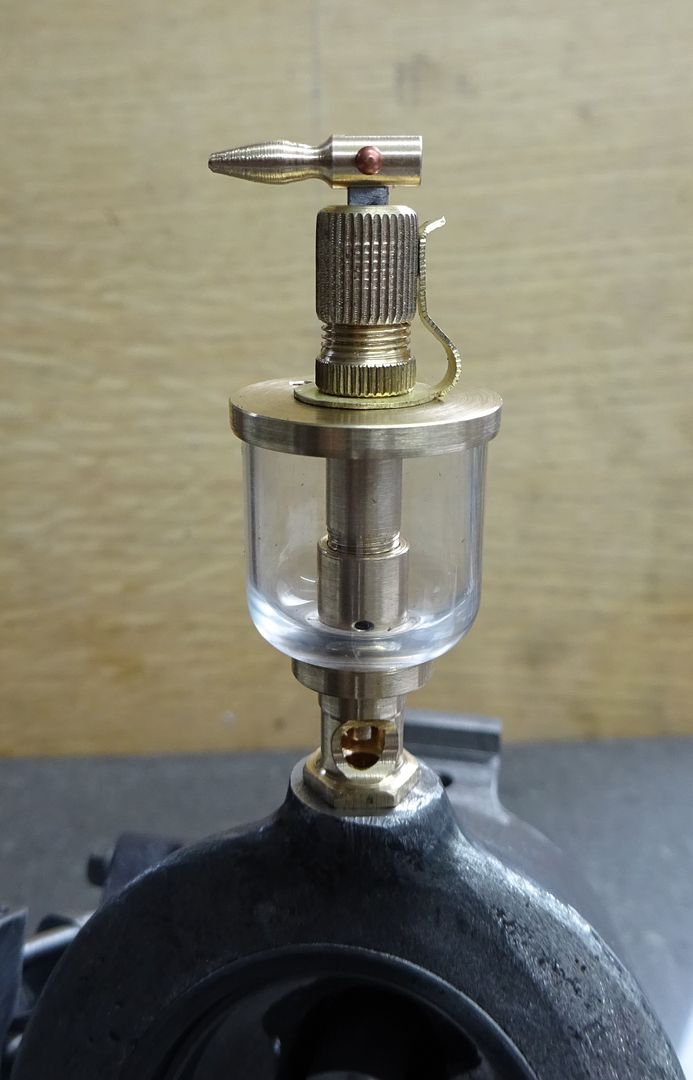
25215 forum posts 3105 photos 1 articles | I made up the drip feed oiler for the Robinson X-Type, bit different from the usual ones which just use a short length of glass tube and flat end plates. This one is a wineglass form and the bowl was machined from 20mm acrylic rod, quite please with how it came up after working down through the Micro-Mesh grits.
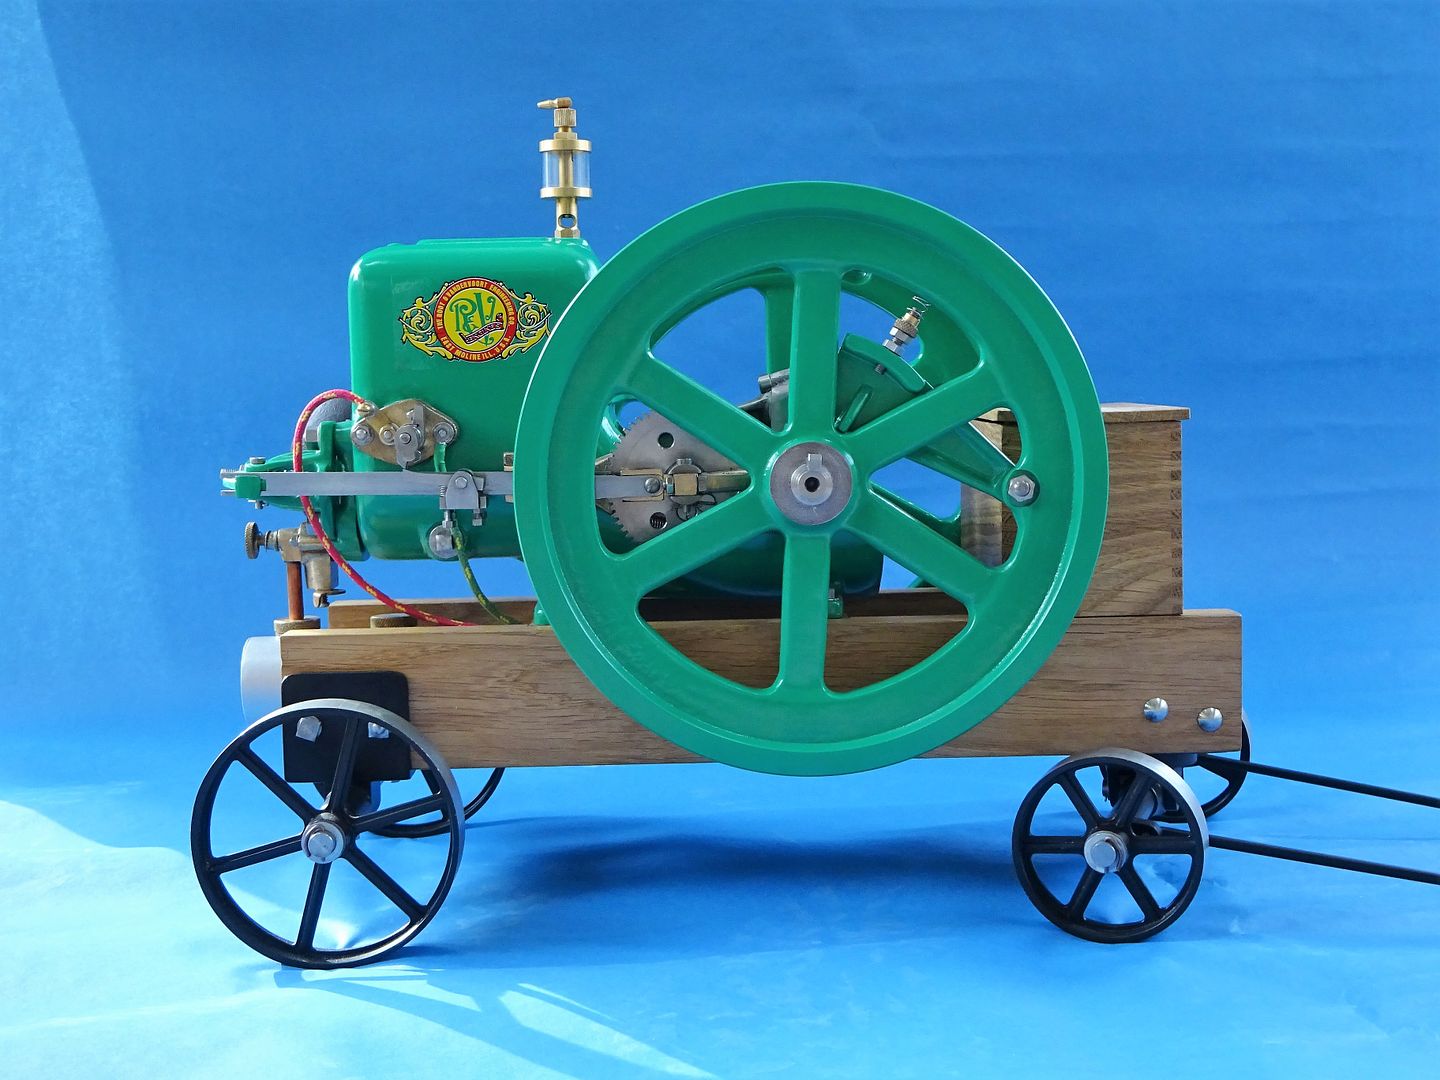
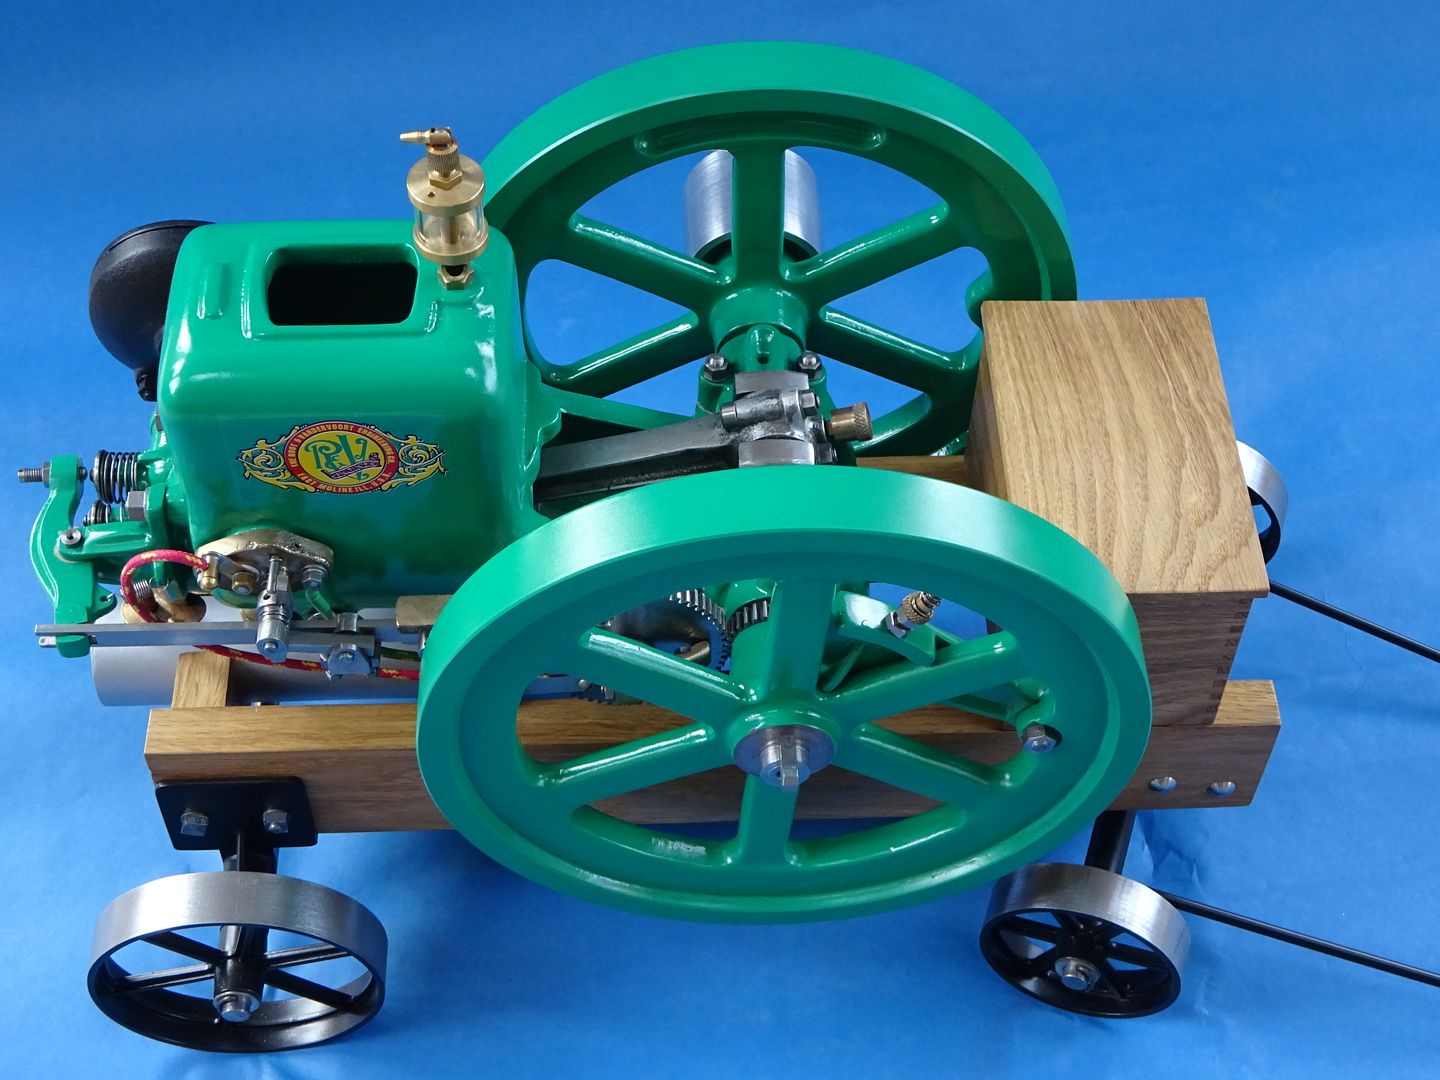
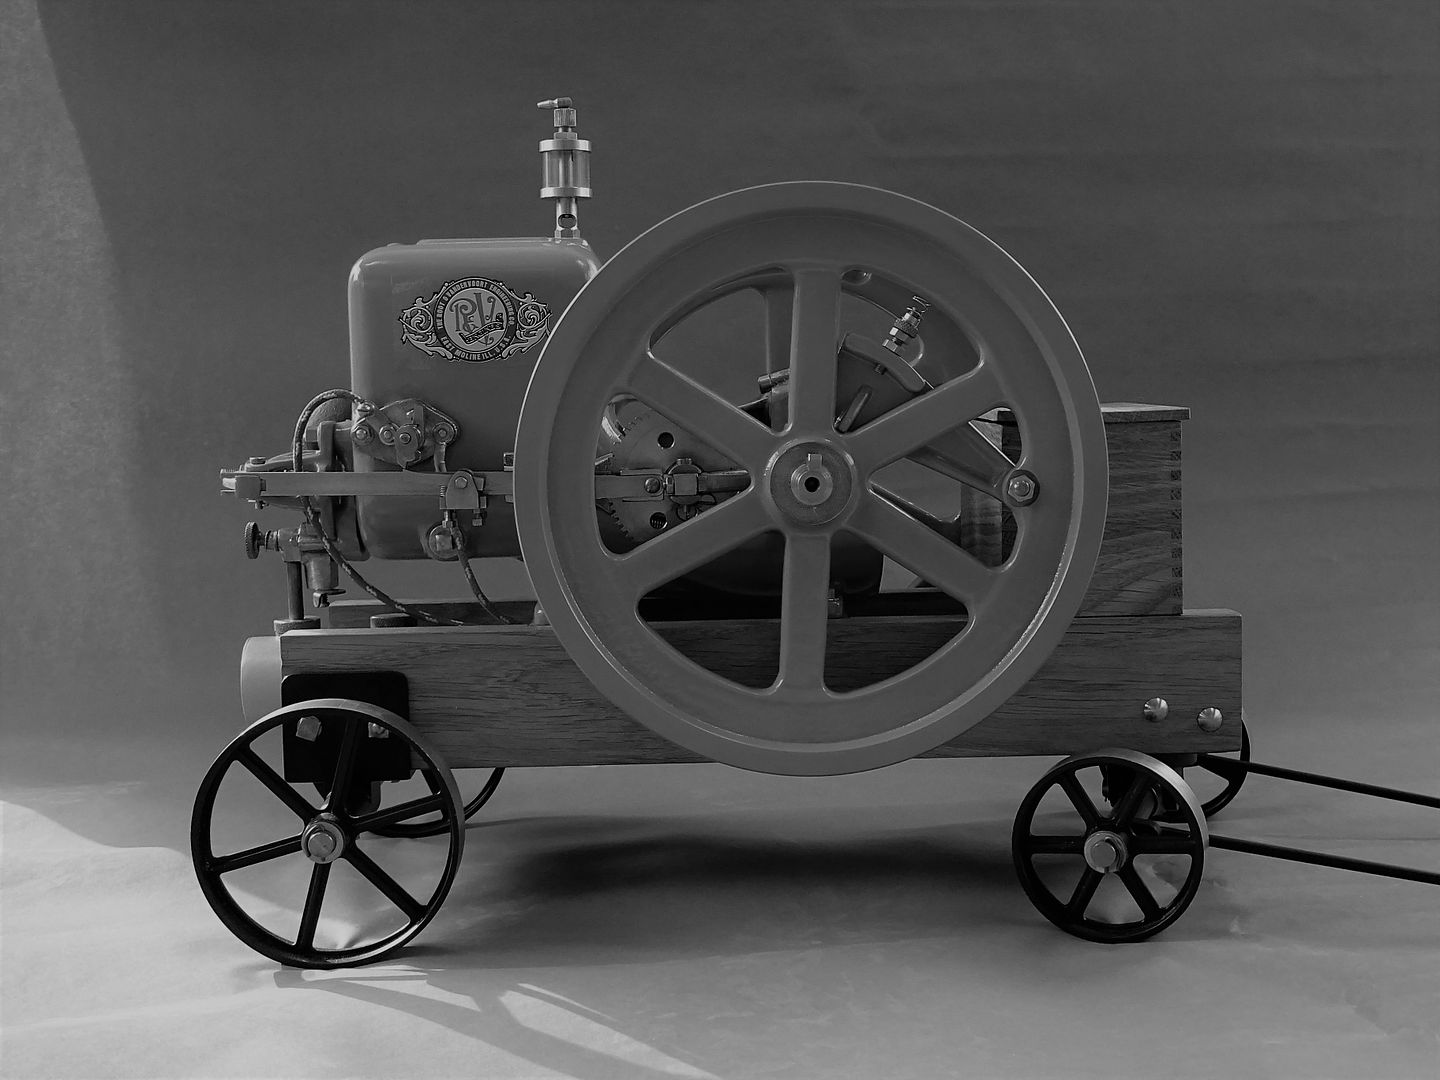
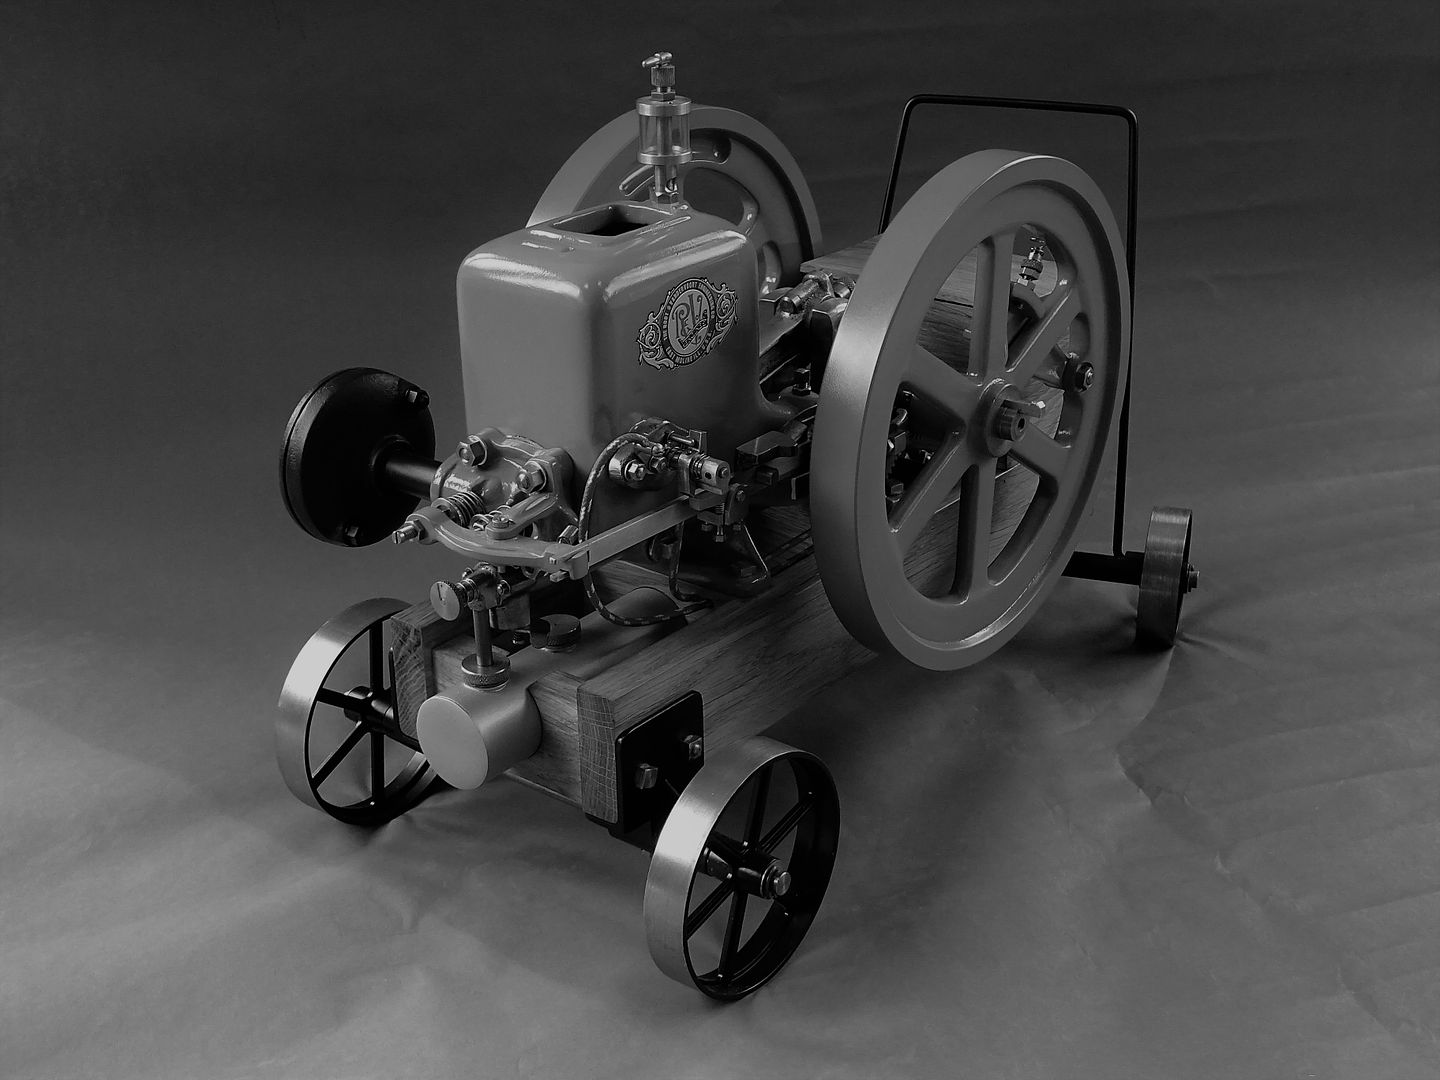
Having painted the Root & Van Dervoort horizontal over the Christmas holiday I thought it was about time to put it together. The green is a little washed out and is quite a bit stronger more along the lines of John Deere green.
Though when you take them like this the colour is less of an issue
No video of the painted engine running as when I was setting up the timing and governor I found the guy who started the model had made the governor arm 1/16" too short so the latch won't engage, hopefully make a replacement in the week and then give it a spin. J |
| mechman48 | 11/03/2018 18:35:26 |
2947 forum posts 468 photos | JasonB... Niiiiice! |
| Samsaranda | 11/03/2018 19:45:47 |
 1688 forum posts 16 photos | George, Cream and Aero Blue go well together, they were the colours of our Corporation buses here in Eastbourne, till they went bust, the buses always looked smart in that livery, the Council still paint their street furniture in those colours. Dave W
|
| Jim Nic | 12/03/2018 00:32:35 |
406 forum posts 235 photos | Stunning work on the oiler Jason. And the Root and Van Dervoort is pretty impressive too, I love how the cart turned out. Jim |
| mechman48 | 13/03/2018 22:43:56 |
2947 forum posts 468 photos | Modified the base colouring to brick effect. I've left the top small layer of tile showing to give the effect of tiling on top of the brick wall...? comments welcome... |
| Mark Rand | 13/03/2018 23:31:20 |
| 1505 forum posts 56 photos | Posted by mechman48 on 13/03/2018 22:43:56:
comments welcome...
Nice! |
| Jim Nic | 13/03/2018 23:37:29 |
406 forum posts 235 photos | It's all a matter of personal taste of course but I think the brick effect looks a lot better than the previous all over tiling. Good choice. Jim |
| mechman48 | 14/03/2018 17:53:46 |
2947 forum posts 468 photos | Did a bit more on the vertical cross, drilled & tapped entablature for bearing stands, fitted square pillar bases, found I didn't have long enough M4 fasteners to go through base into pillars so decided to redrill for M5 x 50 shcs which I had. Assembled & checked for operation... B****r me if the piston isn't bottoming in the cylinder...'oh dear me' says I, or words to that effect. |
| Jim Nic | 14/03/2018 20:04:57 |
406 forum posts 235 photos | George I did notice that you had located your nice brass spacers on top of the entablature whereas Stew's original drawings show them underneath. I thought you had done this to show off your brass polishing skills and had adjusted the pillar length to compensate. The difference would be 10mm. The solution to your problem may be as simple as to locate the spacers between the pillars and the entablature. Jim |
| mechman48 | 14/03/2018 23:03:49 |
2947 forum posts 468 photos | Aha! |
| Mark Rand | 15/03/2018 00:39:22 |
| 1505 forum posts 56 photos | I'm glad it's not just me that does thing like that |

.jpg")
.jpg")
.jpg")

.jpg")
.jpg")
.jpg")


.jpg")
.jpg")
This thread is closed.
Magazine Locator
Want the latest issue of Model Engineer or Model Engineers' Workshop? Use our magazine locator links to find your nearest stockist!
Sign up to our Newsletter
Sign up to our newsletter and get a free digital issue.
You can unsubscribe at anytime. View our privacy policy at www.mortons.co.uk/privacy
Latest Forum Posts
- hemingway ball turner
04/07/2025 14:40:26 - *Oct 2023: FORUM MIGRATION TIMELINE*
05/10/2023 07:57:11 - Making ER11 collet chuck
05/10/2023 07:56:24 - What did you do today? 2023
05/10/2023 07:25:01 - Orrery
05/10/2023 06:00:41 - Wera hand-tools
05/10/2023 05:47:07 - New member
05/10/2023 04:40:11 - Problems with external pot on at1 vfd
05/10/2023 00:06:32 - Drain plug
04/10/2023 23:36:17 - digi phase converter for 10 machines.....
04/10/2023 23:13:48 - More Latest Posts...
- View All Topics
Support Our Partners


Shopping Partners
Subscription Offer

Latest "For Sale" Ads
- Reeves** - Rebuilt Royal Scot by Martin Evans
by John Broughton
£300.00 - BRITANNIA 5" GAUGE James Perrier
by Jon Seabright 1
£2,500.00 - Drill Grinder - for restoration
by Nigel Graham 2
£0.00 - WARCO WM18 MILLING MACHINE
by Alex Chudley
£1,200.00 - MYFORD SUPER 7 LATHE
by Alex Chudley
£2,000.00 - More "For Sale" Ads...
Latest "Wanted" Ads
- D1-3 backplate
by Michael Horley
Price Not Specified - fixed steady for a Colchester bantam mark1 800
by George Jervis
Price Not Specified - lbsc pansy
by JACK SIDEBOTHAM
Price Not Specified - Pratt Burnerd multifit chuck key.
by Tim Riome
Price Not Specified - BANDSAW BLADE WELDER
by HUGH
Price Not Specified - More "Wanted" Ads...
Get In Touch!
Do you want to contact the Model Engineer and Model Engineers' Workshop team?
You can contact us by phone, mail or email about the magazines including becoming a contributor, submitting reader's letters or making queries about articles. You can also get in touch about this website, advertising or other general issues.
Click THIS LINK for full contact details.
For subscription issues please see THIS LINK.
Digital Back Issues


Donate

 Register
 Log-in
Model Engineer Magazine
- Percival Marshall
- M.E. History
- LittleLEC
- M.E. Clock

ME Workshop
- An Adcock
- & Shipley
- Horizontal
- Mill

Subscribe Now
- Great savings
- Delivered to your door

Pre-order your copy!
- Delivered to your doorstep!
- Free UK delivery!
All Forum Topics > Work In Progress and completed items > The Workshop Progress thread 2018