Surface Grinder refurb
| Steve355 | 12/10/2022 09:27:07 |
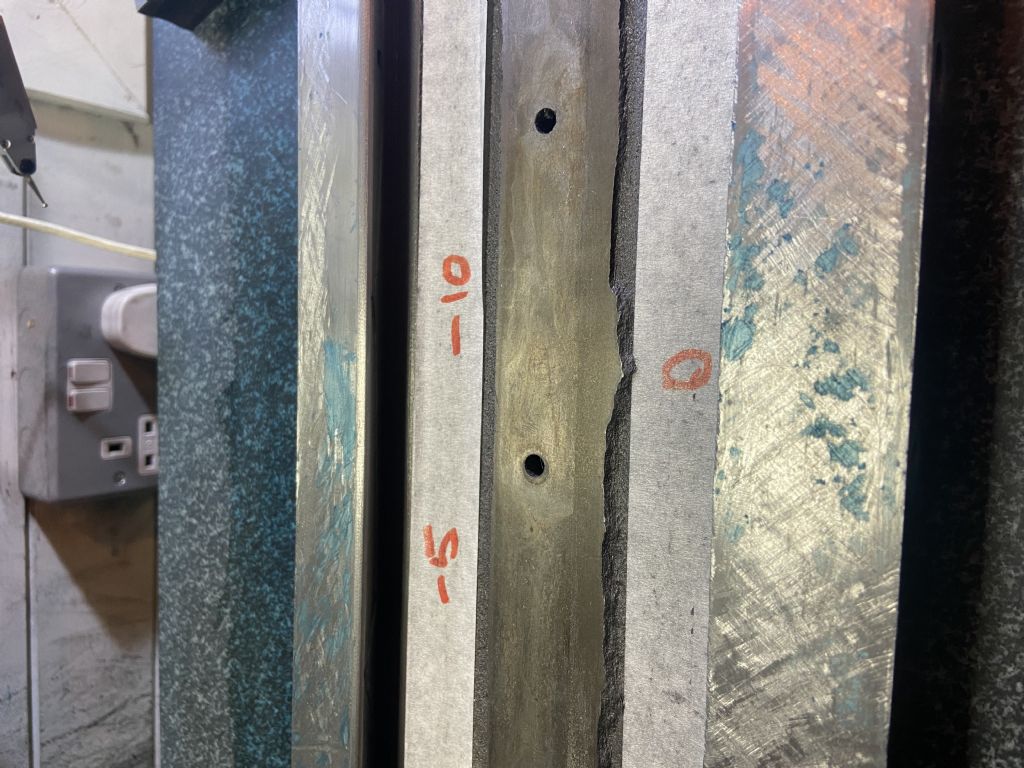
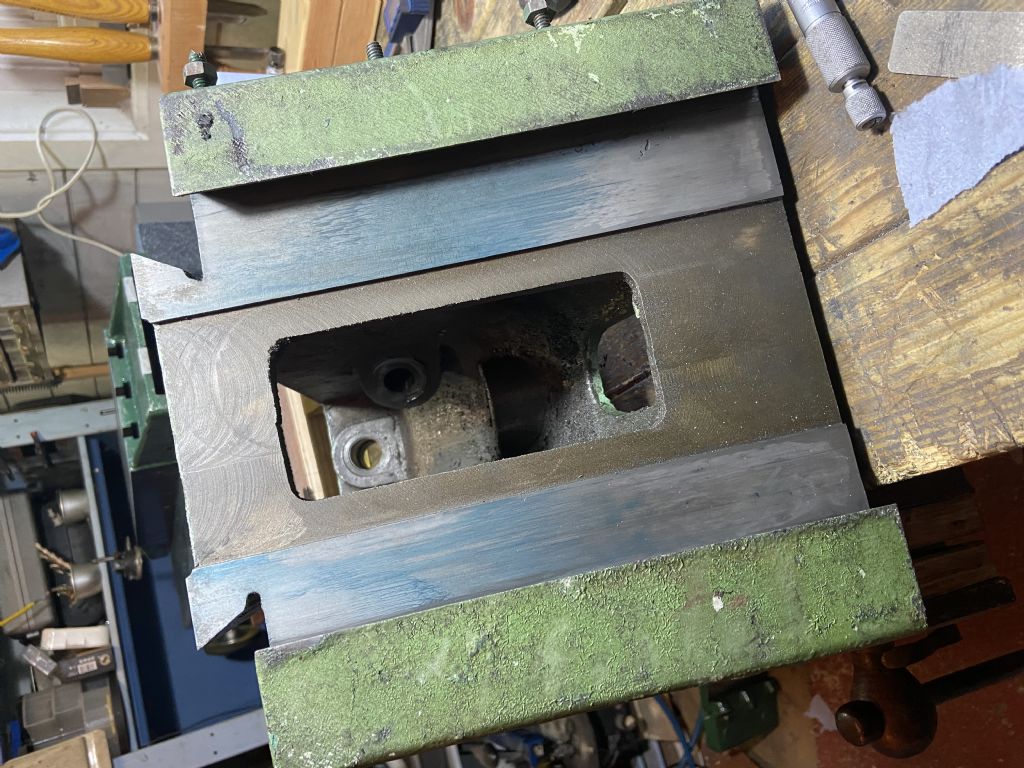
| 321 forum posts 235 photos | Getting disillusioned now I took the table to my local machine shop and they told me to go away. Said they didn’t have time to do it and it was too big for their machines anyway. So I carry on trying to flatten the ways myself. It’s mostly within about 0.001, up to 0.002 in places. But of course I can get it flat, but it needs to be flat and co-planar with the top of the table on the other side. Looking at the blue patch between 5 and 10, the blue says it’s a high spot. But the DTI says it’s a low! I’m very reluctant to keep scraping away at it unless I know what I’m doing is right.
|
| Baz | 12/10/2022 10:49:01 |
| 1033 forum posts 2 photos | Surely the top won’t matter, you will clamp a magnetic chuck on to it and then grind the top of the chuck, unless I am being totally thick as usual in which case I apologise. Not surprised at local machine shop attitude I have heard the same story from many people trying to get bits of machining done, they are told to expletive off or told it will cost hundreds of pounds to do a five minute job. |
| Tony Ray | 12/10/2022 17:58:17 |
| 238 forum posts 47 photos | Baz, Steve is scraping the ways. Steve, sorry to hear about your experience with your local machine shop, clearly a bunch of idiots. I share you concerns re conflicting readings blue vs dti, Maybe it would be worth waiting until your SE is ready and printing off that. Tony |
| Martin Kyte | 12/10/2022 19:13:19 |
3445 forum posts 62 photos | Posted by Steve355 on 12/10/2022 09:27:07:
Getting disillusioned now I took the table to my local machine shop and they told me to go away. Said they didn’t have time to do it and it was too big for their machines anyway. So I carry on trying to flatten the ways myself. It’s mostly within about 0.001, up to 0.002 in places. But of course I can get it flat, but it needs to be flat and co-planar with the top of the table on the other side. Looking at the blue patch between 5 and 10, the blue says it’s a high spot. But the DTI says it’s a low! I’m very reluctant to keep scraping away at it unless I know what I’m doing is right.
Looks like you filled the low spot with blue then. Can happen when there is a lot of blue on the surface plate and it smears into the low spots. Clean it all off and then blue the surface to be scraped. Rub onto the surface plate and the blue will be removed from the high spots. Clean up again and blue the surface plate lightly and the blue should be tranferred to the high spot that way round so you get the inverse. regards Martin |
| Kiwi Bloke | 12/10/2022 21:25:10 |
| 912 forum posts 3 photos | Certainly sounds puzzling, but we need to know more about exactly how you're setting up the job for clocking. How is the work supported? What is the reference surface for the clock? Have you measured table thickness (variations) with a micrometer - assuming the table top is truly flat)? When is the straight-edge coming? Might be a good idea to wait for it. I don't like the idea that the pic shows blue-filled hollows, when there's almost no other blue to be seen. But I agree that sometimes you can get horribly misled by blue's antics. Last two sentences of Martin Kyte's last post is good advice - sanity check! The scraping looks very uneven in depth, and scratchy as hell. Perhaps it's the photography, but I suspect the scraper (hopefully the tool, mostly, not the operator...). |
| Steve355 | 12/10/2022 23:37:53 |
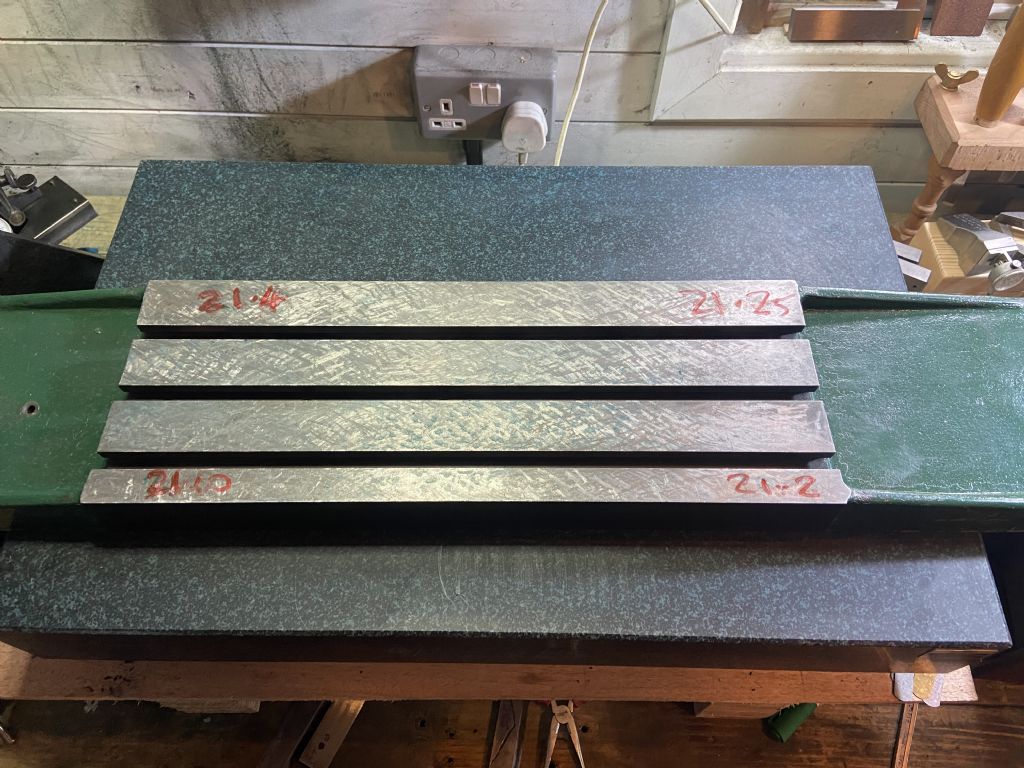
| 321 forum posts 235 photos | The work and workpiece is on a surface plate. The scraping looks horrible because on the ”0” side I have 0.001 to remove across about 12 inches so I was just going at it and roughing it out, I will clean it up as it gets nearer to the target height. That was the idea anyway. Yes I have checked it with a micrometer, but to take the measurements shown I used a small V block on its side to try to measure the general thickness for roughing it to approximately the correct height before using the surface plate to print it and get the surface flat. What I found after a while was that one of the ways has lateral wear of about 0.001, this was really not helping with accurate measurements. The surface plate is 24” (same as the straight edge I’ve ordered) and the ways are 32”. Not ideal at all but I can’t justify a bigger plate or straight edge for this one surface. 24” is plenty for everything else I’m likely to do. So I was focussing on one end of the ways and taking it carefully, I am not sure how the straight edge will help? The top of the table is flat at about 12ppi. There are some areas that aren’t quite 12 ppi but I had to stop somewhere. If I had a really good way of measuring it that I trusted I think it would work out fine. But when the blue doesn’t agree with the dti which doesn’t agree with the micrometer, it gets tricky!
|
| Tony Ray | 13/10/2022 12:42:26 |
| 238 forum posts 47 photos | Steve, The use of the SE was based on watching the well know Youtubers rebuild machines. Generally they scrape the SE to the plate (the plate is always your primary reference and we have no concerns that the plate isn't in spec.) Yes maybe it's not on 3 points but the difference that is going to make is very small compared to the variances you are measuring on your parts. From experience it is very easy to get dirt between the part and the plate - you can feel it on small parts but I think that would be much more difficult on a large lump like your grinder table. This is where your SE comes in as its easier to handle and possibly improve that feel. Bluing on the plate shows how the surface compared to a known surface of high flatness. Miking shows local thicknesses, there are bound to be variances with your table top surface that will affect the readings what is the resolution of your mike? The accuracy of your DTI is less of an issue, provided its rigidly mounted and you can get repeatable readings - which you can check on e.g. a parallel as principally you need to indicate difference. As I mentioned before it is easy to end up with a convex or concave surface which can play havoc with printing. One thing you might try is putting the table scraped side down on two known parallels resting on the surface plate. the indicator base rides on the surface plate and you indicate the downward facing scraped surface. Regarding the quality of your scrapes you really do need to make the change to carbide and a suitable sharpening setup. Don't get disheartened you are doing a good job, maybe take a break for a few days & come back to it with a fresh pair of eyes & renewed energy. Tony |
| Steve355 | 17/10/2022 23:54:32 |
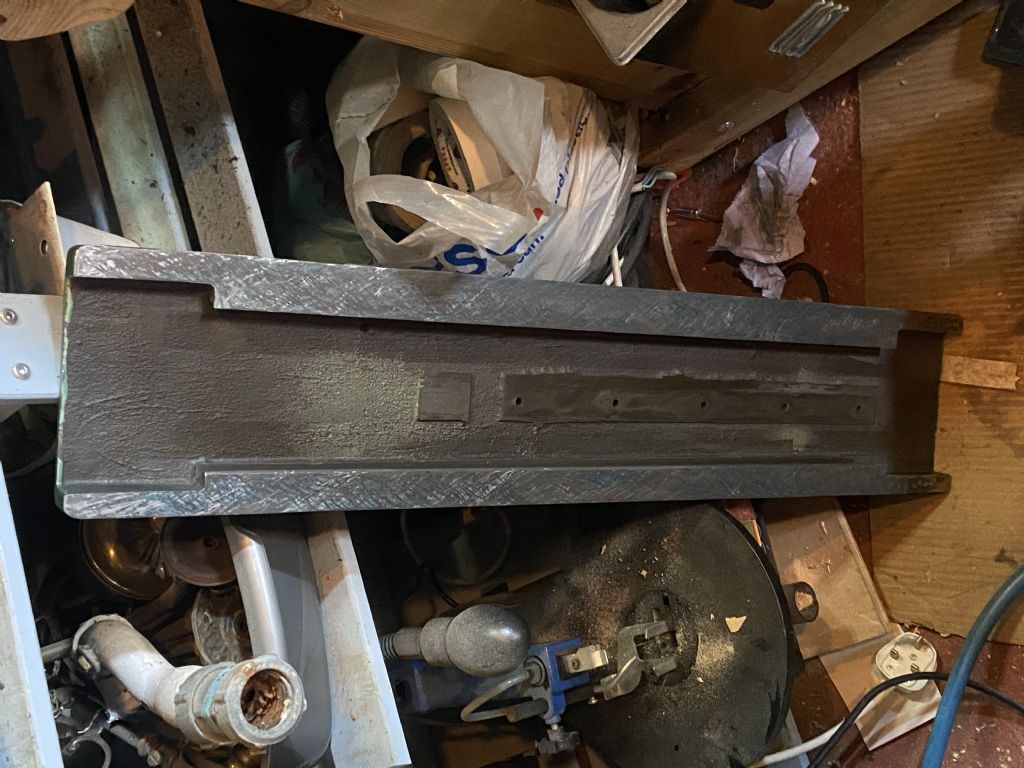
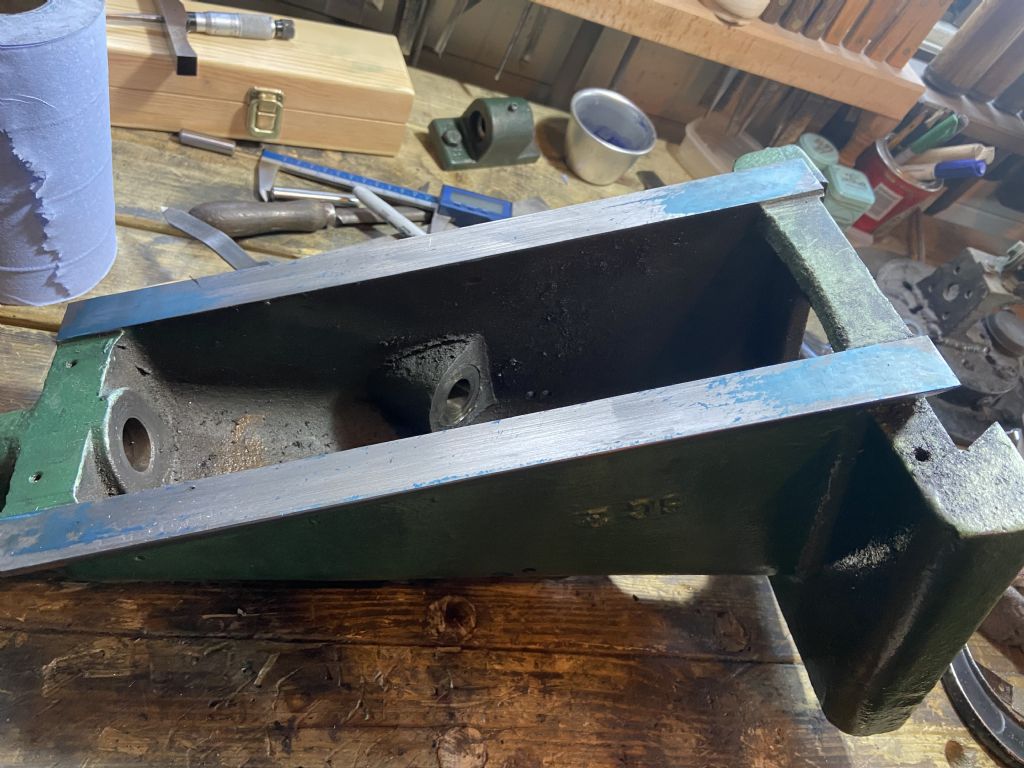
| 321 forum posts 235 photos | Update…. well, I spent the entire weekend on the ways of the table, in the end I made decent progress.I realised that I could measure the top of the table (already scraped) with a depth gauge. I was getting decent consistent measurements that way. I ended up with the table corners within 0.0005. Which will have to do. i dealt with the ways, which don’t quite fit on the surface plate, by carefully scraping not too much so as not to overshoot and end up with a scooped or bowed middle, it’s not 12ppi everywhere by any means, but again, it will have to do and it’s now all flat to 0.0004 rather than 0.004. So ten times flatter than it was. Now I’m onto the knee.I’ve started with the easiest surface, which has some well defined wear in the middle.
I have also blued up the vertical surface of the knee. The question here is, am I seeing this pattern because of.wear (i think that’s where I would expect wear) or poor printing due to the weight distribution of the knee, or both?! Slow progress, but progress. Tony’s idea of having a couple of days off was a good one. Edited By Steve355 on 17/10/2022 23:57:03 Edited By Steve355 on 17/10/2022 23:58:08 |
| Kiwi Bloke | 18/10/2022 01:02:14 |
| 912 forum posts 3 photos | Glad to see that rest & recuperation time helped. Scraping can seem rather soul-destroying, can't it? I'm not sure exactly what you're doing, so can't answer your question, however, some observations... I think that it would be time well spent to make up some dovetail spotting masters. And you'll need some rollers. Scraping overhanging angled surfaces of dovetails is awkward at best, and miserable at worst. Do make sure there's a suitably large 'run-out' groove as there seems to be under the horizontal ways' dovetails. Not so sure about the vertical ones. A small Eclipse scraper, with the end thinned down, comes in useful here. The knee's vertical ways are likely to be worn significantly. I think I'd start scraping these surfaces, and only then correct the knee's right-angled geometry by scraping the horizontal surfaces - it would be easier, particularly the dovetails. You should consider making the relationship between horizontal and vertical ways a tad obtuse, to compensate for the droop that will occur when the saddle and table load the knee. It's probably a good idea to finish the vertical surfaces of the knee with a little central relief. I think Connelly explains the whys and wherefores. However, for the amount of wear that's likely to occur during your use of the grinder, this refinement is optional - however, avoid a convex surface at all costs. (Folk may argue that, since the knee is so heavily loaded, it's likely to be stable, almost regardless of its geometry, but we're trying to do things properly, aren't we? Good luck, you're probably about 20% of the way there... |
| Pete Rimmer | 18/10/2022 06:31:30 |
| 1486 forum posts 105 photos | Steve you're doing great so take heart and keep going. Your goal here is to make the machine perform as well as YOU can without expecting a professional-level job. For sure, it will be better just from what you have done. Your wear on the small end of the knee, the vertical ways, is completely typical. Your print shows blue in the middle, the least worn part, more wear at the bottom of the flat ways (which is carrying the most load) and a little at the top (which is where dirt collects and grinds away the iron). The long ways (Horizontal) are worn in the middle because whomever has used the grinder has only ever ground parts in the middle of the chuck so they have not spread out the wear. This is good for you because you now have four reference points of un-worn material. Start by scraping the long ways on your surface plate. Before you put it on your plate put two opposite-diagonal scraping passes right down both ways to clean them up and create a good pick-up for the blue. Stone them VERY lightly to remove burrs. This will make your plate last longer you don't want to be putting an un-scraped part onto your best plate if you can help it. Now bear in mind that you have a hugely un-balanced weight here so you will have to either use your judgement to support the heavy end with your hand or (the better way IMHO) use a smaller plate to print it and put the plate on top of the part. Just be aware that the heavy end will always put down more blue. Scrape those long ways to get a good print all along them then use a square to check the relationship with the short ways. When you scrape the short ways, start with the section that's printing heaviest and scrape a band across both sides so you end up with two strips of blue that you then move out towards the ends. This will prevent you from scraping the ways rainbow-shaped which they already are. There's an excellent visual representation here: As Kiwi Bloke said above, you can relieve the centre of a moving way so that it wears-in before it starts wearing out. Your work will be much longer lasting that way. Don't do it with a static way, obviously. |
| Tony Ray | 18/10/2022 13:51:17 |
| 238 forum posts 47 photos | I'm glad the rest helped. Regarding the knee you are right to be concerned about the weight distribution affecting the print but I have no experience as to what extent. This is where the SE comes in - are you still waiting for yours to arrive? I would think for now you can rough scrape the knee and finesse it with the SE when it is ready for use. Thats a nice image that Pete linked - I have not seen that before.
|
| David George 1 | 19/10/2022 07:47:47 |
2110 forum posts 565 photos | When I set up a surface grinder the first thing I used to do was to grind the bed top before fitting the chuck. Usualy it took little or no metal of but it made the face absolutly flat to axis. The next was to grind the chuck base. It would be set face down on the ground bed and cleaned up. Then the chuck, with a thin coating of silicone grease between them to prevent corrosion, was ground in situ for a good parallel machine. Then the check for squareness with a bottle square would be done to check the vertical axis. David |
| Pete Rimmer | 19/10/2022 19:19:49 |
| 1486 forum posts 105 photos | Posted by David George 1 on 19/10/2022 07:47:47:
When I set up a surface grinder the first thing I used to do was to grind the bed top before fitting the chuck. Usualy it took little or no metal of but it made the face absolutly flat to axis. The next was to grind the chuck base. It would be set face down on the ground bed and cleaned up. Then the chuck, with a thin coating of silicone grease between them to prevent corrosion, was ground in situ for a good parallel machine. Then the check for squareness with a bottle square would be done to check the vertical axis. David The main issue with surface grinders is that the y-axis ways tend to wear rainbow-shaped. When this happens no amount of grinding the table or chuck wil produce a flat part because the table cross-travel is moving in an arc. Steve is lucky in that 1. his wear is very minimal and 2. his y-axis is not worn in the above fashion. |
| Mark Rand | 19/10/2022 19:36:09 |
| 1505 forum posts 56 photos | The X axis tends to wear because it sees the most motion. The Z axis tends to wear less (especially on a J&S, since they're ball ways) and the Y axis usually very little (again, roller ways in J&S land).
Edited By Mark Rand on 19/10/2022 19:36:40 |
| Pete Rimmer | 19/10/2022 20:24:31 |
| 1486 forum posts 105 photos | No roller ways on an Eagle, they are definitely entry-level. my old J&S 540 had plain ways too. |
| Tony Ray | 27/10/2022 12:45:26 |
| 238 forum posts 47 photos | Hi Steve, How's it going? - haven't seen anything from you for quite a few days. |
| Steve355 | 29/10/2022 08:01:56 |
| 321 forum posts 235 photos | Posted by Tony Ray on 27/10/2022 12:45:26:
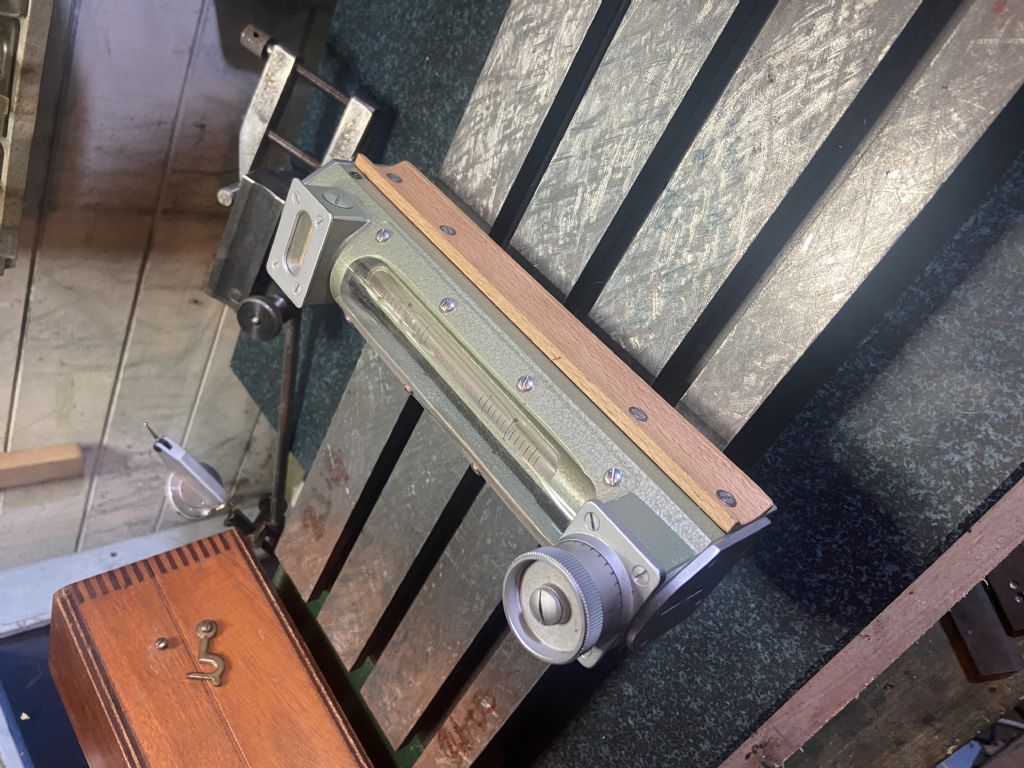
Hi Steve, How's it going? - haven't seen anything from you for quite a few days. Hi Tony, thanks for asking l’ve been going a bit slower for the last week due to half term and work etc. But I have been making some progress with the knee nearly done. I have a fairly clear weekend so I’m hoping to get some hours in… this scraping is a really time consuming business. But hopefully I’ll get the column and knee back on the machine this weekend. One thing that did turn up in the post is a level that I got on eBay. This seems to be a very well made and useful tool, given its very smooth and stable adjustment mechanism. At least, it has helped me double check my measurements. It has 1 in 10,000 divisions, so at 8 inches long, 1 division is 0.0008”. So indeed my table is flat to < 0.0005, probably 0.0002 in most places. Not perfect for a surface grinder but way better than the 0.004 I started with and probably good enough for anything I will do with the machine. BTW I have switched over to the carbide scraper, with a little skinny blade I made to get into dovetails. I’ve been sharpening it with a diamond hone. I think the diamond disc I was sharpening with before was no good and the diamond coating had come off. I really could do with a diamond wheel of some sort. No sign of the straight edge yet More later this weekend, I have some dovetail measurement questions that I know will come up. Steve
|
| Tony Ray | 29/10/2022 08:46:51 |
| 238 forum posts 47 photos | I understand. I’m decorating at the moment; I do that when the light is good and disappear down the workshop when it’s poor. Your table flatness is fine, once you have your magnet in place and ground in that will be your working surface. To sharpen your carbide I recommend something like these 1 Set 6 Inch 240/600/3000 Diamond Coated Wheel Lapping Disc Flat Lap Wheel Kits 4” ones are also available, you just need a backing plate and some means of rotating them. Stefan G made avery nice 24V powered slow speed grinder attaching them to the backing plate with magnets and two drive pins. I copied it and it works beautifully, I also use it to touch up carbide inserts and HSS lathe tools. My grinding rest is a 3D printed tower with 5 degree iirc top surface.
Thats a very nice level.
|
| Mark Davison 1 | 29/10/2022 08:48:57 |
| 134 forum posts 38 photos | Tony, what sort of motor did you use for the slow grinder/lap? |
| Dave S | 29/10/2022 20:41:33 |
| 433 forum posts 95 photos | I just used a normal single phase motor and a steel disk. I load it with 7 micron paste to polish:
Dave Edited By Dave S on 29/10/2022 20:42:13 |
Please login to post a reply.
Want the latest issue of Model Engineer or Model Engineers' Workshop? Use our magazine locator links to find your nearest stockist!
Sign up to our newsletter and get a free digital issue.
You can unsubscribe at anytime. View our privacy policy at www.mortons.co.uk/privacy
- hemingway ball turner
04/07/2025 14:40:26 - *Oct 2023: FORUM MIGRATION TIMELINE*
05/10/2023 07:57:11 - Making ER11 collet chuck
05/10/2023 07:56:24 - What did you do today? 2023
05/10/2023 07:25:01 - Orrery
05/10/2023 06:00:41 - Wera hand-tools
05/10/2023 05:47:07 - New member
05/10/2023 04:40:11 - Problems with external pot on at1 vfd
05/10/2023 00:06:32 - Drain plug
04/10/2023 23:36:17 - digi phase converter for 10 machines.....
04/10/2023 23:13:48 - More Latest Posts...
- View All Topics
- Reeves** - Rebuilt Royal Scot by Martin Evans
by John Broughton
£300.00 - BRITANNIA 5" GAUGE James Perrier
by Jon Seabright 1
£2,500.00 - Drill Grinder - for restoration
by Nigel Graham 2
£0.00 - WARCO WM18 MILLING MACHINE
by Alex Chudley
£1,200.00 - MYFORD SUPER 7 LATHE
by Alex Chudley
£2,000.00 - More "For Sale" Ads...
- D1-3 backplate
by Michael Horley
Price Not Specified - fixed steady for a Colchester bantam mark1 800
by George Jervis
Price Not Specified - lbsc pansy
by JACK SIDEBOTHAM
Price Not Specified - Pratt Burnerd multifit chuck key.
by Tim Riome
Price Not Specified - BANDSAW BLADE WELDER
by HUGH
Price Not Specified - More "Wanted" Ads...
Do you want to contact the Model Engineer and Model Engineers' Workshop team?
You can contact us by phone, mail or email about the magazines including becoming a contributor, submitting reader's letters or making queries about articles. You can also get in touch about this website, advertising or other general issues.
Click THIS LINK for full contact details.
For subscription issues please see THIS LINK.
Model Engineer Magazine
- Percival Marshall
- M.E. History
- LittleLEC
- M.E. Clock
ME Workshop
- An Adcock
- & Shipley
- Horizontal
- Mill
Subscribe Now
- Great savings
- Delivered to your door
Pre-order your copy!
- Delivered to your doorstep!
- Free UK delivery!

 My wife doesn’t care about my project.


 Register
 Log-in


