Forum sponsored by:

Lantern Chuck
| Saxalby | 25/03/2012 18:44:09 |
 187 forum posts 33 photos |
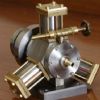
Just thought I would post a few pictures of a 'Lantern Chuck' I recently made. Based on a design in either a GHT or Tubal Cain Book. Modified it to fit in my 3C collet adapter on the Boxford. Got fed up cutting screws down and then trying to get a decent finish on the end. Now just rough cut them and then pop them in the chuck and then shape the end with a small concave form cutter I made. Each size of screw has its own little adapter sleeve it goes into. Pop that in the chuck and when you screw up the lantern the brass pad holds the screw in place to shorted / form the end. Used with the saddle stop - all the same length.
Barry |
| Brian in OZ | 25/03/2012 19:22:40 |
| 63 forum posts | Hello Saxalby, Lovely job and as you say very handy, am interested in how you actually made the "lantern" part of the gadget. Looks maybe that you cut a section form a "U" channel and brazed it to the body and finished off in the mill or by hand, then of course back in the lathe to drill the central hole for the adapters which insidentaly are a great idea. Brian |
| Saxalby | 25/03/2012 20:12:11 |
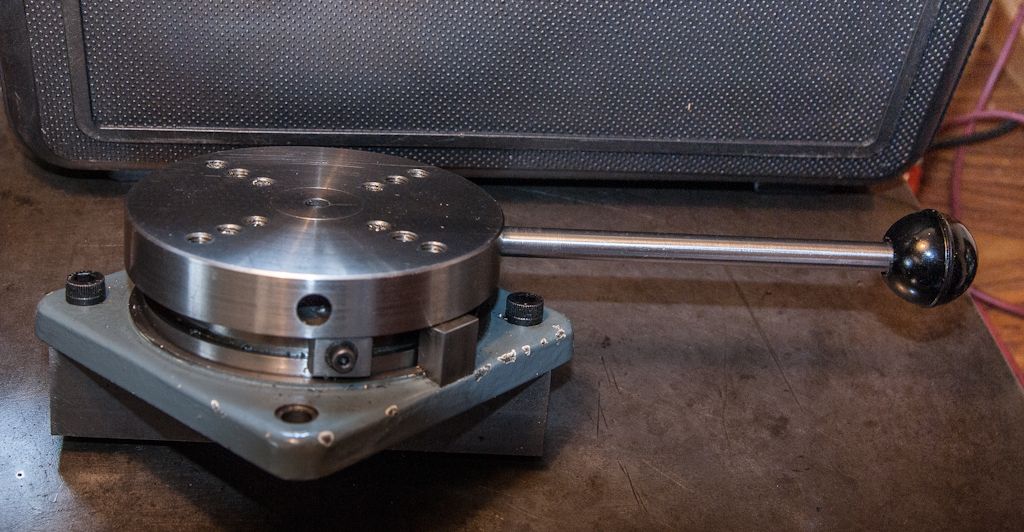
187 forum posts 33 photos | Hi Brian, The 'Lantern' was made from solid. A piece of 1 1/4 inch steel was bored out, screw cut, knurled and then parted off. Held in the chuck with some copper strip to protect the knurling and the front portion reduced to about 1 1/8 inch dia. Lastly chucked on an indexer on the mill and the two cut-outs made (slowly) with the side of a 3/4 inch end mill, till it was reduced to about 3/8 inch or so. Centre hole was drilled with it attached to the 3C adapter. Regards Barry |
| Brian in OZ | 26/03/2012 06:13:00 |
| 63 forum posts | Thanks Barry, That's a good way to make it The square edges inside the "lantern" are what threw me. My gear is a little smaller than yours and I use ER type collects (Emco 3 and C0), so apart from a "normal" one might also knock up an "oversize" one to fit in the 3 jaw. Like you I often have to modify/make small bolts. Am tradeing up to a C1 shortly to get "proper" screw cutting especially for internal threads. A few years ago i picked up a screw cutting jig for the Emco, but at the time not much use for it so traded it for some other attachments, am kicking myself now for not keeping it. There is only so much you can do with taps and dies. Only problem is the C1 does not come with a compound slide so will have to make one (parts are quite expensive by the time they get to Australia). Hopefully with the C1 I can cut LH threads otherwise do have LH taps/dies in 6 and 8mm. There was a good project in a recent MEW for one, just have to find which issue now as think it would scale down to my machine quite well. Then I want to build a little rotary table (not geared) for rounding off bits and pieces, then a ball turning jig. I particularly like the little turret like ones so that both convex and concave cuts can be made (looks so easy on uTube video). Might see if anyone has built such attachments for the small lathes. Brian |
| Saxalby | 26/03/2012 11:36:53 |
187 forum posts 33 photos | Hi Brian, When you get your new C1 perhaps make a version of the Lantern with a parallel shank for either a collet or normal chuck. In the GHT worshop book there is a design for a small, non geared, rotary table. With a small tool post mounted on the rotary table you can use it for ball turning. Kill two birds with one stone. I have done quite a bit of ball handle making. Got fed up with forever loosing the Alan key or spanner for the various bits on the Boxford, so replaced the lot. It really is quite easy - just practice on a few scap pieces first. Regards Barry
|
| NJH | 26/03/2012 14:04:22 |
 2314 forum posts 139 photos | Barry - great idea - I've often thought about one of these and your excellent version ( and the pending need to resize quite a few screws) has motivated me! Brian - I fully endorse Barry's recommendation of GHT's little rotary table. Here, as they say, is one I made earlier!
A little off-putting for me at first was the dovetailed slot around the circumference of the table and even more off-putting was the need to make curved and dovetailed nuts to slide in it for the stops to fix to! Do not be put off by this - Follow GHT's explanation carefully and it really is a piece of cake! The design calls for four "T" slots to be cut to allow work to be clamped to the table. Not having a "T" slot cutter at the time I chose to tap a series of holes so that I could fit clamps to hold the work. ( I arranged these so that I could cut the slots later when I got a cutter - so far I've not found the need to do so.) To make this quick and easy to use I keep a piece of bar fixed to the table
This means I can quickly pop it into the vice on the mill for those "little jobs" I've made up a number of different sized "pins" to fit he centre hole - these can be used to locate through the holes in rods which need their ends rounding off. ( If that makes sense)
It's an interesting and useful project. Regards
Norman Edited By NJH on 26/03/2012 14:09:26 Edited By NJH on 26/03/2012 14:14:47 |
| Stub Mandrel | 27/03/2012 21:23:58 |
 4318 forum posts 291 photos 1 articles |
Handy idea for that blank taper i've got lurking about Neil |
| Brian in OZ | 28/03/2012 21:31:54 |
| 63 forum posts | Hi Barry and Norman, Thanks very much for your advice. Norman the rotary table looks good. You guys have hit on a very good idea, with suitable adjustments to scaling i could make a "common" base which will take the compound slide (still haven't found it), rotary table and ball turning jig. Someone else put up some pics of a good looking ball turner but looks like maybe a little complex when reduced in size for the C1 (but wil check it out anyway. Would need to make up a spare base so can use the rotary table on the mill (Emco 3). Anyway will keep in touch when I have the project to planning stage but lantern chuck is first as have a bunch of bolts to customize Regards Brian |
| Francois Meunier | 29/03/2012 07:38:40 |
| 30 forum posts 6 photos | Hi Saxalby Smart & elegant tool you made.
How do you change the protruding length of the screw/bolt ? is the pad on which the head of the screw rests movable ? applying side thrust for forming the end of a long and slender screw is not possible. I did a similar tool of the John Wilding design (in "Using the small lathe" Zephyrin |
| Peter Bell | 29/03/2012 09:04:28 |
| 399 forum posts 167 photos | Thats a really good idea and well made. I recently had to shorten some 10 & 12 ba screws so made the simple chuck shown. I used a hex brass body with a plate soldered to the end with a suitable hole. The screw to be cut is held on the end of the 4ba steel screw by a magnet and is inserted into the body, tightened up and put into the 3 jaw chuck on the lathe where it is gently filed to length. I found the magnet useful in keeping the screw in place when the chuck is dismantled and can hold it intil it is inserted into the job. Peter
|
| Saxalby | 29/03/2012 11:28:51 |
187 forum posts 33 photos | Hi Zephyrin, When I first made the tool I made up a small quantity of blank sleeves for the screws in a few different lengths. So if I want to form the end of a long screw, use a long sleeve so that the screw is supported outside the lantern. The posted pics show a 5ba being trimmed and formed to about 3/8th long. Shortest I can do is about 3/16th. Hope that makes sense. Peter, Neat little device for those tiny screws. For what I build I am mainly wanting 6ba or larger, on rare occassions 8ba. So the lantern chuck was sized for my own needs. That said your solution could be adapted to the sleeves I use, if I ever do any tiny work. Regards Barry |


 and I have to make a brass sleeve for each length for not getting bent screw, impossible to remove from the tool.
Please login to post a reply.
Magazine Locator
Want the latest issue of Model Engineer or Model Engineers' Workshop? Use our magazine locator links to find your nearest stockist!
Sign up to our Newsletter
Sign up to our newsletter and get a free digital issue.
You can unsubscribe at anytime. View our privacy policy at www.mortons.co.uk/privacy
Latest Forum Posts
- *Oct 2023: FORUM MIGRATION TIMELINE*
05/10/2023 07:57:11 - Making ER11 collet chuck
05/10/2023 07:56:24 - What did you do today? 2023
05/10/2023 07:25:01 - Orrery
05/10/2023 06:00:41 - Wera hand-tools
05/10/2023 05:47:07 - New member
05/10/2023 04:40:11 - Problems with external pot on at1 vfd
05/10/2023 00:06:32 - Drain plug
04/10/2023 23:36:17 - digi phase converter for 10 machines.....
04/10/2023 23:13:48 - Winter Storage Of Locomotives
04/10/2023 21:02:11 - More Latest Posts...
- View All Topics
Support Our Partners


Shopping Partners
Subscription Offer

Latest "For Sale" Ads
- Reeves** - Rebuilt Royal Scot by Martin Evans
by John Broughton
£300.00 - BRITANNIA 5" GAUGE James Perrier
by Jon Seabright 1
£2,500.00 - Drill Grinder - for restoration
by Nigel Graham 2
£0.00 - WARCO WM18 MILLING MACHINE
by Alex Chudley
£1,200.00 - MYFORD SUPER 7 LATHE
by Alex Chudley
£2,000.00 - More "For Sale" Ads...
Latest "Wanted" Ads
- D1-3 backplate
by Michael Horley
Price Not Specified - fixed steady for a Colchester bantam mark1 800
by George Jervis
Price Not Specified - lbsc pansy
by JACK SIDEBOTHAM
Price Not Specified - Pratt Burnerd multifit chuck key.
by Tim Riome
Price Not Specified - BANDSAW BLADE WELDER
by HUGH
Price Not Specified - More "Wanted" Ads...
Get In Touch!
Do you want to contact the Model Engineer and Model Engineers' Workshop team?
You can contact us by phone, mail or email about the magazines including becoming a contributor, submitting reader's letters or making queries about articles. You can also get in touch about this website, advertising or other general issues.
Click THIS LINK for full contact details.
For subscription issues please see THIS LINK.
Digital Back Issues


Donate

 Register
 Log-in
Model Engineer Magazine
- Percival Marshall
- M.E. History
- LittleLEC
- M.E. Clock

ME Workshop
- An Adcock
- & Shipley
- Horizontal
- Mill

Subscribe Now
- Great savings
- Delivered to your door

Pre-order your copy!
- Delivered to your doorstep!
- Free UK delivery!
All Forum Topics > Workshop Tools and Tooling > Lantern Chuck