Forum sponsored by:

ED Racer 'times two'
| Ramon Wilson | 25/02/2010 16:18:01 |
 1655 forum posts 617 photos | Hi,
Following on from experiencing the Nova bursting into life I thought it would be interesting to have a go a designing a diesel based around the 2.46 ED Racer of the 50's/60's.
I borrowed an old Mk4 from a friend and scaled it up by a factor of 1.266 which brings the capacity to approximately 5cc.
The drawings were laid out on copier paper in the traditional way - with a pencil using a piece of Contiboard as a drawing surface - 'CAD' drawing (Contib'd Aided Design!)
Two blocks of ally were obtained and the chipping began - 221/4 ozs. per block to start, 31/2 to finish. Quite a bit of swarf!.
I did two to hedge my bets incase of a mistake - and yes, if you are wondering -the keen eyed may spot a subtle difference but ostensibly they are both suitable for use so now the next stage can begin - Crank shafts - two piece as in The Nova as so far this has stood up well to the torque swinging a fairly large prop. These of course will rev much harder but with a smaller prop.
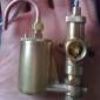
Some asked for some pics so here are a couple,

Rather than fill the site albums up more pics of the the machining stages can be seen here.
if you care to visit. They haven't been captioned yet but I will at some stage.
Now, it's time to clean up that swarf!!!
Regards - Ramon
Edited By David Clark 1 on 26/02/2010 08:05:57 |
| Rob Manley | 25/02/2010 17:51:31 |
 71 forum posts 14 photos | Very impressed with the quality of work so far. Its always fun to cut a complex shape out of a boring solid block, It looks like a very pretty engine. Please keep us informed of progress. |
| V8Eng | 25/02/2010 19:09:48 |
| 1826 forum posts 1 photos | This reminds me, I have an old ED 2cc Competition Special with prop driver section broken off the crankshaft. You might have just inspired to me restore it.
Very impressed with your work so far. Edited By V8Eng on 25/02/2010 19:17:07 |
| Alan Worland | 25/02/2010 20:27:16 |
| 247 forum posts 21 photos | Nice work and good progress, I suppose the time it takes to setup - you might as well make more than one!
Years ago at a model engineering exhibition there was a chap who was making five 71/4 in gauge locos! He said as it took most of the time setting it all up he thought he would get the most out of it! |
| LADmachining | 25/02/2010 21:51:39 |
 126 forum posts 11 photos | Excellent work Ramon! Keep us posted on your progress! |
| Ramon Wilson | 27/02/2010 12:18:48 |
1655 forum posts 617 photos | Thanks for your interest and kind comments.
I'm hoping to get these bead blasted soon but in the meantime will get on with the crankshafts though as perhaps you see I am a little side tracked at the moment!
Back soon with this though.
Regards - Ramon
|
| Speedy Builder5 | 27/02/2010 12:36:34 |
| 2878 forum posts 248 photos | What a super engine - I had one when I was 14, comp special and Hunter 3.5 - Oh yes and an Ed Bee which was converted by ED at Molsey to be water cooled. Allways wanted a Taplin Twin - 2 x ED Hunter cylinders.
Good luck |
| Ramon Wilson | 27/03/2010 23:53:12 |
1655 forum posts 617 photos | Robert - my third engine was an ED Hunter - KK Pacer - clipped the concrete and cracked the crank case all round the bearing housing
 . I renovated an old Taplin Twin some time ago. It was in a very poor state but once finished it totally lived up to it's image and started so easily. I sold it on, something I really do now regret. . I renovated an old Taplin Twin some time ago. It was in a very poor state but once finished it totally lived up to it's image and started so easily. I sold it on, something I really do now regret. As suggested I thought some might like to see the latest bits tackled - the crankshafts and backplates.
   The backplates are machined from solid and proved an interesting part to make. I'm planning on getting all the ally parts made before tackling the internals.
The images on the link have been added to to and captioned.
Hope these are of interest
Regards - Ramon
|
| Ramon Wilson | 13/04/2010 22:42:40 |
1655 forum posts 617 photos | Hi again,
Managed to get a bit more done over the last week or two and as a couple of you did ask to keep you up to date on progress here are a few pics of current state of play
The first two are one engine 'mocked up' - 'dress rehearsal' if you like. No bearings are fitted at this stage as the cases still require bead blasting.
  And this shows the other bits to do the second one.  Pistons, liners and contra pistons are next which will just leave the comp screws needle valve assemblies and rotors to do.
Does anyone know where I can puchase a small amount of the green 'Oilite'
oil filled nylon to machine the rotors from. Failing that I have some black 'Nylatron' - does anyone have any experience using this for this application? I also have some Tufnol which has been used for this part in other designs. Any thoughts?
With the spring like conditions finally here I'm afraid that other love - the garden - will have to take precedent at this time of the year but I'll get on with the rest of it as soon as I can.
Regards for now Ramon
|
| LADmachining | 14/04/2010 10:28:08 |
126 forum posts 11 photos | Hi Ramon, Fantastic work! The engines are coming along very nicely! Regarding the oil-filled nylon, a quick search on eBay brought up:- Should be enough to make the rotors with. The price isn't extortionate, either. Regards, Anthony |
| Ramon Wilson | 14/04/2010 13:33:18 |
1655 forum posts 617 photos | Thanks Anthony, I had searched but hadn't given Ebay a thought. Piece duly ordered at very reasonable price shame it was round bar but then you can't have everything!  Thanks again - back soon - Ramon |
| duncan webster | 14/04/2010 21:11:14 |
| 5307 forum posts 83 photos | Very impressive, now all you have to do is publish details of your cross slide drilling gizmo, which looks really useful |
| Alan Worland | 14/04/2010 22:19:57 |
| 247 forum posts 21 photos | 'Hats off' to you Ramon, superb looking workmanship! |
| Circlip | 15/04/2010 12:11:31 |
| 1723 forum posts | Many years ago (Oh, L, drag up yer zimmers), One of my design components was molded in Nylon. Part of the brief for the finished item was that it should be flexible and collecting them "Out of the mold" prooved that the darned things exhibited the flexibility of cream crackers.
"Ah" said the tecky rep, "Thats cos they're fresh out of the mold and haven't had time to absorb any water, in 24 Hrs they'll feel different again, you could boil them in water to speed up the process"
Since we wanted another component to slide inside a slot molded into it, some bright spark (
 ) suggested "What about boiling them in oil??" ) suggested "What about boiling them in oil??" As it was handy, and also due to be changed, they got a bubbling in the chip pan and despite the stink, EVEN after washing and drying them, the flexibility AND the lubricicity was obvious.
I wouldn't advocate using Flora or Vigin Olive Oil, but a standard Nylon 6 suitably "Cooked" in an appropriate lubricant may get some out of a tight squeeze (Pun intended).
Keep having to post this for re-oiling "Oilites"
Regards Ian. |
| Ramon Wilson | 15/04/2010 21:23:18 |
1655 forum posts 617 photos | Thanks Ian, Until I read of this material in Dave Parkes I/C topics in ME I was not aware of it's existance. He recommends it for this application in his designs and I thought I would go ahead and try some. Having ordered a piece after LAD's link (it arrived today) I have 'googled' it and found that it is particularly recommended for heavy loading in low RPM situations!
I'm now thinking that the design of this rotor with it's substantial radial cutout may lead to distortion at the anticipated rpm. I will make one just to see but am thinking that I will revert to using Tufnol as this has been tried and tested in this situation.
Had a really good day at Myford's open day today, spent to much - as you do - but very happy
Thanks for the kind comments but the drill spindle will have to wait awhile I'm afraid!
Regards - Ramon Edited By Ramon Wilson on 15/04/2010 21:25:05 |
| Ramon Wilson | 20/04/2010 22:46:12 |
1655 forum posts 617 photos | Had a good session on my friend Lee's bead blaster today and finally got the cases and backplates done along with parts from a couple of other rebuilds.
Heres how they look now
  I can now build the bottom ends up though I think I will wait a bit until all the parts are made. Liners and pistons next and an attempt at that anodising.
Regards for now - Ramon |
| Terryd | 21/04/2010 06:47:55 |
 1946 forum posts 179 photos | They look lovely Ramon, I can't wait to see the finished article. I'm especially interested in your anodising results when you get round to it, and considering your skill and persistence I believe that it will be a superb job. Regards Terry |
| Ramon Wilson | 27/04/2010 22:46:39 |
1655 forum posts 617 photos | Hi again, Spent an interesting couple of days making the pistons and liners. As said elswhere it was decided to make one from cast iron and the other from a 'tough steel'. The cast iron was an offcut and has an exceptionally close grain - much finer than the continuous cast bar I have. Shame there wasn't more for the pistons. I have no idea of the steel - it came from a largish stud - 1-1/4 dia by a foot - 'surplus to requirements' from offshore days. Probably of American manufacture the end of the stud was neatlly marked ie engraved not punched - 'CR 8 S 7' Whether that relates to the grade I have no idea.
It turned reasonably well and gave a good finish just have to see how it stands up to the task now.
The cutter(s) for the ports - three were made just incase (just as well) - came from 2mm thick GFS. Heat treated and tempered light straw the first two did not stand up to the steel liner both wearing quite quickly despite low speed. This was put down more to insufficient backing off so ensured this was better on the last one and left it hard and untempered as well. Slowest possible speed and 'Bingo' - sailed through !
   Piston material came from a slab of continuous cast bar - this was rather than waste the larger diameter round bar 'in store'. Hit a 'snag' tonight when lapping the first piston to go into the liner. Just realised in time as I was beginning to think I had left rather too much on for lapping that I was trying to fit it to the wrong (and tight) end of the liner!  I think I may have caught it in time, it is still quite tight at the very top of the bore but won't really be able to tell if the compression is good enough until it's assembled I think I may have caught it in time, it is still quite tight at the very top of the bore but won't really be able to tell if the compression is good enough until it's assembled If one bore had been made slightly larger and that done first then it could have been used for the smaller - must keep that in mind ???. If one bore had been made slightly larger and that done first then it could have been used for the smaller - must keep that in mind ???.Not far to go now - hope this is still of interest
Regards - Ramon
|
| Terryd | 28/04/2010 06:57:16 |
1946 forum posts 179 photos | Hi Ramon, great to see your progress and hear about your problems and overcoming them. I can't wait to see the final products. - My breath has never been so bated. In fact if you don't get on with that anodising soon I may keel over for want of oxygen, I have been very busy over the last week or so and haven't had time to get out and play with my Rivers but hopefully this weekend.................. Terry |
| Ramon Wilson 1 | 28/04/2010 22:18:22 |
| 1 forum posts | Hi Terry
'and there I was thinking that rap on the fingers had put you off
You might be interested in how this goes!
Had better success with the second piston today. I confess to 'taking a shortcut' (I know I know
) last night and lapped the piston down with a very fine stone. It transpires the pistons had distorted very slightly when machining the internals and lapping that first piston to the liner revealed it's ovality. Took the time to bore a simple piston lap today and the second is a big improvement. The first is possibly usable - it is a very tiny amount - but if it proves not to have reasonable compression it may be salvageble by 'growing it' with heat and re lapping - failing that its another piston. This time though I shall not finish turn the OD until after the insides!All the parts are ready for anodising and I have all the neccesary except some green dye. Having spent some time looking I have not found anything so far that 'fits the minds eye'. In that case it might be blue!
Regards - Ramon
PS All pics are up to date on here
Edited By David Clark 1 on 27/05/2010 16:04:36 |
Please login to post a reply.
Magazine Locator
Want the latest issue of Model Engineer or Model Engineers' Workshop? Use our magazine locator links to find your nearest stockist!
Sign up to our Newsletter
Sign up to our newsletter and get a free digital issue.
You can unsubscribe at anytime. View our privacy policy at www.mortons.co.uk/privacy
Latest Forum Posts
- hemingway ball turner
04/07/2025 14:40:26 - *Oct 2023: FORUM MIGRATION TIMELINE*
05/10/2023 07:57:11 - Making ER11 collet chuck
05/10/2023 07:56:24 - What did you do today? 2023
05/10/2023 07:25:01 - Orrery
05/10/2023 06:00:41 - Wera hand-tools
05/10/2023 05:47:07 - New member
05/10/2023 04:40:11 - Problems with external pot on at1 vfd
05/10/2023 00:06:32 - Drain plug
04/10/2023 23:36:17 - digi phase converter for 10 machines.....
04/10/2023 23:13:48 - More Latest Posts...
- View All Topics
Support Our Partners


Shopping Partners
Subscription Offer

Latest "For Sale" Ads
- Reeves** - Rebuilt Royal Scot by Martin Evans
by John Broughton
£300.00 - BRITANNIA 5" GAUGE James Perrier
by Jon Seabright 1
£2,500.00 - Drill Grinder - for restoration
by Nigel Graham 2
£0.00 - WARCO WM18 MILLING MACHINE
by Alex Chudley
£1,200.00 - MYFORD SUPER 7 LATHE
by Alex Chudley
£2,000.00 - More "For Sale" Ads...
Latest "Wanted" Ads
- D1-3 backplate
by Michael Horley
Price Not Specified - fixed steady for a Colchester bantam mark1 800
by George Jervis
Price Not Specified - lbsc pansy
by JACK SIDEBOTHAM
Price Not Specified - Pratt Burnerd multifit chuck key.
by Tim Riome
Price Not Specified - BANDSAW BLADE WELDER
by HUGH
Price Not Specified - More "Wanted" Ads...
Get In Touch!
Do you want to contact the Model Engineer and Model Engineers' Workshop team?
You can contact us by phone, mail or email about the magazines including becoming a contributor, submitting reader's letters or making queries about articles. You can also get in touch about this website, advertising or other general issues.
Click THIS LINK for full contact details.
For subscription issues please see THIS LINK.
Digital Back Issues


Donate

 Register
 Log-in
Model Engineer Magazine
- Percival Marshall
- M.E. History
- LittleLEC
- M.E. Clock

ME Workshop
- An Adcock
- & Shipley
- Horizontal
- Mill

Subscribe Now
- Great savings
- Delivered to your door

Pre-order your copy!
- Delivered to your doorstep!
- Free UK delivery!
All Forum Topics > I/C Engines > ED Racer 'times two'