Level/Flatness using laser/webcam/python
Measuring the flatness of a surface with a laser and a webcam to microns over large surfaces.
| Chuck Taper | 30/03/2023 11:17:35 |
95 forum posts 37 photos | This technique is new to me. It all seems fairly straightforward You tube Video https://www.youtube.com/watch?v=hnHjrz_inQU A brief search on here [laser] returned no similar thread. Thoughts? Regards. Frank C. |
| John McNamara | 30/03/2023 11:20:30 |
1377 forum posts 133 photos | Bryan and a heap of contributors are doing a great job. on Discord |
| Andy_G | 31/03/2023 00:07:12 |
260 forum posts | The fundamental problem they face is that the LASER beam is affected by thermal gradients, turbulence and convection currents in the air. (Even having somebody stainding near it is enough to cause a beam deviation of several hundred microns over a few metres). I designed & built a LASER guided cutting tool in the late 1980s (using a quadrant photodiode as the target). It was easily capable of micron level resolution, however the beam deviation due to air currents within the machine enclosure rendered it useless. |
| Chris Mate | 31/03/2023 06:50:32 |
| 325 forum posts 52 photos | Andy G interesting from 1st hand experience. |
| KW56 | 31/03/2023 07:39:34 |
| 8 forum posts | We used to use an older version of this Renishaw laser machine tool calibration system :- https://www.renishaw.com/en/xk10-alignment-laser-system--44377 It works in a similar way but bounces the laser back with mirrors to use interferometry to calculate errors to 4 or 5 decimal places. The requirement to avoid draughts and keeping temperature stable was the same. |
| SillyOldDuffer | 31/03/2023 15:41:08 |
| 10668 forum posts 2415 photos | Posted by Andy_G on 31/03/2023 00:07:12:
The fundamental problem they face is that the LASER beam is affected by thermal gradients, turbulence and convection currents in the air. (Even having somebody stainding near it is enough to cause a beam deviation of several hundred microns over a few metres). I designed & built a LASER guided cutting tool in the late 1980s (using a quadrant photodiode as the target). It was easily capable of micron level resolution, however the beam deviation due to air currents within the machine enclosure rendered it useless. Ah, but did your cutting tool or KW56's Renishaw calibrator work in the same way as the Youtube leveller? I think a cutting tool guidance system is much harder than a leveller because a guidance system has to work fast and accurately, more-or-less in real-time? The leveller only has to be accurate; it can take as long as it needs to get a good answer. As I understood it, a rather wobbly laser beam is scanned to fill the whole room with a plane of light. The test girder is set up just below the plane, such that a digital camera sensor interrupts the scan as it sweeps the room. Thus the sensor, with pixels about 4 microns apart, detects a sequence of hits spread across several vertical lines of pixels either side of the horizontal plane. Which pixels are lit up by hundreds of scans, are recorded by a computer. They're distributed evenly either side of a mean, and the computer calculates the mean. Air movement will spread the distribution but not alter the mean, and, although the mean's certainty will reduced, this can be corrected by taking more samples. Basically, the leveller relies on the software (Python) to achieve accuracy by identifying where the majority of a large number of photons hit the sensor. The method gets more accuracy than the pixel spacing suggests, and is less vulnerable to air currents because it averages them out. The main problem I see is the time averaging takes to get results. Hard to see how it could guide a tool unless the laser scan, sensor and computer were all super-fast. Looking at the Renishaw XK10 blurb, I suspect it works in the same way as the Youtube leveller. 'The laser plane is aligned and datumed at positions 1, 2 and 3. The deviation measured at position 4, in combination with the axis length, is used to calculate the vertical angle between the two axes.' Much better engineered and the XK10 does range correction and self-checking, but at root there's also a laser plane, measurement of a deviation and lots of software running on a powerful Windows 10 box. I guess the deviation is calculated in the same way as the Youtube leveller does it, but the numbers are crunched faster and more elaborately from multiple sensors if required. Similar, but faster, easier to use, considerably more capable, and reliably accurate. (Perhaps 100 times better than Youtube!) Bouncing lasers off the moon is harder than I thought. I imagined it being done with a red pen laser. Nope. A grown-up laser is fired through a big telescope to collimate the beam, about 3.5 metres diameter on earth. After travelling 380,000km to a reflector thoughtfully left behind by a moon mission, the laser beam is 2km across. Then, the tiny amount of reflected laser light that gets back to the telescope has to be separated from all the rest. It's all very high-tech. I expect they had to use an Arduino! Dave Dave
Edited By SillyOldDuffer on 31/03/2023 15:42:04 |
| mgnbuk | 31/03/2023 16:35:48 |
| 1394 forum posts 103 photos | We used to use an older version of this Renishaw laser machine tool calibration system Ditto. I had a Renishaw ML10 laser + EC10 environmental compensation unit + a big box of optics to play with at my last-but-one employment. Beam movement due to draughts was an issue, particularly when working with long distances - the return beam could be seen wandering about in big, draughty machine shops. Long distances also showed the return beam had increased from a bright approx. 1.5mm dot that left the laser unit to a dim 5p coin sized return beam. - accurate alignment was essential to get a useable signal strength & in those circumstances a drought shop was a nightmare. No Windows 10 powerbox back then - the Renishaw software we used was DOS based & ran (via a half width ISA interface card) on an Amstrad ALT 286 monochrome laptop & a dot matrix printer ! We did have a commercial system very similar to the system in the video demonstrated at one point - probably 30 years ago. The demo was done in our works levelling a floor borer bed . The tripod mounted laser set up a level plane & there was a sensor on a base that also had a digital readout that could be zeroed. After that, as the sensor was moved about the bed next to each levelling point it displayed how high or low that point was relative to the set zero point & the levelling bolt adjusted to bring the readout to zero. It was impressively quick to use, but the boss was not impressed enough to buy one ! Impressive to see what some (clever) people can accomplish by creatively re-purposing relatively cheap, off the shelf consumer items. Nigel B. |
| Andy_G | 01/04/2023 11:45:15 |
260 forum posts | My tool guidance effort was a real-time servo system - no averaging. I was more successful with a profile measurement gauge that used a linescan camera illuminated by a LASER working over ~200mm. Sub-pixel resolution is easily possible through interpolation - similarly real-time edge detection from a video signal. Averaging will help remove random effects, but can't account for systematic errors. Hopefully it will get them what they want. When I dabbled in this professionally, anything like this was done in the 'Constant Temperature Room' which (as the name suggests) was maintained at a tightly controlled temperature 24/7 so you didn't get problems with thermal gradients due to temperature differences between equipment and the air. The beam divergence of LASER pointers is pretty poor.
|
| Robert Atkinson 2 | 01/04/2023 13:34:31 |
1891 forum posts 37 photos | The Renishaw ML 10 and it's replacement are interferometers. It can only measure distance between optical elements. Hewlett Packard made a similar system. It used a dual wavelength laser. Both use Helium Neon gas lasers with wavelength stabilisation but minute adjustment of the cavity length. Typically this was done with a heater to expand the material. Angular and flatness measurements rely on distance comparisins with special optics. For full accuarcy they have to be compensated for the local speed of light which is affected by air pressure and temperature. I've used both the HP and Renishaw systems.
|
| John McNamara | 01/04/2023 15:25:14 |
1377 forum posts 133 photos | I have contributed to the discord group and also the starter post at Mycncuk. The results of my experiments with webcam/laser and Webcam/wire combinations favour wire for straight line measurement. Repeatable accuracy was obtained with wire and webcam, alignment to a few microns. Tensioned wire is affected by wind and draughts so it must be done in still air. It is also affected by vibration from say nearby machinery. |
| Michael Gilligan | 01/04/2023 20:07:53 |
23121 forum posts 1360 photos | Posted by John McNamara on 01/04/2023 15:25:14:
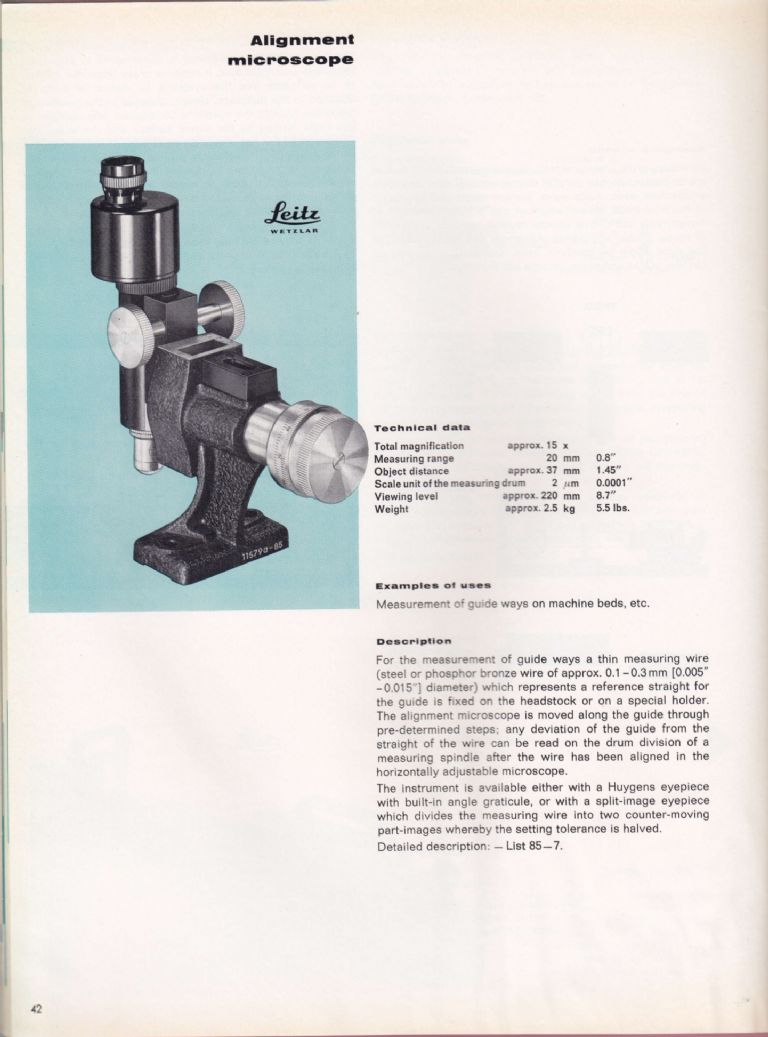
[…] . I don’t think I have ever seen the electrically controlled one, John … but this may be of interest: . . MichaelG. . Source: __ https://archive.org/details/pdfy-8Bodc5JEPZ0RGXru/mode/2up PDF download should be available, but it seems to be struggling today. Edited By Michael Gilligan on 01/04/2023 20:20:10 |
| John McNamara | 02/04/2023 02:35:09 |
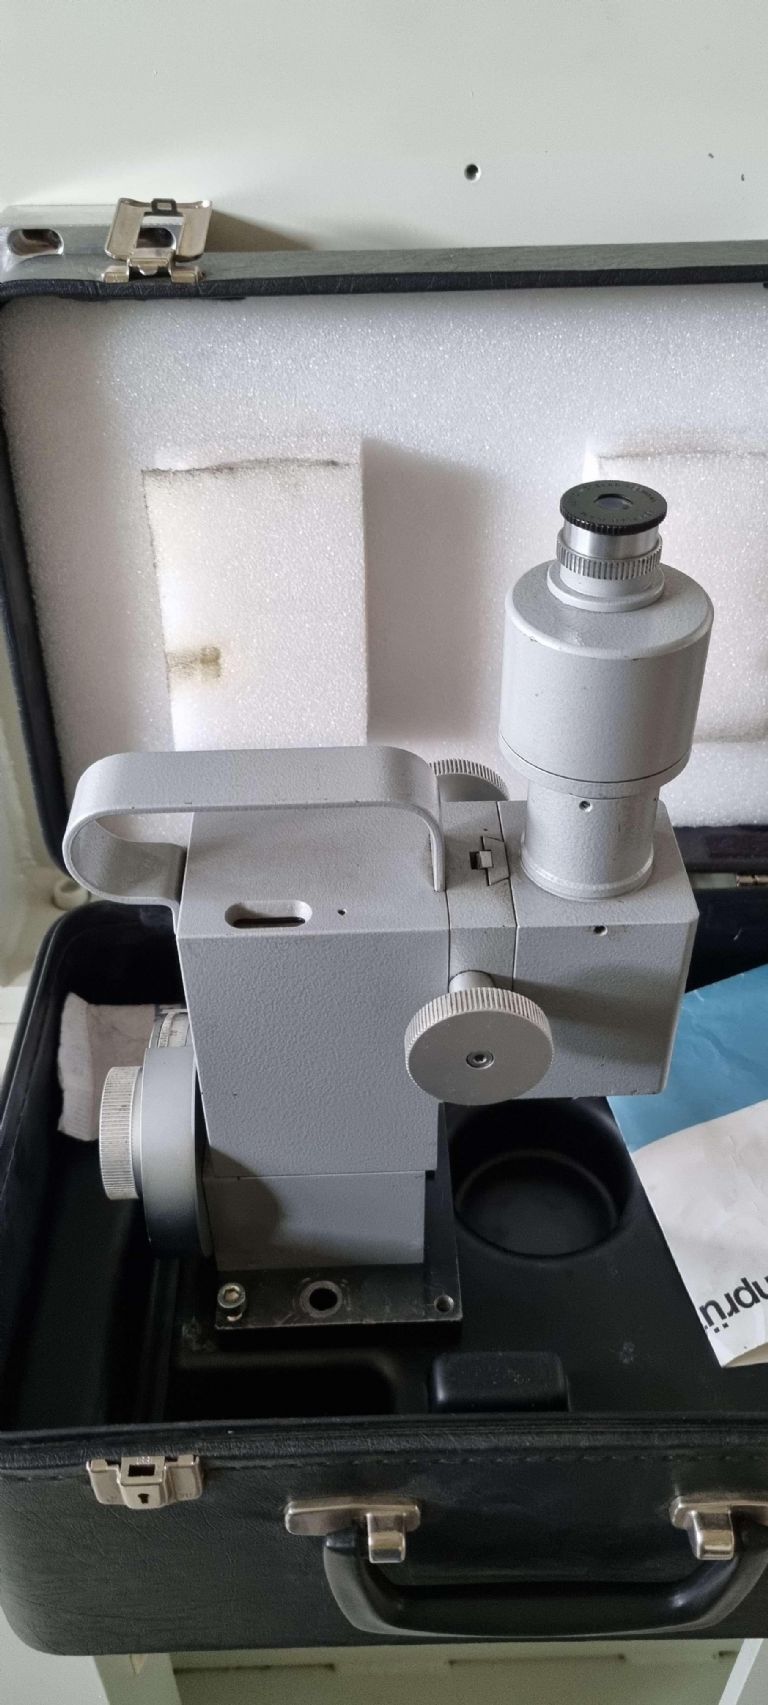
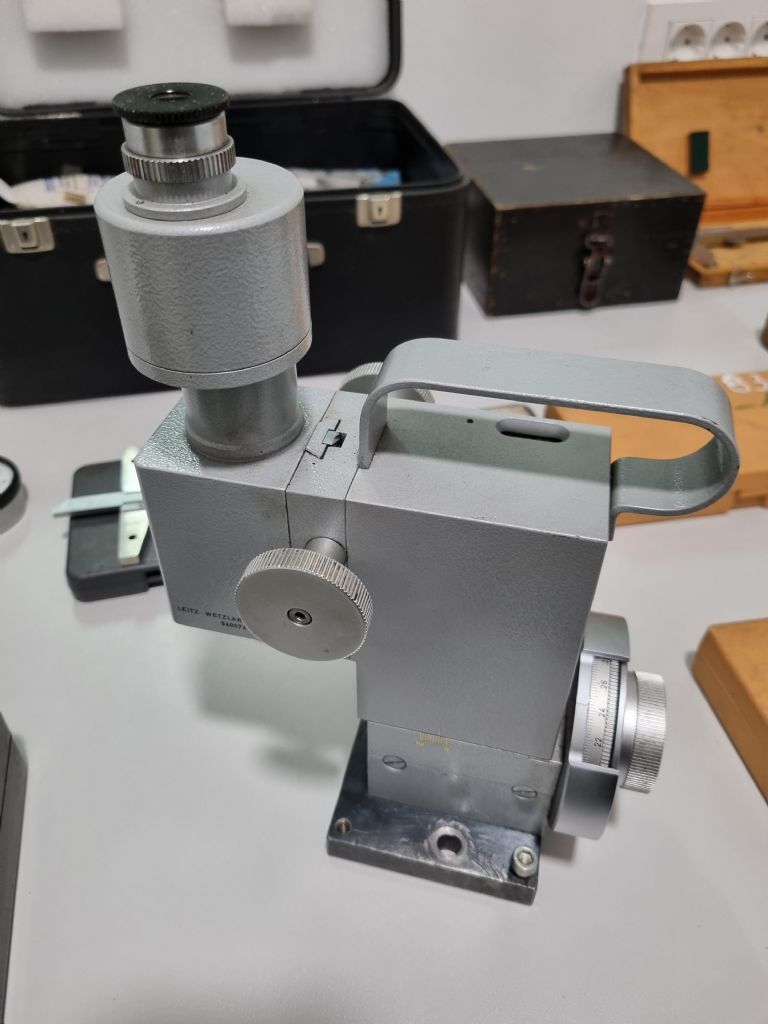
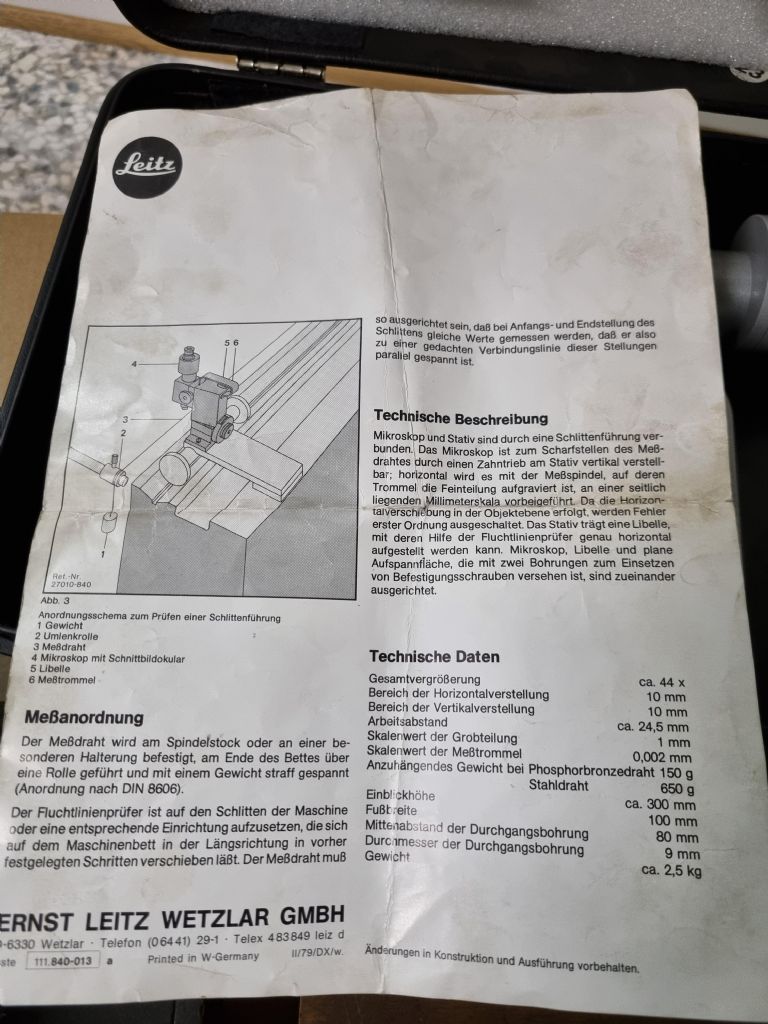
1377 forum posts 133 photos | Hi Michael |
| Michael Gilligan | 02/04/2023 05:09:22 |
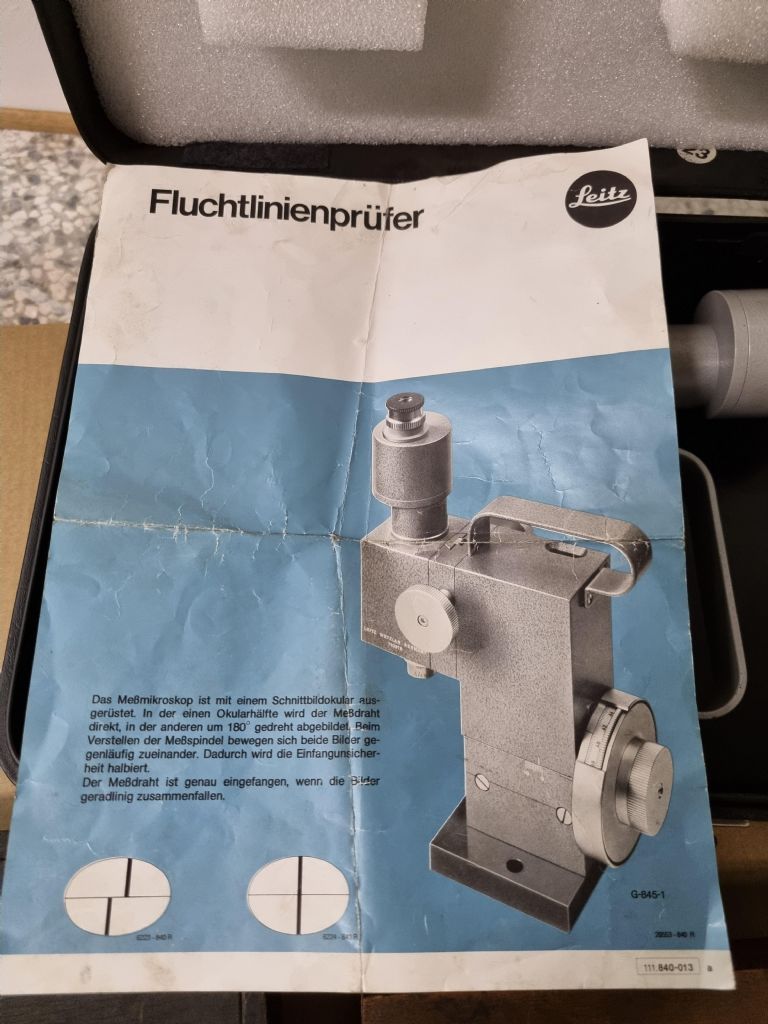
23121 forum posts 1360 photos | Very interesting, John, thanks for sharing the photos. I don’t speak German, but fortunately most technical German is very literal and therefore translation is quite simple. Fluchtlinienprüfer translates to Flight Line Tester and it doesn’t take too much imagination to realise the conceptual similarity between a flight-line and a taut wire. We did a lot of this rudimentary translation when I worked at KODAK in the early 1970s, but it’s much easier now … I just turn to DeepL when I see a tantalising word, instead of hauling-out the dictionary. MichaelG. . Edit: __ and there is even a Wikipedia page about them: https://de.wikipedia.org/wiki/Fluchtlinienprüfer
Edited By Michael Gilligan on 02/04/2023 05:34:28 |
Please login to post a reply.
Want the latest issue of Model Engineer or Model Engineers' Workshop? Use our magazine locator links to find your nearest stockist!
Sign up to our newsletter and get a free digital issue.
You can unsubscribe at anytime. View our privacy policy at www.mortons.co.uk/privacy
- *Oct 2023: FORUM MIGRATION TIMELINE*
05/10/2023 07:57:11 - Making ER11 collet chuck
05/10/2023 07:56:24 - What did you do today? 2023
05/10/2023 07:25:01 - Orrery
05/10/2023 06:00:41 - Wera hand-tools
05/10/2023 05:47:07 - New member
05/10/2023 04:40:11 - Problems with external pot on at1 vfd
05/10/2023 00:06:32 - Drain plug
04/10/2023 23:36:17 - digi phase converter for 10 machines.....
04/10/2023 23:13:48 - Winter Storage Of Locomotives
04/10/2023 21:02:11 - More Latest Posts...
- View All Topics
- Reeves** - Rebuilt Royal Scot by Martin Evans
by John Broughton
£300.00 - BRITANNIA 5" GAUGE James Perrier
by Jon Seabright 1
£2,500.00 - Drill Grinder - for restoration
by Nigel Graham 2
£0.00 - WARCO WM18 MILLING MACHINE
by Alex Chudley
£1,200.00 - MYFORD SUPER 7 LATHE
by Alex Chudley
£2,000.00 - More "For Sale" Ads...
- D1-3 backplate
by Michael Horley
Price Not Specified - fixed steady for a Colchester bantam mark1 800
by George Jervis
Price Not Specified - lbsc pansy
by JACK SIDEBOTHAM
Price Not Specified - Pratt Burnerd multifit chuck key.
by Tim Riome
Price Not Specified - BANDSAW BLADE WELDER
by HUGH
Price Not Specified - More "Wanted" Ads...
Do you want to contact the Model Engineer and Model Engineers' Workshop team?
You can contact us by phone, mail or email about the magazines including becoming a contributor, submitting reader's letters or making queries about articles. You can also get in touch about this website, advertising or other general issues.
Click THIS LINK for full contact details.
For subscription issues please see THIS LINK.
Model Engineer Magazine
- Percival Marshall
- M.E. History
- LittleLEC
- M.E. Clock
ME Workshop
- An Adcock
- & Shipley
- Horizontal
- Mill
Subscribe Now
- Great savings
- Delivered to your door
Pre-order your copy!
- Delivered to your doorstep!
- Free UK delivery!



 Register
 Log-in


