Forum sponsored by:

Convex buffer face
| paul rushmer | 21/09/2018 12:40:18 |
| 104 forum posts 17 photos | I hand tool mine using a file ground smooth on the end and sharpened like a wide parting tool, the tool rest being a round rod held in the tool post. Check the profile by eye and feel polish with emery to finish. This method is quick simple and easy. Just be carful. Paul |
| KWIL | 21/09/2018 15:14:31 |
| 3681 forum posts 70 photos | Pointy radius rod and the DAG Brown approach produce identical items so there is no guess work to make them look OK. |
| Ron Laden | 21/09/2018 15:25:19 |
 2320 forum posts 452 photos | Posted by Mick B1 on 20/09/2018 21:46:16:
I've never actually done this, but an experienced turner showed me a method using a pointy rod the length of the required radius located in deep dot-punches below spindle centreline on headstock and crossslide chuckside face. You use the saddle handwheel to keep the radius rod in contact both ends, whilst traversing a tool across the workface. The saddle moves away from the chuck to generate the radius. You arrange the tool so that it reaches centre when the radius rod's parallel to the bedways. It's fiddly, but it's simple, accurate and I've seen it work. Thanks for this idea Mick, I gave it a try on a test piece and it works really well and is easy to do. The only problem I have is the four blanks which I have for the buffers are 70mm long and the radius needs to be around 200mm. A 200mm guide rod keeps the cross slide too far way from the workpiece even with the top slide fully wound in, I,m using a mini-lathe by the way. The blanks need to be around 125 mm long and then it will work, however all is not lost. A machinist friend supplied me with the 70mm blanks (FOC) which was very good of him, I dont know the grade of aluminium but it is the hardest I have come across. The 3.2mm parting tool I have works really well as a groove tool (well on good machining aluminium at least) but it doesnt like the material my friend supplied. So I need to get a softer grade and longer blanks and then I think it will be fine. Thanks again Ron
Edited By Ron Laden on 21/09/2018 15:26:45 Edited By Ron Laden on 21/09/2018 15:28:14
Edited By Ron Laden on 21/09/2018 15:53:52 |
| Ron Laden | 21/09/2018 15:29:56 |
2320 forum posts 452 photos | Sorry, dont know why my above reply is in miniature, cant seem to change it..? Ron |
| Michael Gilligan | 21/09/2018 15:35:15 |
 23121 forum posts 1360 photos | Posted by Ron Laden on 21/09/2018 15:29:56:
Sorry, dont know why my above reply is in miniature, cant seem to change it..? Ron . Ron, It's because you started typing in Mick's edited text ... The formatting was carried over from that. MichaelG.
|
| Ron Laden | 21/09/2018 15:39:08 |
2320 forum posts 452 photos | Thanks Michael, I didnt realise that. Ron |
| Ron Laden | 22/09/2018 11:56:23 |
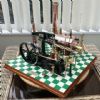
2320 forum posts 452 photos | Sorry for the not too good a picture of a test piece and the guide rod using the method that Mick put forward, it is really easy to do and works a treat...thanks Mick. Good thing is of course, you get repeatable results when producing more than one item. I just have to get some better material before I machine the buffer set, the stuff I have been given is awful, dont know what it is but terrible to machine.
|
| Ron Laden | 27/09/2018 08:36:40 |
2320 forum posts 452 photos | Well, I managed to produce the first of the 4 buffers (non sprung) using the guide rod method, I think it turned out ok. The buffer is tapped M6 for mounting to the chassis plate, just need to go over it with some wet or dry to remove some scratches from the base. It took me over two and a half hours to produce from a 35mm dia blank, slow I know, but I guess a lot of that is down to inexperience plus I still dont tend to push the mini-lathe. I know its alu but I didnt take any cut deeper than 10 thou, the balance of 3 should be quicker though but I,m not in any hurry. Ron
Edited By Ron Laden on 27/09/2018 08:39:43 |
| Martin Kyte | 27/09/2018 12:47:42 |
 3445 forum posts 62 photos | Posted by Ron Laden on 21/09/2018 15:25:19:
Posted by Mick B1 on 20/09/2018 21:46:16:
I've never actually done this, but an experienced turner showed me a method using a pointy rod the length of the required radius located in deep dot-punches below spindle centreline on headstock and crossslide chuckside face. You use the saddle handwheel to keep the radius rod in contact both ends, whilst traversing a tool across the workface. The saddle moves away from the chuck to generate the radius. You arrange the tool so that it reaches centre when the radius rod's parallel to the bedways. It's fiddly, but it's simple, accurate and I've seen it work. Thanks for this idea Mick, I gave it a try on a test piece and it works really well and is easy to do. The only problem I have is the four blanks which I have for the buffers are 70mm long and the radius needs to be around 200mm. A 200mm guide rod keeps the cross slide too far way from the workpiece even with the top slide fully wound in, I,m using a mini-lathe by the way. The blanks need to be around 125 mm long and then it will work, however all is not lost. A machinist friend supplied me with the 70mm blanks (FOC) which was very good of him, I dont know the grade of aluminium but it is the hardest I have come across. The 3.2mm parting tool I have works really well as a groove tool (well on good machining aluminium at least) but it doesnt like the material my friend supplied. So I need to get a softer grade and longer blanks and then I think it will be fine. Thanks again Ron
Edited By Ron Laden on 21/09/2018 15:26:45 Edited By Ron Laden on 21/09/2018 15:28:14
Edited By Ron Laden on 21/09/2018 15:53:52 the point where the rod touches the cross slide doesn't need to be on the front face. A suitable piece of angle or something extending to the tailstock side at a convenient position would serve just as well. regards Martin |
| Ron Laden | 27/09/2018 13:16:02 |
2320 forum posts 452 photos | Thanks for that tip Martin, I never thought of that but I can see how it would work. Ron
|
| Jeff Dayman | 27/09/2018 14:34:31 |
| 2356 forum posts 47 photos | Your buffer looks great Ron, nice job! |
| Neil Wyatt | 27/09/2018 15:29:31 |
 19226 forum posts 749 photos 86 articles | Nice job Ron. The maximum 10-thou cut in the manual is a bad joke. Don't be afraid of 1mm in steel or 2mm in aluminium alloy as long as the rpm isn't too low. Let's face it, when parting you are going to be taking cuts typically between 1.5 and 3mm without overloading the machine. Neil |
| Ron Laden | 27/09/2018 17:14:44 |
2320 forum posts 452 photos | Thanks Jeff Thanks Neil, point taken, when I make the other three I will get a bit braver with the cuts. The buffer ram is 14mm dia and the ram body 19mm from a 35mm dia blank so you can see why it took me so long. I did have one scary moment though, whilst I was turning the front face radius the cross slide suddenly kicked forward about 4mm, fortunately no damage was done. When I checked, the cross slide had gone from its normal 0.1-0.2mm backlash to 4mm. The two cap heads that hold the leadscrew nut had worked loose without me realising. I set it up again using the method you describe in your mini-lathe book and all is now well. Ron |
| not done it yet | 27/09/2018 19:06:43 |
| 7517 forum posts 20 photos | Who really cares if it took that long? Better to make slow progress rather than c*ck it up. You are not trying to make a living at this! Experience and confidence will follow. The final outcome looks very good - and that is what matters. You will soon find that ‘roughing out’ material with a lesser surface finish takes a lot less time than doing it like finishing cuts all the way through.
|
| Lainchy | 29/05/2020 12:51:02 |
 273 forum posts 103 photos | I love this forum for tips! Found this under a search. I have to do the same on my Juliet, albeit that it doesn't quote a radius. Looking forward to having a go though now Thanks ME |


Please login to post a reply.
Magazine Locator
Want the latest issue of Model Engineer or Model Engineers' Workshop? Use our magazine locator links to find your nearest stockist!
Sign up to our Newsletter
Sign up to our newsletter and get a free digital issue.
You can unsubscribe at anytime. View our privacy policy at www.mortons.co.uk/privacy
Latest Forum Posts
- *Oct 2023: FORUM MIGRATION TIMELINE*
05/10/2023 07:57:11 - Making ER11 collet chuck
05/10/2023 07:56:24 - What did you do today? 2023
05/10/2023 07:25:01 - Orrery
05/10/2023 06:00:41 - Wera hand-tools
05/10/2023 05:47:07 - New member
05/10/2023 04:40:11 - Problems with external pot on at1 vfd
05/10/2023 00:06:32 - Drain plug
04/10/2023 23:36:17 - digi phase converter for 10 machines.....
04/10/2023 23:13:48 - Winter Storage Of Locomotives
04/10/2023 21:02:11 - More Latest Posts...
- View All Topics
Support Our Partners


Shopping Partners
Subscription Offer

Latest "For Sale" Ads
- Reeves** - Rebuilt Royal Scot by Martin Evans
by John Broughton
£300.00 - BRITANNIA 5" GAUGE James Perrier
by Jon Seabright 1
£2,500.00 - Drill Grinder - for restoration
by Nigel Graham 2
£0.00 - WARCO WM18 MILLING MACHINE
by Alex Chudley
£1,200.00 - MYFORD SUPER 7 LATHE
by Alex Chudley
£2,000.00 - More "For Sale" Ads...
Latest "Wanted" Ads
- D1-3 backplate
by Michael Horley
Price Not Specified - fixed steady for a Colchester bantam mark1 800
by George Jervis
Price Not Specified - lbsc pansy
by JACK SIDEBOTHAM
Price Not Specified - Pratt Burnerd multifit chuck key.
by Tim Riome
Price Not Specified - BANDSAW BLADE WELDER
by HUGH
Price Not Specified - More "Wanted" Ads...
Get In Touch!
Do you want to contact the Model Engineer and Model Engineers' Workshop team?
You can contact us by phone, mail or email about the magazines including becoming a contributor, submitting reader's letters or making queries about articles. You can also get in touch about this website, advertising or other general issues.
Click THIS LINK for full contact details.
For subscription issues please see THIS LINK.
Digital Back Issues


Donate

 Register
 Log-in
Model Engineer Magazine
- Percival Marshall
- M.E. History
- LittleLEC
- M.E. Clock

ME Workshop
- An Adcock
- & Shipley
- Horizontal
- Mill

Subscribe Now
- Great savings
- Delivered to your door

Pre-order your copy!
- Delivered to your doorstep!
- Free UK delivery!
All Forum Topics > Beginners questions > Convex buffer face