Forum sponsored by:

The Workshop Progress thread 2018
| JasonB | 29/07/2018 17:01:20 |
 25215 forum posts 3105 photos 1 articles | Thanks Ian. I just used a small dropper bottle to put a drop or two in the main bearing cups and onto the exposed piston rather than fill the drip lubricator. I was running it dry, the base is usually filled with water for cooling so kept runs down to about 2mins before allowing to cool. |
| mechman48 | 29/07/2018 17:58:21 |
 2947 forum posts 468 photos | Geoff; super little oscillator, looks nicely balanced too, not trying to vibrate off the table. |
| geoff walker 1 | 30/07/2018 13:11:12 |
| 521 forum posts 217 photos | Another sumptuous example of craftsmanship Jason, well done Like many others I envy not just your talent but the efficiency with which you turn out these lovely models. Geoff |
| Mark Rand | 30/07/2018 22:23:17 |
| 1505 forum posts 56 photos | Just out of curiosity Jason, about how many hours a week do you spend int the shed? |
| Jim Nic | 30/07/2018 22:30:17 |
 406 forum posts 235 photos | About half of 'em and the other half is spent responding to queries on most of the modelling forums. Jim |
| JasonB | 31/07/2018 07:05:10 |
25215 forum posts 3105 photos 1 articles | In the winter I can usually manage a couple of evenings of about 2.5hrs each and a couple of half days at the weekend so maybe 15hrs total a week. Less in the summer once the grass and my Bonsai start growing. I did notice in the latest ME that there was a 4" Burrell built in 5 months (get your finger out Andrew! ) |
| JasonB | 12/08/2018 17:52:43 |
25215 forum posts 3105 photos 1 articles | With the workshop back down to a more comfortable temperature I was able to make the fitted pins that the Robinson linkages pivot on, quite happy with the way it turns over so far.
I then did some of the furnace base, I'm going for the look of the coal fired version which will also have a small chimney rather than the more often modeled three legged base,
Short vid of the motion. |
| mechman48 | 13/08/2018 15:07:24 |
2947 forum posts 468 photos | Have started on my 'Boxer Oscillator, marked off the frame, roughly cut out & drilled for crank & ports... |
| Jim Nic | 13/08/2018 16:02:11 |
406 forum posts 235 photos | Looks great George, particularly like the paint job. Jim |
| Mark Rand | 14/08/2018 20:50:07 |
| 1505 forum posts 56 photos | Slapped some rather stale Hammerite on the milling machine riser that I've just finished welding up. Ugly welds, ugly paint, built like the proverbial out-house. The lugs on the side will be for brackets to hold the milling vices, rotary table and its chuck when not in use. Next thing is to do the machining on it.
Edited By Mark Rand on 14/08/2018 21:17:17 |
| mechman48 | 15/08/2018 09:29:58 |
2947 forum posts 468 photos |
Continued on with the Boxer oscillator...
Edited By mechman48 on 15/08/2018 09:32:11 |
| Jim Nic | 15/08/2018 10:22:40 |
406 forum posts 235 photos | Some progress on the Overcrank engine. The cylinder assembly looked the most challenging so that's where I started. The cylinder block centre section:
The centre section with the cylinders. The bores have been left undersize until after silver soldering:
Set up for silver soldering. For some reason although I know the theory and have some good gear (a Seivert torch), I do not have the knack of making good quick clean joints.
And here is the soldered cylinder block after pickling:
It still needs fettling and cleaning up but I reckon it'll do. Next is to finish the bores to correct size and drill the steam passages. Jim
|
| Mark Rand | 15/08/2018 11:57:22 |
| 1505 forum posts 56 photos | Is it worth looking for some insulating fire bricks instead of the solid ones? They tend to heat up far more rapidly. |
| JasonB | 15/08/2018 12:15:02 |
25215 forum posts 3105 photos 1 articles | Those look like skamolex blocks and sheet to me, very good insulator and tends to throw the heat back at the work. |
| Jim Nic | 15/08/2018 13:59:49 |
406 forum posts 235 photos | My little hearth is purpose made and bought from CuP Alloys so I don't think that is the problem. Although for the large chunks of brass shown here something a bit bigger to hold more heat in the job may have helped. The bricks are just used to hold the insulators in place. Jim |
| Mark Rand | 15/08/2018 18:38:29 |
| 1505 forum posts 56 photos | Sorry, I had thought they were the high density fire bricks used in the back of fireplaces. Didn't notice the shiny spots on the surface until I expanded the picture. Edited By Mark Rand on 15/08/2018 18:38:56 |
| Brian H | 15/08/2018 19:21:42 |
 2312 forum posts 112 photos | Silver soldering looks good to me. Brian |
| mechman48 | 17/08/2018 10:47:17 |
2947 forum posts 468 photos | Nice soldering job Jim. As an aside but in same context; are you using Propane from small cylinder & how do you store it , inside or outside?. Asking as insurance companies are very reticent to cover for storage of flammable items in garages attached to properties here. What do other members do for storage for MAPP cans / rattle spray cans ? I have most of mine stored in outside separate shed or locked in my steel ( sheet metal ) tool trolley / steel ( ditto ) wall cupboard... Clarkes... usual disclaimer applies. |
| JasonB | 25/08/2018 16:53:21 |
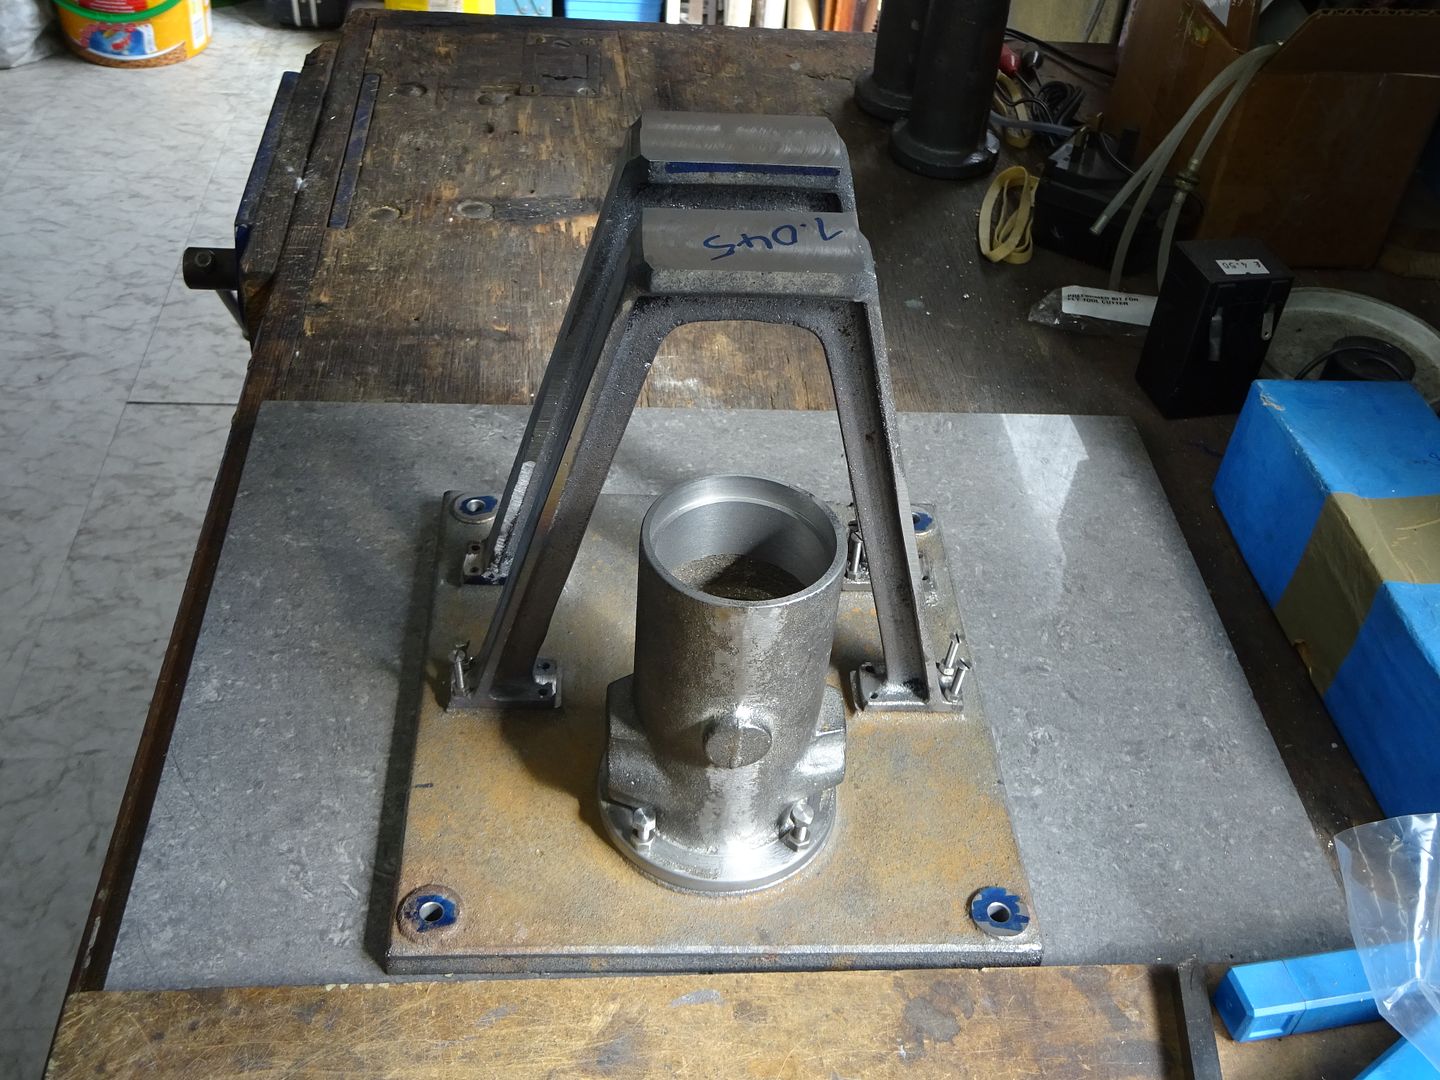
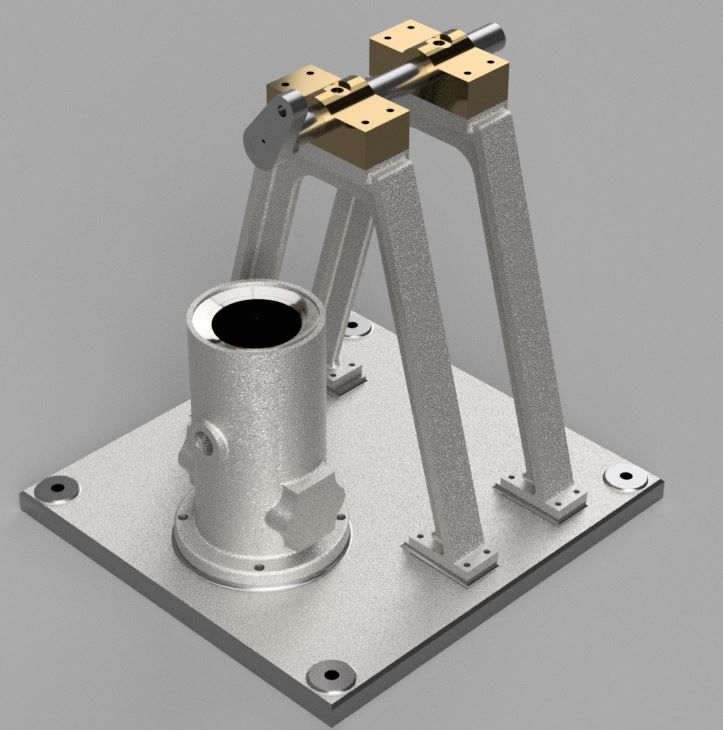
25215 forum posts 3105 photos 1 articles | Not wanting to let Andrew down I have made a bit of swarf out of the newly acquired IF Allman castings just to see what they were like under the skin and to see what the finished sizes would end up as so that I could make a start on the drawings.
I'm Drawing it up in Alibre but using the Render function in F360 as I can't justify paying the extra for Keyshot that Alibre uses.
|
| Ron Laden | 25/08/2018 17:41:31 |
 2320 forum posts 452 photos | Jason, Do you have your collection of stationary engines on display around your home, the ones I have seen look to be lovely pieces of engineering which deserve to be on show. Ron |


.jpg")


.jpg")
.jpg")


This thread is closed.
Magazine Locator
Want the latest issue of Model Engineer or Model Engineers' Workshop? Use our magazine locator links to find your nearest stockist!
Sign up to our Newsletter
Sign up to our newsletter and get a free digital issue.
You can unsubscribe at anytime. View our privacy policy at www.mortons.co.uk/privacy
Latest Forum Posts
- hemingway ball turner
04/07/2025 14:40:26 - *Oct 2023: FORUM MIGRATION TIMELINE*
05/10/2023 07:57:11 - Making ER11 collet chuck
05/10/2023 07:56:24 - What did you do today? 2023
05/10/2023 07:25:01 - Orrery
05/10/2023 06:00:41 - Wera hand-tools
05/10/2023 05:47:07 - New member
05/10/2023 04:40:11 - Problems with external pot on at1 vfd
05/10/2023 00:06:32 - Drain plug
04/10/2023 23:36:17 - digi phase converter for 10 machines.....
04/10/2023 23:13:48 - More Latest Posts...
- View All Topics
Support Our Partners


Shopping Partners
Subscription Offer

Latest "For Sale" Ads
- Reeves** - Rebuilt Royal Scot by Martin Evans
by John Broughton
£300.00 - BRITANNIA 5" GAUGE James Perrier
by Jon Seabright 1
£2,500.00 - Drill Grinder - for restoration
by Nigel Graham 2
£0.00 - WARCO WM18 MILLING MACHINE
by Alex Chudley
£1,200.00 - MYFORD SUPER 7 LATHE
by Alex Chudley
£2,000.00 - More "For Sale" Ads...
Latest "Wanted" Ads
- D1-3 backplate
by Michael Horley
Price Not Specified - fixed steady for a Colchester bantam mark1 800
by George Jervis
Price Not Specified - lbsc pansy
by JACK SIDEBOTHAM
Price Not Specified - Pratt Burnerd multifit chuck key.
by Tim Riome
Price Not Specified - BANDSAW BLADE WELDER
by HUGH
Price Not Specified - More "Wanted" Ads...
Get In Touch!
Do you want to contact the Model Engineer and Model Engineers' Workshop team?
You can contact us by phone, mail or email about the magazines including becoming a contributor, submitting reader's letters or making queries about articles. You can also get in touch about this website, advertising or other general issues.
Click THIS LINK for full contact details.
For subscription issues please see THIS LINK.
Digital Back Issues


Donate

 Register
 Log-in
Model Engineer Magazine
- Percival Marshall
- M.E. History
- LittleLEC
- M.E. Clock

ME Workshop
- An Adcock
- & Shipley
- Horizontal
- Mill

Subscribe Now
- Great savings
- Delivered to your door

Pre-order your copy!
- Delivered to your doorstep!
- Free UK delivery!
All Forum Topics > Work In Progress and completed items > The Workshop Progress thread 2018