Forum sponsored by:

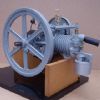
E T Westbury Wyvern engine Crankshaft/Flywheels fixing design
Removal of flywheels, any problems?
| Terence Knight | 05/08/2012 11:39:20 |
| 5 forum posts | I am in the midst of making a Wyvern engine from a Hemingway kit, the cylinder housing and its liner are mounted on the bedplate. Bearings done and ready for the crankshaft. The crankshaft is now made but on both ends the 3/8" dia threaded section is made 3/4" longer than the drawing states. My reason; for possible use of locknuts and puller. The flywheels are fixed by the use of a tapered split bush nipped in by a single 3/8"nut bearing on each flywheel outer face. This design looks fine until you want a flywheel off again, obviously a puller will be required. A puller can use the extended thread or the end of the shaft to bear on. However it is just possible that pulling the flywheel off may tighten in the split tapered bush making life that bit more difficult. Has anybody any experience of removing Wyvern flywheels built to the Westbury drawing design? Are they pigs to get off. I could fit a parallel key and forget the taper. Thanks.
|
| Engine Builder | 05/08/2012 13:58:39 |
 267 forum posts | I use a similar system to fit the flywheels to my engines but drill through the collet and into the crankshaft a bit and fit a silver steel pin. Then when you want to take of the flywheel the collet stays on the crankshaft. The pin is drilled and tapped so a screw may be fitted to remove it. The taper is a good idea fitting a key to a parallel shaft often makes for a wobbly flywheel. Edited By Engine Builder on 05/08/2012 13:59:58 |
| Terence Knight | 05/08/2012 18:11:35 |
| 5 forum posts | To Engine Builder, Spot on, thanks for the prompt reply and a nice simple solution that uses the original design. A 1/8"/5 BA silver steel pin thro the taper sleeve thick end and into the shafts inner end adjacent the shoulder will hold the sleeve virtually at its fixed position when the flywheel is pulled off. A slightly elongated slot for the pin in the sleeve will allow a good tight fit on the taper. Wonderfull, thanks again. Terry Knight
|
| Andrew Evans | 05/08/2012 20:17:06 |
| 366 forum posts 8 photos | Hi. I am just about to start on building this engine from the Hemmingway's Kit. Can you give any advice on if you have run into major difficulties or problems? It's the first IC engine I have built, having done a couple of steam engines from bar stock.
Cheers Andy |
| Neil Cawthra | 27/10/2013 00:12:47 |
| 2 forum posts | Hello to All, I am a new member and need some help. I have a completed Wyvern engine except for the carb. I have the gun-metal casting for the carb & all the prints but this is beyond what I can do. I was wondering if anyone out there can help me out with the machining of this part. This is really a beautiful engine and would like to get it completed. Any help would be great! Neil |
| MAX THE MILLER | 27/10/2013 10:06:43 |
| 26 forum posts 1 photos | There's a description of building this engine here:-
|
| Andrew Evans | 27/10/2013 10:24:08 |
| 366 forum posts 8 photos | Thanks Max - this is very timely as the Hemmingway plans arrived in the post this weeks with castings to arrive in a week or so. I was planning to start a thread about the build - I will be much slower than you I think. Is it bad manners to join your thread ? andy |
| MAX THE MILLER | 27/10/2013 10:28:47 |
| 26 forum posts 1 photos | It's not my engine. I've just been following the thread on the other forum with interest. |
| Roderick Jenkins | 27/10/2013 14:54:54 |
 2376 forum posts 800 photos | Posted by MAX THE MILLER on 27/10/2013 10:06:43:
There's a description of building this engine here:-
This thread has got a bit stuck at the moment. I am making the gears and thought I understood how to mill helical gears. Now I'm plagued by doubts. Rod |
| David Cambridge | 10/11/2016 07:18:28 |
| 252 forum posts 68 photos | Admittedly re-awaking an old thread, but I have the same question as Terence. It looks like ‘Engine Builder’ has supplied the solution, but I don’t understand what is being suggested. I’d be grateful if someone can explain again. i.e. I don’t understand: ‘I use a similar system to fit the flywheels to my engines but drill through the collet and into the crankshaft a bit and fit a silver steel pin. Then when you want to take of the flywheel the collet stays on the crankshaft. The pin is drilled and tapped so a screw may be fitted to remove it. The taper is a good idea fitting a key to a parallel shaft often makes for a wobbly flywheel.’ David |
| JasonB | 10/11/2016 17:21:09 |
 25215 forum posts 3105 photos 1 articles | Slip the tapered collet onto the crankshaft so it butts up against the gear or bearing depending on which side you are doing and then drill through the taper collet say 3mm and also carry the hole through into the crank. When you come to assemble the collet is slid onto the crank and a short 3mm pin put into the hole to hold it in position on the crank. This pin can be drilled and tapped say M2 so that you can pop a screw into it and use that to pull it out of teh hole if needed.
Myself I have never used the taper loc type fixing for flywheels, I just bore them to a good fit on teh crankshaft and then usually retain with a gib head key, small engines may get a grub screw or two instead. If there is no slop in the fit of teh flywheel to the crank you should not get any wobble. |
| David Cambridge | 10/11/2016 18:29:35 |
| 252 forum posts 68 photos | I see. Thanks Jason – it looks like you went to a bit of trouble drawing that for me. It’s really appreciated. David |
| geoff walker 1 | 16/08/2017 18:28:20 |
| 521 forum posts 217 photos | Hi All Question for Rod Jenkins Hi Rod, I am currently making a crankshaft for a small marine engine I've just been looking at your Wyvern build and the way you built the crankshaft. Can you tell me how you applied the loctite to the shaft and the webs? Not the crank pin that's easy enough Did you just put loctite in the holes and then push the crankshaft through? Which would of course smear loctite along the shaft as you push it through. Sorry if this seems a daft question but I may be missing something. geoff |
| Maurice | 16/08/2017 19:22:16 |
| 469 forum posts 50 photos | I am not Rod, but this method may help. I first "loctite" the crank pin into the webs with a piece of shaft material through the other holes for alignment, then leave it to cure. Meanwhile, I clamp a piece of ground bar into a matching pair of Vee blocks that are sitting firmly on a ground surface, with a gap between them, a little larger than the width over the finished webs. I then lift the whole thing and put a little "thread lock" on the underside of the Vee blocks, and temporarily "glue" them to the ground surface they were sitting on. When the thread lock has cured, the round ground bar is removed, and the two shaft parts of the crankshaft are inserted into the web assembly, and the whole thing clamped into the glued down Vee blocks. When all has cured the crankshaft is removed, and a light tap with a small hammer(with a piece of brass interposed) will remove the Vee blocks from the ground surface. Any thread lock on the Vee blocks is easily removed with a sharp blade.The last crankshaft that I assembled like this, I held in a collet at one end and clocked the other end for runout. It was less than half thou. |
| Roderick Jenkins | 16/08/2017 20:02:47 |
2376 forum posts 800 photos | Posted by geoff walker 1 on 16/08/2017 18:28:20:
Did you just put loctite in the holes and then push the crankshaft through? Which would of course smear loctite along the shaft as you push it through Hi Geoff, I did and it does. The Loctite is very fluid though and wipes off easily with a bit of kitchen paper. Cheers, Rod |
| JasonB | 16/08/2017 20:16:06 |
25215 forum posts 3105 photos 1 articles | Like Maurice I make up the "U" shape of webs and pin first then when that has cured slip it onto the crank stopping just short of its final position. Apply a couple of rings of Loctite to one side of each web and then slide it into position while twisting the main rod. That way you don't smear it all down the rod. Having said that I solder all my IC engine cranks and keep the Loctite for small steam engines |
| geoff walker 1 | 16/08/2017 22:03:33 |
| 521 forum posts 217 photos | Hi, thanks for the replies, useful information. Maurice in the absence of two matching vee blocks I think I will do what Jason suggested. Never really occurred to me that you could just glue and slide the crankshaft through , but why not? Should be good for mine, the crankshaft and pin are only 1/4" diameter and the webs are 5/16" thick, so there is a good bonding area. I had thought about holding the crank pin in a collet and shouldering both ends to make it easy to set the gap between the webs. thanks again geoff |
| Ian S C | 18/09/2017 13:02:08 |
 7468 forum posts 230 photos | A rough sketch of the assembly of a simple crankshaft. If you want it can be silver soldered instead of Loctite. The only motor I have with this form of crankshaft is a small beam hot air engine, the diameter of the shaft and pin is 3 mm, the webs are 2 mm thick, and shaft lock is holding up well. Ian S C
Edited By Ian S C on 18/09/2017 13:06:30 |


Please login to post a reply.
Magazine Locator
Want the latest issue of Model Engineer or Model Engineers' Workshop? Use our magazine locator links to find your nearest stockist!
Sign up to our Newsletter
Sign up to our newsletter and get a free digital issue.
You can unsubscribe at anytime. View our privacy policy at www.mortons.co.uk/privacy
Latest Forum Posts
- *Oct 2023: FORUM MIGRATION TIMELINE*
05/10/2023 07:57:11 - Making ER11 collet chuck
05/10/2023 07:56:24 - What did you do today? 2023
05/10/2023 07:25:01 - Orrery
05/10/2023 06:00:41 - Wera hand-tools
05/10/2023 05:47:07 - New member
05/10/2023 04:40:11 - Problems with external pot on at1 vfd
05/10/2023 00:06:32 - Drain plug
04/10/2023 23:36:17 - digi phase converter for 10 machines.....
04/10/2023 23:13:48 - Winter Storage Of Locomotives
04/10/2023 21:02:11 - More Latest Posts...
- View All Topics
Support Our Partners


Shopping Partners
Subscription Offer

Latest "For Sale" Ads
- Reeves** - Rebuilt Royal Scot by Martin Evans
by John Broughton
£300.00 - BRITANNIA 5" GAUGE James Perrier
by Jon Seabright 1
£2,500.00 - Drill Grinder - for restoration
by Nigel Graham 2
£0.00 - WARCO WM18 MILLING MACHINE
by Alex Chudley
£1,200.00 - MYFORD SUPER 7 LATHE
by Alex Chudley
£2,000.00 - More "For Sale" Ads...
Latest "Wanted" Ads
- D1-3 backplate
by Michael Horley
Price Not Specified - fixed steady for a Colchester bantam mark1 800
by George Jervis
Price Not Specified - lbsc pansy
by JACK SIDEBOTHAM
Price Not Specified - Pratt Burnerd multifit chuck key.
by Tim Riome
Price Not Specified - BANDSAW BLADE WELDER
by HUGH
Price Not Specified - More "Wanted" Ads...
Get In Touch!
Do you want to contact the Model Engineer and Model Engineers' Workshop team?
You can contact us by phone, mail or email about the magazines including becoming a contributor, submitting reader's letters or making queries about articles. You can also get in touch about this website, advertising or other general issues.
Click THIS LINK for full contact details.
For subscription issues please see THIS LINK.
Digital Back Issues


Donate

 Register
 Log-in
Model Engineer Magazine
- Percival Marshall
- M.E. History
- LittleLEC
- M.E. Clock

ME Workshop
- An Adcock
- & Shipley
- Horizontal
- Mill

Subscribe Now
- Great savings
- Delivered to your door

Pre-order your copy!
- Delivered to your doorstep!
- Free UK delivery!
All Forum Topics > I/C Engines > E T Westbury Wyvern engine Crankshaft/Flywheels fixing design