Forum sponsored by:

Stuart 10H and Score
| Doddy | 22/01/2010 16:40:44 |
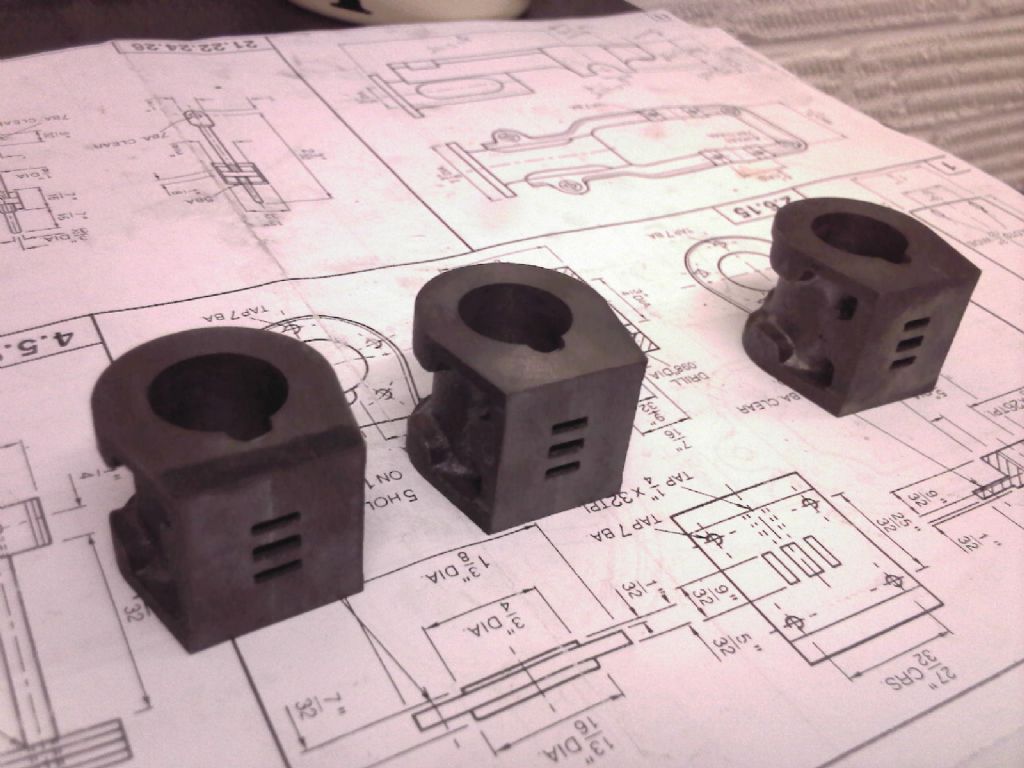
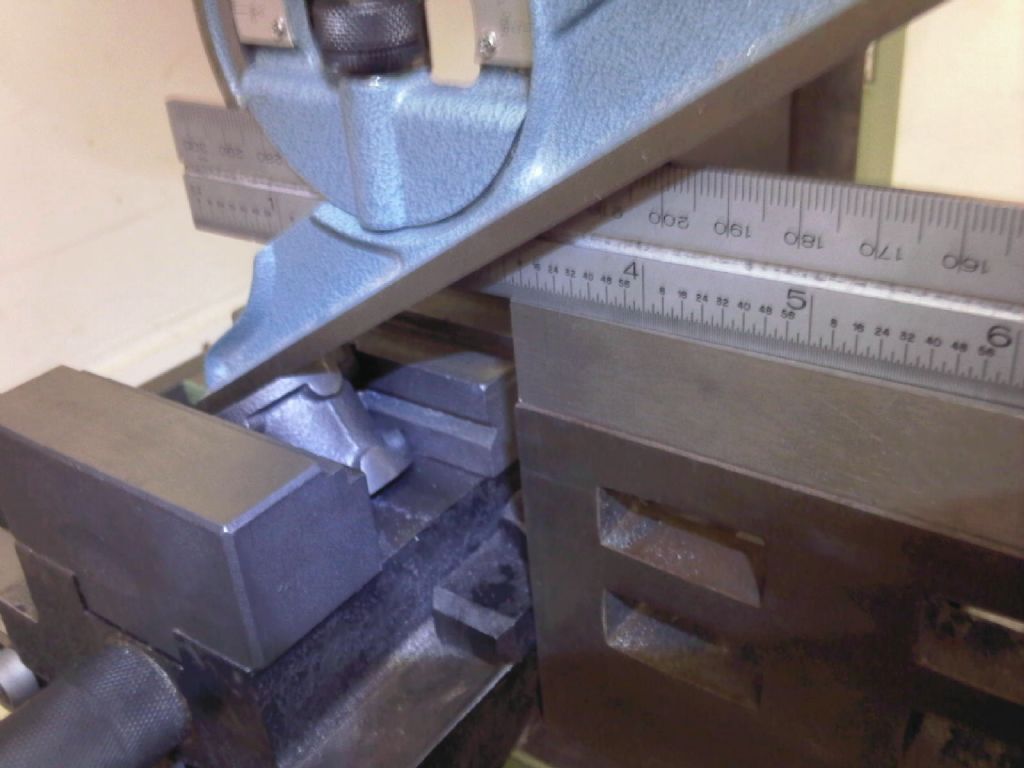
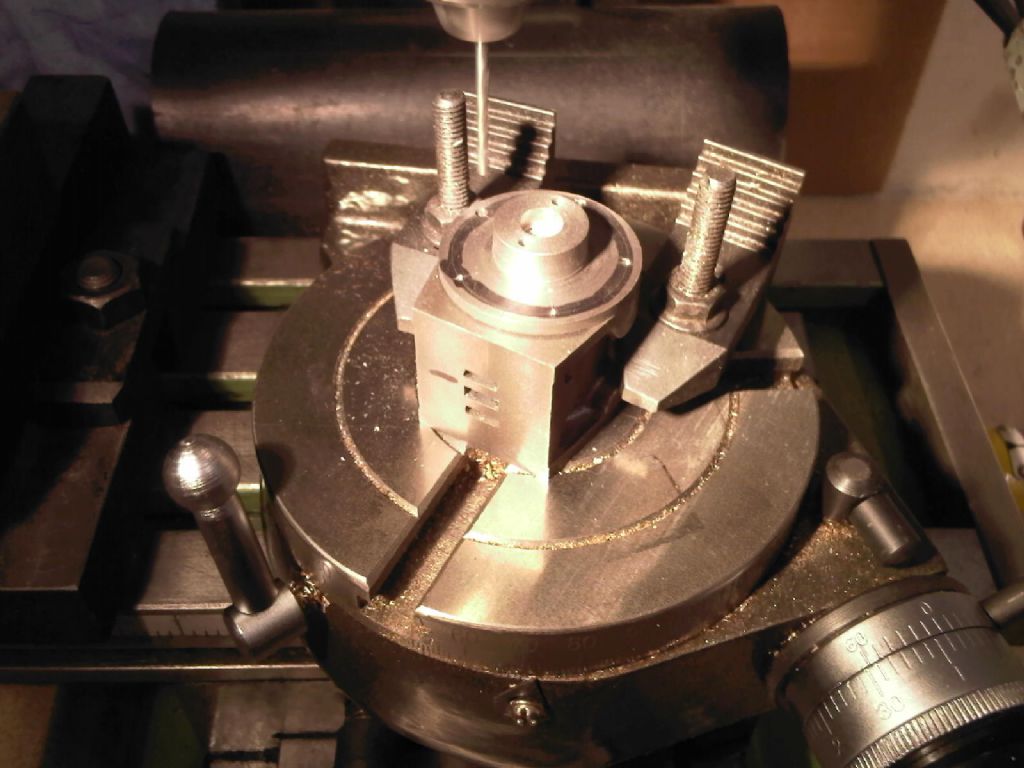
 72 forum posts 103 photos | No problems facing and boring the cylinder, set up around the outer edge with scribe block. just used a small vee block to spread the load on the webs - maybe some packing would help to prevent any marks
 milled the steam way then set to the required angle and nipped in the vice, centre drilled and then drill through to ports The three cylinders so far.......
|
| lancelot | 22/01/2010 17:15:35 |
 63 forum posts 4 photos | Hi David, when you come to fitting the cylinders to the frame bed...if the pitch circle dia. on the drawing is used I think you will find it very difficult to fit the nuts at the back of the cylinders...This is the ''Score'' I am referring to, I really would like the pitch circle increased a bit on the drawing...I made the mistake of following the drawing and had one heck of a lot of ''fettling'' to do plus had to use ''one size smaller nuts''...lucky not to scrap it.
All the best for now,
John. |
| Circlip | 22/01/2010 17:36:10 |
| 1723 forum posts | Might be worth checking that all the machined faces and the bore are square and true to each other David, boreing using the 4 jaw to hold the cylinder may be a bit suspect. Hope it is true.
Regards Ian. |
| Doddy | 22/01/2010 18:01:31 |
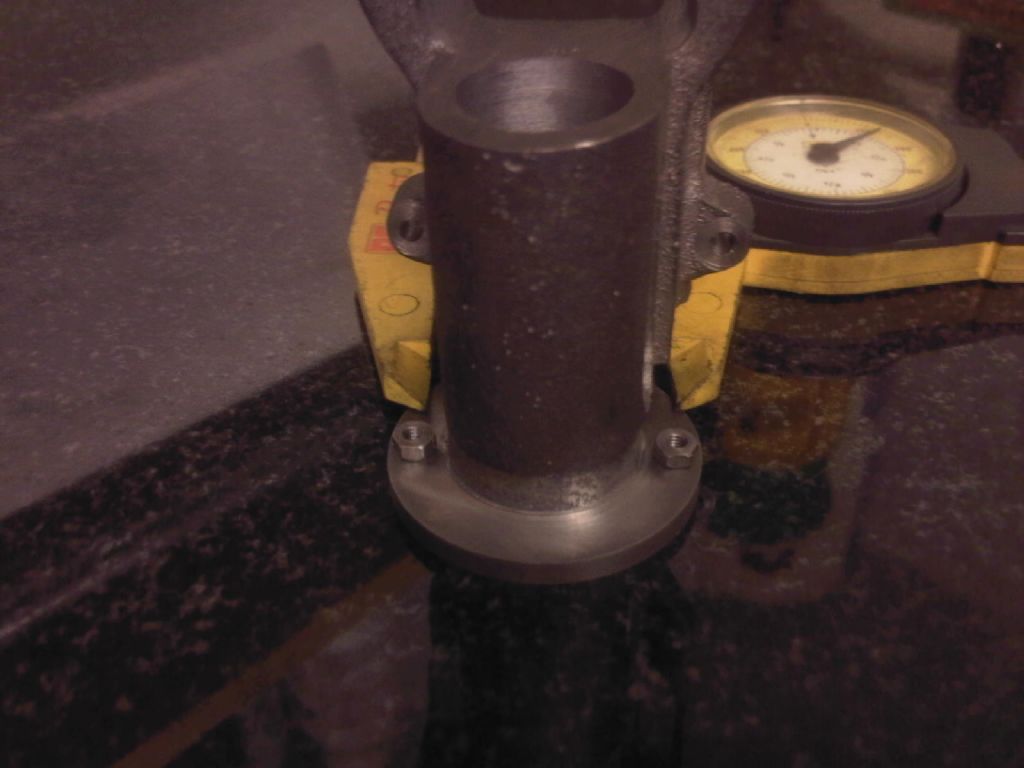
72 forum posts 103 photos | The rough casting was set in the four jaw and set to the rough cast outside edge using a scribing block then the front edge faced, followed by the bore (without moving from the chuck) this ensure the front face which bolts to the frame is square to the bore.
A mandrel was then made to fit the bore - size for size (just warmed the cylinder with a hot air gun to shrink fit) then the outer face was turned
The cylinder was then bolted to my face plate on the milling machine to square off to size the port face - will have to find the photo's |
| Doddy | 23/01/2010 17:20:22 |
72 forum posts 103 photos | Many thanks lancelot for the tip RE: "fitting the cylinders to the frame bed" will check the PCD - thought I'd make the cylinder covers first then drill tapping size through with the cover/cylinder in place then open cover hole out to clearance size
|
| Doddy | 27/01/2010 16:39:48 |
72 forum posts 103 photos | Made up a chucking piece and had no problems machining cylinder top covers  But now I need some advice - the Stuart drawings shows the Bottom Cylinder Cover which carries the gland housing say to drill and tap 5/16" br 26tpi ? what thread is that - is it an ME thread (thought they were 32tpi or 40tpi) not sure if to go for M8x1.0 pitch or 5/16"BSF or do I make a nice little two bolt hole gland follower in brass using 10BA studding ? I know it will be small an fiddly to nip up - any thoughts most welcome Any thought on were to spend my money on HSS taps and dies ME or Metric ? |
| David Clark 1 | 27/01/2010 16:52:09 |
 3357 forum posts 112 photos 10 articles | Hi There
5/16 x 26 is I think an ME series tap and die.
Tracy tools for new or the Toolbox in Colyton Devon for second hand.
regards David
|
| martin leslie | 27/01/2010 17:04:39 |
| 8 forum posts | Hi
Your thread is also a 5/16 Bscy or Cycle thread.
As found by the dozen on pre 1970 British Motorcycles. |
| Mike Rose | 27/01/2010 17:15:52 |
| 9 forum posts | Hi
There also was one called British Standard Brass (BSB) which used 26 TPI for all sizes. I believe the thread profiles differ foreach standard.
regards Mike |
| Doddy | 19/02/2010 16:44:37 |
72 forum posts 103 photos | Ok as I've not yet saved enough pounds, shillings and pence to buy some decent ME taps and dies I've made my Stuart 10H a nice little gland follower with 8BA studs, just enough room and should be able to get a spanner on to nip up the gland. I know the purests will frown on me not following the drawing, but as I don't intend to run this on steam, I don't think it to much of a problem, and I think it looks much better, but failing that I can always make the gland as per the drawing once I've spent some of (her in charge) money
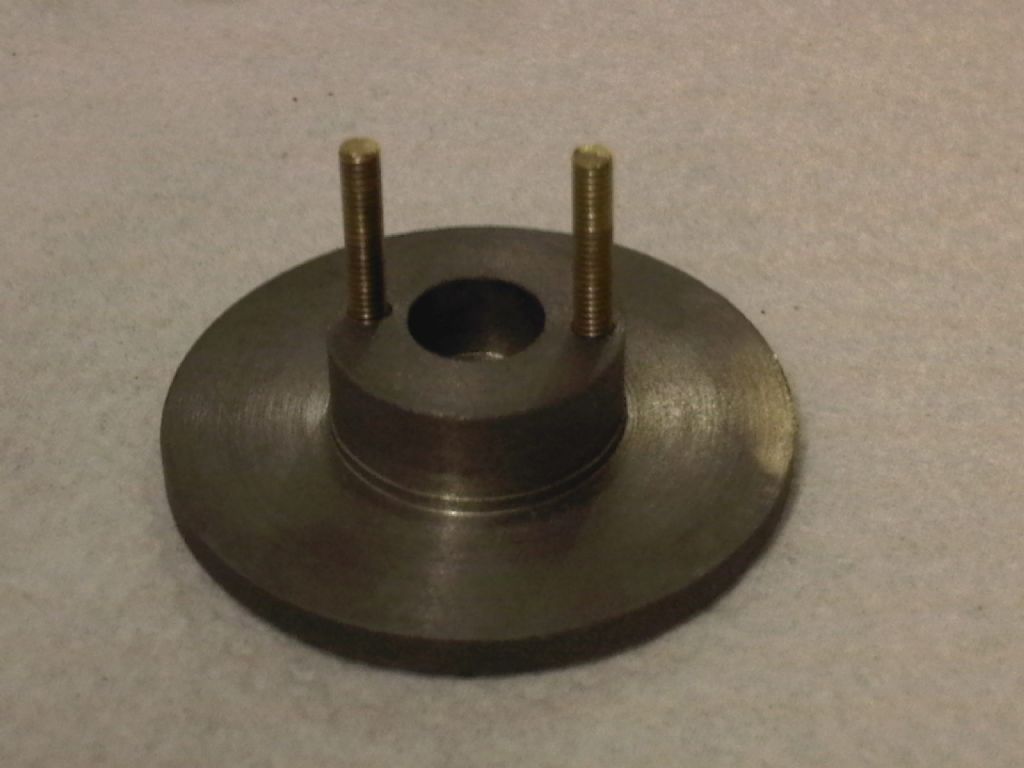 Gland follower using 8BA nuts and studs
Dosen't look much room but should be able to get an 8BA spanner on !
Similar dimensions to the threaded gland follower on the drawing so should clear the Crosshead ? Edited By David Dodwell on 19/02/2010 16:49:25 |
| Jeff Dayman | 19/02/2010 16:48:14 |
| 2356 forum posts 47 photos | Looks great to me, well done.
JGD |
| lancelot | 20/02/2010 13:32:54 |
63 forum posts 4 photos | nothing wrong with that... actually solves some of the inherent binding problems involved with the threaded gland type...keep her cutting David.
John. |
| Doddy | 22/02/2010 17:33:10 |
72 forum posts 103 photos | Posted by lancelot on 22/01/2010 17:15:35:
Hi David, when you come to fitting the cylinders to the frame bed...if the pitch circle dia. on the drawing is used I think you will find it very difficult to fit the nuts at the back of the cylinders...This is the ''Score'' I am referring to, I really would like the pitch circle increased a bit on the drawing...I made the mistake of following the drawing and had one heck of a lot of ''fettling'' to do plus had to use ''one size smaller nuts''...lucky not to scrap it.
All the best for now,
John.
Thanks John, your're right, it is a little tight at 1 1/8th PCD so made mine 1 3/16" PCD
Edited By David Dodwell on 22/02/2010 17:36:39 |
| Doddy | 19/03/2010 16:10:20 |
72 forum posts 103 photos | Wasn't to keen on the Stuart "S" cast in the middle of the valve cover so made my own from a cast iron off cut 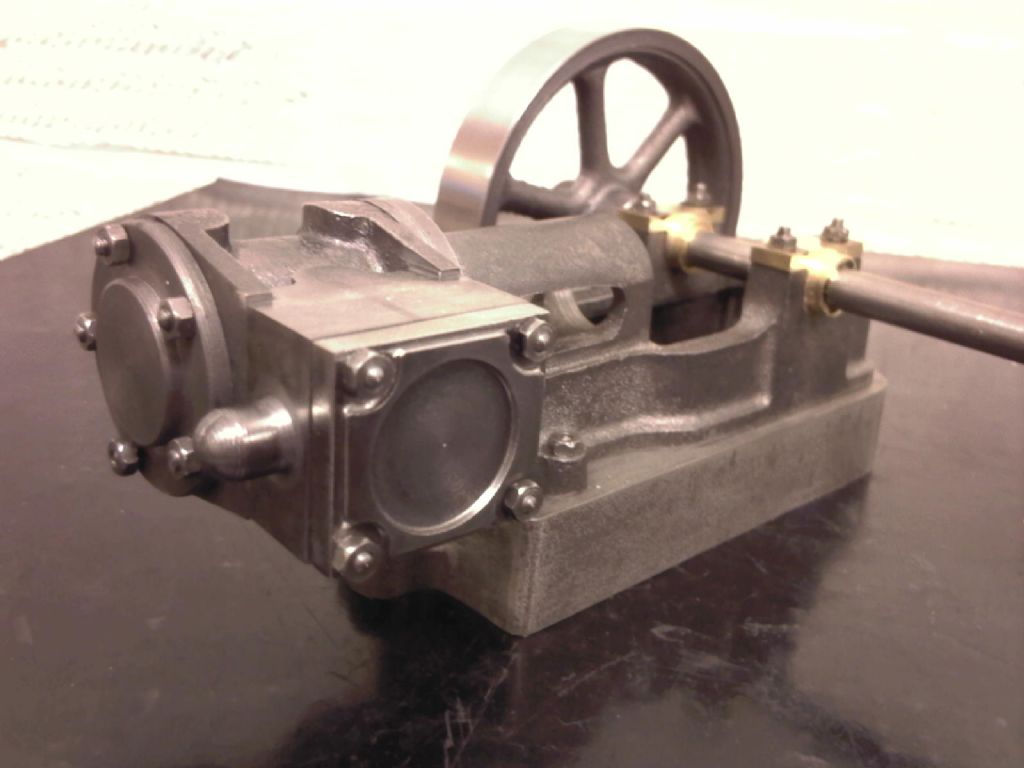 Fabricated the crank - be-aware that the plans show the crankpin to be 5/8" long - It's not it's 11/16" (many thanks for the tip off "Pengwern") 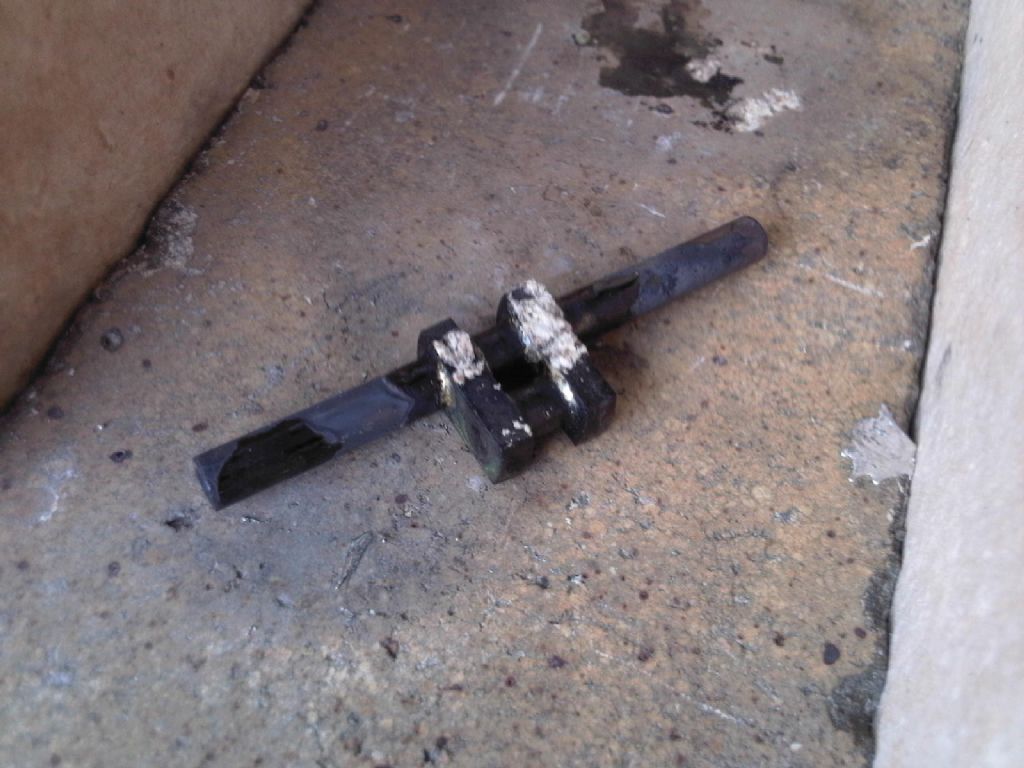 back in the lathe to clean up crank webs 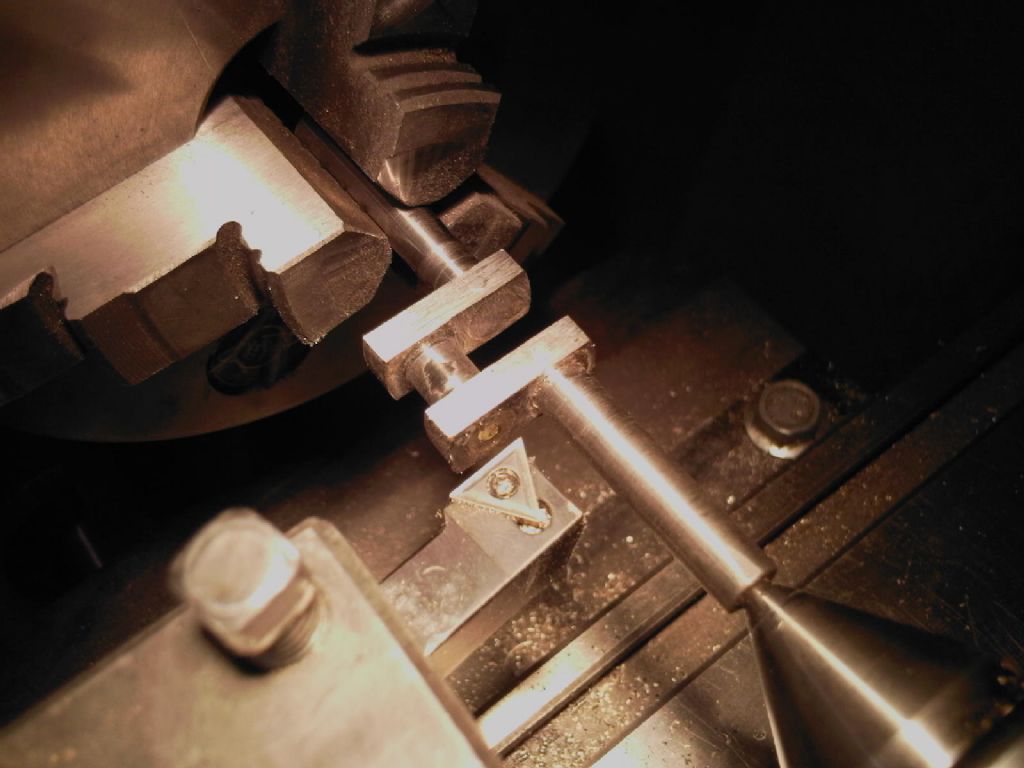 Made some oil cups 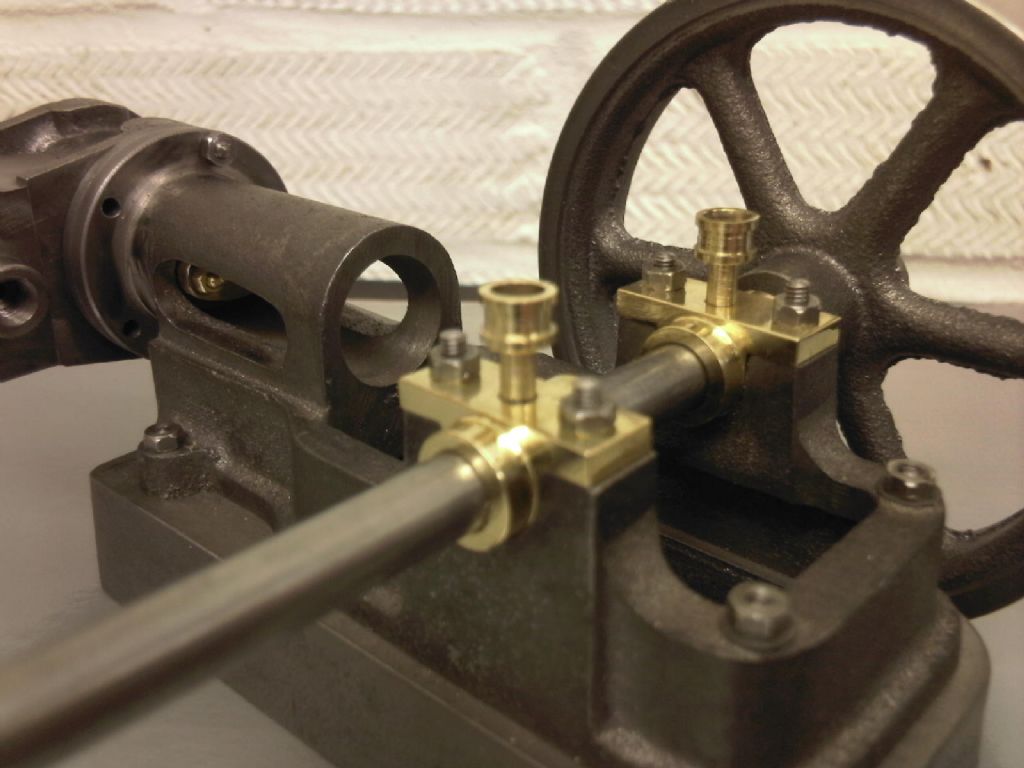 Crank installed and aligned - had to trim a few thou off the inner faces 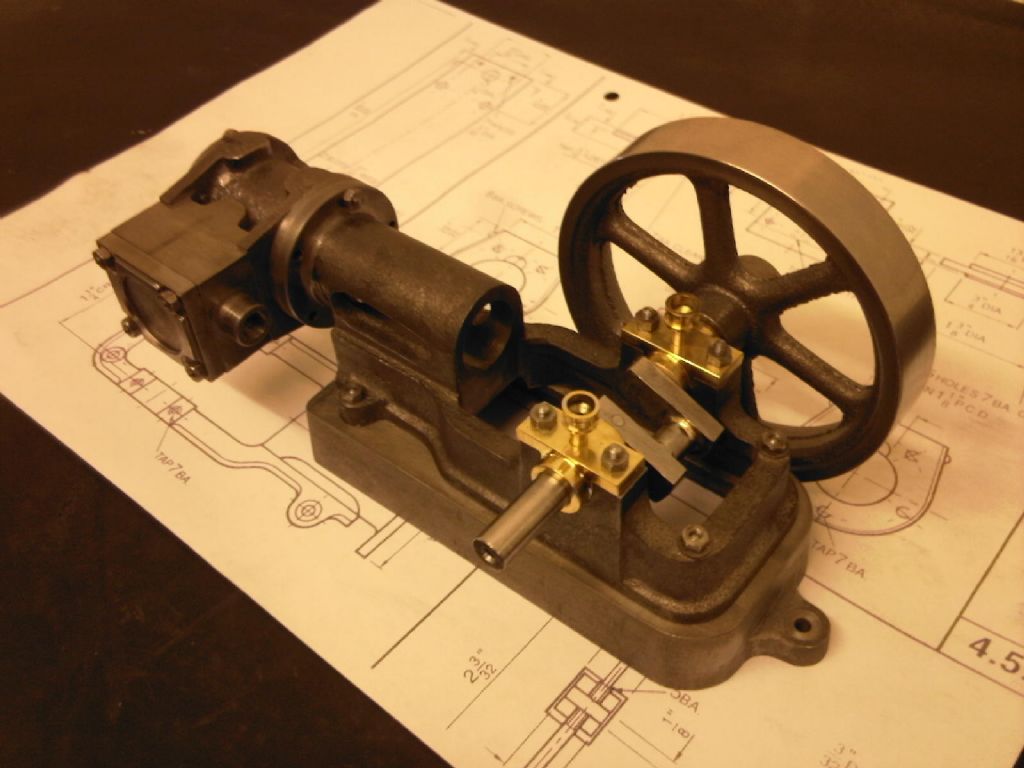 |
| NJH | 19/03/2010 17:01:19 |
 2314 forum posts 139 photos | Hi David This is a very useful and interesting thread. I particularly like your 'photos of components and set-ups. These, together with the tips you have received, should provide a valuable resource for builders of these or other Stuart models. Well done! NJH |
| Nigel McBurney 1 | 19/03/2010 19:34:25 |
 1101 forum posts 3 photos | hi five sixteenth dia by 26 tpi is British standard brass thread the form is Whitworth with thread angle of 55 degrees, brass thread all 26 tpi is commonly used on english models including stuart. BSB also used on old gas fittings. British cycle is different it has a 60 degree thread form. |
| Doddy | 07/04/2010 21:31:02 |
72 forum posts 103 photos | So how did you split the con-rod big end? - I was going to use a fine slit saw in the mill but struggled to find an easy way to hold it square, as it won't fit my vice very well - then thought about using the Dremmel but again couldn't hold it secure and square so gave up and used the Juinior hacksaw ! Big mistake !! too much speed and not enough haste ? (see photo of the run off) - ended up making a new bottom half 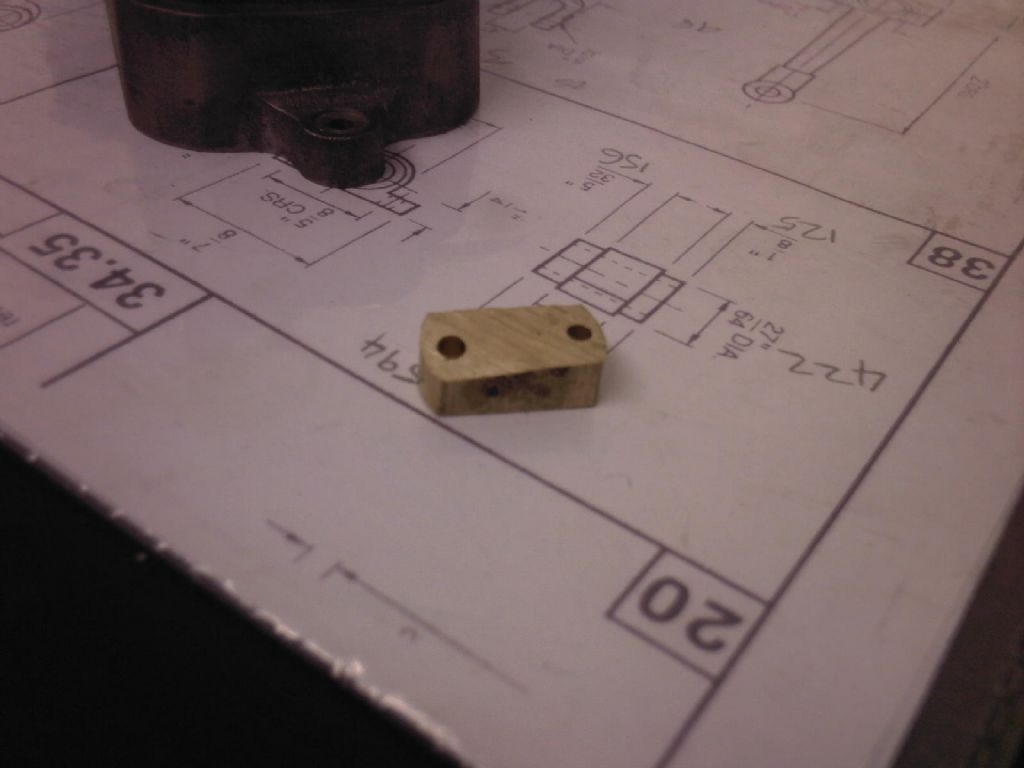 will be making a jig for holding the two con-rods for the Double next time - but here its OK now and installed 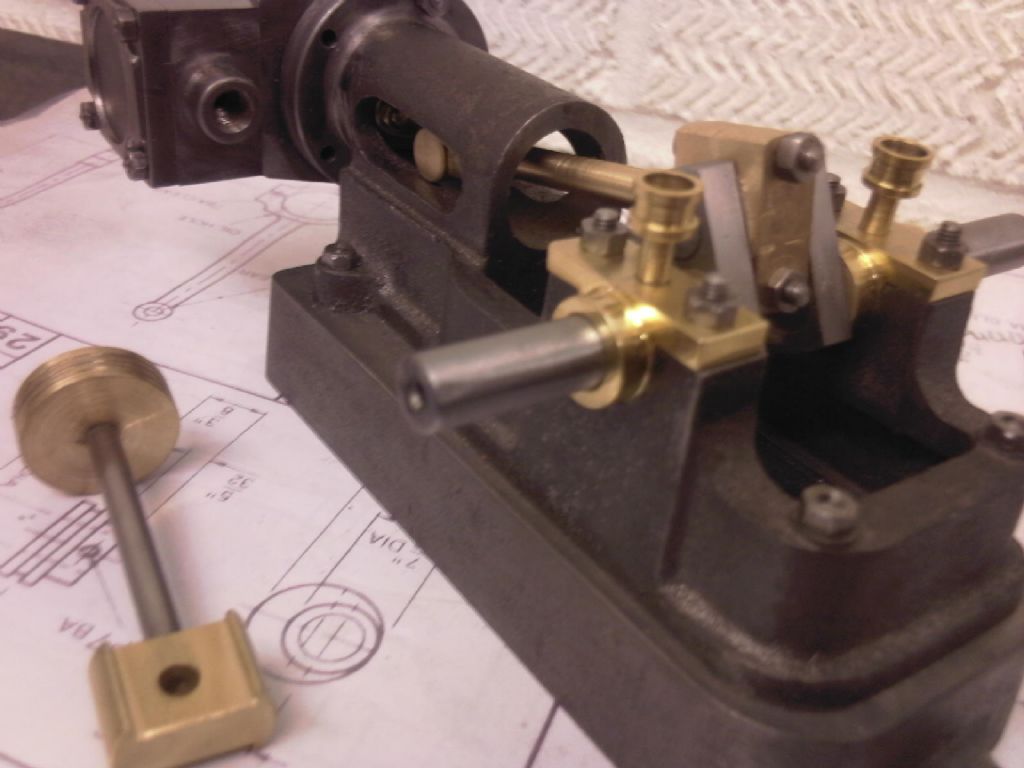 |
| Doddy | 05/05/2010 20:49:23 |
72 forum posts 103 photos | Nearly finished made the eccentric up in the 3jaw
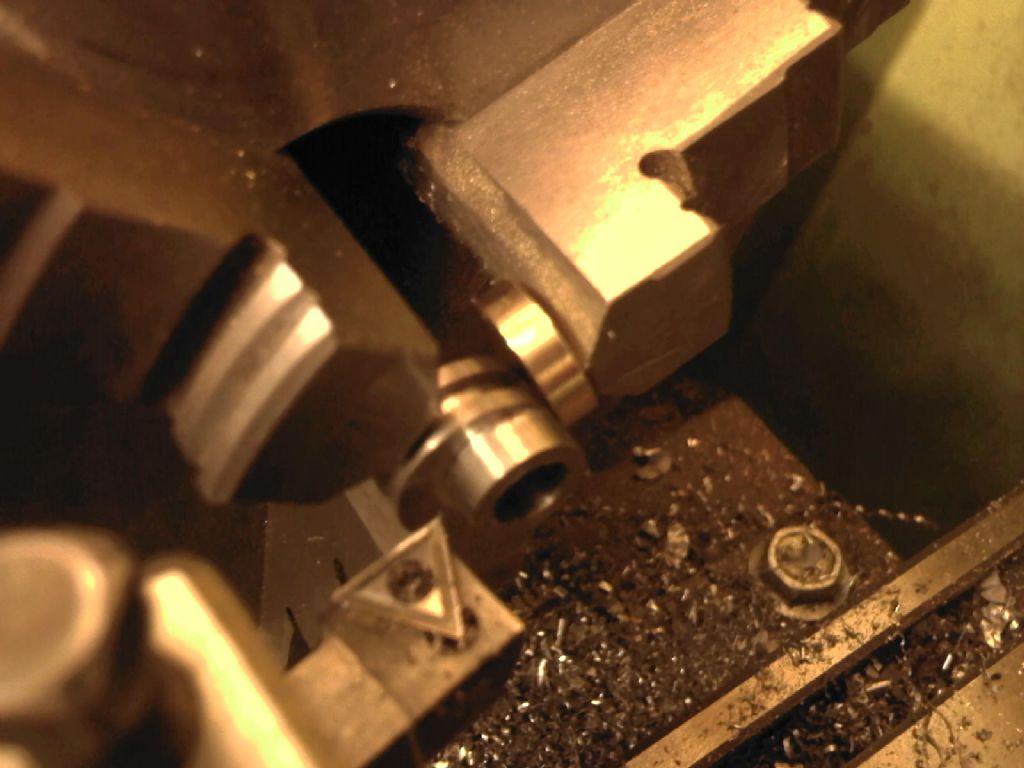 Just some fit and finishing now 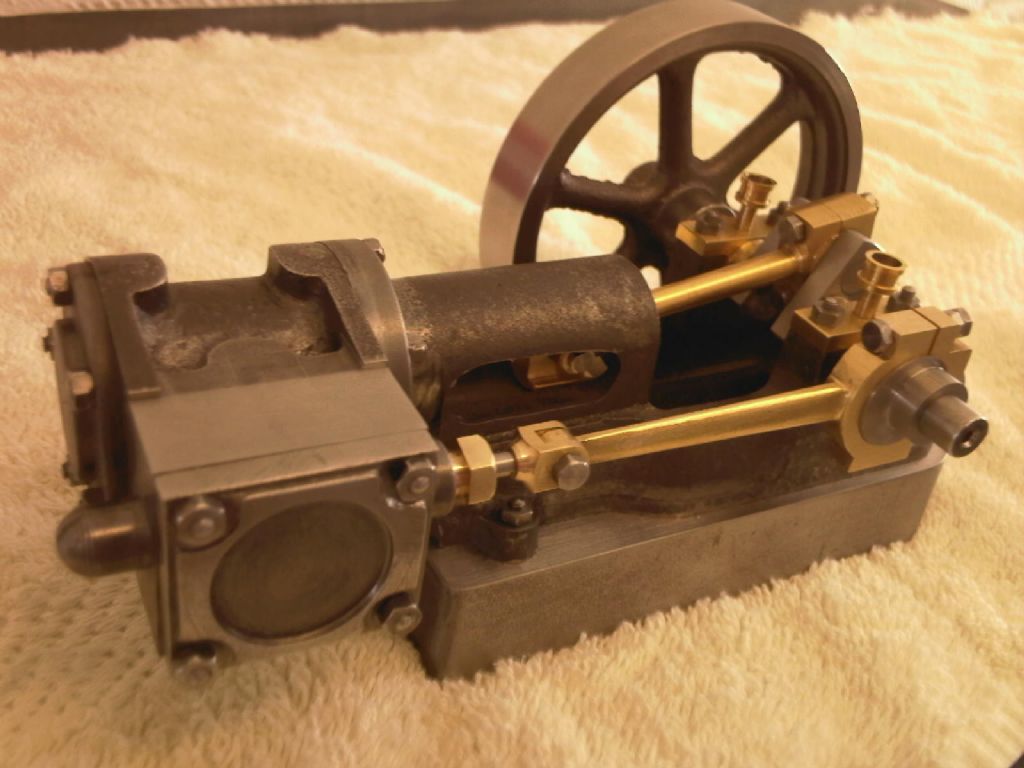 Valves - Drain cocks and some pipework next and then the hardest part (for me!) how to paint and finish off - any help most welcome |
| Ramon Wilson | 06/05/2010 23:26:42 |
 1655 forum posts 617 photos | Hullo David,
In response to your request for help in painting I think I may be able to offer a bit of help on that front.
All the old adages on painting hold true except that oft heard phrase 'A coat of paint covers a multitude of sins'. Quite simply it doesn't but on the other hand it doesn't take much effort and certainly less than you have put in so far with this very nice job of building this10H to achieve a reasonable finish. It is always a shame to see a nicely made model let down by a poorly applied paint job.
Achieving a good result depends on several factors but number one has to be good surface preparation followed by good compatible products and means to apply them.
You have the choice of two methods - by brush or by spray - either aerosol or proper spraygun. 'Generally' - By brush it is better to use enamels or acrylics and apply cellulose products by spraying though these are getting more difficult to obtain in small quantities. Personally, though I have the means of both, I would unhesitatingly use a brush finish for what you intend at this time.
The castings should be carefully degreased - acetone or cellulose thinner - spray gun cleaner available at car accessory shops is ideal. Then take the time to mask up those areas you wish to leave unpainted. I lay masking tape down on a piece of perspex and cut it to the widths I need with a scalpel and straight edge. I used to think of masking as a pain - a time barrier between 'now' and applying the paint. The time for the application of the paint is usually much less than that required for masking so I look at it from the opposite direction now - the masking is much the more important bit of the process.
Once masked up the pores of the casting need to be filled. Ideally - if it's still available use brush applied car cellulose grey primer. This is the only cellulose product you really want to apply with a brush. Brush on several thin coats - don't be tempted to put it on thickly - if you do it will appear dry but will still be soft - when the next layer goes on you will drag it off. After about three coats give it a light rub over with wet and dry paper - about 320 grit and repeat it. Finish the final layer or two with 600 used wet. Your final colour finish (two to three coats maximum) will be dictated by these layers. By keeping it thin it can be applied quickly trying not to brush it out and going over the same area twice as this can/will cause dragging. Buy yourself a couple of nice brushes at an art shop. They don't have to be expensive sable but buy good quality. I use 3/8" wide flat synthetic bristle brushes (normally sold for water colour or acrylic application) one for primer the other for the colour.
Enamel paint should be thinned slightly, standing the tin on a radiator to warm the paint or in a dish of fairly hot water - this will help the paint flow better. Do not try to get a perfectly even, opaque coverage on the first coat but concentrate more on a thin layer of uniform thickness . Let it dry well - preferably overnight - then cut it back gently with wet and dry 600 grit used wet sufficient for the second coat to adhere to. You should have a very nice smooth finish by the third coat at the most depending on the make of paint and colour chosen. Let it harden for at least week or so before trying to buff a finish into it with silver polish /brasso/T-Cut etc.
Enamel paint will go successfully over cellulose but not the other way. Acrylic paint will also go over cellulose but may, possibly, exhibit a cracked finish in a short time. This is normally due to the paint below 'moving' which cellulose does over time. Acrylic is very hard and subsequently cracks. I have not used this combination on metal surfaces but have, to my cost, on a model aircraft, the whole lot having to be stripped off within a week of painting it. If you do decide to use acrylic then I would definitely use an acrylic base on the casting.
Paints - nothing wrong with good old Humbrol, though I prefer 'Japlac'. International paints are very good too though I don't think they are available in the small 250ml tins anymore. And of course many others including the Phoenix paints though I have never used them. I would add to always use the recommended thinner. No doubt you can use 'white spirit' on some but if it goes wrong it's too late.
I hope the above gives you a start - no doubt others will add to this but any questions just ask
Best advice is just take your time, don't be in a hurry to apply the colour but get the sub-surface right first.
Regards - Ramon
Edited By Ramon Wilson on 06/05/2010 23:29:30 |
| Doddy | 07/05/2010 19:06:48 |
72 forum posts 103 photos | Many thanks for that - any thoughts on the small steel parts such as the studs and nuts ! do I need to laqucer them once polished or just leave them lighty oiled ! |
Please login to post a reply.
Magazine Locator
Want the latest issue of Model Engineer or Model Engineers' Workshop? Use our magazine locator links to find your nearest stockist!
Sign up to our Newsletter
Sign up to our newsletter and get a free digital issue.
You can unsubscribe at anytime. View our privacy policy at www.mortons.co.uk/privacy
Latest Forum Posts
- *Oct 2023: FORUM MIGRATION TIMELINE*
05/10/2023 07:57:11 - Making ER11 collet chuck
05/10/2023 07:56:24 - What did you do today? 2023
05/10/2023 07:25:01 - Orrery
05/10/2023 06:00:41 - Wera hand-tools
05/10/2023 05:47:07 - New member
05/10/2023 04:40:11 - Problems with external pot on at1 vfd
05/10/2023 00:06:32 - Drain plug
04/10/2023 23:36:17 - digi phase converter for 10 machines.....
04/10/2023 23:13:48 - Winter Storage Of Locomotives
04/10/2023 21:02:11 - More Latest Posts...
- View All Topics
Support Our Partners


Shopping Partners
Subscription Offer

Latest "For Sale" Ads
- Reeves** - Rebuilt Royal Scot by Martin Evans
by John Broughton
£300.00 - BRITANNIA 5" GAUGE James Perrier
by Jon Seabright 1
£2,500.00 - Drill Grinder - for restoration
by Nigel Graham 2
£0.00 - WARCO WM18 MILLING MACHINE
by Alex Chudley
£1,200.00 - MYFORD SUPER 7 LATHE
by Alex Chudley
£2,000.00 - More "For Sale" Ads...
Latest "Wanted" Ads
- D1-3 backplate
by Michael Horley
Price Not Specified - fixed steady for a Colchester bantam mark1 800
by George Jervis
Price Not Specified - lbsc pansy
by JACK SIDEBOTHAM
Price Not Specified - Pratt Burnerd multifit chuck key.
by Tim Riome
Price Not Specified - BANDSAW BLADE WELDER
by HUGH
Price Not Specified - More "Wanted" Ads...
Get In Touch!
Do you want to contact the Model Engineer and Model Engineers' Workshop team?
You can contact us by phone, mail or email about the magazines including becoming a contributor, submitting reader's letters or making queries about articles. You can also get in touch about this website, advertising or other general issues.
Click THIS LINK for full contact details.
For subscription issues please see THIS LINK.
Digital Back Issues


Donate

 Register
 Log-in
Model Engineer Magazine
- Percival Marshall
- M.E. History
- LittleLEC
- M.E. Clock

ME Workshop
- An Adcock
- & Shipley
- Horizontal
- Mill

Subscribe Now
- Great savings
- Delivered to your door

Pre-order your copy!
- Delivered to your doorstep!
- Free UK delivery!
All Forum Topics > Stationary engines > Stuart 10H and Score