Surface Grinder refurb
| Steve355 | 23/09/2022 20:30:17 |
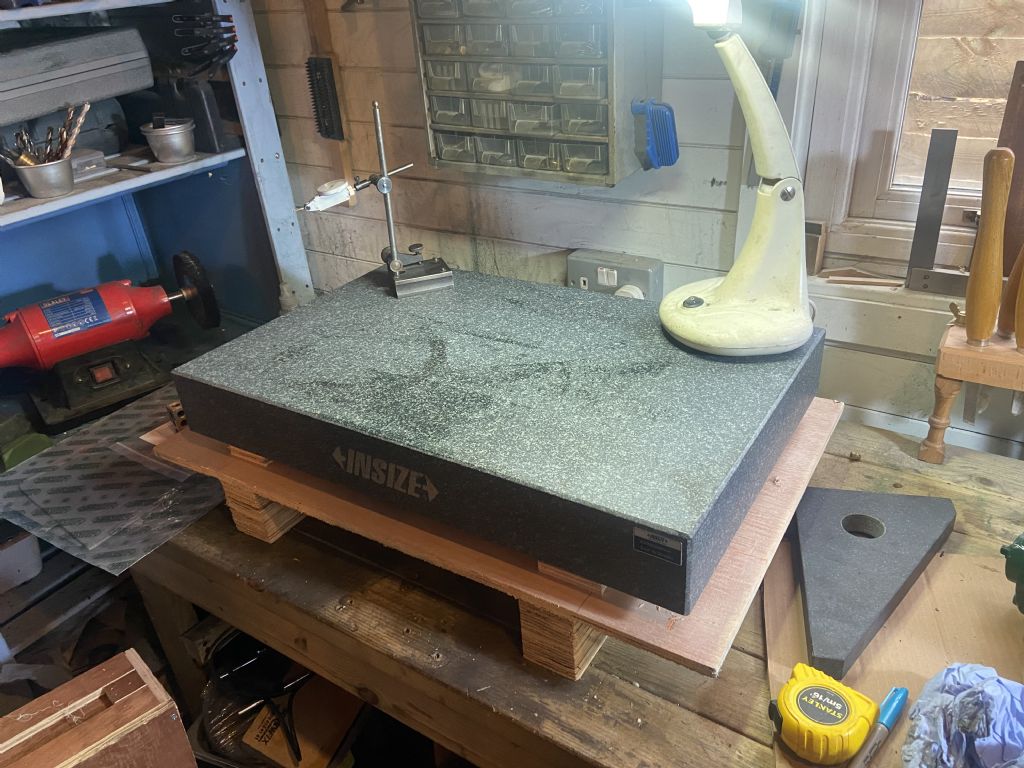
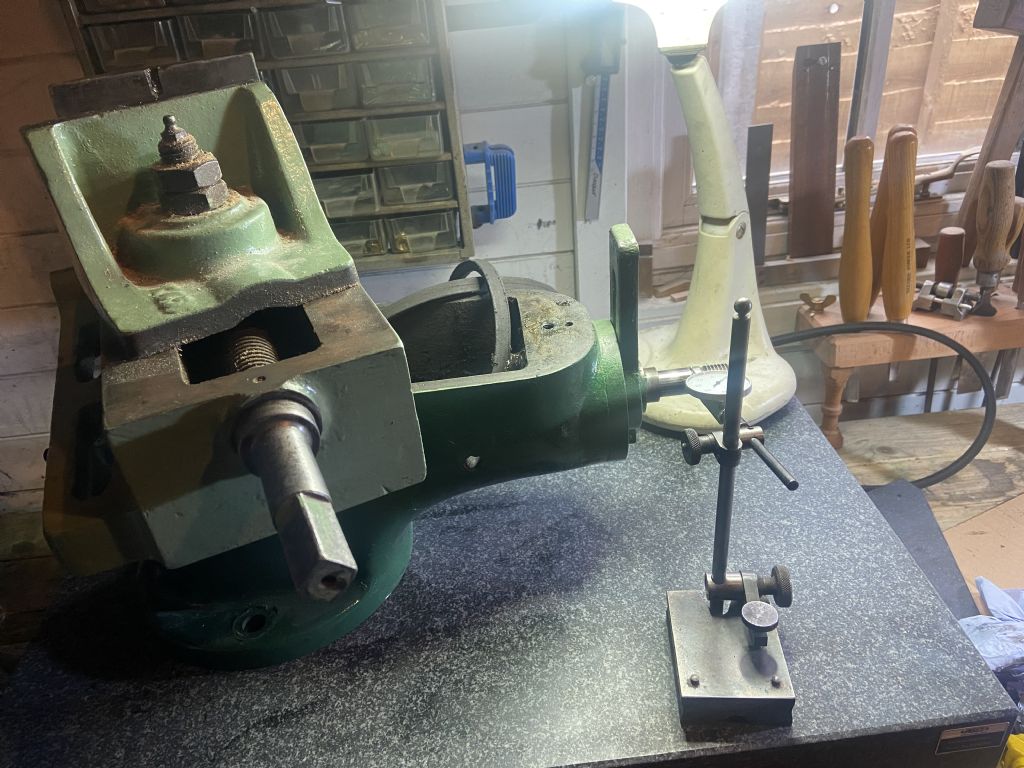
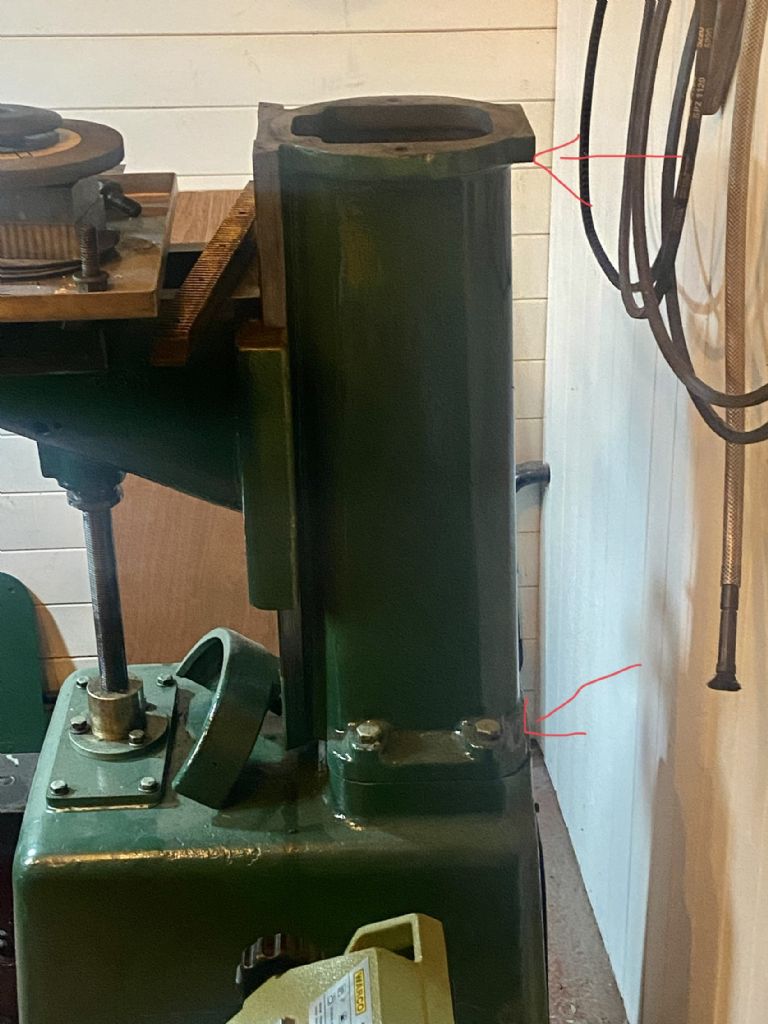
| 321 forum posts 235 photos | Hi all My new surface plate turned up yesterday at last, so I can get on with my surface grinder refurb project. It’s 25 inches long, and already I can see what a tremendous benefit it will be. Unbelievably heavy though. I will post progress on this thread for advice and moral support Looking at the Connelly machine tool reconditioning book, he is clear that one should start with the headstock and spindle, and work around the machine to the table. If one starts at the table, it’s possible to get everything square in relation to the table, only to find the spindle is pointing off around the room somewhere, with not much that can be done about it. So that’s what I did. Connelly gives the following tolerances for the spindle: Perpendicularity to the vertical axis of the machine - 0.0004” (I got 0.0001) Runout at the spindle - 0.0004” (surprising high I thought) - I measured 0.0004 So I am on the tolerance, and the headstock and spindle is acceptable. Does that sound right? I put my pillar drill vise on the headstock to keep it steady. It didn’t seem to wobble, but I was getting inconsistent readings until I did that. Also there was paint on the bottom reference surface of the headstock, which I had to remove. But I think as long as I can accept 0.0004 runout, the spindle assembly is good. Next it’s the column. I noticed the column seems to have some reference surfaces on the back, painted over, but look like the they were put there for measuring purposes (red arrows). So checking the flatness of the column is next. Any thoughts welcome.
Steve |
| John P | 23/09/2022 22:02:16 |
| 451 forum posts 268 photos | Seeing your photo with your new surface plate mounted on https://www.starrett.com/precision-granite/precision-granite-faq
John |
| Steve355 | 23/09/2022 22:28:38 |
| 321 forum posts 235 photos | Posted by John P on 23/09/2022 22:02:16:
Seeing your photo with your new surface plate mounted on https://www.starrett.com/precision-granite/precision-granite-faq
John I have no doubt you are right, the problem is I can’t handle it. The plywood base is actually part of the box it came in. I had to use a block and tackle to get it on the bench. I need to find a permanent place for it, when I do I will buy/make a stand and get the correct jacks for it. Once I’m done with it on the bench I will put the lid of the box back on and use the block and tackle again to get it off the bench. It seems like that’s the best way to avoid damaging it at the moment. |
| Robin | 24/09/2022 15:55:09 |
678 forum posts | Am I missing something? How does the spindle alignment with the table matter on a surface grinder? Surely all you need is rigid to the vertical slide, alignment coming when you dress the wheel? I have just replaced the vertical slide on mine with linear rails and a stepper. Precision was not high on my agenda, have I gone terribly wrong? (As usual) Robin |
| Steve355 | 24/09/2022 21:45:09 |
| 321 forum posts 235 photos | Posted by Robin on 24/09/2022 15:55:09:
Am I missing something? How does the spindle alignment with the table matter on a surface grinder? Surely all you need is rigid to the vertical slide, alignment coming when you dress the wheel? I have just replaced the vertical slide on mine with linear rails and a stepper. Precision was not high on my agenda, have I gone terribly wrong? (As usual) Robin Intuitively, I’d think you are right, but See P485 of Connelly, apparently it’s about surface finish. In fact, I got the procedure for the spindle from the horizontal mill section of the book, because it reflects better the architecture of my machine, Whatever, it does no harm to make sure that all the components of the machine are reasonably accurate. |
| Steve355 | 24/09/2022 22:05:42 |
| 321 forum posts 235 photos | Column… stuck already, help!
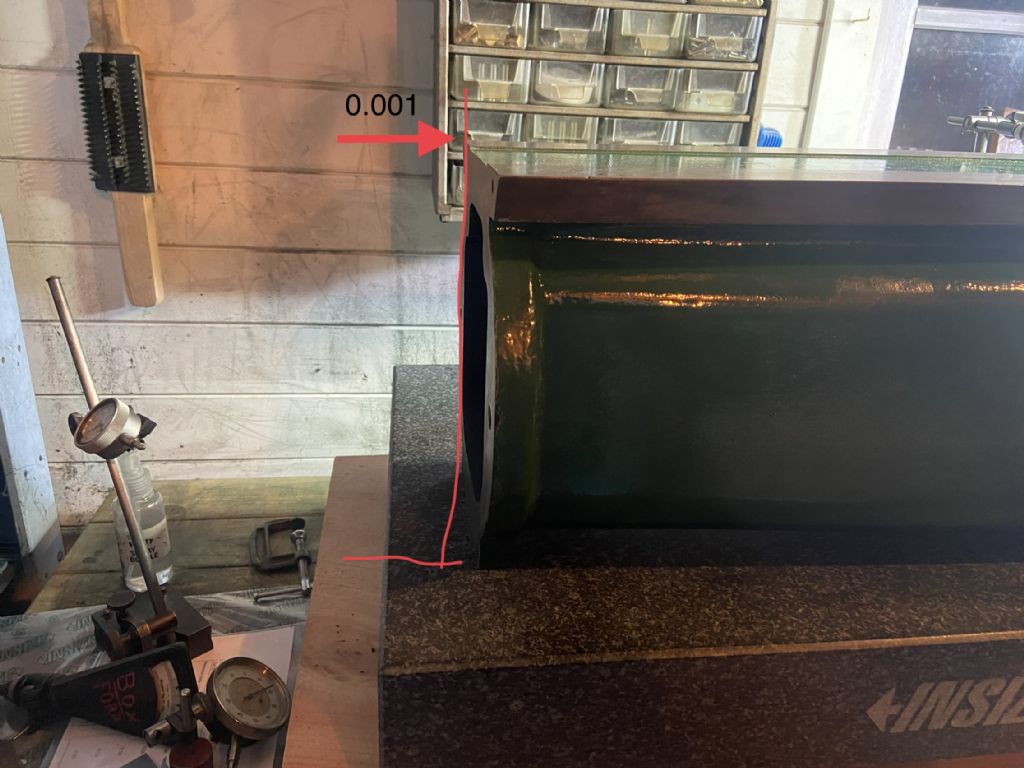
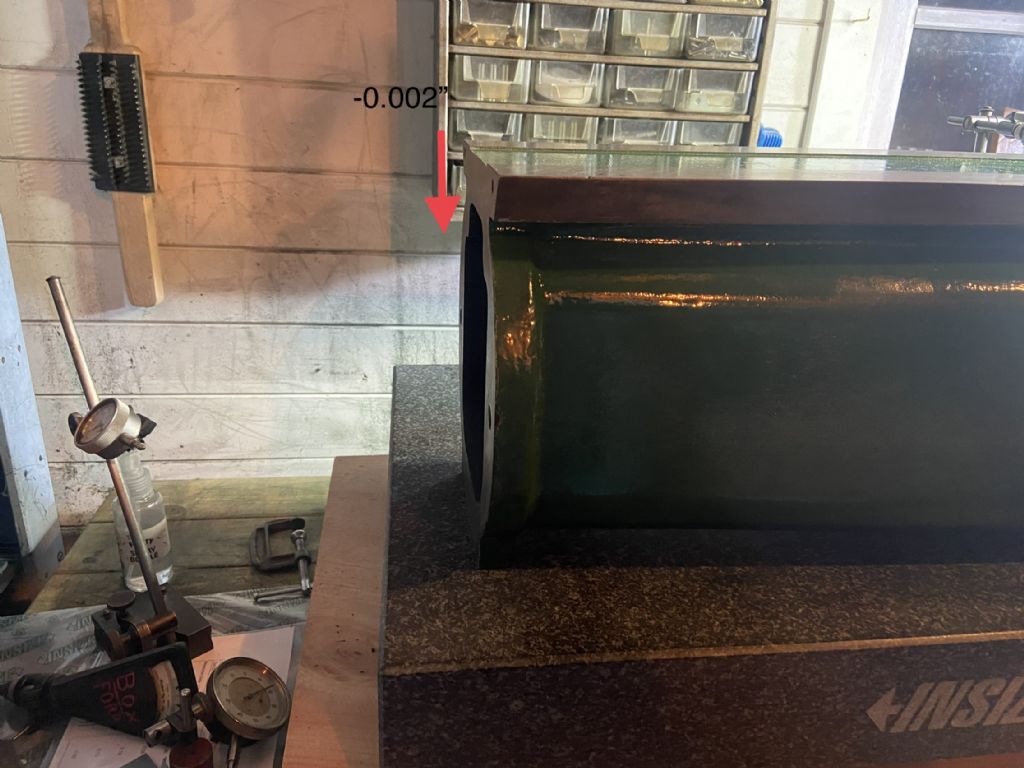
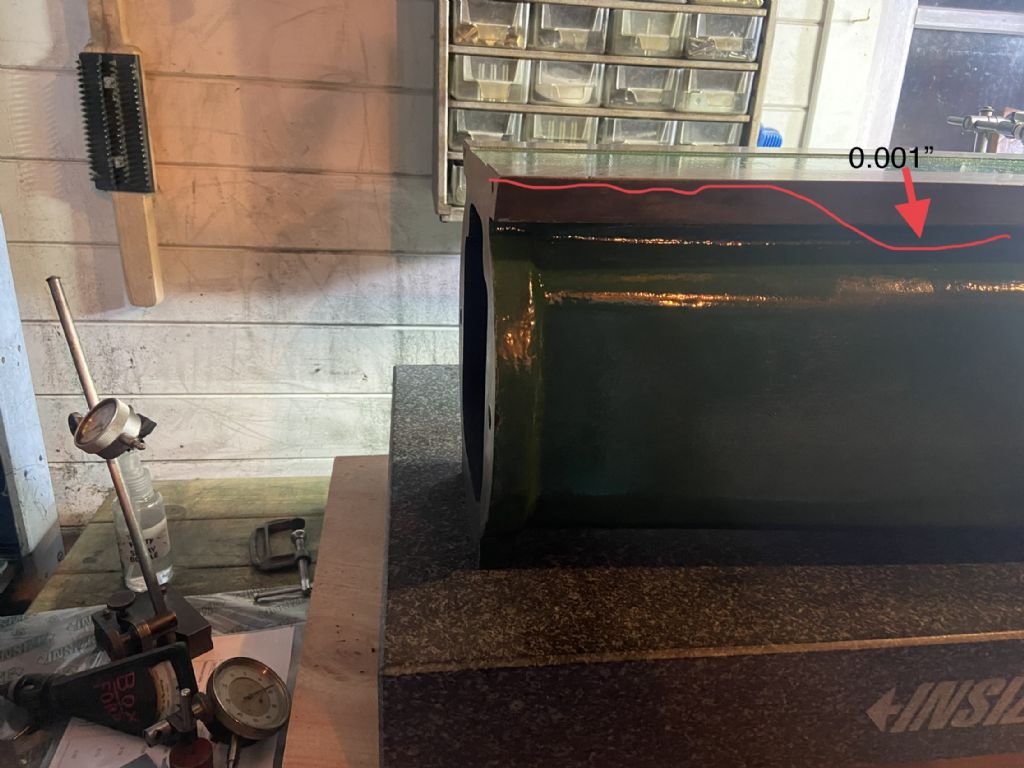
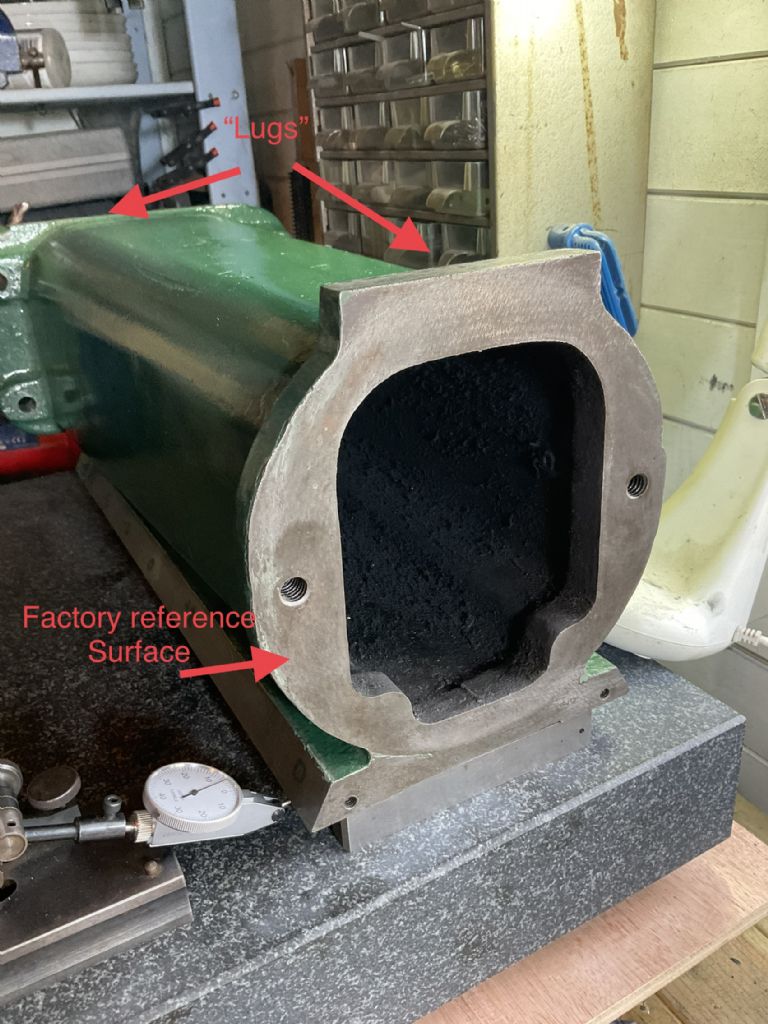
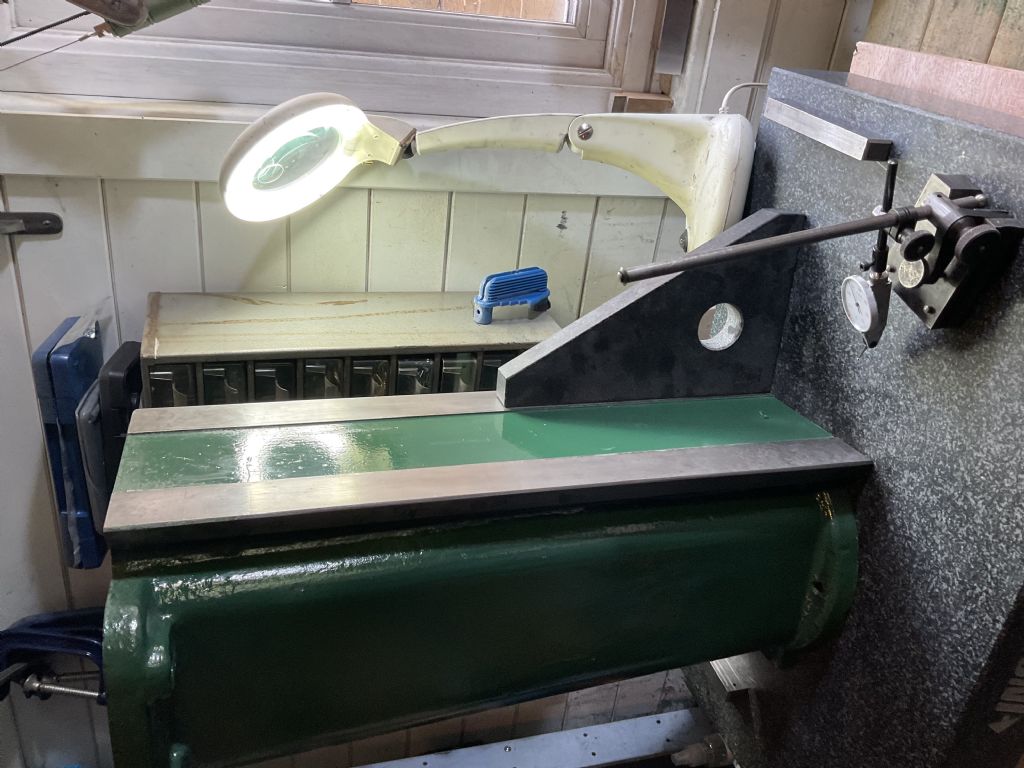
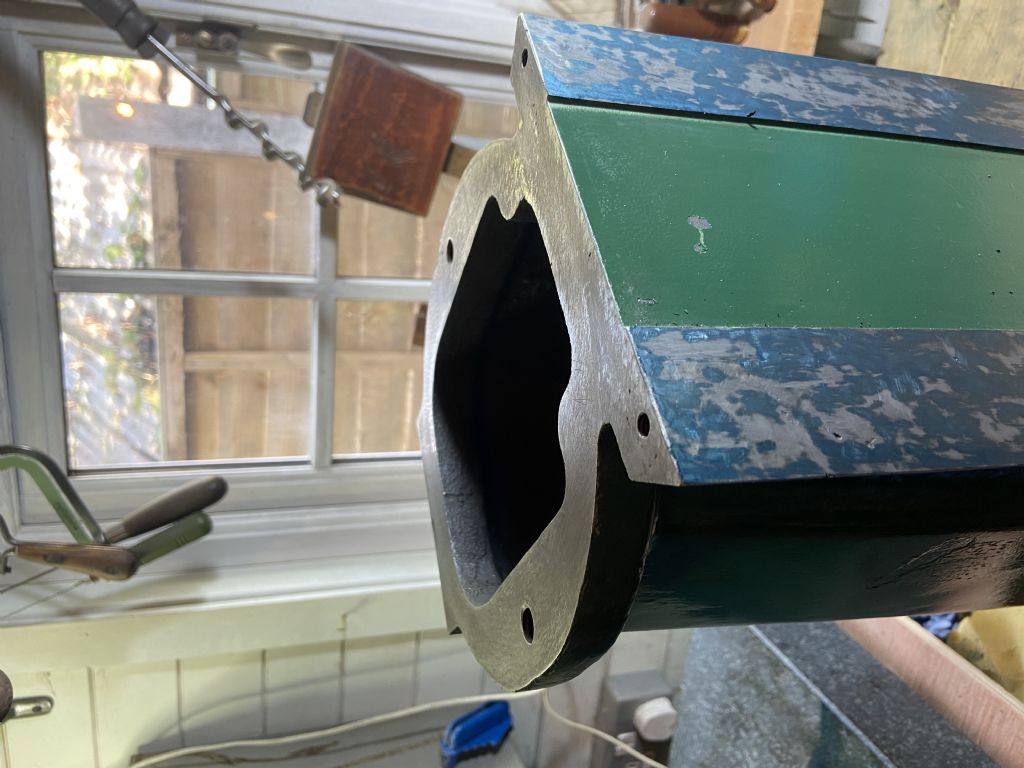
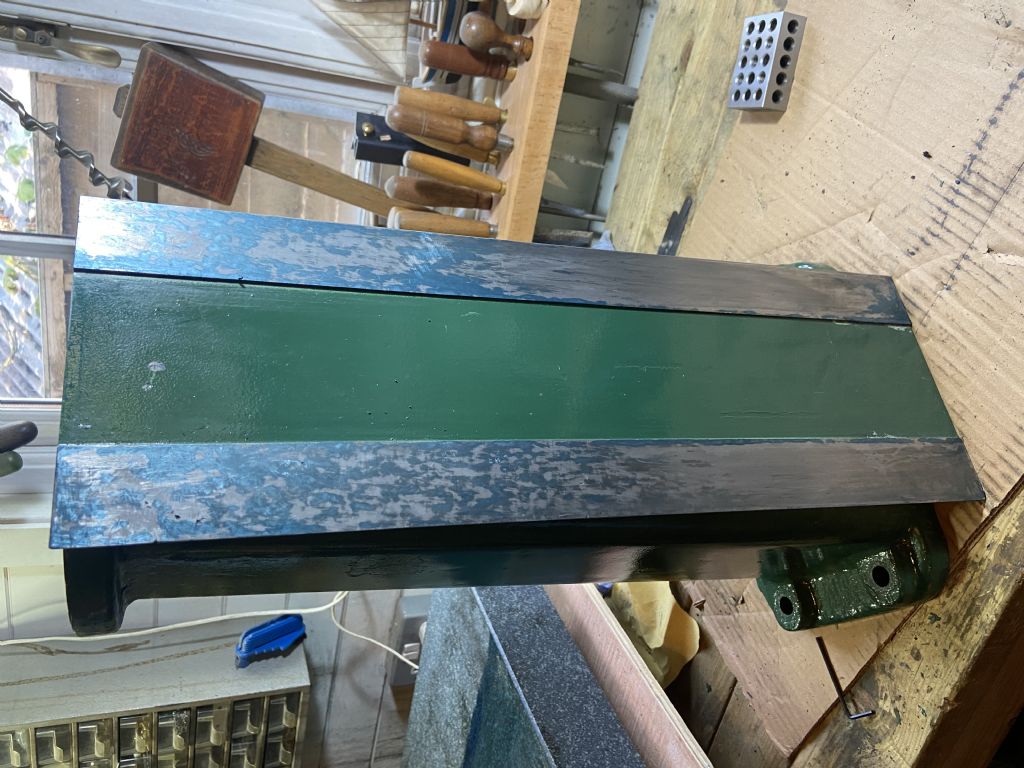
On my column there are some ground “lugs” on the back of the column, which I was hoping were for the purpose of supporting the column square on a surface plate for inspection purposes. I am sure I was right, but they seem to have been knocked about over the years and it seems to be not quite accurate using these as reference surfaces. I am trying to 1) check that the ways are perpendicular to the surface that mates with the headstock and 2) indicate the ways to check for “co-flatness” (I read that word somewhere) so I can make a plan for scraping. 1) with the column on the surface plate the headstock surface is about 0.001” out of square with the surface plate (if I place a 0.002” feeler gauge under the other end of the column. That’s the closest I could get it. 2) the far way surface is about 0.002” lower than the near way. I am certain that this is because of the position of the shim rather than a genuine error 3) about 2/3 of the way along the ways I get a roughly 0.001” dip, looking like some wear on the ways, in the area where the knee usually operates. Not too bad. but I can’t get really reliable, repeatable measurements like this. Possible solutions 1) shim like crazy and try to get the column aligned with the surface plate better - hard and not easily repeatable 2) mess around with a precision level 3) get a pair of meaty parallels, turn the column ways-down and take measurements from the bottom Any thoughts or advice appreciated
Steve
|
| Kiwi Bloke | 25/09/2022 09:55:54 |
| 912 forum posts 3 photos | I may not have fully understood your intended approach, and thus your problem. However, here are some thoughts on what my approach to the task would be. There are, of course, other approaches: I'm not claiming mine is the best. |
| Steve355 | 25/09/2022 13:08:27 |
| 321 forum posts 235 photos | Kiwi Bloke Sorry, I’m not explaining myself well. See pic…. So the factory reference surface is the surface the headstock sits on. It is not a wear surface and shouldn’t need scraping. The ways need to be perpendicular to this surface and co-planar. If I just start scraping the ways, I can get them flat, but they will not necessarily be perpendicular to the factory surface. They will likely be in a skewed plane. I was hoping to use the “lugs” to sit the column on the surface plate, making the plane of the ways perpendicular to the reference surface, and parallel to the surface plate. However, when I do that, the reference surface isn’t quite perpendicular to the surface plate, by about a thou. Which makes it tricky. Ideally I’d put the reference surface on the plate directly, and take measurements: but, clearly my reference square and surface gauge are nothing like tall enough for that. The reason for taking the measurements is (having watched videos by Keith Rucker et al doing this) to get the ways perpendicular to the reference surface and co-planar, they split them into areas of similar height and scrape and measure, scrape and measure etc. to bring it gradually in to a perpendicular and co-planar surface. Then, once pretty close, spot and scrape it dead flat. Problem is, I can’t quite seem to work out a way to get those measurements accurately and reliably. Steve Edited By Steve355 on 25/09/2022 13:09:14 Edited By Steve355 on 25/09/2022 13:10:00 |
| Kiwi Bloke | 26/09/2022 00:38:23 |
| 912 forum posts 3 photos | Steve, your explanation is fine; the problem is that we're coming at this from different directions and run the risk of talking at cross purposes. Also, according to my wife, I'm capable of misunderstanding the simplest of things. BTW, I note the nice granite square! Incidentally, for bolting faces, as at the top and bottom of the column, there's no need to scrape for a high density of contact points, and the surface can be relieved in areas away from the bolt holes. Then, for correcting alignment, only small areas need to be scraped. |
| Pete Rimmer | 26/09/2022 06:47:40 |
| 1486 forum posts 105 photos | Steve, You're approaching this problem backwards. Scrape the long ways straight and flat then put the square on the long ways and use it to measure the short ways' perpendicularity with the scraped long ways. For that surface it only needs to be pretty close because you will dress the wheel from the moving cross-slide. What is most imporatant is that the knee and cross table ways are nicely scraped in. That joint barely matters at all. |
| Steve355 | 26/09/2022 08:23:24 |
| 321 forum posts 235 photos | Posted by Pete Rimmer on 26/09/2022 06:47:40:
Steve, You're approaching this problem backwards. Scrape the long ways straight and flat then put the square on the long ways and use it to measure the short ways' perpendicularity with the scraped long ways. For that surface it only needs to be pretty close because you will dress the wheel from the moving cross-slide. What is most imporatant is that the knee and cross table ways are nicely scraped in. That joint barely matters at all. Hi Pete Last night, I got fed up with it and started doing precisely that. I had a good look in Connelly on scraping perpendicular, and frankly he says “use a protractor” or make up a square template (how?!) I’ve Googled around the topic too, and there is a lot of BS about it, but no clear examples of how it’s done There must be a standard approach to it - basically these machine tools are big squares. Steve
|
| John P | 26/09/2022 10:14:14 |
| 451 forum posts 268 photos | Buy or make something like this. https://www.judgetool.com/products/suburban-tool-magnetic-cylindrical-square/
|
| John P | 26/09/2022 10:32:09 |
| 451 forum posts 268 photos | Should have added this video in previous posting on https://www.youtube.com/watch?v=LOaAMvGjUTk John |
| Robin | 26/09/2022 10:48:02 |
678 forum posts | Posted by Steve355 on 25/09/2022 13:08:27:
Ideally I’d put the reference surface on the plate directly, and take measurements but, clearly my reference square and surface gauge are nothing like tall enough for that. Me again A deep cut on the surface grinder might be a mm in 20 passes. Cut by hand your tea is stone cold and your cigarette has burnt to nothing in the ashtray. I think your reference square could be a massive overkill albeit very pretty. Here's a thought... If you ever decide to cut with the side of the wheel You can probably tell I lie awake at night trying to get my head around this stuff. Robin |
| Tony Pratt 1 | 26/09/2022 11:46:56 |
| 2319 forum posts 13 photos | Serious question to the OP! Does your grinder actually need refurbishing, have you tried using it or is this something you just want to do? Tony |
| Steve355 | 26/09/2022 11:53:35 |
| 321 forum posts 235 photos | Kiwi bloke thanks for the effort you have put into responding, I’ve come to the conclusion that you are right. I managed to get the column and square but only by adding a 0.004” at the other end. That’s a lot of scraping. And in fact, if I did want to get the end surface of the column flat, the amount of metal there is pretty minimal, and as you say it will only need to lose a thou. So I’ve started the spotting and scraping process. Add the spotting is basically mirroring the measurements that I took. my next question I will need to address some dovetails before long, and I’m guessing for that I need a straight edge. Here are the lengths of the dovetails: column 21” table 25” knee 16” and 15” i’ve already been in conversations with Mr Lamb about getting a straight edge. What’s the best size to get? obviously something Long enough for the table, but won’t that be unwieldy for the shorter dovetails, and possibly other small dovetails I want to do in the future? on my lathe etc? I can barely afford one straight edge, let alone too! Cheers Steve |
| peak4 | 26/09/2022 14:18:16 |
2207 forum posts 210 photos | Did you ever look at the video series on Youtube about fettling a Herbert, which is what gave me quite a lot of pointers. |
| Steve355 | 26/09/2022 14:52:43 |
| 321 forum posts 235 photos | Hi Bill Yes, and I’ve been combing your pics for tips on how to do all this! >>>Also, don't forget that maybe you don't need to scrape the top of the column yet; Thats a really good point. Steve |
| Steve355 | 26/09/2022 20:38:43 |
| 321 forum posts 235 photos |
dovetail lengths: column 21” table 25” knee 16” and 15” I am going to ring HR Lamb in the morning and order a 24” straight edge unless someone advises me not to…. Thanks |
| Kiwi Bloke | 26/09/2022 21:07:58 |
| 912 forum posts 3 photos | Sounds good. I'm not familiar with HR Lamb's products. Just a reminder to think ahead: will the straight-edge be suitable to get into the 'female' dovetails, ie has it a bevelled edge? You'll probably end up making small masters for awkward internal dovetail work, unless your muscle development keeps up with your work... Good luck. By half-way into this project, you'll either have been bitten by the scraping bug, or will vow never to do any more - ever! |
Please login to post a reply.
Want the latest issue of Model Engineer or Model Engineers' Workshop? Use our magazine locator links to find your nearest stockist!
Sign up to our newsletter and get a free digital issue.
You can unsubscribe at anytime. View our privacy policy at www.mortons.co.uk/privacy
- *Oct 2023: FORUM MIGRATION TIMELINE*
05/10/2023 07:57:11 - Making ER11 collet chuck
05/10/2023 07:56:24 - What did you do today? 2023
05/10/2023 07:25:01 - Orrery
05/10/2023 06:00:41 - Wera hand-tools
05/10/2023 05:47:07 - New member
05/10/2023 04:40:11 - Problems with external pot on at1 vfd
05/10/2023 00:06:32 - Drain plug
04/10/2023 23:36:17 - digi phase converter for 10 machines.....
04/10/2023 23:13:48 - Winter Storage Of Locomotives
04/10/2023 21:02:11 - More Latest Posts...
- View All Topics
- Reeves** - Rebuilt Royal Scot by Martin Evans
by John Broughton
£300.00 - BRITANNIA 5" GAUGE James Perrier
by Jon Seabright 1
£2,500.00 - Drill Grinder - for restoration
by Nigel Graham 2
£0.00 - WARCO WM18 MILLING MACHINE
by Alex Chudley
£1,200.00 - MYFORD SUPER 7 LATHE
by Alex Chudley
£2,000.00 - More "For Sale" Ads...
- D1-3 backplate
by Michael Horley
Price Not Specified - fixed steady for a Colchester bantam mark1 800
by George Jervis
Price Not Specified - lbsc pansy
by JACK SIDEBOTHAM
Price Not Specified - Pratt Burnerd multifit chuck key.
by Tim Riome
Price Not Specified - BANDSAW BLADE WELDER
by HUGH
Price Not Specified - More "Wanted" Ads...
Do you want to contact the Model Engineer and Model Engineers' Workshop team?
You can contact us by phone, mail or email about the magazines including becoming a contributor, submitting reader's letters or making queries about articles. You can also get in touch about this website, advertising or other general issues.
Click THIS LINK for full contact details.
For subscription issues please see THIS LINK.
Model Engineer Magazine
- Percival Marshall
- M.E. History
- LittleLEC
- M.E. Clock
ME Workshop
- An Adcock
- & Shipley
- Horizontal
- Mill
Subscribe Now
- Great savings
- Delivered to your door
Pre-order your copy!
- Delivered to your doorstep!
- Free UK delivery!

 and also it may be useful,to others attempting a similar project.


 Register
 Log-in


