Drawing a saw blade - help!
| SillyOldDuffer | 27/08/2022 21:56:08 |
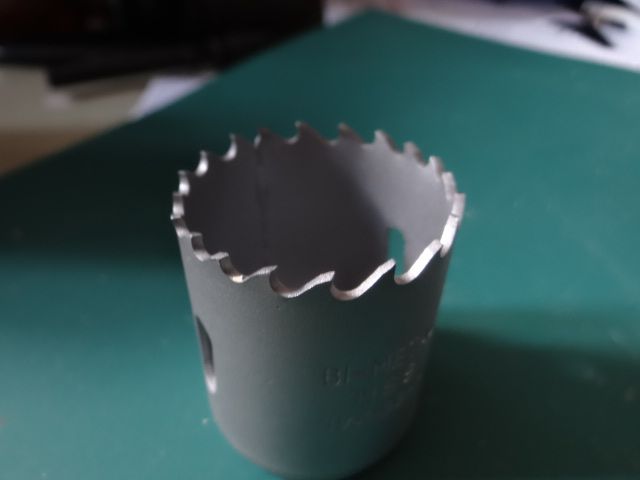
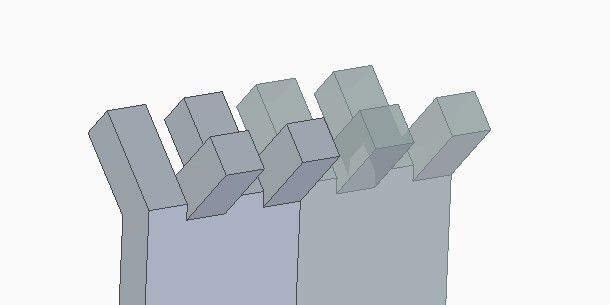
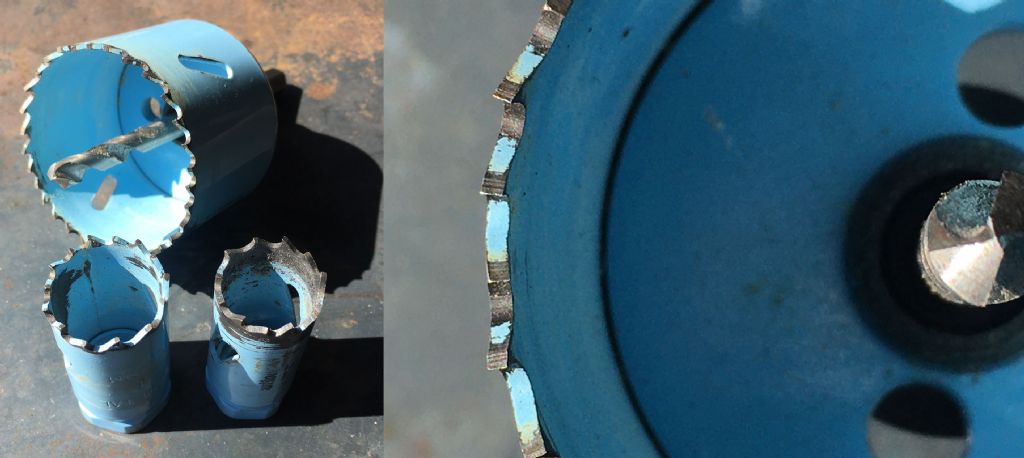
| 10668 forum posts 2415 photos | I learn CAD by tackling ever more difficult objects, mostly successful, but the latest has me stumped. My nemesis is a hole saw: First attempt was easy enough, not worrying about the exact scale, below was done by creating a plane tangent to the cylinder, sketching a tooth on the plane, cutting through the cylinder with the sketch, and then replicating the cut with a circular pattern: There are three problems! First, the teeth don't align properly with the central axis. The error is more obvious on a small diameter hole saw and is caused by a flat sketch being projected parallel on to the curve. Second, the teeth need to be alternately bent a couple of degrees in and out to create the kerf. Something like this, but easier to draw and replicate in a circle with properly shaped teeth;
Thirdly, the teeth in the real saw aren't all the same depth. It can just be seen in the first photo that the teeth nearest and furthest from the camera are deep and those to the side are shallow. Might be a manufacturing error except it looks neatly deliberate. I don't know how to model this saw in CAD! I've failed with FreeCAD and Solid Edge in both Part Design and sheet-metal modes. Very grateful for any suggestions please! Thanks in anticipation, Dave |
| Andrew Johnston | 27/08/2022 22:42:16 |
7061 forum posts 719 photos | Use a loft from the sketch to a point on the rotational axis to create the tooth shape? Andrew PS: In reality I expect the teeth are cut straight during manfacture with no taper Edited By Andrew Johnston on 27/08/2022 22:43:57 |
| Huub | 27/08/2022 23:16:04 |
| 220 forum posts 20 photos | Posted by SillyOldDuffer on 27/08/2022 21:56:08:There are three problems!
The teeth don't align properly with the central axis. The error is more obvious on a small diameter hole saw and is caused by a flat sketch being projected parallel on to the curve. I use Freecad and it takes some time to get used to it.
You need to draw a construction line from the centre of the saw blade to the cutting edge. Than you can set the angle between the cutting edge and this construction line. You draw 1 tooth and use the polar pattern to draw all other teeth. To bent 2 teeth, you draw 2 teeth and project the sketch on a curved surface. You can use the Curves workbench for this. Curve workbench If you want to change the height of the teeth, drawing a bunch of teeth at the right height, projecting them on a curved surface and than making a polar array is an option. I can't think of an easier way at the moment. To make life easier, you need to set all dimensions in a spreadsheet. The dimensions in the drawing can than be changed by just changing the dimension in the spreadsheet. In the spreadsheet you can make a configuration table having different dimensions for different saw blades. You can then check your design changes for different saw blades by just selecting the right saw blade. If any of these techniques is unknown, use Youtube to learn it.
|
| lee webster | 27/08/2022 23:17:38 |
| 383 forum posts 71 photos | Could you draw the tooth as a separate body, shape it so that it has the correct angles and then make a mirror copy in the correct axis moved the correct distance from the first tooth and cut both of the teeth bodies from the cylinder body then replicate the cut around the cylinder central axis. I think I made it sound more complicated than it is. As for the cutter in the first photo, I have never seen a hole saw like that. |
| Paul Lousick | 28/08/2022 03:30:39 |
| 2276 forum posts 801 photos | Hole saws like the one shown are fitted to a spindle and use a twist drill to centre the hole. Available at bigger hardware stores. They can be used on wood and sheet metal. Dave, Another feature for you to incorporate is that the teeth ate set to give clearance for the saw. One tooth is bent out and the next tooth bent in. (The final grind appears to be in line with the drill centre) Paul. |
| JasonB | 28/08/2022 06:58:47 |
25215 forum posts 3105 photos 1 articles | Does the CAD that you are using have sheet metal? you may be able to draw it flat and then roll it up just like the saws are made. If not you may be able to wrap the sketch of the teeth around the circle The better makes of holesaw have the variable pitch to reduce chatter and noise, if you look on larger dia saws you can see it quite clearly. Also you get the odd part tooth where the rolled up blade is joined which confirms the teeth are cut then rolled Is it just me that thinks Dave has too much time on his hands
Edited By JasonB on 28/08/2022 07:28:33 |
| Paul Lousick | 28/08/2022 08:13:56 |
| 2276 forum posts 801 photos | Nothing better than a good challenge if you have plenty of time on your hands to get the brain cells working. I started to model the hole saw but ran out of it !. Maybe later when I find some.
|
| Michael Gilligan | 28/08/2022 09:10:16 |
23121 forum posts 1360 photos | I’ve just logged-in for the first time in a while … and seen this interesting thread: It immediately reminded me of a question I asked, back in 2015 … MichaelG. . https://www.model-engineer.co.uk/forums/postings.asp?th=112241 Edited By Michael Gilligan on 28/08/2022 09:10:44 |
| JasonB | 28/08/2022 10:04:33 |
25215 forum posts 3105 photos 1 articles | I was only thinking the other day if you were OK Michael as you had been a bit quiet, I too was reminded of those images I posted some time ago. |
| old mart | 28/08/2022 15:40:23 |
| 4655 forum posts 304 photos | It is not uncommon for saw blades to have variable pitch which could complicate things. |
| SillyOldDuffer | 28/08/2022 17:26:12 |
| 10668 forum posts 2415 photos | Posted by Andrew Johnston on 27/08/2022 22:42:16:
Use a loft from the sketch to a point on the rotational axis to create the tooth shape? Andrew PS: In reality I expect the teeth are cut straight during manfacture with no taper
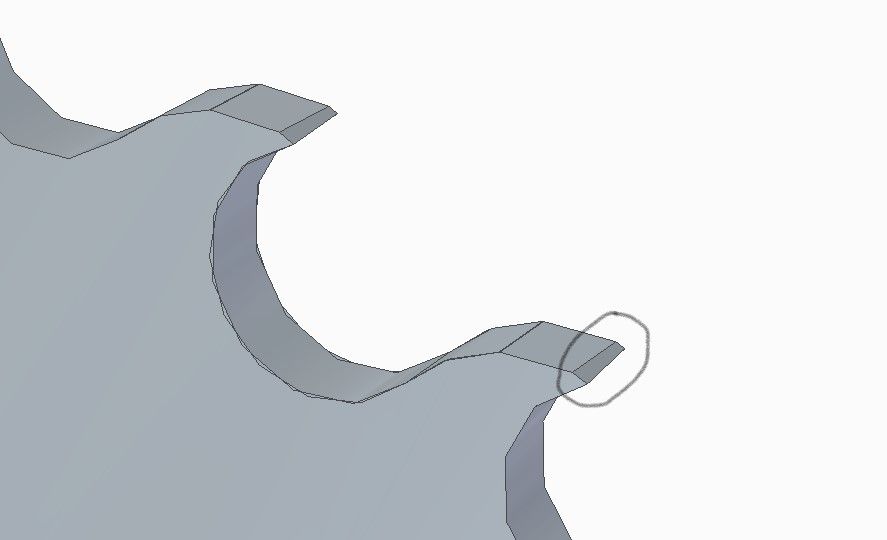
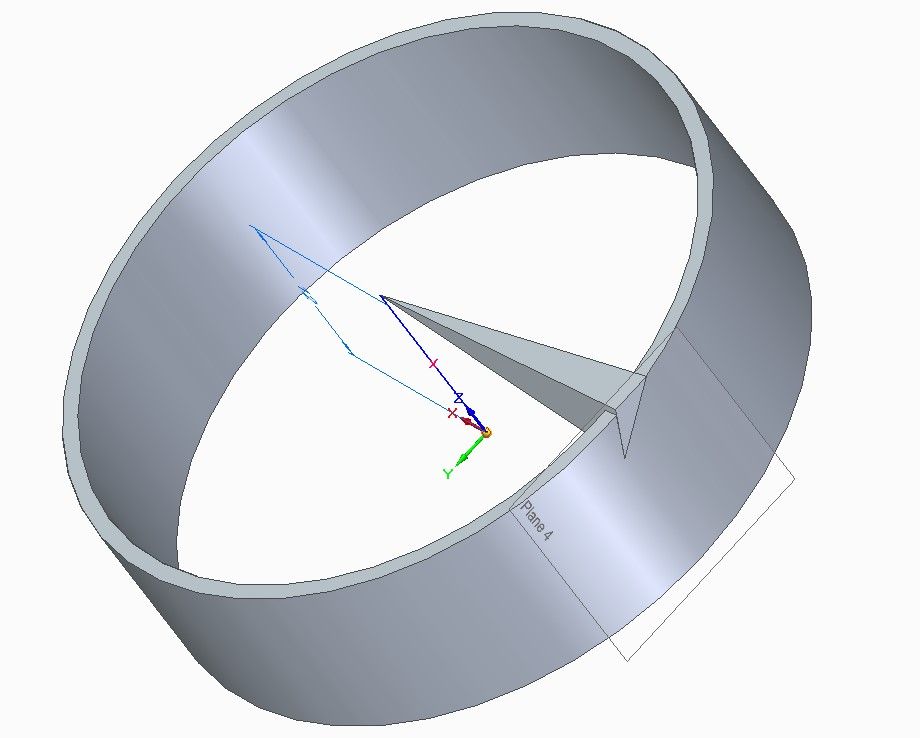
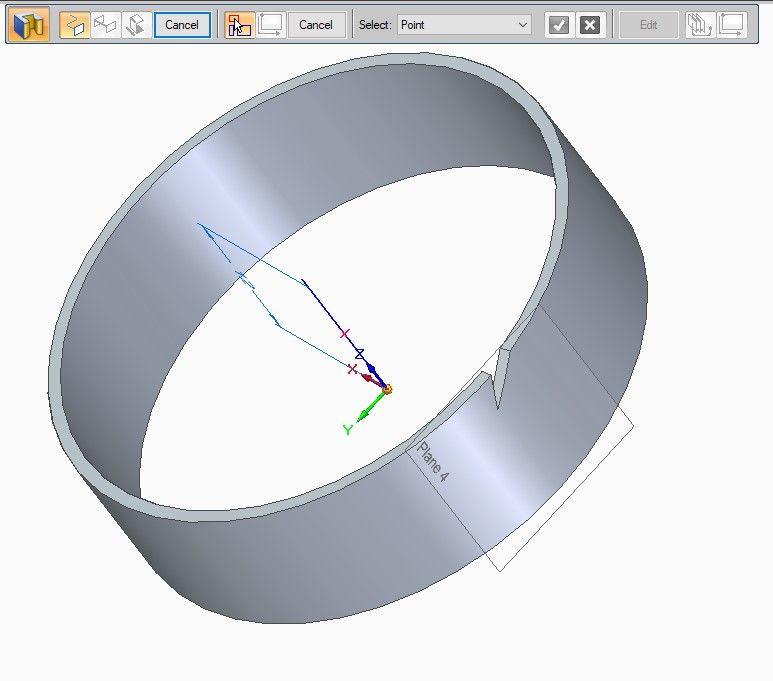
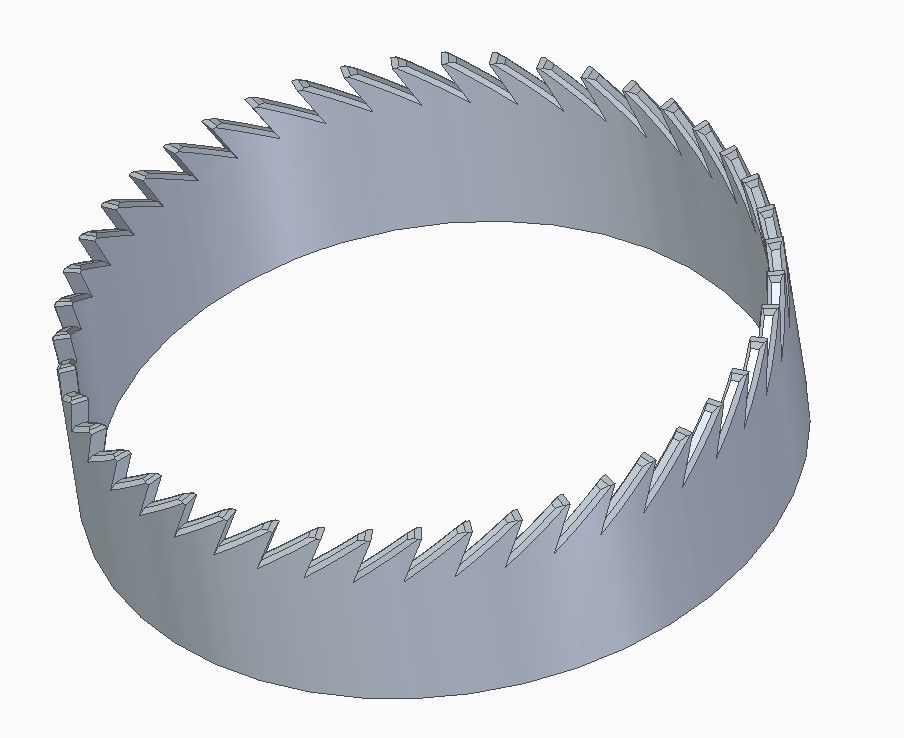
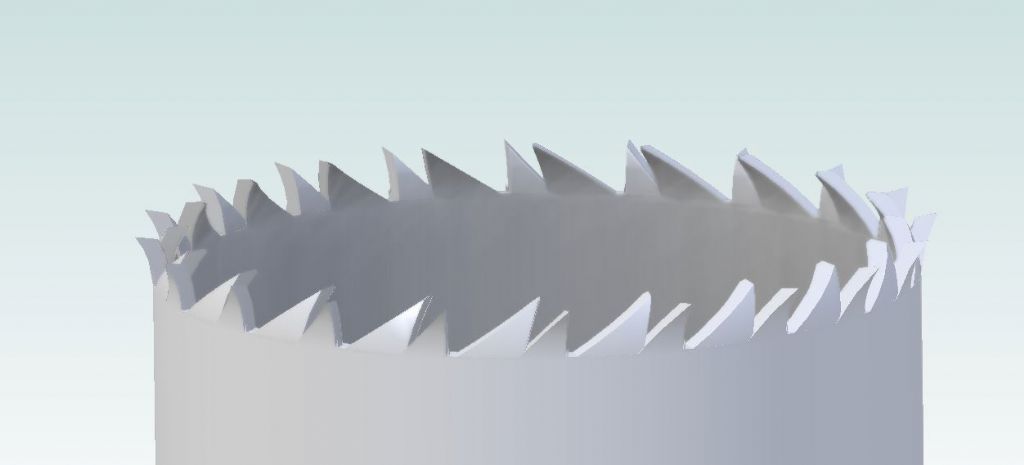
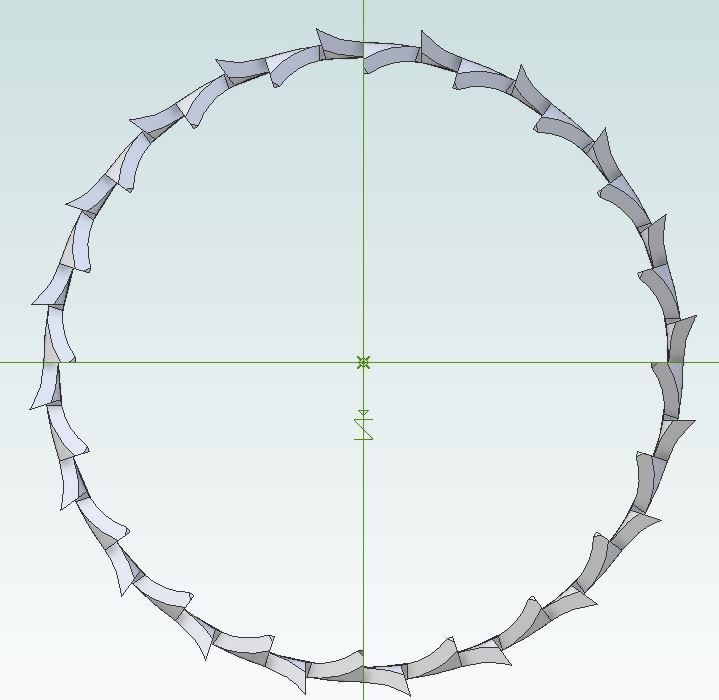
This suggestion works, or at least is a considerable improvement. Thanks! Having a busy day so to save time the example is with a V tooth. First picture shows the sketch on it's tangent plane, lofted solid to a point on the axis, to show it's shape (Discovery: Solid Edge won't loft to a line.) The same loft applied as a cut: And the tooth with some chamfering rotated as a pattern cut around the Z axis: Progress, but the tooth relief isn't quite right, and there's no kerf (teeth bent alternately) or variable depthing. Jason suggested the Sheet-metal workbench, which I've tried. As far as I can see FreeCAD and SE don't allow a bend to be applied to a curved strip. It is possible to kerf the teeth on a straight strip, but I can't find a way of bending a straight strip into a circle. Normally I find it easier to 3D-model in CAD than to make the real thing. This seems to be an exception: bending strip metal into a circle and kerfing saw-teeth is easy in real life! Back to the drawing board! Ta, Dave |
| JasonB | 28/08/2022 18:09:34 |
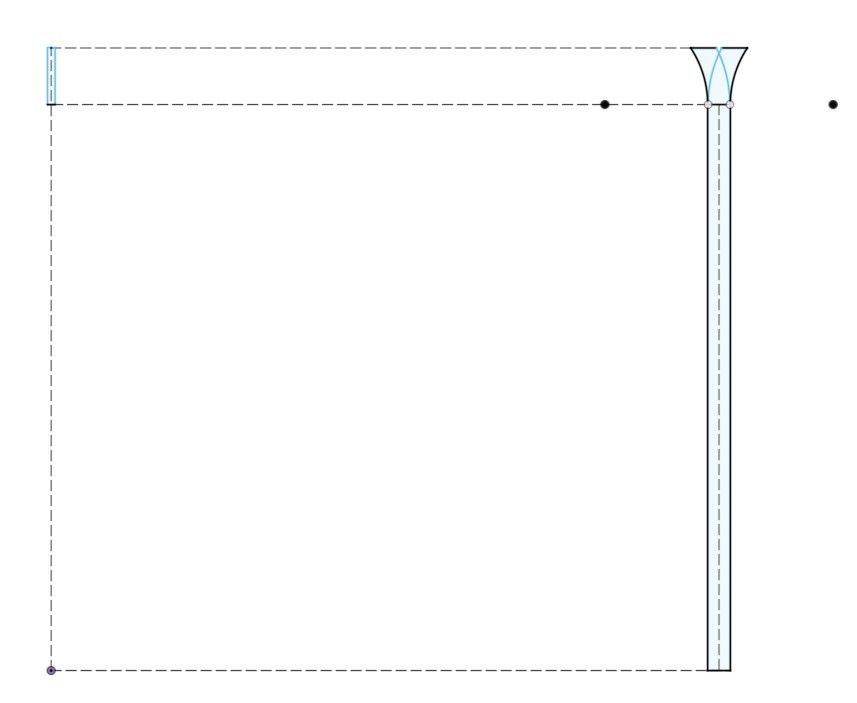
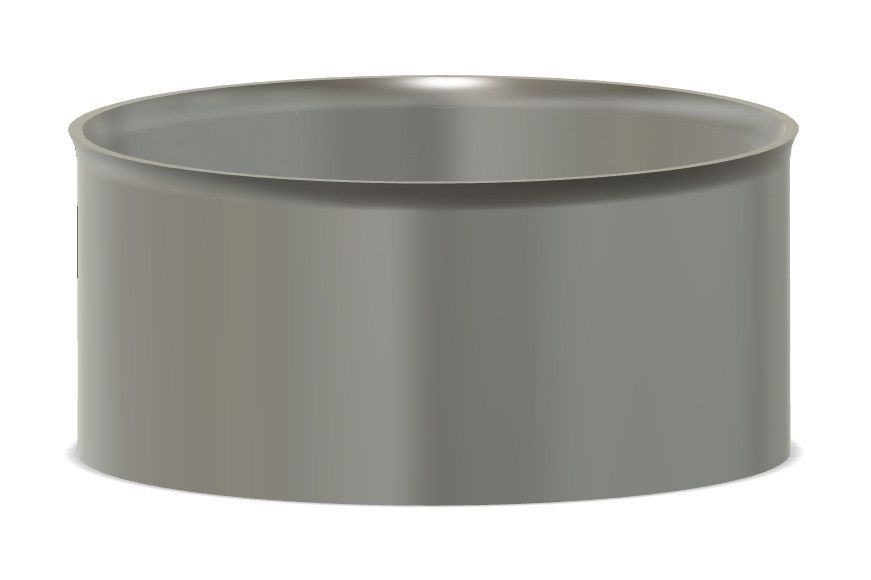
25215 forum posts 3105 photos 1 articles | I wonder if you could make it by combining two sketched. Draw as you have above but with a slight trumpet shape and cut the teeth plus a gap which will gibe you the teeth bent outwards. Then do an additional ring around the top that bends in slightly and cut the alternate teeth from that. When the two are combined you will have teeth set in either direction. |
| Ed Duffner | 28/08/2022 18:35:30 |
| 863 forum posts 104 photos | Can you select a set of points which form the profile of a tooth and move/rotate the those points in or out of the arc of the blade face?
|
| JasonB | 28/08/2022 18:44:00 |
25215 forum posts 3105 photos 1 articles | Needs a bit more work getting the inner and outer teeth the same size but basically what I said in the previous post using Boolean unite to make the flaired out tube and ring of flaired in teeth into one unit Edited By JasonB on 28/08/2022 18:56:27 |
| SillyOldDuffer | 28/08/2022 19:04:24 |
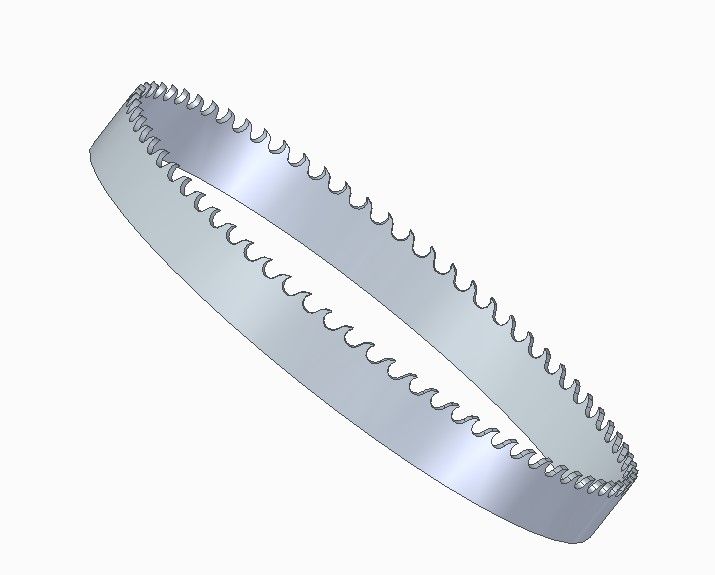
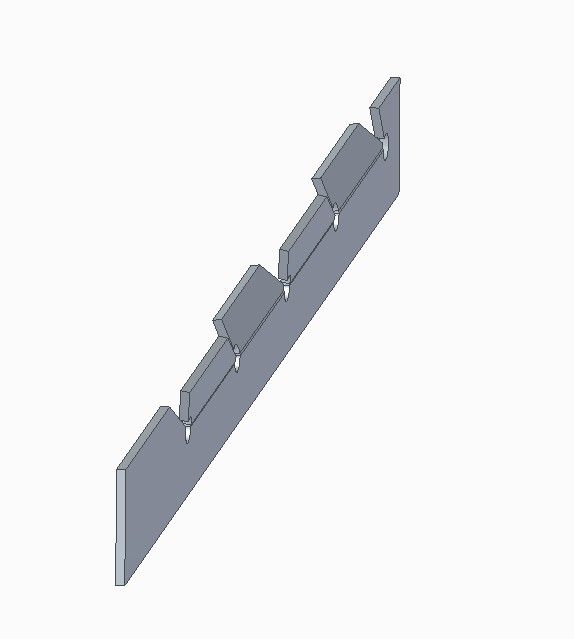
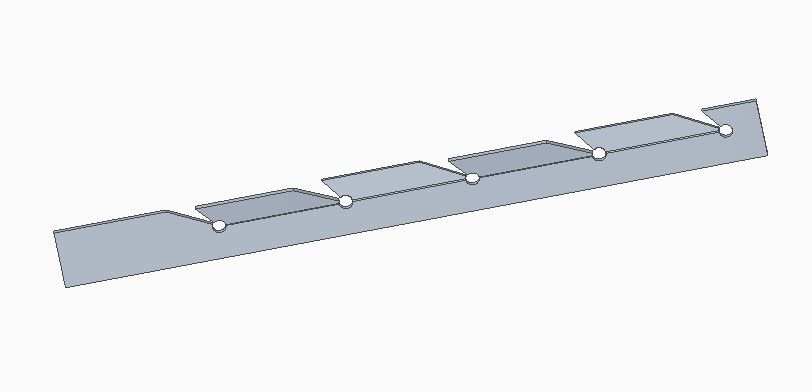
| 10668 forum posts 2415 photos | SolidEdge Sheetmetal achieved this on a straight blade: Hard work though because the teeth have to be bent one at a time - takes forever. Also the round holes are essential to relieve the bends: seems SoildEdge won't apply bends that break the rules! A quick try with Ed's suggestion didn't work in Solid Edge (Sheetmetal) and I'll try in Part mode later. I like Jason's trumpet idea, pretty sure SE can do the same and will try after I've eaten. Cheers, Dave
|
| Gary Wooding | 29/08/2022 14:02:27 |
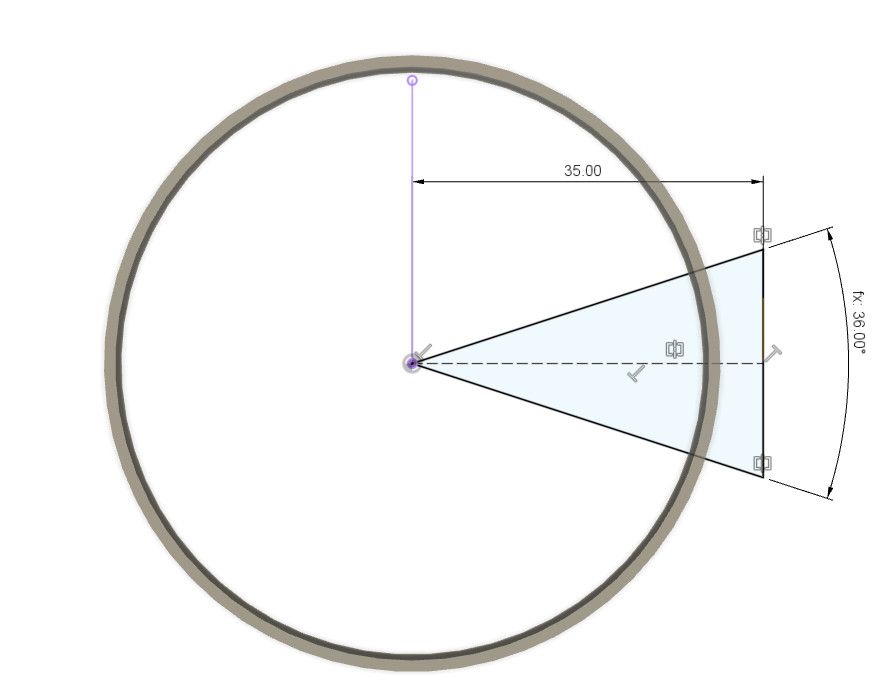
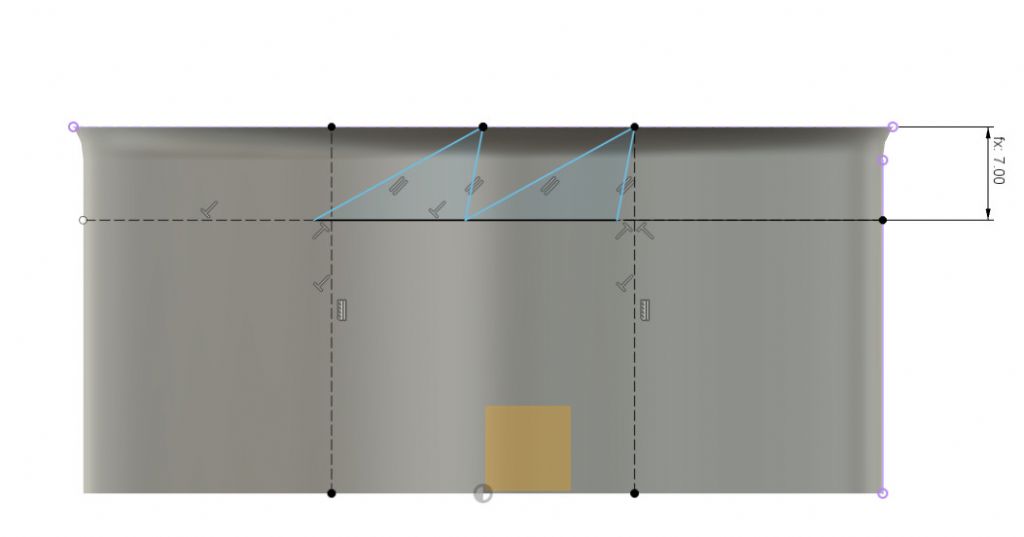
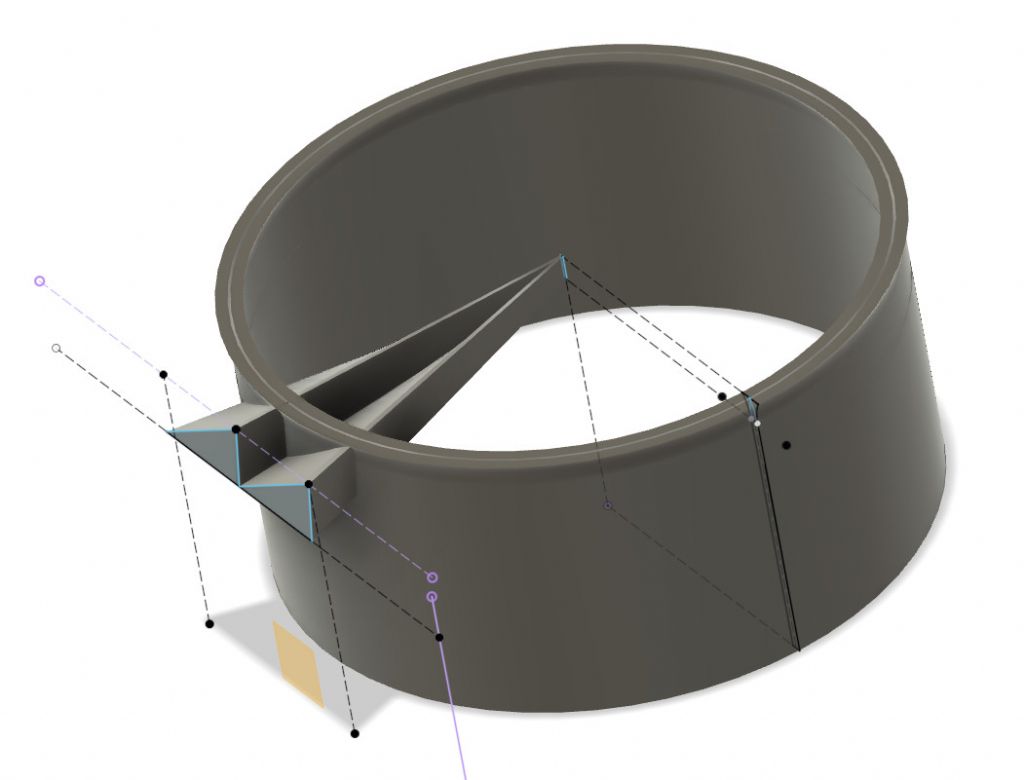
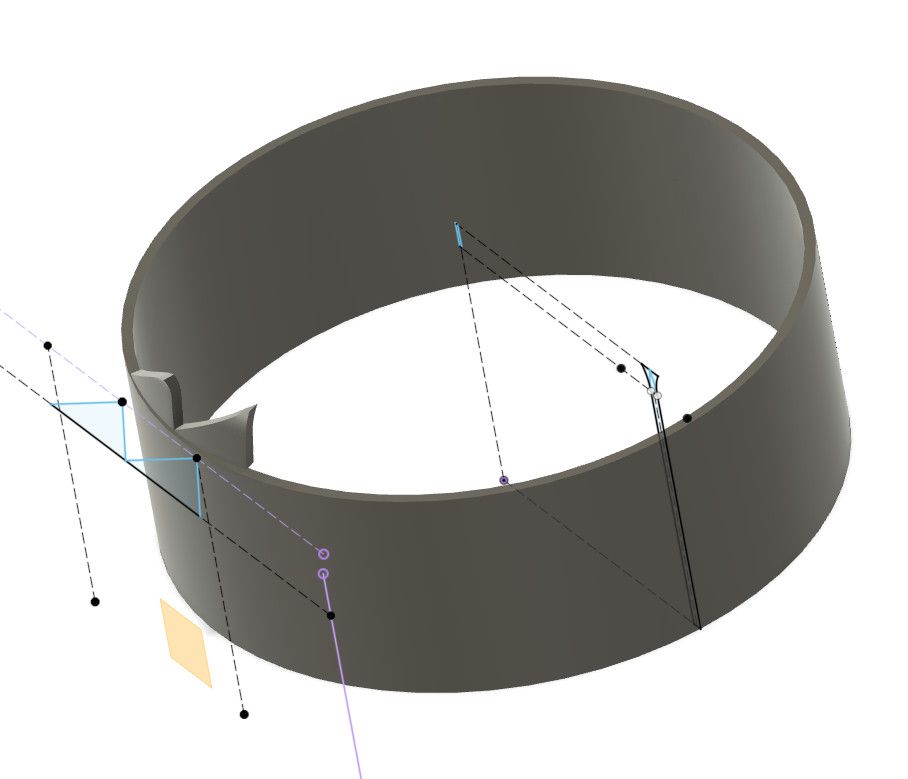
| 1074 forum posts 290 photos | Here's my effort in Fusion. |
| SillyOldDuffer | 29/08/2022 15:28:28 |
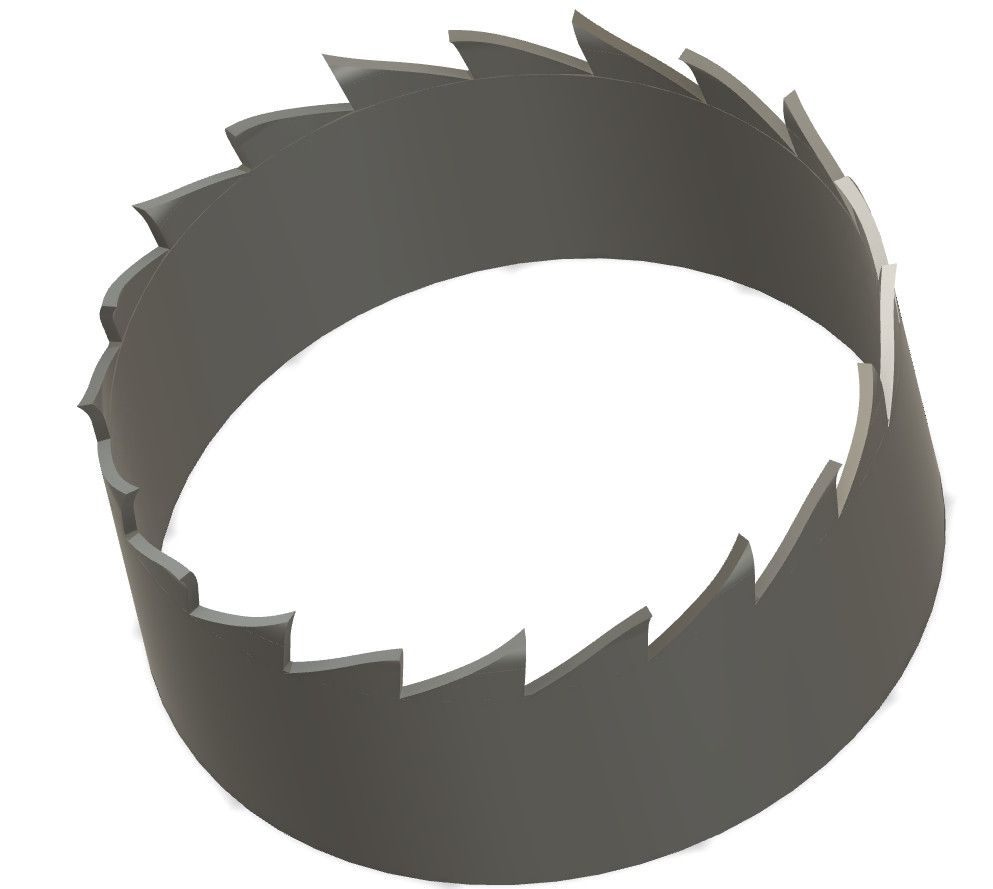
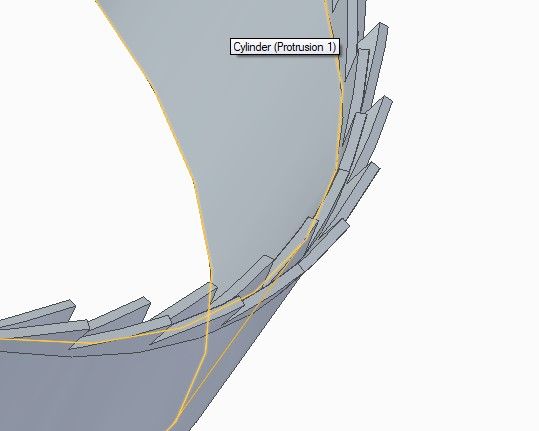
| 10668 forum posts 2415 photos | This my first attempt at Jason's Trumpet method, proof of concept, with no attempt at getting the tooth details right. However it works, and is quick! I'm impressed by Gary's Fusion360 version. How was it done? Ta Dave |
| Gary Wooding | 29/08/2022 19:30:15 |
| 1074 forum posts 290 photos | I first created sketch of two versions of the profile of the blade; one with the lip curving out and the other with the lip curving in. Then each profile was revolved to create two bodies in the same location. Here's the one for the top sloping out. A new sketch was then drawn from the top. This was to get the correct angle for the pairs of teeth - I chose 10 pairs. I then created a workplane offset from the original sketch, but through the line defining the angle of the previous sketch. I then cut then created a workplane to cut the two bodies along the horizontal line of that sketch. This created 4 bodies: two copies of the cylindrical parts, and one each of the in/out sloping parts. |
| Gary Wooding | 29/08/2022 19:41:37 |
| 1074 forum posts 290 photos | Continued... I then lofted the two teeth towards the small rectangle in the centre. Because the in/out sloping parts were now separate from the two cylindrical parts I could create an intersection of one tooth and the in-slope section, and the other with the out-slope section. I could then do a circular pattern of the two teeth and then combine then with one of the cylindrical parts. That completed the job. |
| HOWARDT | 29/08/2022 21:07:54 |
| 1081 forum posts 39 photos | Having followed this topic with the thought that the profile was wrong looked at manufacturing process. The saws are actually made from flat saw profile welded into a circle. Much easier to draw and get the correct tooth profile. |
Please login to post a reply.
Want the latest issue of Model Engineer or Model Engineers' Workshop? Use our magazine locator links to find your nearest stockist!
Sign up to our newsletter and get a free digital issue.
You can unsubscribe at anytime. View our privacy policy at www.mortons.co.uk/privacy
- *Oct 2023: FORUM MIGRATION TIMELINE*
05/10/2023 07:57:11 - Making ER11 collet chuck
05/10/2023 07:56:24 - What did you do today? 2023
05/10/2023 07:25:01 - Orrery
05/10/2023 06:00:41 - Wera hand-tools
05/10/2023 05:47:07 - New member
05/10/2023 04:40:11 - Problems with external pot on at1 vfd
05/10/2023 00:06:32 - Drain plug
04/10/2023 23:36:17 - digi phase converter for 10 machines.....
04/10/2023 23:13:48 - Winter Storage Of Locomotives
04/10/2023 21:02:11 - More Latest Posts...
- View All Topics
- Reeves** - Rebuilt Royal Scot by Martin Evans
by John Broughton
£300.00 - BRITANNIA 5" GAUGE James Perrier
by Jon Seabright 1
£2,500.00 - Drill Grinder - for restoration
by Nigel Graham 2
£0.00 - WARCO WM18 MILLING MACHINE
by Alex Chudley
£1,200.00 - MYFORD SUPER 7 LATHE
by Alex Chudley
£2,000.00 - More "For Sale" Ads...
- D1-3 backplate
by Michael Horley
Price Not Specified - fixed steady for a Colchester bantam mark1 800
by George Jervis
Price Not Specified - lbsc pansy
by JACK SIDEBOTHAM
Price Not Specified - Pratt Burnerd multifit chuck key.
by Tim Riome
Price Not Specified - BANDSAW BLADE WELDER
by HUGH
Price Not Specified - More "Wanted" Ads...
Do you want to contact the Model Engineer and Model Engineers' Workshop team?
You can contact us by phone, mail or email about the magazines including becoming a contributor, submitting reader's letters or making queries about articles. You can also get in touch about this website, advertising or other general issues.
Click THIS LINK for full contact details.
For subscription issues please see THIS LINK.
Model Engineer Magazine
- Percival Marshall
- M.E. History
- LittleLEC
- M.E. Clock
ME Workshop
- An Adcock
- & Shipley
- Horizontal
- Mill
Subscribe Now
- Great savings
- Delivered to your door
Pre-order your copy!
- Delivered to your doorstep!
- Free UK delivery!



 Register
 Log-in


