Mill tooling runouts
| gerry madden | 31/12/2018 13:56:25 |
| 331 forum posts 156 photos | They say the devil makes work for idle hands so during a spare afternoon last week (I had intended to tidy the workshop!) I thought I would do some runout checks on my mill tooling. I seem to have acquired a Jacobs, Rohm and ER collet chucks over the years so I thought I'd see how they compared. For each check, I assembled the chuck into the spindle, fitted the bit, measured and repeated this 5 times. The runout was measured radially on a smooth part of the shank of a 6mm bit approx. 5mm down from the jaws. After averaging al the data this is what I found: Jacobs 13mm 1)tightening by one hole 26um 2)tightening by 3 holes 25um Rohm 0~6mm 19um ER25 standard collet chuck: 1) normal tightening 12um 2) very tight 14um What I didn't do is measure the runout of the spindle itself. But I did put the DI on the tapered bore of the collet chuck and this gave ne about 10um which suggests that the standard collets are not so bad. What did concern me though was the flexibility of the structure. Just a light finger pressure on the bit, OR the chuck, OR the head, produced almost the same level of sidewards elastic deflection in the order of 15um. I definitely want to investigate the root of this and see if it can be easily improved. Does anyone know what would be a typical 'spindle' rigidity value (um/N) in a small hobby mill ? Clearly though my problem is not the spindle. I think I have a problem with the stability of the clamping surfaces in the structural parts. When I know more I'll let you know.
|
| Michael Gilligan | 31/12/2018 17:20:10 |
23121 forum posts 1360 photos | Posted by gerry madden on 31/12/2018 13:56:25:
.... What did concern me though was the flexibility of the structure. Just a light finger pressure on the bit, OR the chuck, OR the head, produced almost the same level of sidewards elastic deflection in the order of 15um. I definitely want to investigate the root of this and see if it can be easily improved. Does anyone know what would be a typical 'spindle' rigidity value (um/N) in a small hobby mill ? Clearly though my problem is not the spindle. I think I have a problem with the stability of the clamping surfaces in the structural parts. When I know more I'll let you know. . Very interesting, Gerry I recently noticed something similar on a microscope [from a good maker] ... It's fine for visual work, but difficult to use with a camera. Getting back to little mills, though: My BCA MkIII is probably a good 'benchmark' for how a small capacity mill might be better constructed ... But I'm sure production costs would not suit the modern hobby-market. MichaelG. . For inspiration: http://www.lathes.co.uk/bca/page5.html Edited By Michael Gilligan on 31/12/2018 17:22:31 |
| Tim Stevens | 31/12/2018 18:15:32 |
1779 forum posts 1 photos | All materials bend when subject to a load. All gaps in the structure also allow movement in the same conditions. If we assume that you were putting no load on the table of the machine when applying your light finger pressure there could be movement in the attachment of the column, the gibs on which the head slides, the attachment of the back half of the head to the front, the bearings locating the spindle assembly, and the quill inside the assembly. Take up all these potential gaps and much of your flex will disappear, but you won't be able to do anything useful with your mill. As Michael Gilligan says, you can have stiff or you can have cheap ... Wassail, Tim |
| Vic | 31/12/2018 18:34:37 |
| 3453 forum posts 23 photos | One thing that always surprises me is the number of times I see a cut being increased by extending the quill rather than raising the table. I was taught never to do this. I only move the quill on my machine when drilling. |
| Andrew Johnston | 31/12/2018 19:33:38 |
7061 forum posts 719 photos | Posted by Vic on 31/12/2018 18:34:37: One thing that always surprises me is the number of times I see a cut being increased by extending the quill rather than raising the table. I was taught never to do this. I only move the quill on my machine when drilling. +1 And on my mill (Bridgeport) moving the knee with a graduated dial is more accurate than moving the quill. Andrew |
| JasonB | 31/12/2018 19:45:55 |
25215 forum posts 3105 photos 1 articles | All goes out the window on most benchtop imported mills, not only do they lack a knee but the fine feed is usually on the quill and a lot even provide a digital readout so the extension of the quill can be set more accurately than with a hard to reach head handwheel. |
| Emgee | 31/12/2018 20:38:10 |
| 2610 forum posts 312 photos | The first mill I had was a Victoria U1 model I believe, anyhow it had a vertical head but no quill so all cuts had to be put on with the knee traverse, OK when putting on cut depths but not so good if drilling deep holes. Emgee |
| Former Member | 31/12/2018 21:11:16 |
[This posting has been removed] | |
| Bill Pudney | 01/01/2019 02:04:04 |
| 622 forum posts 24 photos | Over the Christmas break I had to take my mini lathe apart. It seemed like a good opportunity to check and adjust the spindle alignment. I chose to use "Rollies Dads Method", as described by John Moran. This requires using a DTI to measure the out of truth of a suitable test bar. My initial setup used traditional, fair quality (mixture of MW, Mitutoyo, Starret) DTI holders etc. Well what a performance, I was thoroughly confused with conflicting and non repeatable measurements. I came to the conclusion that the problem was flexibility in the DTI holding system. So I made a special DTI holder, with reamed holes to take the DTIs, mounted on top of the compound slide using the thread which normally secures the toolpost. Both Indicators could be mounted at the same time. What a difference! No more conflicting measurements, all (well o.k....most) measurements were repeatable, within a very short time I had the out of truth of the spindle down to acceptable limits, approx 0.04mm over 300mm both vertically and horizontally. The acid test of course was the cutting test, which showed an error of less than 0.01mm (graduations on my best micrometer) over a 100mm test length. The actual error, given the equipment to measure it, would probably be between 0.004 to 0.006mm. Pretty good I reckon for a 12 year old, much used Chinese pre assembled kit!! All provided by a rigid system!! Happy New Year cheers Bill |
| Andrew Johnston | 01/01/2019 16:23:42 |
7061 forum posts 719 photos | Posted by JasonB on 31/12/2018 19:45:55:
All goes out the window...................... Closely followed by the mill? Andrew |
| gerry madden | 12/02/2019 09:52:36 |
| 331 forum posts 156 photos | Hi All, I have now made some more detailed investigations into the rigidity of my mill. Measuring deflections at the chuck with loads up to 15Kgf I find the compliance in the right and left direction (X axis) is twice as much as that in the Y axis. Graph in next post - it doesn't like it inserted here for some reason! Its surprisingly linear too. There was also some hysteresis, in other words after applying and releasing the loads the spindle didn't return to exactly the same place. The 'free play' if I can call it that (but its not a noticable rattle) could be minimised by excessive tightening of all the gib screws and headstock clamp bolts but never completely eliminated. So I think some is in the spindle itself. The minimum I could get was about +/- 2um. Without normal gib settings it was about +/-6um. As mentioned in my previous mail, when I put the DI on the spindle headstock, the deflections were of a very similar order which suggests that the elasticity is in the structure rather than in the spindle itself. The headstock looks quite rigid so I'm wondering if there is some 'rock' / weakness in the joint between the headstock and the vertical column. I'll begin taking it all apart to see if I can find anything that could be easily improved. |
| gerry madden | 12/02/2019 09:55:05 |
| 331 forum posts 156 photos | ….no it wont allow me to paste the graph or even a snip of the graph..
|
| gerry madden | 12/02/2019 09:56:21 |
| 331 forum posts 156 photos | |
| Tim Stevens | 12/02/2019 10:25:08 |
1779 forum posts 1 photos | Gerry - you say: I find the compliance in the right and left direction (X axis) is twice as much as that in the Y axis I am fairly sure that 'compliance' is not the word you need. A compliant device is one which follows its instruction precisely, so you really mean the opposite, I suggest. Would flexibility be a better word? Or deviation, perhaps? Or even floppiness? PS my Champion 20V is much the same. One day I will try a couple of steel straps from the top of the column to the wall behind it. Regards, Tim |
| Michael Gilligan | 12/02/2019 10:31:12 |
23121 forum posts 1360 photos | Posted by gerry madden on 31/12/2018 13:56:25:
I think I have a problem with the stability of the clamping surfaces in the structural parts. When I know more I'll let you know. . Thanks for the update, Gerry . I have quoted from your original post because that is the area which I think needs work. Obviously the individual structural elements could be stiffened, but you should get 'value' from improving the stability of any semi-permanent joints. [grab the low-hanging fruit, as they say] When I worked in the vibration test lab. We experimented with using Loctite 638 as a hard gasket material; with excellent results. ... Happy to discuss this further, if you are interested. MichaelG. |
| Michael Gilligan | 12/02/2019 10:38:27 |
23121 forum posts 1360 photos | Posted by Tim Stevens on 12/02/2019 10:25:08:
I am fairly sure that 'compliance' is not the word you need. A compliant device is one which follows its instruction precisely ... . Tim, Other definitions are available, and may be more relevant MichaelG. . In Physics: Compliance is the property of a material of undergoing elastic deformation or (of a gas) change in volume when subjected to an applied force. It is equal to the reciprocal of stiffness. |
| gerry madden | 23/02/2019 15:44:58 |
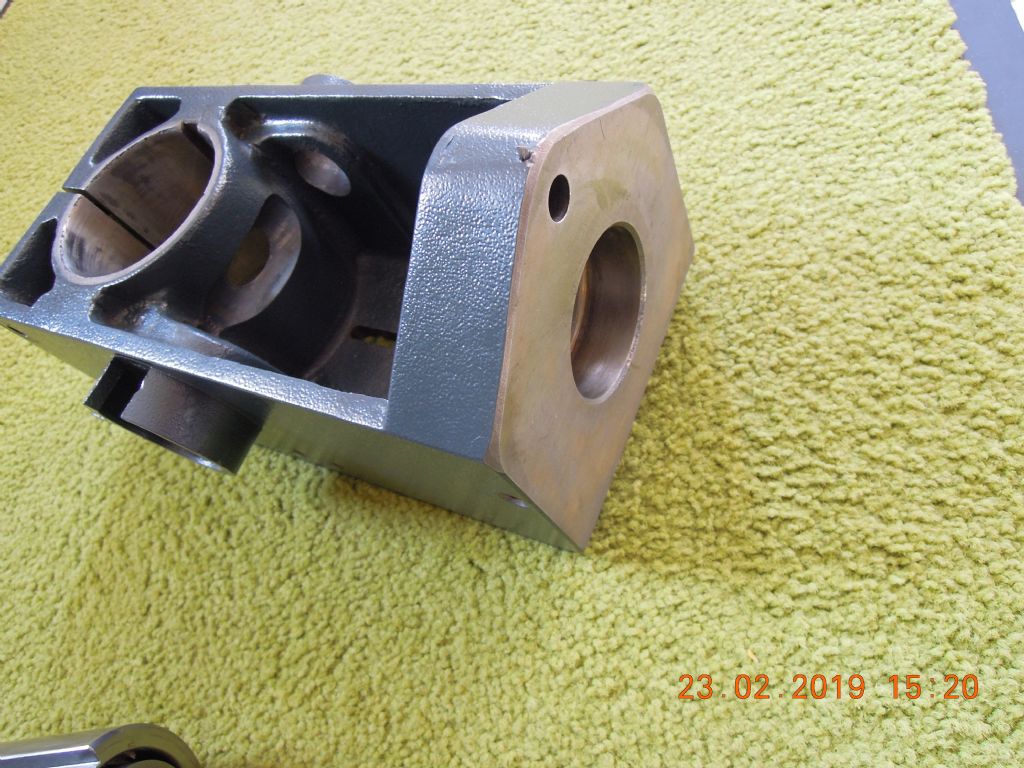
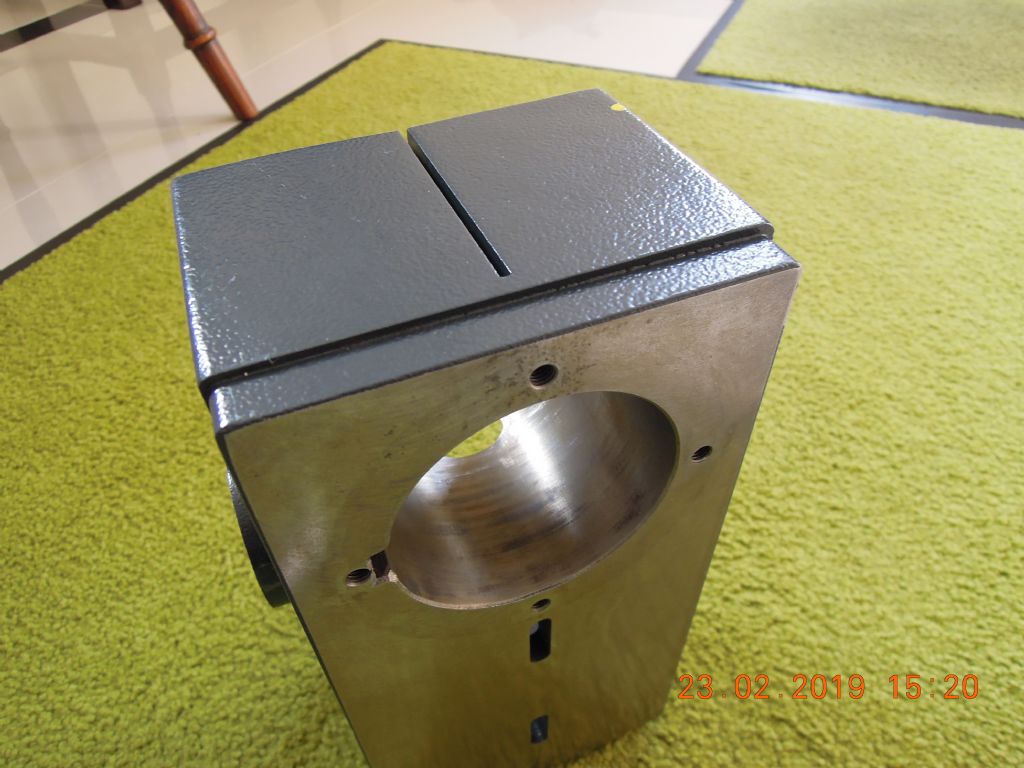
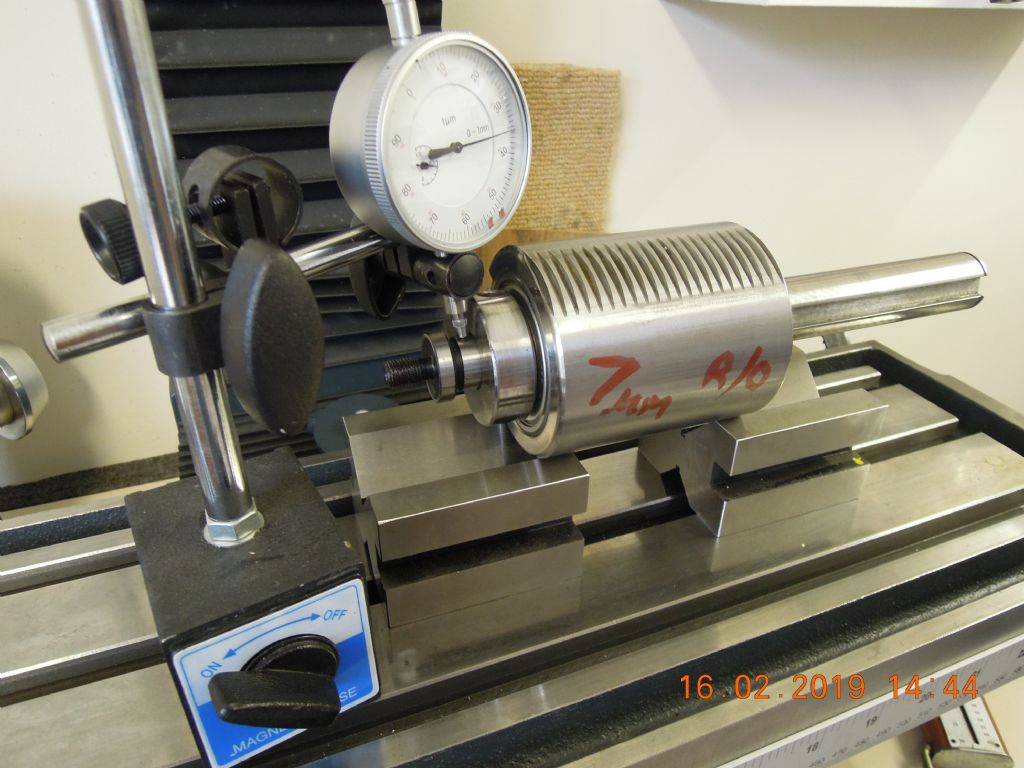
| 331 forum posts 156 photos | Ive started to strip my mill and inspect the parts to see if I can improve the rigidity. The head is off the vertical slide and the spindle is out of the head. The first thing to become obvious was that the clamping face that goes against the slide was far from flat !!! When I put the casting on a flat surface and it rocks right and left. The finish of the face suggests its been on a linisher instead of being ground ! Extraordinary! Witness marking on the face confirms erratic and one-sided contact with the slide. Whether it has always out of flat or has warped over the ten years or so that I've had the mill it I'm not sure. But I suspect the former based on the dreadful linished finish. So the first thing I need to do is get it face ground. Does anyone know of a good place to go in the Leighton Buzzard / Milton Keynes area please ? The quill is a clearance fit in the cast head of course and is clamped on the lower edge only. Clearly this doesnt help with stabilising the upper portion of the quill due to the 'cut' not being completely through the body. So Im thinking of completing the cut and fitting another clamp bolt at the upper position. I'll have to move a screw hole of course but any thoughts on the wisdom of this modification ? I can think of a few risks which might or might not be manageable but I welcome your thoughts on whether I should be so drastic. Inspection of the spindle threw up some surprises too. It spun smoothly with a nice uniform 'hiss' typical of well preloaded-bearings. I put it on some V-blocks and tried to measure the runout. After the struggle of getting the DI into the internal taper I could confirm this to be around 2 microns. I did initially try measuring the spindle runout on a chuck inserted into the spindle. This produced variable results of up to 7 microns. Playing about I found the cause of the variability was micro-movements of the chucks taper in the spindle. Small differences in taper angles and other geometric non-uniformities was allowing the male part to rock. I hadn't used the drawbar to pull in the chuck and that might have helped reduce the rock. I'm pretty sure though it wouldn't have eliminated it completely. Clearly there are MT2 tapers and there are precision MT2 tapers ! Another interesting and unexpected characteristic of the spindle was that applying a few Kgfs of load to its nose caused not only elastic deflections but some semi-permanent deflections too. The latter were in the order of too 3~4 microns which was a bit concerning at first. I then found that with the tiniest rotation the spindle returned exactly to its origin. Clearly there is frictional hysteresis in non-rotating ball bearings too. I have spent years in bearings and didn't know that !
|
Please login to post a reply.
Want the latest issue of Model Engineer or Model Engineers' Workshop? Use our magazine locator links to find your nearest stockist!
Sign up to our newsletter and get a free digital issue.
You can unsubscribe at anytime. View our privacy policy at www.mortons.co.uk/privacy
- *Oct 2023: FORUM MIGRATION TIMELINE*
05/10/2023 07:57:11 - Making ER11 collet chuck
05/10/2023 07:56:24 - What did you do today? 2023
05/10/2023 07:25:01 - Orrery
05/10/2023 06:00:41 - Wera hand-tools
05/10/2023 05:47:07 - New member
05/10/2023 04:40:11 - Problems with external pot on at1 vfd
05/10/2023 00:06:32 - Drain plug
04/10/2023 23:36:17 - digi phase converter for 10 machines.....
04/10/2023 23:13:48 - Winter Storage Of Locomotives
04/10/2023 21:02:11 - More Latest Posts...
- View All Topics
- Reeves** - Rebuilt Royal Scot by Martin Evans
by John Broughton
£300.00 - BRITANNIA 5" GAUGE James Perrier
by Jon Seabright 1
£2,500.00 - Drill Grinder - for restoration
by Nigel Graham 2
£0.00 - WARCO WM18 MILLING MACHINE
by Alex Chudley
£1,200.00 - MYFORD SUPER 7 LATHE
by Alex Chudley
£2,000.00 - More "For Sale" Ads...
- D1-3 backplate
by Michael Horley
Price Not Specified - fixed steady for a Colchester bantam mark1 800
by George Jervis
Price Not Specified - lbsc pansy
by JACK SIDEBOTHAM
Price Not Specified - Pratt Burnerd multifit chuck key.
by Tim Riome
Price Not Specified - BANDSAW BLADE WELDER
by HUGH
Price Not Specified - More "Wanted" Ads...
Do you want to contact the Model Engineer and Model Engineers' Workshop team?
You can contact us by phone, mail or email about the magazines including becoming a contributor, submitting reader's letters or making queries about articles. You can also get in touch about this website, advertising or other general issues.
Click THIS LINK for full contact details.
For subscription issues please see THIS LINK.
Model Engineer Magazine
- Percival Marshall
- M.E. History
- LittleLEC
- M.E. Clock
ME Workshop
- An Adcock
- & Shipley
- Horizontal
- Mill
Subscribe Now
- Great savings
- Delivered to your door
Pre-order your copy!
- Delivered to your doorstep!
- Free UK delivery!


 Register
 Log-in


