Forum sponsored by:

Acute (a cute?) tool sharpening system
| John Haine | 03/11/2015 09:25:00 |
| 5563 forum posts 322 photos | Well, my kit for this arrived last Friday, delivered by Hermes in the form of a Vauxhall Astra rather than a winged chariot! My first impression - what a lot of bits! And more work than I expected, but none of it looks hard. Seeing it "in the flesh" I am even more impressed with the quality of the design, and there will be some interesting machining challenges, mainly in setting up (as always). I will try to keep a photo blog of progress and post here. So far I've assembled the base and table and made a start on the work arm, with no major issues. |
| Michael Gilligan | 03/11/2015 09:46:07 |
 23121 forum posts 1360 photos | I look forward to following this, John ... It does appear to be an excellent design. MichaelG.
|
| Vic | 03/11/2015 10:04:48 |
| 3453 forum posts 23 photos | I look forward to seeing how you get on with this John. |
| RICHARD GREEN 2 | 03/11/2015 10:16:58 |
| 329 forum posts 193 photos | Any chance of some pictures ? |
| John Haine | 03/11/2015 20:53:38 |
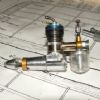
| 5563 forum posts 322 photos | Here is a picture of the assembled base.
The table is supplied finished except for cutting out a gap to go around the wheel. The brackets and struts are ready made and drilled with pilot holes that need to be enlarged to clear the bolts. The kit includes 2 lengths of 1 inch ali to make the big spacers - these need to be faced to length and drilled 6mm through. One small problem, the drawings specify that one of the bolt holes in each bracket is slightly smaller than clearance, 5.8 or 5.8 mm, to lock the bolt from rotating. I found this impossible to achieve, so have added lock washers under the bolt heads so that they can be tightened with the handle alone. You also need to make the big "washers" that go between the adjustable handles and the struts/brackets - these are 5mm thick and have a radial groove ion one face to locate an O ring that provides a little bit of pressure to assist in smooth adjustment when the handles are slightly loosened. Two laser cut discs of MS are provided for these, but I thought it was easier just to turn and part each one from an MS bar. Once assembled the base is very rigid when locked, but easy to adjust when slightly loosened. Next job - the pantograph that carries the tool holder and clamps to the table. Watch this space... |
| John Haine | 04/11/2015 06:54:05 |
| 5563 forum posts 322 photos |
This is the clamp block that goes on the top edge of the table. Supplied as a laser cut disc of 8mm steel with hole positions spot drilled. Centre hole is drilled out 5 mm and tapped M6x1. The other two holes are for the shoulder screws that form pivots for two of the parallel links. There is a 4mm step which has to be milled off the surface, parallel to the line of the pivots. I clamped the drilled part down to the mill table and set the shoulder screws square to the table edge using a big combination square - a bit tricky. The only way I could make my VMB reach the part was to use the longest cutter I had, which isn't over sharp so the finish is not wonderful. Now a problem I found was that the table material, nominally 4mm thick, is actually 3.85 so a 4 mm step is too large for the clamp to work. So I had to turn a shade off the top surface to bring the actual step down to 3.75 mm. Best to measure the table first and cut the step to suit. To turn the top and the sides I bolted the item to a short length of steel with a 6 mm hole drilled through, a bit like this...
This actually shows the sandwich of the clamp washer that forms the other part of the clamp and the pantograph joiner. Two ~41 mm laser cut discs are supplied with the latter having the hole positions spotted. I marked the centre positions thus:
popped the centres and drilled 6 mm after locating the centres using a point in the drill chuck. Then I turned the outside surface to clean up, and drilled and tapped the 4 holes M4. Next photo shows the clamp fixed on the table edge.
I need to shorten the threaded portion of the clamp bolt so it's flush with the top of the block when tight. Next, the pantograph links... |
| Michael Gilligan | 04/11/2015 07:50:37 |
23121 forum posts 1360 photos | Thanks, John Very useful information and photos Please keep 'em coming. MichaelG. |
| John Haine | 05/11/2015 18:51:14 |
| 5563 forum posts 322 photos | Having drilled and tapped the link joiner the next job was to drill and ream the holes in the links.
Held in my little vice clamped on the VMB table, lined up using a point in the spot provided. Drilled 8 holes 5.9 mm then reamed out to 6 mm and deburred.
Next, the work head swivel. This goes at the other end of the pantograph and allows the work head to be turned to the required cutting angle and clamped. The large hole in the centre as supplied is about 36.5 dia and needs to be bored out to 38. The spottings for the screw holes are accurate in the cut blank but nothing else can be relied on. So I cautiously filed the straight edge next to the spottings smooth to the outline (which is laser marked on the edge, with about 1 mm machining allowance), and set it against a straight edge clamped square to the table. Then aligned the mill spindle to one of the spotted holes by holding a point in the chuck and adjusting the point so it entered the spotting accurately as judged by eye and feel. Then I clamped everything down, so we have the spottings aligned square to the table and the spindle axis aligned with one of the spottings. Then I moved the table Y by 15 mm which places the axis exactly halfway between the spottings; and X by 27 mm which places it in line with the centre of the big hole. Locked the slides, fitted the boring head, it needed 4 cuts at about 100 rpm to take the hole diameter to 38.02 mm - not bad.
Then I could drill and tap for the link pivot bolts and make a trial assembly, as shown here. |
| Vic | 05/11/2015 19:24:14 |
| 3453 forum posts 23 photos | Thank you very much for the pictures so far John, very helpful. |
| John Haine | 08/11/2015 18:23:18 |
| 5563 forum posts 322 photos | Bit of a setback today. Have gone on to making the workhead which involves turning a very shallow shoulder on a couple of circular blanks laser cut from plate. As they are pre-cut the only practical way to hold them is to drill through the centre and hold on a stud into a mandrel held in the chuck. The material is very "sticky" and even taking very shallow cuts I've suffered 3 dig-ins that stalled the lathe, and b******d the tipped tool. So now started on one of those loops where I don't seem to have a spare tip that's sharp for the holder; try a different holder that I made that turns out to be bowed (never noticed before) so you can't easily get the tool to centre height, now I need to make a small mod to a tangential tool holder I made a while back but needs a dimension adjusting which means it's back to the mill....tired and frustrated, taking a break! |
| Vic | 08/11/2015 18:44:15 |
| 3453 forum posts 23 photos | Don't get too downbeat John, we're all behind you. |
| Neil Wyatt | 08/11/2015 18:46:52 |
 19226 forum posts 749 photos 86 articles | Sounds like a job where a set of soft jaws would help. Neil |
| John Haine | 08/11/2015 21:46:06 |
| 5563 forum posts 322 photos | You're right Neil! Another project... |
| Danny M2Z | 09/11/2015 06:47:00 |
 963 forum posts 2 photos | My last set of soft jaws (to hold a Cox engine backpate) went like this. Slit a piece of round aluminium stock axially with 3 slits (with one slit almost all the way to the centre). Pack the long slit with a few layers of aluminium drink can (according to width of slit), leave the ends projecting from the front face. Mount in chuck, do not remove it from now on but mark #1 jaw anyway as they are re-usable. Drill and bore the hole to suit the work then slightly loosen the jaws and pick out the packing without disturbing the alignment. Place your object in the new soft jaws and tighten the chuck. It will be concentric. About 20 Minutes work. * Danny M *
|
| John Haine | 09/11/2015 08:44:28 |
| 5563 forum posts 322 photos | Thanks Danny, good suggestion. |
| John Haine | 10/11/2015 20:10:49 |
| 5563 forum posts 322 photos | OK, well I have turned both bits now, holding them as before but with different tools. I still find the material very "sticky" and suffered several dig-in/jams, but no matter, job done. I didn't take any photos of the operation I'm afraid, they would not have been very edifying! There aare now some easier operations to be done, which I will pick up tomorrow and hopefully post some photos. A bit of feedback to Eccentric: I've done quite a lot of turning steel of around this diameter (50mm) without problems like this, the plate material seems to be very "sticky" and prone to digging in. It might be easier if these two pieces at least could be supplied as blanks parted off from a bit of 2" FC bar perhaps? |
| Neil Wyatt | 10/11/2015 20:22:51 |
19226 forum posts 749 photos 86 articles | Hi John, Not sure if you sent that feedback to Gary, but I'm sure he would be glad to receive it. Neil
|
| John Haine | 12/11/2015 22:59:36 |
| 5563 forum posts 322 photos | A bit more progress. Have now progressed to the "ways" that bolt on top of the work head base. These are segments of circles, laser cut from plate, with hole positions spotted accurately but a general machining allowance round the edge of about half a millimetre. I started off confidently drilling the mounting holes but soon realised (should have thought before) that actually it is critical to machine all round the edge to get these accurate and there is no obvious datum other than the holes. After a lot of though in the small hours of this morning I've decided this is a job for my cnc mill, but will need a mounting fixture using the accurate (I hope!) drilled holes as a datum. That will be a job for Saturday when I can also take some photos to post. Watch this space! |
| BW | 14/11/2015 10:38:51 |
| 249 forum posts 40 photos | Posted by Danny M2Z on 09/11/2015 06:47:00:
My last set of soft jaws (to hold a Cox engine backpate) went like this. Slit a piece of round aluminium stock axially with 3 slits (with one slit almost all the way to the centre). Pack the long slit with a few layers of aluminium drink can (according to width of slit), leave the ends projecting from the front face. Mount in chuck, do not remove it from now on but mark #1 jaw anyway as they are re-usable. Drill and bore the hole to suit the work then slightly loosen the jaws and pick out the packing without disturbing the alignment. Place your object in the new soft jaws and tighten the chuck. It will be concentric. About 20 Minutes work. * Danny M * Hello, I don't understand this description - any pictures / web pages / previous threads that might help me please ? Bill
|
| John Haine | 15/11/2015 14:49:00 |
| 5563 forum posts 322 photos | OK, so now the ways are machined all round. I made a little fixture (or is it a jig?) to hold them on my Novamill - basically a small square of 16 mm ali squared up so I could locate a corner datum, with a couple of holes coordinate drilled/tapped M4 to clamp down the blanks, drilled to exactly the required spacing (20mm) and at known positions relative to the corner datum.
Here the adjustable way is bolted down using csk screws to pull the blank into alignment, in the process of profiling round the blank. The block is clamped down with a single M8 flange nut and braced against the mill fence which is at right angles to the table. 6mm end mill, 1000 rpm, 50mm/minute feed. This was the second part being milled, you can see that the cutter went 0.1 mm into the fixture first time round (deliberately) to clear all the periphery. I generated the toolpath by working out the exact dimensions and using G-Simple which is a free CAM package, highly recommended. Here is s picture grabbed from the screen of the simulated toolpath:
And this is what the end product looks like with the ways bolted down and the work holder in the slot as a trial assembly.
I also asked Gary at Eccentric about this and he recommended a much simpler method which I would have used if I'd thought of it! Here is what he said (he is quite happy for me to copy it here). "I found the simplest way to machine that edge was to drill both holes in the way then use a pair of dowel pins or two small pieces of rod in the holes and grip it in the milling vice. It doesn’t matter too much about the diameter of the pins so long as they are straight, accurate and are the same diameter. Put the pins through the holes and have them sitting on the top of the vise jaws supporting the way between them, this will ensure that any cut taken will be parallel to the holes. Make sure the top of the vise jaws are parallel with the table before taking a cut of course." Simples! Edited By John Haine on 15/11/2015 14:50:07 |


Please login to post a reply.
Magazine Locator
Want the latest issue of Model Engineer or Model Engineers' Workshop? Use our magazine locator links to find your nearest stockist!
Sign up to our Newsletter
Sign up to our newsletter and get a free digital issue.
You can unsubscribe at anytime. View our privacy policy at www.mortons.co.uk/privacy
Latest Forum Posts
- *Oct 2023: FORUM MIGRATION TIMELINE*
05/10/2023 07:57:11 - Making ER11 collet chuck
05/10/2023 07:56:24 - What did you do today? 2023
05/10/2023 07:25:01 - Orrery
05/10/2023 06:00:41 - Wera hand-tools
05/10/2023 05:47:07 - New member
05/10/2023 04:40:11 - Problems with external pot on at1 vfd
05/10/2023 00:06:32 - Drain plug
04/10/2023 23:36:17 - digi phase converter for 10 machines.....
04/10/2023 23:13:48 - Winter Storage Of Locomotives
04/10/2023 21:02:11 - More Latest Posts...
- View All Topics
Support Our Partners


Shopping Partners
Subscription Offer

Latest "For Sale" Ads
- Reeves** - Rebuilt Royal Scot by Martin Evans
by John Broughton
£300.00 - BRITANNIA 5" GAUGE James Perrier
by Jon Seabright 1
£2,500.00 - Drill Grinder - for restoration
by Nigel Graham 2
£0.00 - WARCO WM18 MILLING MACHINE
by Alex Chudley
£1,200.00 - MYFORD SUPER 7 LATHE
by Alex Chudley
£2,000.00 - More "For Sale" Ads...
Latest "Wanted" Ads
- D1-3 backplate
by Michael Horley
Price Not Specified - fixed steady for a Colchester bantam mark1 800
by George Jervis
Price Not Specified - lbsc pansy
by JACK SIDEBOTHAM
Price Not Specified - Pratt Burnerd multifit chuck key.
by Tim Riome
Price Not Specified - BANDSAW BLADE WELDER
by HUGH
Price Not Specified - More "Wanted" Ads...
Get In Touch!
Do you want to contact the Model Engineer and Model Engineers' Workshop team?
You can contact us by phone, mail or email about the magazines including becoming a contributor, submitting reader's letters or making queries about articles. You can also get in touch about this website, advertising or other general issues.
Click THIS LINK for full contact details.
For subscription issues please see THIS LINK.
Digital Back Issues


Donate

 Register
 Log-in
Model Engineer Magazine
- Percival Marshall
- M.E. History
- LittleLEC
- M.E. Clock

ME Workshop
- An Adcock
- & Shipley
- Horizontal
- Mill

Subscribe Now
- Great savings
- Delivered to your door

Pre-order your copy!
- Delivered to your doorstep!
- Free UK delivery!
All Forum Topics > Workshop Tools and Tooling > Acute (a cute?) tool sharpening system