
Clarke cl500m mill drill head
| Bodgit Fixit and Run | 13/12/2014 20:29:20 |
| 91 forum posts 2 photos | Hi. Anyone got any thought on how to improve the clamping on the mill head for this machine the existing setup is just a simple clamp bolt which is simply inadequate as the head keeps moving and I lose repeatability. I don't have room for another mill so need to modify this one to lock it up better. |
| Graham Titman | 14/12/2014 07:35:36 |
 158 forum posts 28 photos | Hi with my Chester version i made a washer 2inches diameter and used a standard nut with a long spanner or socket on it to get plenty of leverage. |
| Ady1 | 14/12/2014 12:22:02 |
 6137 forum posts 893 photos | The design imparts a huge amount of leverage at the locking point. Even if you can lock it up properly you will get vibration and flex. sounds silly but if you can brace the drill end of the head with a bit of 4x4 against the back wall behind the lathe kinda thing you may see a surprising improvement stiffness is everything at the hobby level if you want any decent improvements you will need to focus on the chuck end of the unit Edited By Ady1 on 14/12/2014 12:27:56 |
| mechman48 | 14/12/2014 12:30:48 |
 2947 forum posts 468 photos | Can confirm the stiffness is everything... George. |
| Edward Spicer | 14/12/2014 13:05:12 |
| 3 forum posts 2 photos | I extended the length of the clamp handle to give more leverage but I did this more as an aid to releasing the clamping as I too found that it needed to be as tight as you could get it with the standard handle but, of course the extended handle lets me tighten it more - where will it all end! |
| Bodgit Fixit and Run | 14/12/2014 13:06:07 |
| 91 forum posts 2 photos | Unfortunately bracing isn't an option. I'm toying with the idea a second height adjusting ring to lock up the first and then see if there is a way to lock the head to the ring using an indent type of assembly. This might stop the wander if it can be done. It may mean losing some of the free rotation because of indent location points but it may be worth this. Not that the rotation is particularly useful anyway. |
| Michael Gilligan | 14/12/2014 14:55:42 |
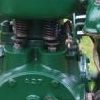
 23121 forum posts 1360 photos | For the benefit of those of us not familiar with the Clarke products:
MichaelG. |
| Bodgit Fixit and Run | 14/12/2014 15:48:49 |
| 91 forum posts 2 photos | Hi Michael. Yes that's the one. The head fit seems ok. The head clamps directly onto the screw thread which means that it is minimal in reality. There must be a more effective way of lock it up. Time to brainstorm methinks. |
| martin perman | 14/12/2014 16:52:37 |
 2095 forum posts 75 photos | I have the same lathe but because I have a Vertical mill and a Horizontal mill I've only used the milling head for small drilling work, when my leg /foot allows me to spend time in my garage I will have a look for idea's.
Martin P |
| Graham Titman | 14/12/2014 18:16:19 |
158 forum posts 28 photos | Hi as i said this morning with the chester version i used a nut and a long ring spanner and built the Anthony Mount trapezium engine with it. http://www.pollymodelengineering.co.uk/sections/stationary-engines/anthony-mount-models/trapezium-Connecting-Rod-Engine.asp The ring would often vibrate down but the head would stay in place but when you are using the lathe it is useful to push the milling head 90 degrees out of the way. |
| Bodgit Fixit and Run | 14/12/2014 19:01:30 |
| 91 forum posts 2 photos | I would still want to push the head out of the way which Is why I'm wondering about an Indent pin idea. It would need to be fairly substantial though.
|
| Steven Vine | 14/12/2014 20:46:40 |
| 340 forum posts 30 photos | Hi Bodgit I have the Warco version of that machine. On my version the mill head casting clamps onto a smooth part of the Upright Column, just above the threaded bit, and not on the threaded bit by the look of things. Quite a few times in the last 6 years or so, the mill head has jumped up and then violently swung out of the way when a milling cutter has got bogged down. Scary to say the least. But this has only occurred when I have lost concentration and taken too heavy a cut. Most of the time, light cuts, a sharp cutter, and a moderately firm tightening of the locking lever keeps the milling head in place without issue. Further to Michaels question about the fit, have you taken the head completely off the machine and inspected the fit between the head casting and Upright Column. If the mill head keeps moving and you have done the clamp up tight then maybe the casting has been bored out too much and is a loose fit on the Upright Column. If you find a sufficient gap, is there any chance you can insert a temporary thin shim sheet or wire in there, and clamp up, and see if things improve. I am thinking just a little piece may make a lot of difference. Also, are the threads on the locking bolt in good condition and applying enough force. If the threads are worn or soft then maybe that is why you cannot clamp adequately? A more drastic step would be to lengthen the split in the casting a little (I've seen that done with the casting in the quill area). Also, maybe try a disassembly and dry off any oil or grease and see if that improves matters. Another drastic step, rough up the column to increase the friction between it and the casting. Careful you don't drop the plastic bevel gear during all this (the Warco guys did that to my machine and had to renew the gear). Maybe you could secure a substantial bar/plate affair to the oil cover plate (blind flange) at the back of the headstock using studs and wing nuts. Drill and tap for a couple of studs in the mill head casting. You could then secure the bar/plate to the mill head casting with wing nuts. All can quickly be removed if you need to swing the mill head. Or, drill through the mill head casting and a little way into the Upright Column. Then insert a bolt to secure the two together. I only have to apply a 'quite firm' pressure to my locking lever to secure the mill head casting. Forgive me for saying, but you don't want to extend the lever to gain more clamping force as it could break the casting. It's a different place I know, but I was tightening up the Quill Lock (not applying much force) and one of the casting lugs broke off. Keep us posted. Steve
|
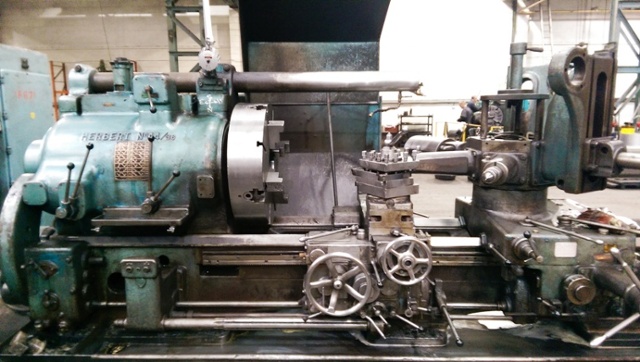
| Ady1 | 15/12/2014 00:31:46 |
6137 forum posts 893 photos | herberts tried to stiffen things up by creating a box with a bar on the headstock and a knee on the capstan
Edited By Ady1 on 15/12/2014 00:34:30 |
| Bodgit Fixit and Run | 18/12/2014 19:54:49 |
| 91 forum posts 2 photos | I think I have come up with a cunning plan. Watch this space.
|
| Ady1 | 18/12/2014 20:54:35 |
6137 forum posts 893 photos |
|

Please login to post a reply.
Want the latest issue of Model Engineer or Model Engineers' Workshop? Use our magazine locator links to find your nearest stockist!
Sign up to our newsletter and get a free digital issue.
You can unsubscribe at anytime. View our privacy policy at www.mortons.co.uk/privacy
- hemingway ball turner
04/07/2025 14:40:26 - *Oct 2023: FORUM MIGRATION TIMELINE*
05/10/2023 07:57:11 - Making ER11 collet chuck
05/10/2023 07:56:24 - What did you do today? 2023
05/10/2023 07:25:01 - Orrery
05/10/2023 06:00:41 - Wera hand-tools
05/10/2023 05:47:07 - New member
05/10/2023 04:40:11 - Problems with external pot on at1 vfd
05/10/2023 00:06:32 - Drain plug
04/10/2023 23:36:17 - digi phase converter for 10 machines.....
04/10/2023 23:13:48 - More Latest Posts...
- View All Topics


- Reeves** - Rebuilt Royal Scot by Martin Evans
by John Broughton
£300.00 - BRITANNIA 5" GAUGE James Perrier
by Jon Seabright 1
£2,500.00 - Drill Grinder - for restoration
by Nigel Graham 2
£0.00 - WARCO WM18 MILLING MACHINE
by Alex Chudley
£1,200.00 - MYFORD SUPER 7 LATHE
by Alex Chudley
£2,000.00 - More "For Sale" Ads...
- D1-3 backplate
by Michael Horley
Price Not Specified - fixed steady for a Colchester bantam mark1 800
by George Jervis
Price Not Specified - lbsc pansy
by JACK SIDEBOTHAM
Price Not Specified - Pratt Burnerd multifit chuck key.
by Tim Riome
Price Not Specified - BANDSAW BLADE WELDER
by HUGH
Price Not Specified - More "Wanted" Ads...
Do you want to contact the Model Engineer and Model Engineers' Workshop team?
You can contact us by phone, mail or email about the magazines including becoming a contributor, submitting reader's letters or making queries about articles. You can also get in touch about this website, advertising or other general issues.
Click THIS LINK for full contact details.
For subscription issues please see THIS LINK.


 Register
 Log-in
Model Engineer Magazine
- Percival Marshall
- M.E. History
- LittleLEC
- M.E. Clock

ME Workshop
- An Adcock
- & Shipley
- Horizontal
- Mill

Subscribe Now
- Great savings
- Delivered to your door

Pre-order your copy!
- Delivered to your doorstep!
- Free UK delivery!