Three Cylinder Steam Aero Engine
| John Purdy | 12/02/2021 06:02:16 |
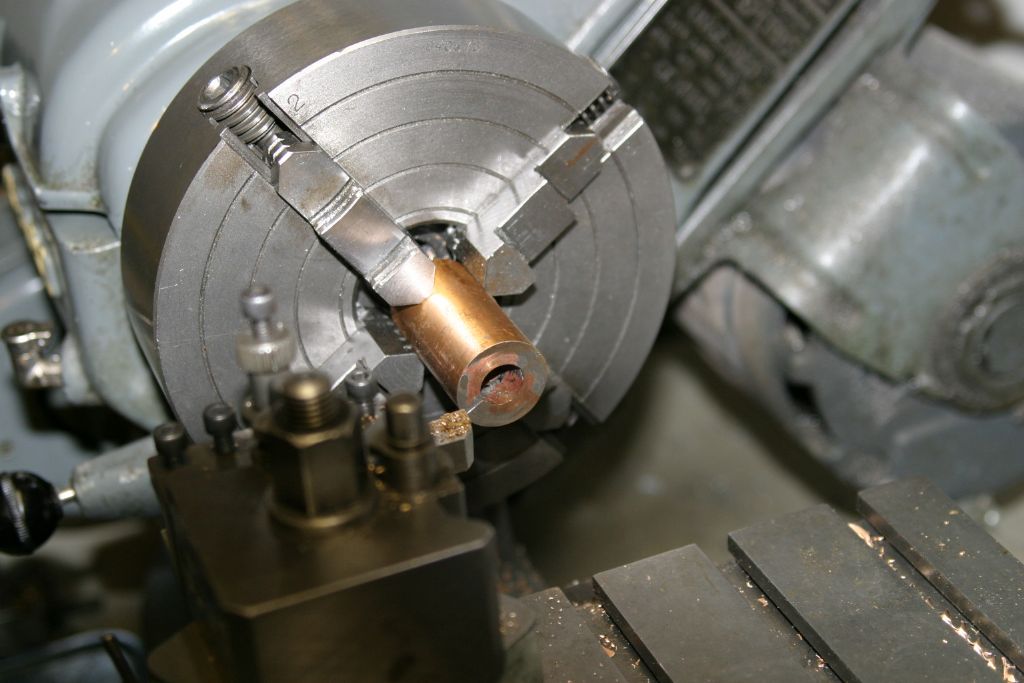
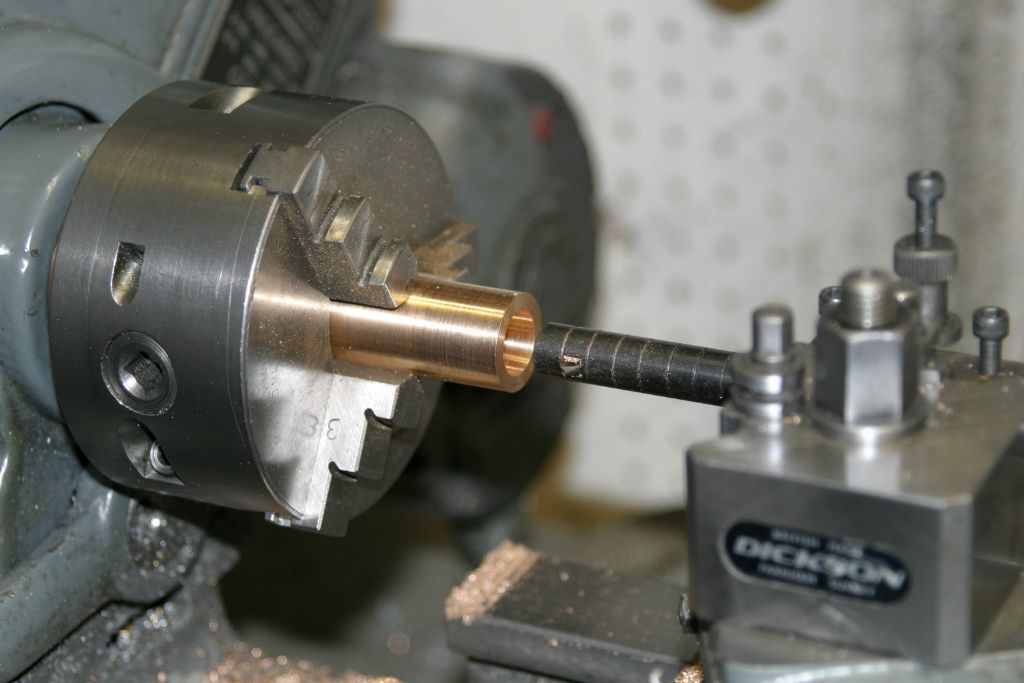
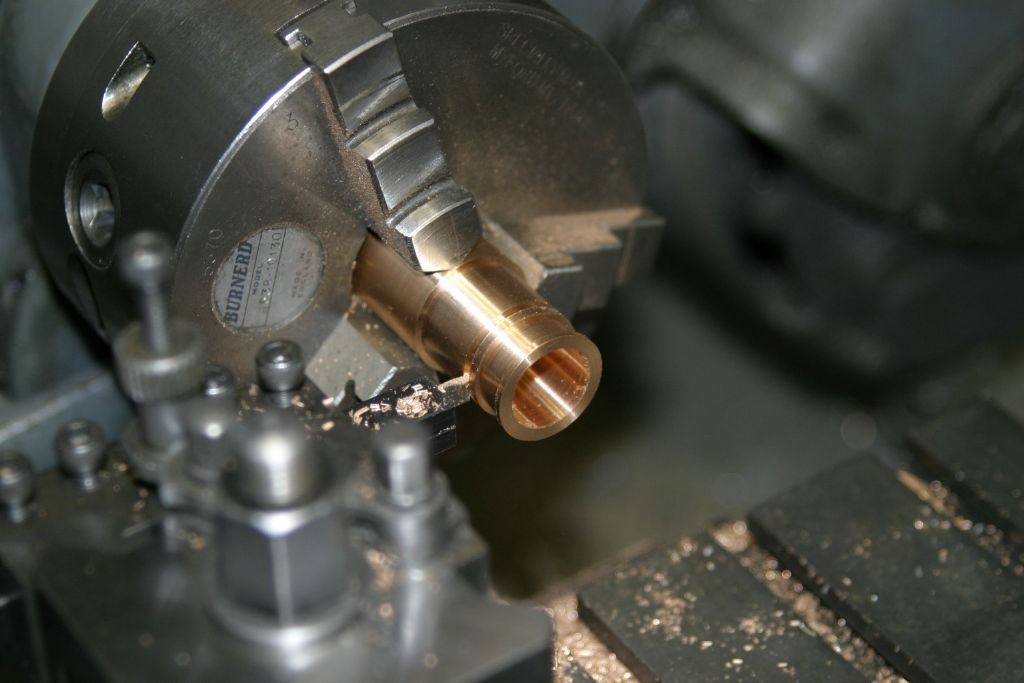
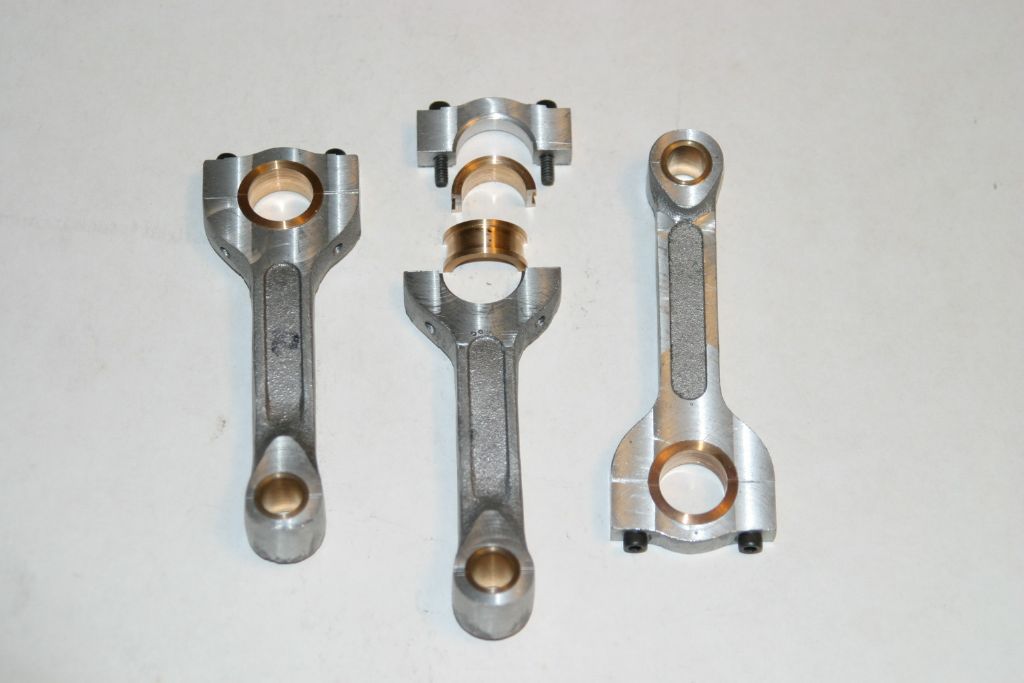
431 forum posts 252 photos | The big end bearings started as a 2" length of 1" dia. bronze rod. It was first drilled through 1/2" and then using a 1/32" slitting saw was split longitudinally in half. Each half was then mounted in the mill vice, with the sawn faces parallel to the table, and cleaned up with an end mill, as I have found a thin slitting saw tends to wander and seldom cuts straight. The two halves were then tinned with 50/50 SnPb solder, clamped together and heated to sweat them together. The bar, now decidedly oval due to the material removed in splitting it, was mounted in the 4 jaw and "centred" using a dial indicator. When I say "centred" I mean the chuck was adjusted so that the readings each side on the split line were the same and the two at 90 deg. were the same. In other words the two high points gave the same reading and the two low points were also the same. This should ensure that the split line is in the middle of the finished bearing. Once set, the OD was skimmed to clean up to be round as far as the chuck jaws. Transferred to the 3 jaw, with the other end (still oval) outward, it was turned down to the same diameter as the first. The centre was then bored out to .656" for a running fit on the crank pin. After boring for the crank pin, the OD was turned to .825" for a running fit in the recesses in the sides of the con rods and then, using a small cutoff tool, the groove was cut and the bearing cut off slightly over length. After all 3 were turned they were mounted one at a time on an expanding mandrel and the cutoff end faced back to give an overall length of .366". They were heated with the torch to separate the two halves and once cool the excess solder was removed by rubbing on a fine file. A trial fit on the crank pin found they all fit and rotate but are a little tighter than I would like so will require some easing. |
| John Purdy | 24/02/2021 23:09:20 |
431 forum posts 252 photos |
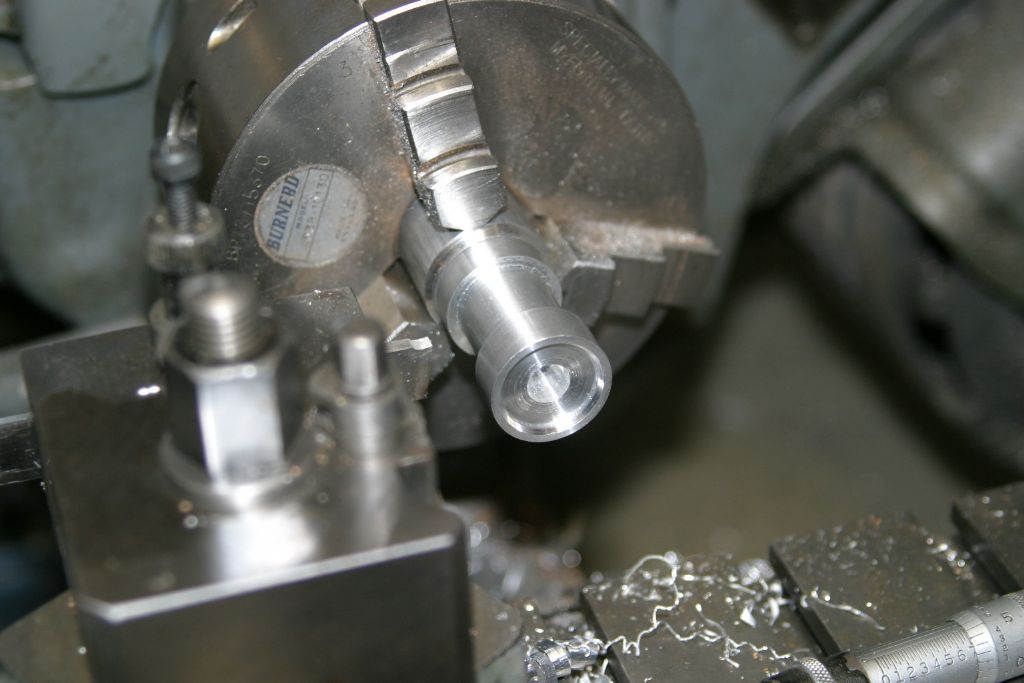
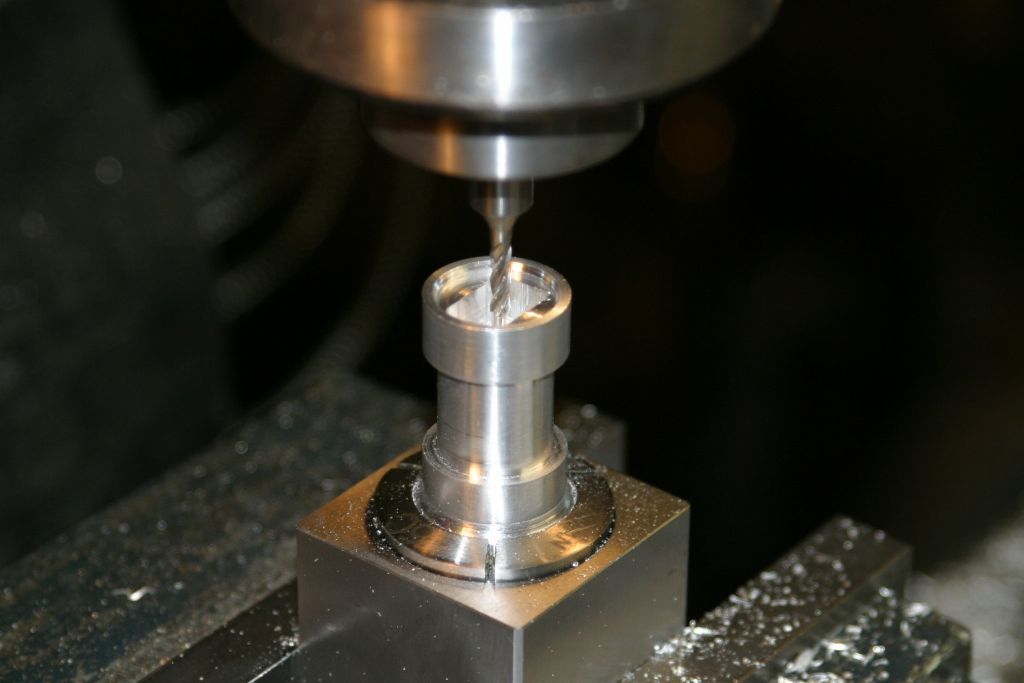
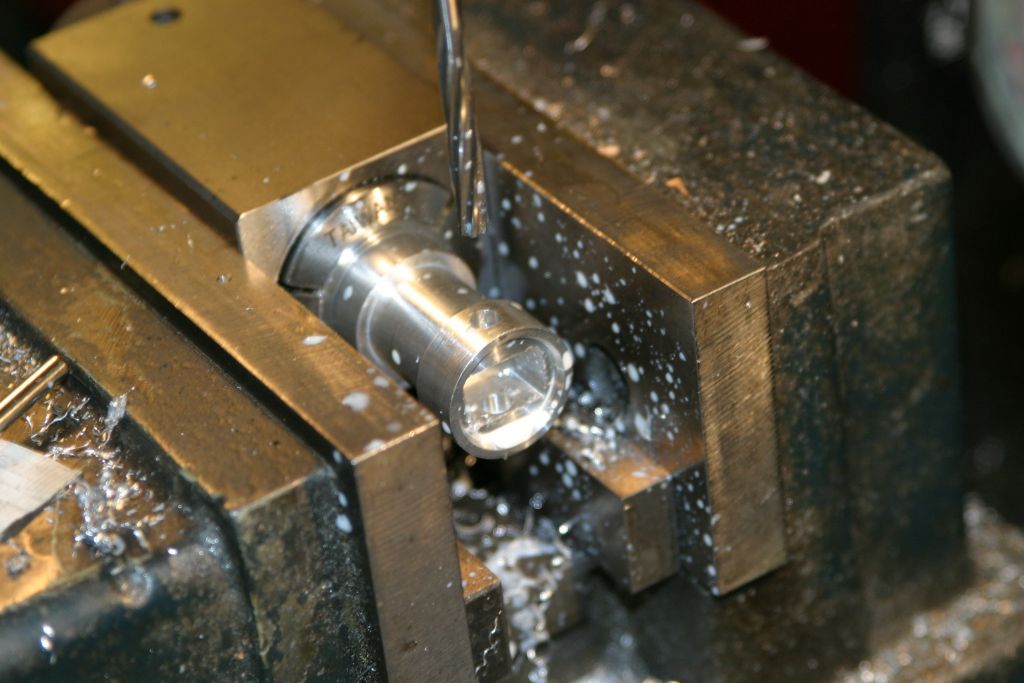
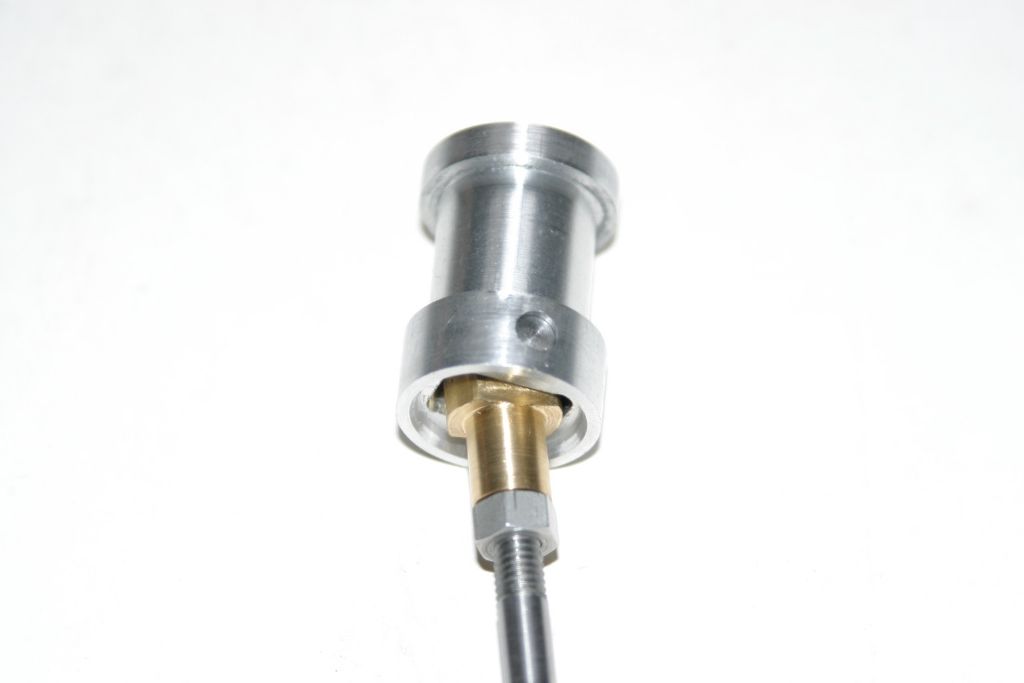
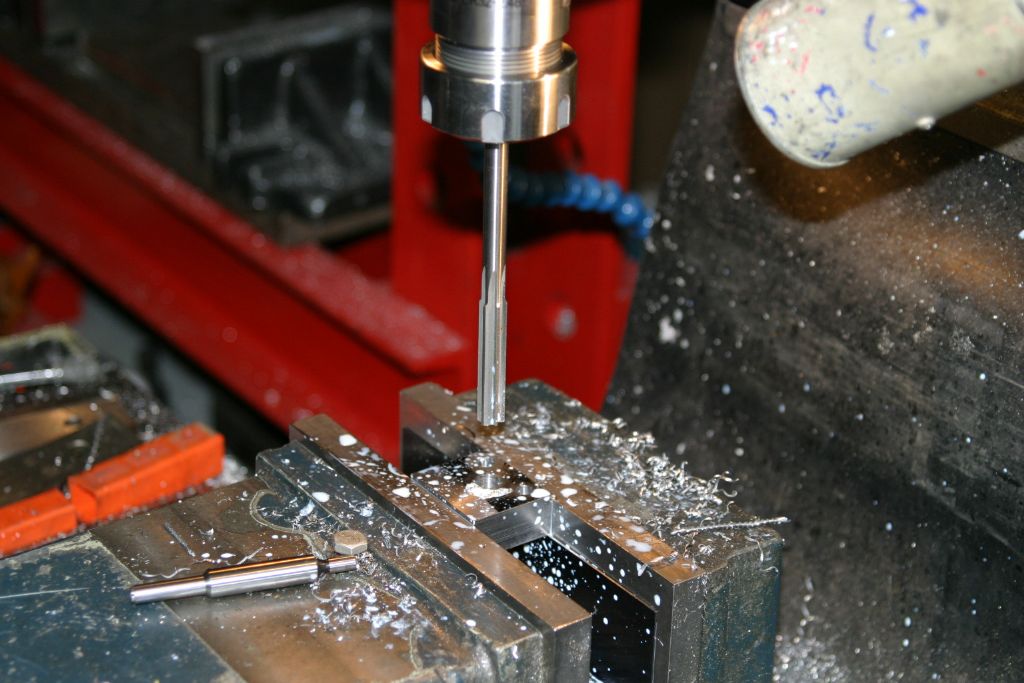
Turning the OD of the valves for a -.0005" fit in the valve bodies from 1" dia.6061 T6 .aluminum rod. Held in a 1" 5C collet in a collet block the valve was set vertically in the mill to mill out the pocket for the valve rod head. A 5/16" slot drill was first used to mill out the recess to the finished dimensions of .560"x.380"x.500" deep, opening out the 5/16" hole previously drilled while turning the OD in the lathe. The 5/16" end mill was switched to an 1/8" end mill to clean out the corners to give clearance for the valve rod head to rock back and forth. The plans show the corners as square, not quite sure how this would be done other than perhaps planning? A quick calculation shows that the valve rod swings through an arc of about 7 degrees as the eccentric rotates and a trial fit shows that the 1/16" radius corners provides sufficient clearance to accommodate this. The collet block, now set horizontally, for drilling and reaming for the valve wrist pin. After drilling to .015" under size it was reamed through .1870 then one side opened up with a .1875" reamer. This allows the .1875" drill rod wrist pin to be a push fit through one side and through the valve rod head then to be a press fit into the other side, thus retaining it in place. Now back to the lathe to cut off and face the cut off end to bring the valve to 1.250" long overall. More importantly to have the flange at the top finish at .180" wide as this controls the timing. Finished valve, one down, two more to go. |
| John Purdy | 28/02/2021 01:47:30 |
431 forum posts 252 photos |
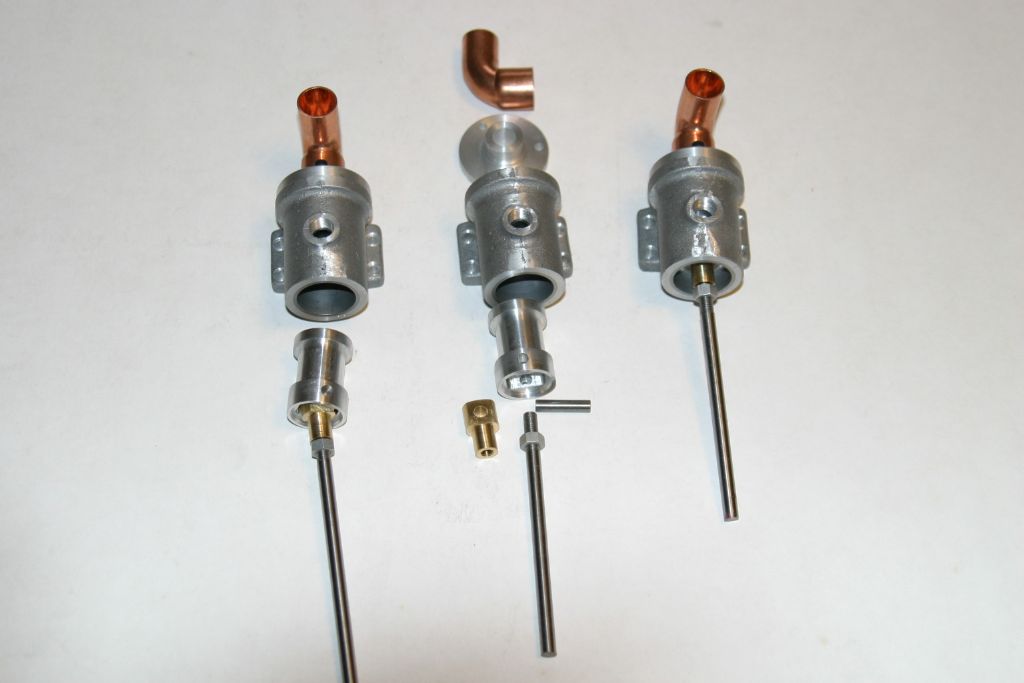
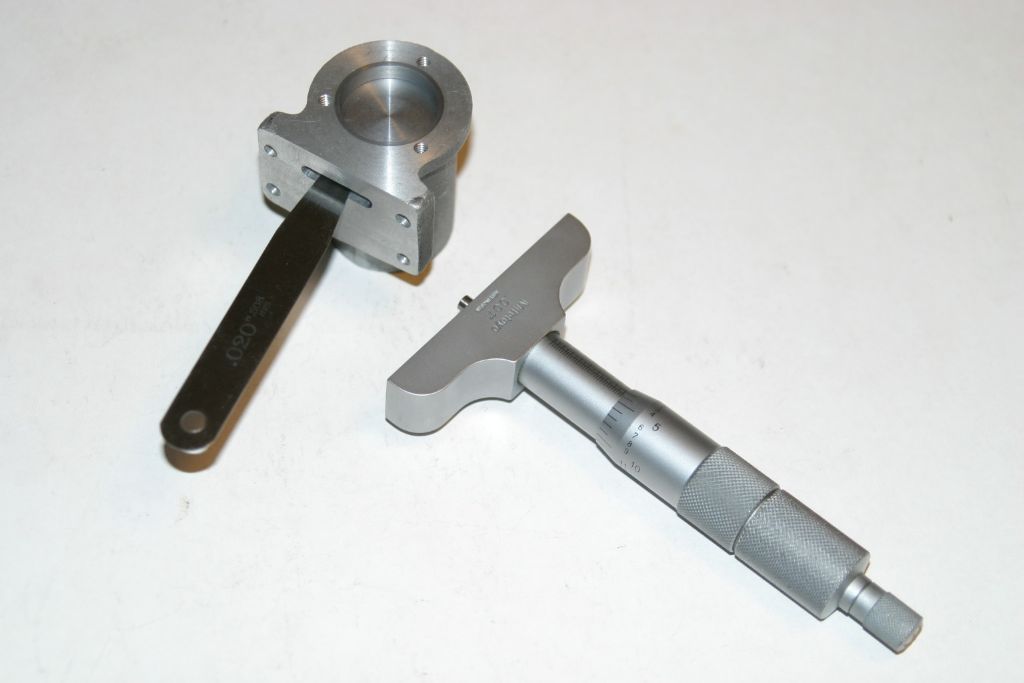
The completed valve bodies and valves. The bottom end of the valve rods still need to be cut to length and threaded. Have to wait till the eccentric is done to check the measurements. After some head scratching I came up with this idea. Before mounting the valve body and valve on the engine, put the valve in the body and push it up till the upper land is above the port, then with a .020" feeler gauge inserted in the port, push the valve down till it traps the feeler. With a depth mike measure the distance from the top of the valve to the top of the valve body. In this case the mike read .179" therefore with the the engine assembled, if the valve is set with the piston at TDC so that the distance from the top of the valve to the top of the valve body is .199" (.179 + .020 for the feeler gauge) then the port should be just opening. That's the theory anyway! Now to tackle the "eccentric". I think it will have to be fabricated as I don't have any suitably sized material to hack it out of the solid.
|
| gary | 28/02/2021 05:07:46 |
| 164 forum posts 37 photos | very nice john, have you decided on a propeller for it. |
| John Purdy | 28/02/2021 18:38:44 |
431 forum posts 252 photos | I have given it some thought but a scale prop would be 24" in dia 4 blade. A major project in itself. I seem to recall some details of making a prop in a past issue of ME. I believe it was in conjunction with Blackmore's rotary engine, will have to dig it out. |
| John Purdy | 14/03/2021 02:39:55 |
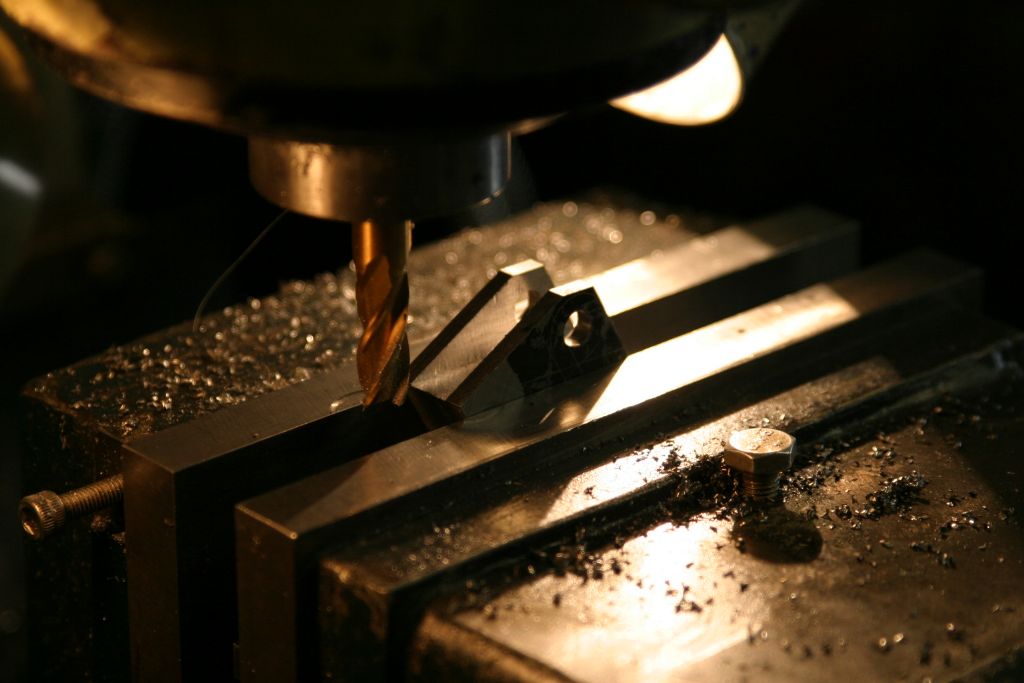
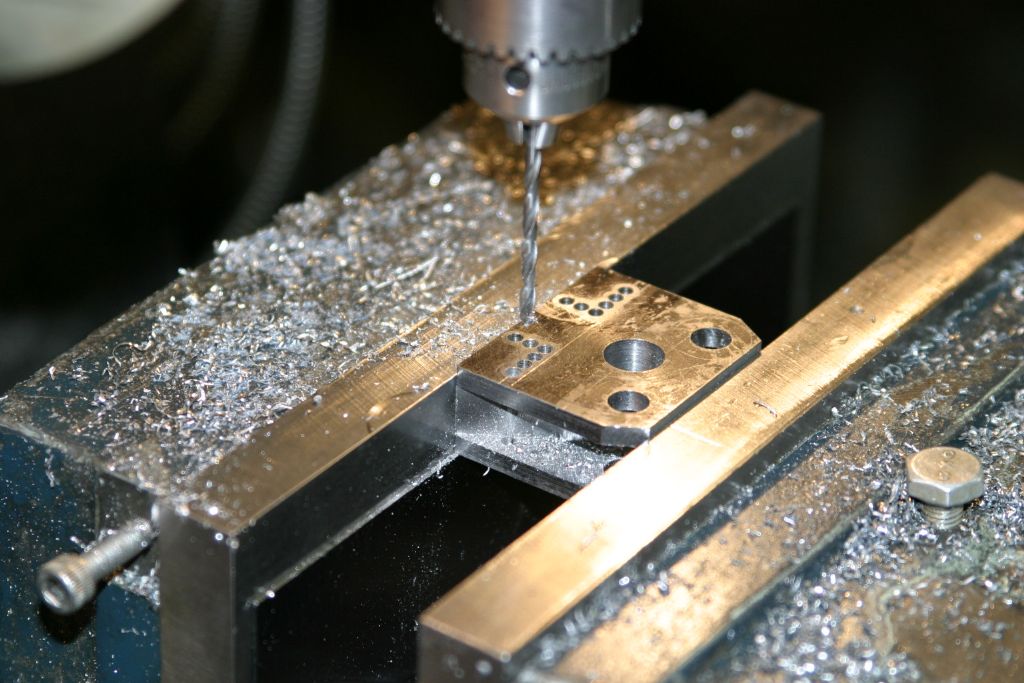
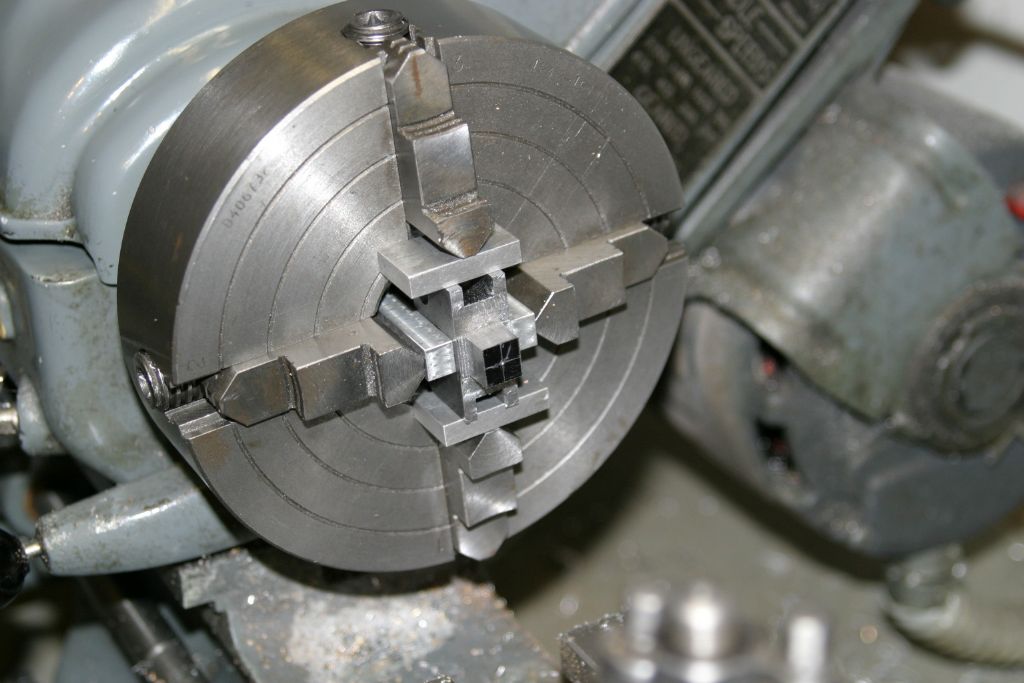
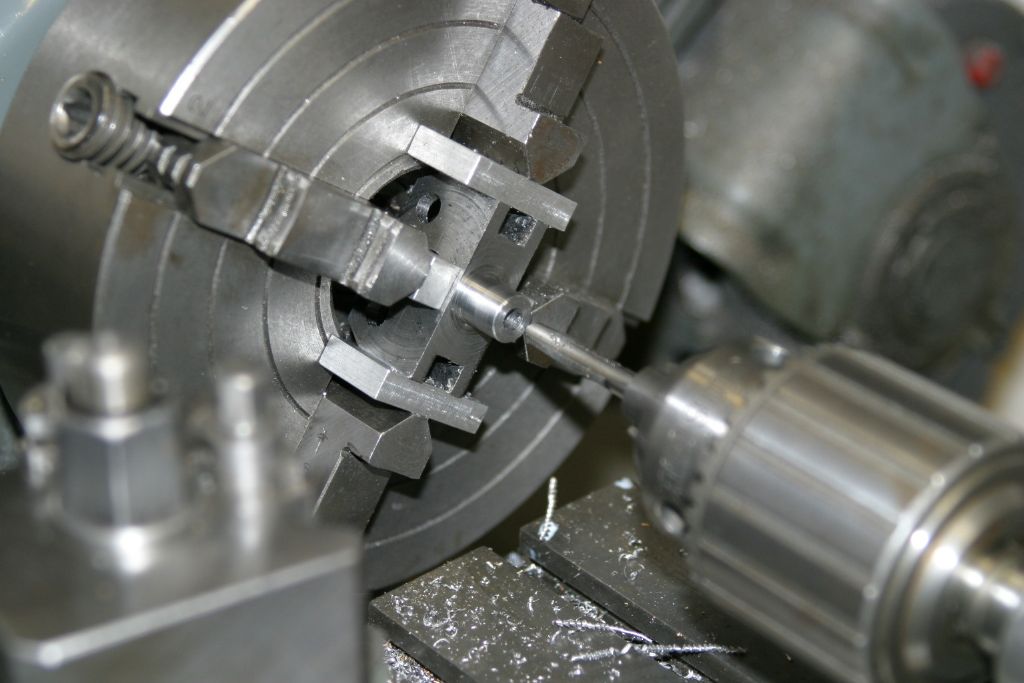
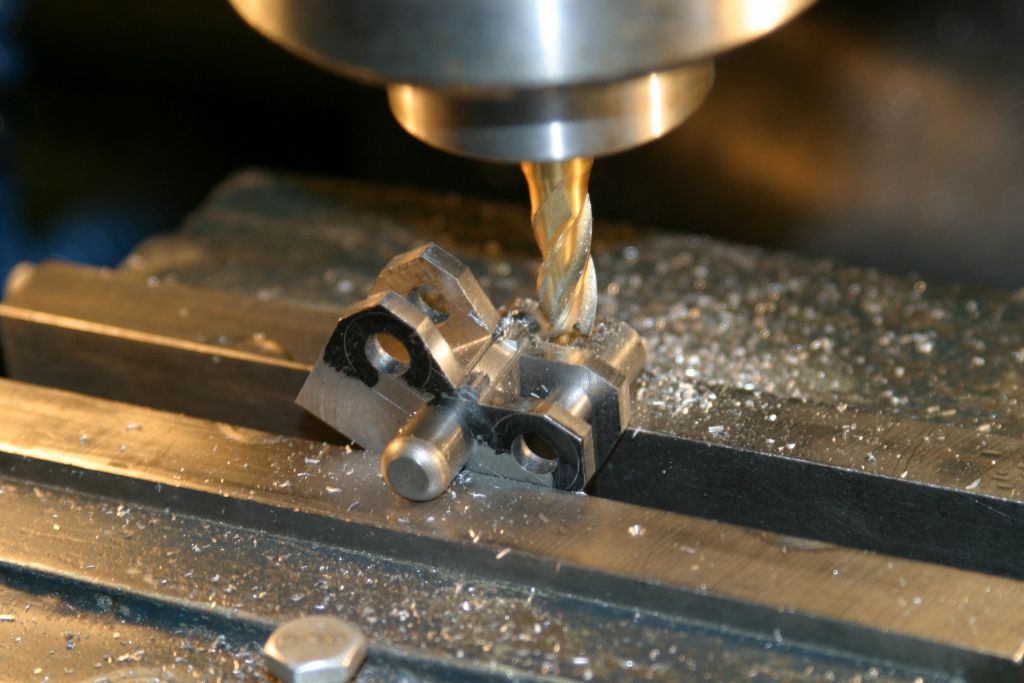
431 forum posts 252 photos | Started on the "eccentric" unit. Found a piece of 3/4" thick 4" x 10" steel of unknown parentage that had been flame cut out of some plate, so rather than fabricate it I've hack sawed a piece off and will hack it out of the solid. I've squared up a piece to 1.520" x 1.300" x .625" and its definitely not free cutting steel, its pretty tough. Wonder how my end mills will hold up? After marking out, the blank was mounted in the mill and, using coordinates, the .375" hole for the eccentric pin bush and the two .250" holes for the two upper pivot pins for the valve rod ends were drilled and reamed. The lower valve rod is threaded into a boss in the bottom of the unit. Set up in the mill vice at a 60 degree angle to mill out the first slot for the valve rod end with a 5/16" end mill. The 5/16" was switched for an 11/32" end mill which was run through the middle of the slot at full depth and then the slot was widened out to the plan dimension of .350" by taking cuts from each sides ensuring that the two ears ended up the same thickness. Note was made of the X axis DRO readings on the final pass on each side so the other slot would end up the same width. The block was then turned over 60 degrees the other way to do the slot on the other side. Chain drilling before sawing out the excess in the bottom corners in preparation for mounting in the 4 jaw to turn, drill, and tap the boss on the bottom for the fixed valve rod. Before mounting in the 4 jaw it was back to the mill to clean up the rough edges and leaving it about .010" oversize for finishing. At the same time the width of the centre boss was brought to .420" to make it roughly square so there would be less kerchunking while turning it round to .400" dia. in the 4 jaw. Set in the 4 jaw ready to clean up the bottom face to dimension and turn the boss to .400" diameter, then drill and tap 7/32-40 for the inner end of the lower valve rod. The drawings call for each end of the valve rods to be threaded 12-28 but I have made the outer ends 12-28 but the inner ones 7/32-40 (#12 is .216 dia.). This will give a finer adjustment of the valve position. |
| John Purdy | 17/03/2021 02:58:03 |
431 forum posts 252 photos |
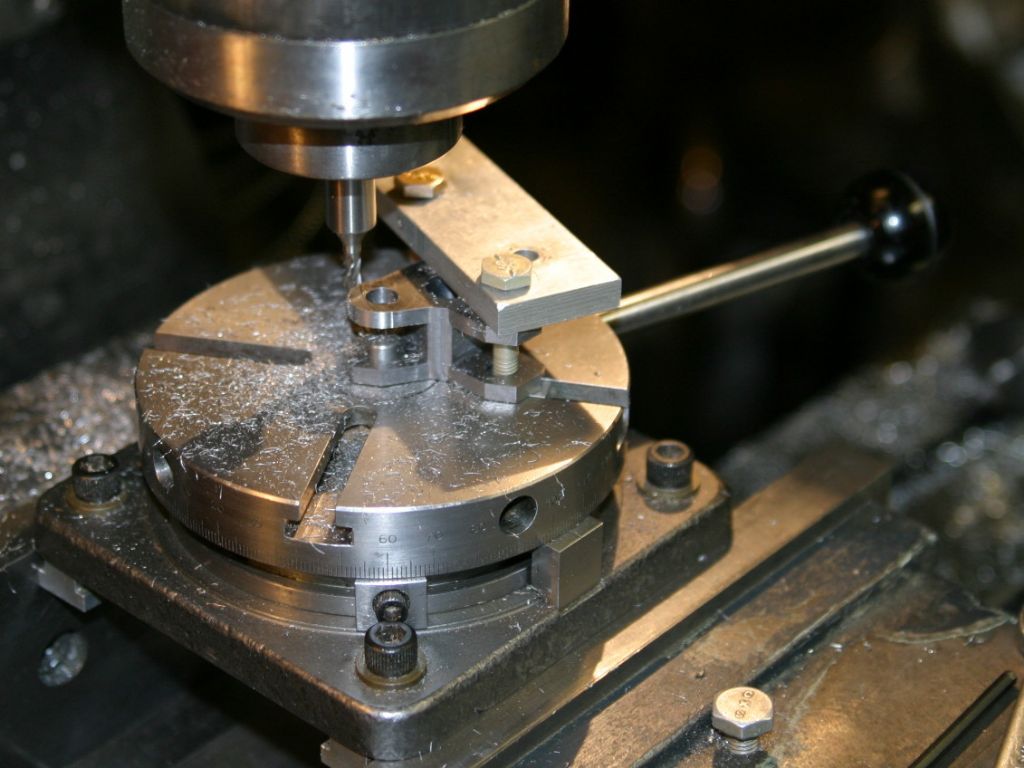
The bottom face has been cleaned up to dimension and the boss turned and drilled #10 ready to tap 7/32-40 for the valve rod. To profile the outside, a button .480" dia. with a .250" spigot was machined up from a scrap of 1/2" rod to use as a jig to mark out the profile of the top of the "ears" around the 1/4" holes to act as a guide for milling the sides to the right width. Short lengths of 3/8" and 1/4" rods were placed in the centre 3/8" and one of the two 1/4" holes and the eccentric was clamped in the mill vice with the ends of the rods hard against the top of the vice jaw, but with the 1/4" rod sitting on a 1/16" shim. This makes the centre lines of the two holes parallel to the horizontal table movement enabling the sides of the ears to be milled to dimension and at the right angle. The setup was then repeated for the other 3 sides. Milling out the inside sides of the ears using the setup as outlined above. Now to turn it horizontal with a pin in each of the 1/4" holes resting on the vice jaw to mill out the pip left in the centre using an 1/8" end mill. The eccentric was then turned over to mill the outside profile. Mounted on a 1/4" pin in the centre of my small 4" rotary table, the ends of the ears were rounded off using an 1/8" end mill.
Edited By John Purdy on 17/03/2021 02:59:55 |
| John Purdy | 18/03/2021 00:49:28 |
431 forum posts 252 photos |
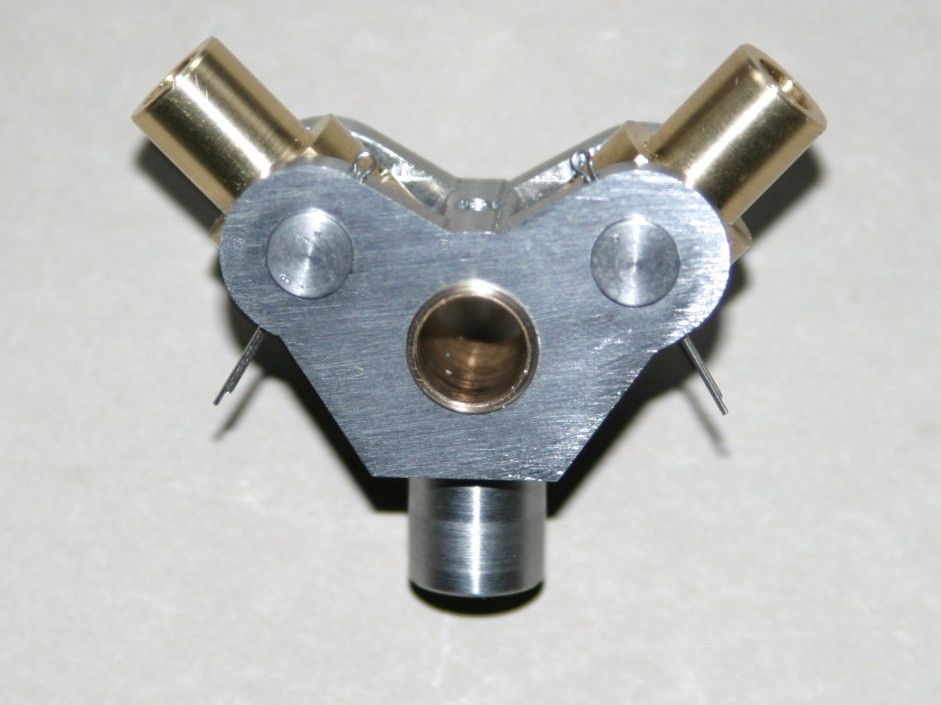
The finished "eccentric" with the two upper valve rod ends mounted and the bronze eccentric pin bushing pressed in. The manufacture wasn't as bad as I had anticipated and the 5/16" end mill that did most of the work is still acceptably sharp!
Edited By John Purdy on 18/03/2021 00:49:58 Edited By John Purdy on 18/03/2021 00:51:08 |
| John Purdy | 21/03/2021 05:55:55 |
431 forum posts 252 photos |
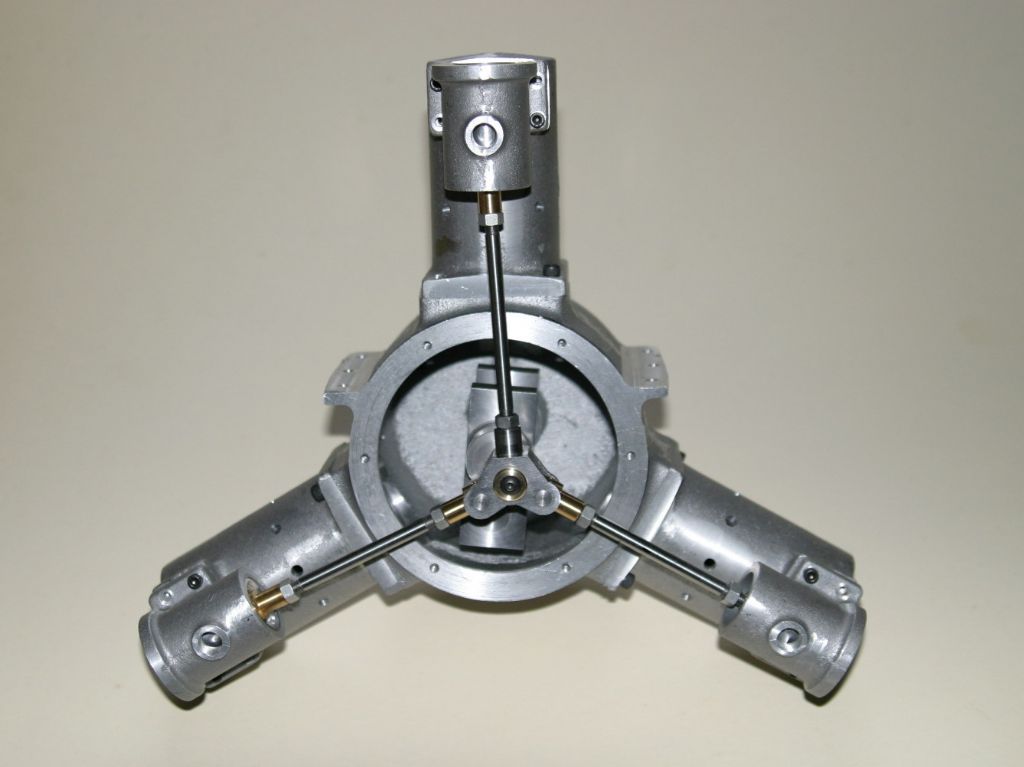
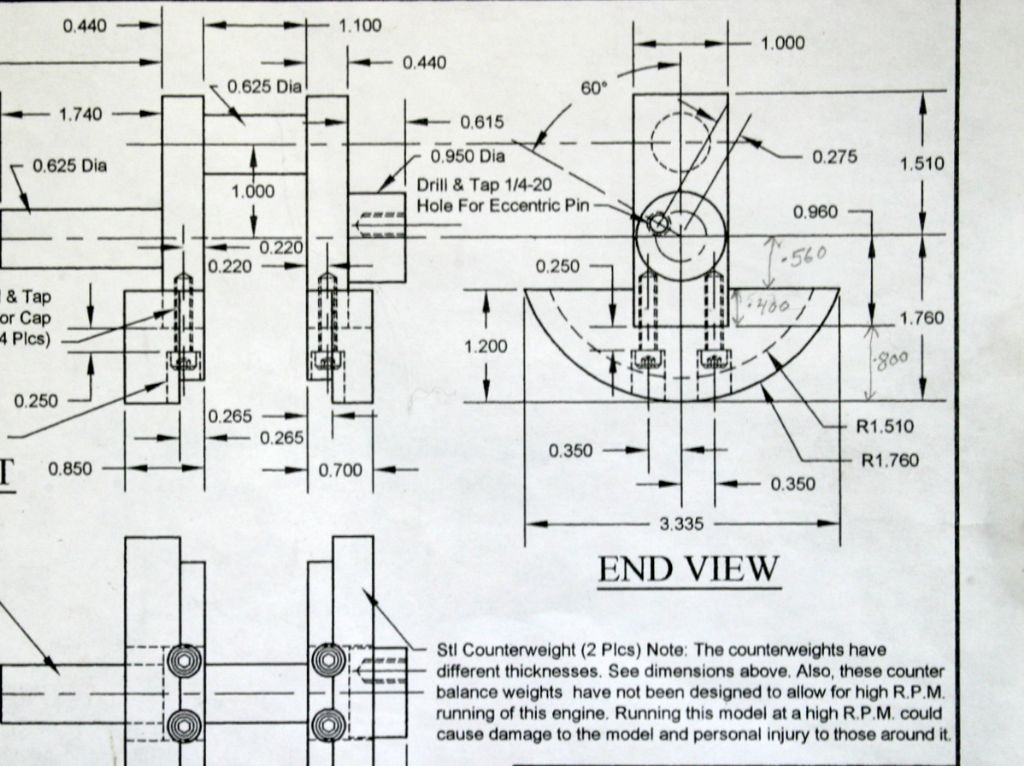
The engine partially assembled to mark the over length valve rods to final length. They were then cut to length and the bottom 5/8" screw cut 7/32-40. Reassembled, the valve timing was set by adjusting the length of the valve rods. Note the rear crankcase cover is not on since the tops of the cylinders are closed with the cover on there would be no way to tell when the pistons are at TDC, this way the crank can be seen to determine TDC for each cylinder. After roughly adjusting to get the right distance between the top of the valve and the top of the valve body as determined earlier (.197" ) the fine adjustment was carried out by rotating the valve rod, ensuring that the valve itself didn't rotate. As the threads on each end are a different pitch (.0357" and .025" ), one turn of the rod lengthens or shortens the whole assembly by .0107" depending on which way the rod is turned. The only thing left to do now is the counter weights for the crank shaft and plumb for the steam/air supply to the valve bodies(chests). I think I have come up with some material for the counter weights, need two pieces, 3.335"x 1.200", one at .850" thick the other, .700" thick. As far as the plumbing I'm not sure what to use. From the picture of the model it looks like commercial tubing fittings were used.
Edited By John Purdy on 21/03/2021 05:57:09 |
| JasonB | 21/03/2021 07:12:00 |
25215 forum posts 3105 photos 1 articles | They look like small 1/8" BSP/NPT street elbows, This is the common way most American engines are plumbed both model and full size with what look like mallable iron fittings. The three nutted unions do look a bit on the large size and could be reduced down a bit. EKP sell them in BSP. If pipe sizes are smaller then the cast "trees" from P M Research will give the same look.
Edited By JasonB on 21/03/2021 07:13:11 |
| John Purdy | 21/03/2021 17:24:25 |
431 forum posts 252 photos | Jason When I said the plumbing looked like commercial tube fittings I should have said pipe fittings as you say. The plans call for the inlet on the valve body to be tapped 1/4 NTP, so I assume all the fittings in the picture are 1/4 NTP. I agree that the union look too big, so am trying to come up with something that looks a little better. PM Research do a 1/16 NTP union which might look better.
|
| JasonB | 21/03/2021 18:47:36 |
25215 forum posts 3105 photos 1 articles | 1/4" BSP would be the nearest match to 1/4" NPT. As I said EKP do them but you could shop around and find them a bit cheaper, I used to get them from a supplier that did stuff for narrow boats but they seem to have disappeared. The 1/16" unions from PMR would be too small but they are easy enough to make from hex stock which is what I usually do for the American Hit & Miss Engines and if you use 40tpi ME threads for the internals they look OK. I've got some sizes that I used knocking about somewhere so will did them out. |
| John Purdy | 21/03/2021 22:32:08 |
431 forum posts 252 photos | I just realized that for some reason I said the pipe fittings are 1/4 NTP and that the valve body was trapped 1/4 NTP when they are actually 1/8 NTP as Jason said. The valve bodies are currently tapped 3/8 - 32 but that can always be changed! I have thought about making the couplings, I don't have any large hex but have some round that I could make hex out of. I seem to recall that there was article in ME about making couplings with dimensions for various sizes of tube, have to see if I can find it. Edited By John Purdy on 21/03/2021 22:52:19 |
| John Purdy | 31/03/2021 22:49:37 |
431 forum posts 252 photos |
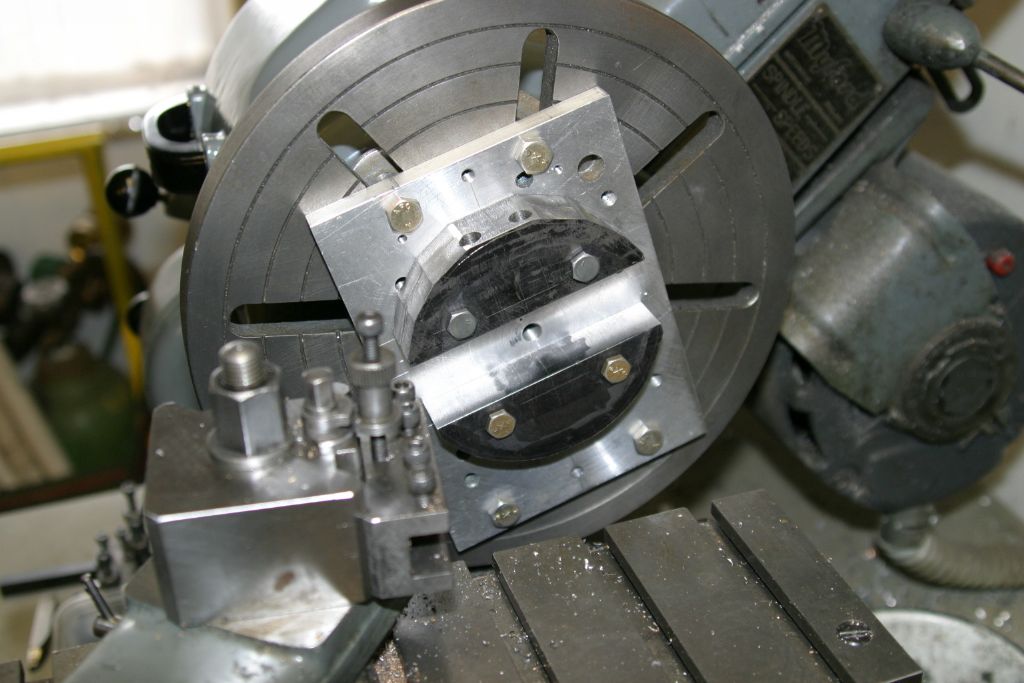
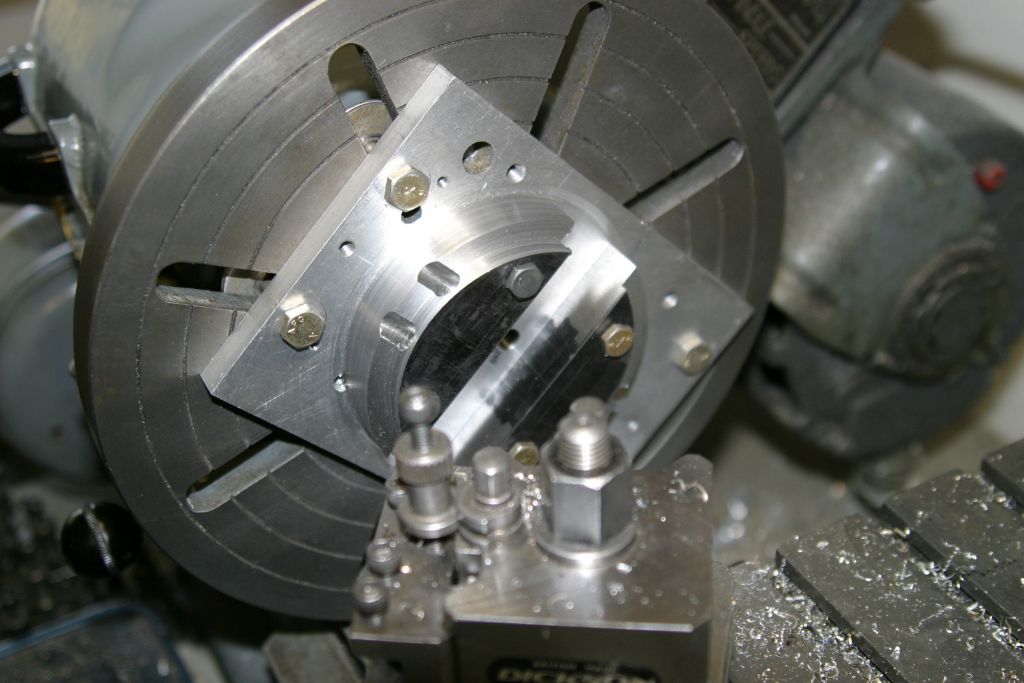
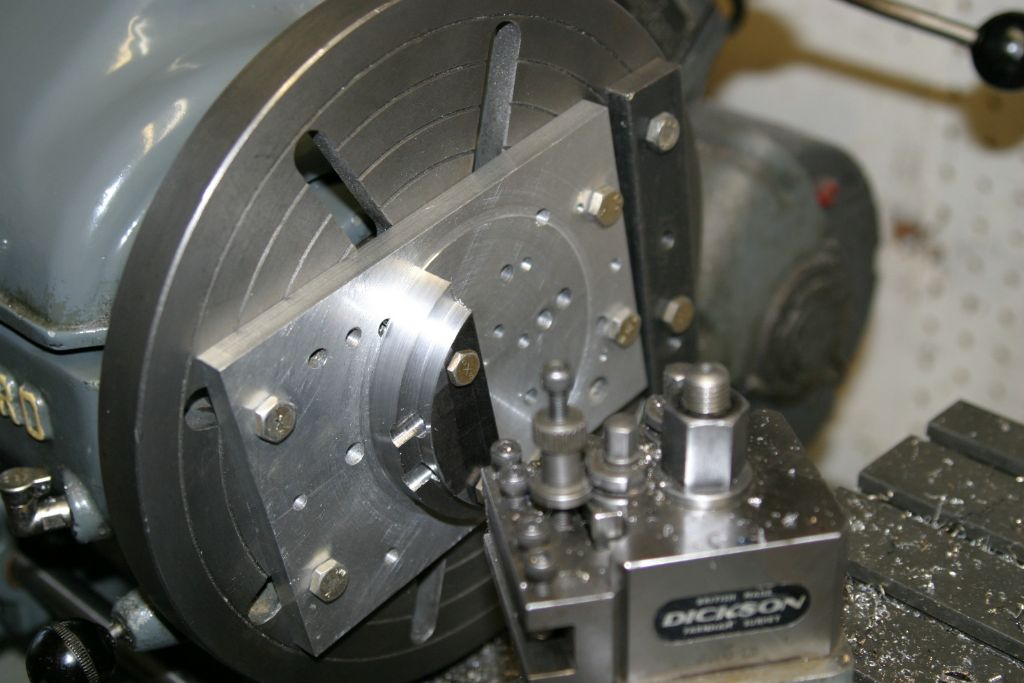
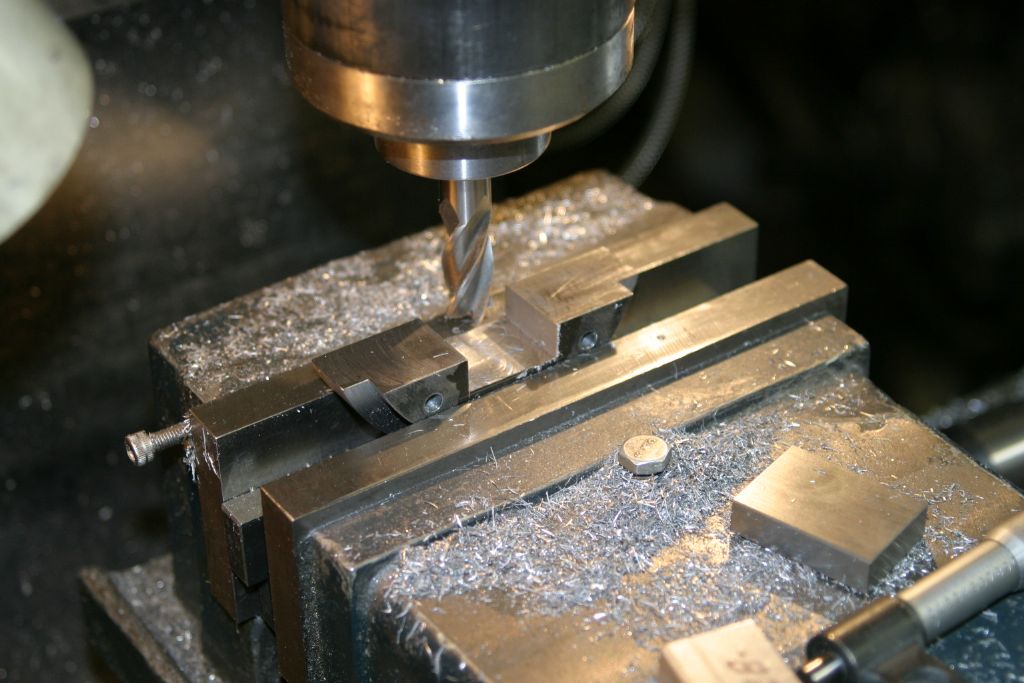
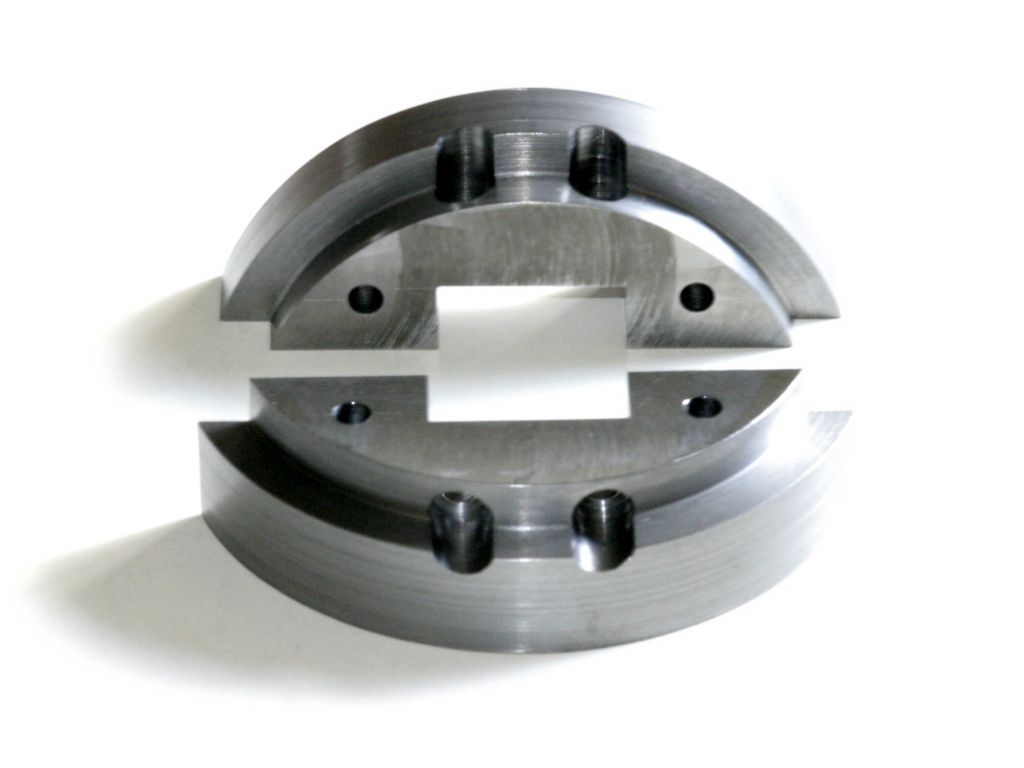
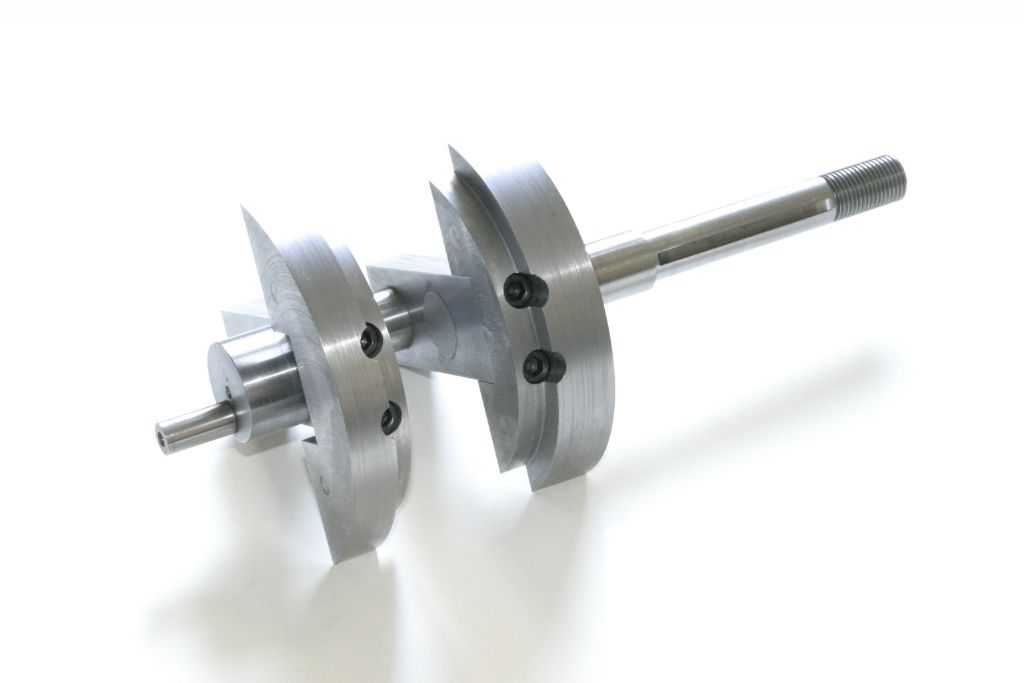
For the crankshaft counter weights, two slices of steel were sawn off some black plate and machined to be slightly oversize, finishing at 3.375 ( 3.378 ), 1.240 ( 1.260 ), and .851 ( .701 ). The holes for the 10-32 hex socket head cap screws for fixing them to the crank web were then drilled #21 tapping size and counterbored 5/16" diameter. Also two #21 holes were drilled in each for some 10-32 bolts to fix them to a jig plate to be bolted to the faceplate for turning the weights to the semi circular shape. These holes were positioned so that the heads wouldn't be in the way of any of the turning operations. When completed these holes will be plugged with some short lengths of 3/16" dia. rod. I had first considered putting the hold down bolts in the centre section that would be cut out for the socket that goes around the crank web but felt that this wouldn't provide a secure enough hold for the intermittent turning operations. Embryo counterweights mounted on the jig plate and centred on the faceplate using a wobbler in preparation for turning the outsides to the 1.760" radius. As pictured the balance was good enough to run at the lathe's lowest direct speed ( 281 rpm ). The outsides turned to dimension and the .250 x .265 reduced section on the corner of the outer diameter turned to size. Since the two halves are of different thickness, once the thicker one had been turned to .265" deep the thinner was only be .115" deep, therefore the thick one was removed to finish turning the thinner one. Finish turning the recess on the thinner weight, note the extra weight attached to the faceplate to counteract the out of balance. Milling out the recess for the end of the crank web, after chain drilling and sawing out the bulk of the waste. The holes for the fixing screws were then spotted through into the webs and the webs tapped 10-32, and the holes in the counterweights opened up to clear the #10 screws ( #10 drill ). The finished crankshaft counterweights with the holes used to fasten them to the faceplate yet to be filled in. The crankshaft with the finished counterweights attached.
|
| John Purdy | 03/04/2021 00:52:15 |
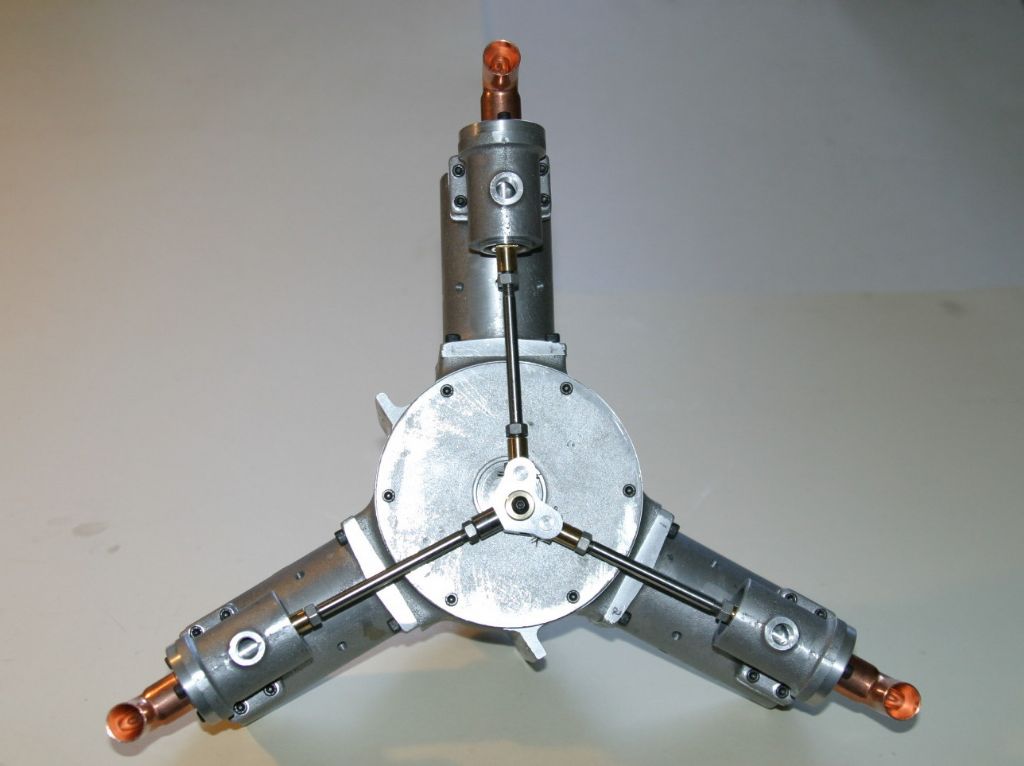
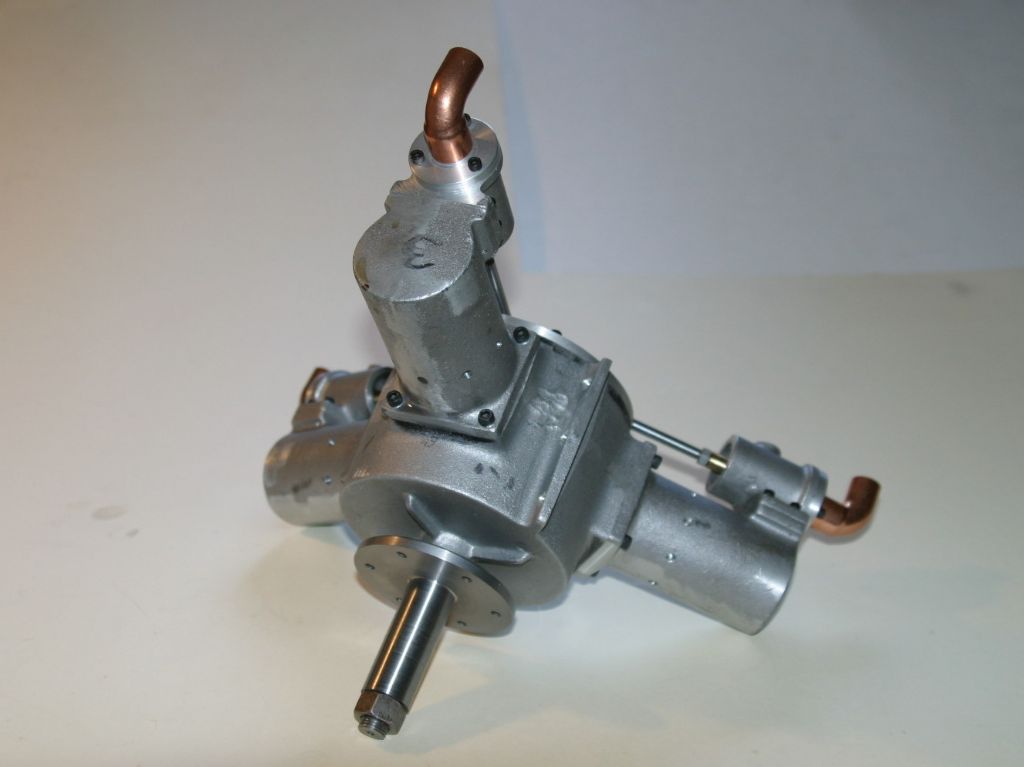
431 forum posts 252 photos | Here are a couple of pictures of the completely assembled engine, minus the inlet plumbing. I first assembled it without oiling any parts to check the fits and it rotated quite freely with no binding. After oiling everything up and reassembling it its a lot stiffer due to the oil drag but there is no sign of any tight spots. The next thing is to design a stand for it and to figure out how I'm going to hook up the inlet plumbing so I can put some air to it and see if it runs. First the valve timing will have to be checked as I think things changed when I assembled it, which means taking off the back crankcase cover so I can see when the pistons are at TDC. For any one contemplating building one, the plans are nineteen 8 1/2 x 11 sheets stapled into a booklet easily separated for use. I found no dimensional errors on the plans but there are a few missing dimensions, but they could be determined from listed ones. The castings were generally good with some porosity in a few and some had minimal machining allowance, requiring careful setup before machining. As mentioned earlier the cast boss on the crankcase back plate was quite a bit smaller than the required finished dimension. |
| John Purdy | 03/04/2021 03:48:56 |
431 forum posts 252 photos | While re-setting the valves I found that the piston motion could easily be seen through the drilled exhaust ports in the cylinder and it was easy to judge when the piston was at TDC, so there was no need to take the crankcase back plate off. Also if I was doing it again I would make the valve rod ends that are in the valves longer to give more for a 11/32" wrench to grip to hold the valve from rotating as the jam nut is tightened. As it is, it only sticks out of the bottom of the valve slightly less than 1/16". The plans call for the head to be .388" long with the hole for the wrist pin .188" from the end. I would increase the .388" to .588" keeping the .188" the same (the valve rods would then have to be shortened by .200" to compensate ). I found that the valve wrist pins have to be very close to 90 degrees to the plane of the swing of the valve rods or everything jams up as the eccentric goes around, hence the need to ensure the valve doesn't rotate while tightening the jam nut. Edited By John Purdy on 03/04/2021 03:49:47 |
| John Purdy | 11/04/2021 00:18:50 |
431 forum posts 252 photos |
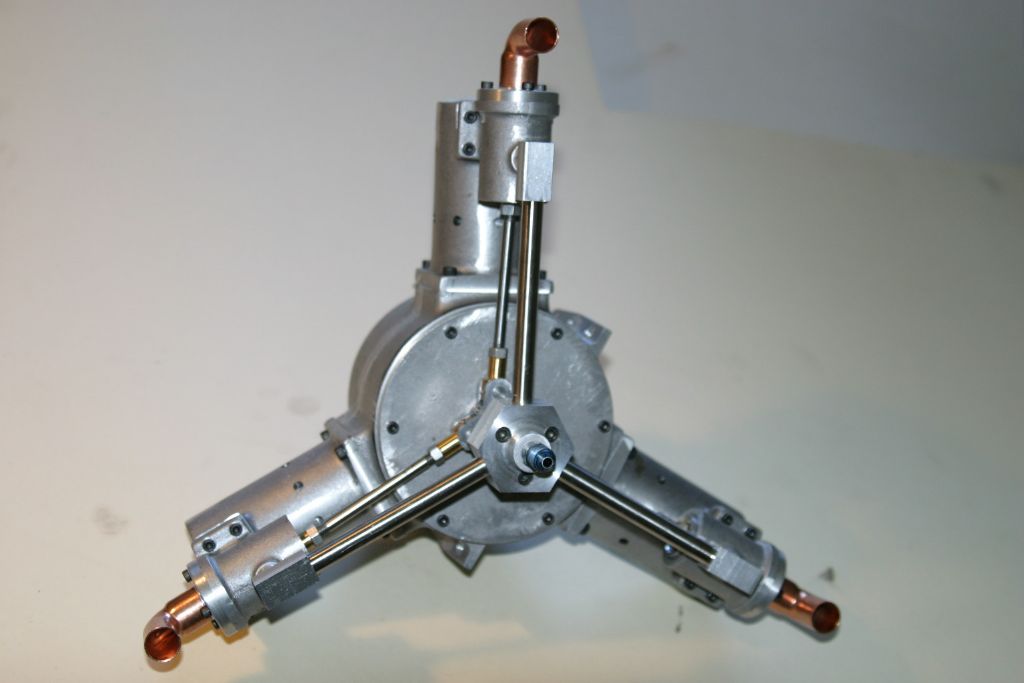
Here's my solution for the inlet plumbing, made from some pieces of aluminum and 3/8" OD tubing. Inlet fitting is a 1/4' flare fitting. So that's it, finished (except painting??? ). Now I guess I need to fabricate a stand for it and think about a prop !
|
| gary | 11/04/2021 06:42:24 |
| 164 forum posts 37 photos | well done john, looks good without paint ? |
| DiogenesII | 11/04/2021 10:45:04 |
| 859 forum posts 268 photos | Nice job, John - the inlet pipework looks much more in proportion to the whole. ..I rather like it without paint, too - tho' it always feels a bit cheeky to be commenting on the finish of another's engine.. Please keep us updated on the prop and other bits & pieces, it's an enjoyable build... |
| John Purdy | 28/05/2021 22:43:29 |
431 forum posts 252 photos | Now that the this engine is finished except for the stand ( still haven't found any material for that yet ), the next project will be a Red Wing hit and miss, castings are ordered and awaiting delivery.
|
Please login to post a reply.
Want the latest issue of Model Engineer or Model Engineers' Workshop? Use our magazine locator links to find your nearest stockist!
Sign up to our newsletter and get a free digital issue.
You can unsubscribe at anytime. View our privacy policy at www.mortons.co.uk/privacy
- *Oct 2023: FORUM MIGRATION TIMELINE*
05/10/2023 07:57:11 - Making ER11 collet chuck
05/10/2023 07:56:24 - What did you do today? 2023
05/10/2023 07:25:01 - Orrery
05/10/2023 06:00:41 - Wera hand-tools
05/10/2023 05:47:07 - New member
05/10/2023 04:40:11 - Problems with external pot on at1 vfd
05/10/2023 00:06:32 - Drain plug
04/10/2023 23:36:17 - digi phase converter for 10 machines.....
04/10/2023 23:13:48 - Winter Storage Of Locomotives
04/10/2023 21:02:11 - More Latest Posts...
- View All Topics
- Reeves** - Rebuilt Royal Scot by Martin Evans
by John Broughton
£300.00 - BRITANNIA 5" GAUGE James Perrier
by Jon Seabright 1
£2,500.00 - Drill Grinder - for restoration
by Nigel Graham 2
£0.00 - WARCO WM18 MILLING MACHINE
by Alex Chudley
£1,200.00 - MYFORD SUPER 7 LATHE
by Alex Chudley
£2,000.00 - More "For Sale" Ads...
- D1-3 backplate
by Michael Horley
Price Not Specified - fixed steady for a Colchester bantam mark1 800
by George Jervis
Price Not Specified - lbsc pansy
by JACK SIDEBOTHAM
Price Not Specified - Pratt Burnerd multifit chuck key.
by Tim Riome
Price Not Specified - BANDSAW BLADE WELDER
by HUGH
Price Not Specified - More "Wanted" Ads...
Do you want to contact the Model Engineer and Model Engineers' Workshop team?
You can contact us by phone, mail or email about the magazines including becoming a contributor, submitting reader's letters or making queries about articles. You can also get in touch about this website, advertising or other general issues.
Click THIS LINK for full contact details.
For subscription issues please see THIS LINK.
Model Engineer Magazine
- Percival Marshall
- M.E. History
- LittleLEC
- M.E. Clock
ME Workshop
- An Adcock
- & Shipley
- Horizontal
- Mill
Subscribe Now
- Great savings
- Delivered to your door
Pre-order your copy!
- Delivered to your doorstep!
- Free UK delivery!



 Register
 Log-in


