Forum sponsored by:

Myford Mk1 Super 7 restoration
| Morty | 10/05/2020 09:49:42 |
 94 forum posts 101 photos | Hi Steve! I'm nearly there now, just the back and bottom to do, I am not going to do the top of the cabinet or the underside of the tray as the paint is intact, and the inside will get a rub down and de-grease. I'm using red oxide on the cabinet and tray and etch primer on any aluminium castings, will probably use hi build on castings as required. Hi MichealG! I hope that My ramblings and digital etchings will be of some use to some poor soul in the future!! Thanks for looking in! Cheers, Pete |
| Steviegtr | 10/05/2020 15:12:06 |
 2668 forum posts 352 photos | As MichealG says keep up the good work. The pictures paint a thousand words so lots more. There are still a lot of those lathes around, so guess plenty of members can use yours for a good reference. Steve. |
| Peter Sansom | 11/05/2020 11:52:00 |
| 125 forum posts 4 photos | I have a Mk2 1958 S7. Did a recondition a couple of years ago. Still have a few bits to do and it missed out o a repaint as we were getting ready to move. Ahave been too busy after the the move to do much. I had the bed reground. The hardest issue was finding a surface grinder long enough. ground the bed top and tehn converted the saddle to a wide bed. Also fitted taper roller bearings instead of the Angular Contact bearings. If you do the taper roller bearing conversion, make sure that you get bears from SKF, NSK or similar. The Taper Roller bearings are common as thehy are used on a lot of cars. Most are rubbish with too much noise/vibration. SKF have a higher speed rating. Ended also replacing the bearing in he clutch as there was a lot of noise there. Still habe to replace the Clutch Thrust bearing and the Oilit bushes. I have the parts now, just need time.
Peter |
| Morty | 15/05/2020 16:17:17 |
94 forum posts 101 photos | Hi Peter! Thanks for the advice I am thinking about doing the side bed conversion, but I am getting the lathe back together to see how the land lies before doing it. I have a quick ring around about a bed grind, looking at £5-600 mark, I think I might get away with the side guide setup. I will check the spindle bearings out when I strip the headstock down,they feel alright but if I need to change them I will go for taper rollers, I have always used SKF or FAG bearings, never had a problem! My S7 is fitted with the early clutch, I have been asked with the information on this and will again check it out when dismantled. Again, many thanks for the advice! Cheers, Pete |
| Steviegtr | 15/05/2020 23:28:58 |
2668 forum posts 352 photos | Just take it easy with the clutch. It is a cast split ring on the S1 & not uncommon to break in half. We brazed one back together. Still working. But no parts available for that version. Steve. |
| Morty | 15/05/2020 23:44:00 |
94 forum posts 101 photos | Hi Steve! Thanks for the heads-up, duly noted!! The reason for stripping it down was for cleaning and painting, I can get round that by using a 'hairy stick' for both!! It was working fine when I tested it so maybe best left alone, there is some play in the lever pivot that I will need to attend to. Cheers, Pete |
| Mike Donnerstag | 16/07/2020 19:18:33 |
 231 forum posts 53 photos | This is a very interesting thread to me, as I'm just about to replace the bed on my Myford Super 7 and will shortly be removing the headstock and motorising assembly from the old bed. Do I need to remove the spindle and remove the drive belt to allow the headstock and motorising assembly to be separated? Mike |
| Morty | 16/07/2020 23:55:51 |
94 forum posts 101 photos | Hi Mike! To change a belt, You can either pull the spindle , or strip the clutch off, I have tried to keep the stripped lathe in 'biggish chunks' and work on them as separate projects,so I did not want to strip the motorising assembly yet. ( In fact, I cut the belt off as it is being replaced, but needed to move the spindle to gain better access to the headstock securing bolts, expect them to be tight!!!) The motorising unit just bolts to the back of the headstock with four hex bolts just lifted away when the belt has been removed. I took the motor off first to keep the weight down. I would just like to apologise for My lack of updates on the thread, My health has been a bit up and down recently, so I have had to limit My time in the workshop. The cabinet, tray and rising blocks are all stripped and ready for painting, I will post the pics up when I have done 'em!! Thanks for Your patience, and keep safe. Cheers, Pete
|
| Mike Donnerstag | 17/07/2020 11:04:42 |
231 forum posts 53 photos | Many thanks Pete. Sorry to hear about your health - hope it improves soon, and I look forward to your updates. Which do you think is easiest: removing the spindle or removing the countershaft? Also, this may be a silly question but... how do you know if your rear headstock bearings need replacing? Mike |
| Morty | 17/07/2020 15:13:53 |
94 forum posts 101 photos | Hi Mike! Thanks for Your reply and good wishes, it is very frustrating for Me at the moment, I want to get on with the job! I have not stripped the countershaft down yet so I cannot really comment on which is easier,but You will find it helpful to remove the spindle for better access to the headstock securing bolts anyway. As to the bearings, I have not removed mine yet,when I do I will clean them and check for any roughness or play,if any detected I will replace them as a pair,possibly with taper rollers. Always spend the extra for branded bearings, (SKF is My preference) makes sense in the long run! I checked the spindle before I untightened it and it seemed very good,clocked the runout and found it negligible, the bronze bush looked to be in good condition,will know more when it is cleaned properly. I hope this has been useful Mike! Cheers, Pete
|
| Adrian Downes | 28/07/2020 08:36:14 |
 35 forum posts 15 photos | Hi Pete, I'm a little late getting to this thread but have read your exploits with interest. We could almost be twins! I'm a 1959 vintage Burtonian with a recently installed Super 7 (1962 model so it's just younger than me) I'm also a recent heart attack survivor , April 28th 2018 & used my Covid furlough to bring initiate my retirement project early. If your lathe is still in need of some turning mine has offered it's services 😊 Get back to me here or PM if we can be of any help or if you just want to meet up for a beer & compare notes about our mechanical mistresses 🍻 Cheers..... Ady@Burton |
| ega | 28/07/2020 11:19:23 |
| 2805 forum posts 219 photos | Posted by Mike Donnerstag on 17/07/2020 11:04:42:
Many thanks Pete. Sorry to hear about your health - hope it improves soon, and I look forward to your updates. Which do you think is easiest: removing the spindle or removing the countershaft? Also, this may be a silly question but... how do you know if your rear headstock bearings need replacing? Mike I think that the simple answer is that if you are going to the trouble of stripping everything down it is false economy not to replace them. |
| bricky | 28/07/2020 19:34:11 |
| 627 forum posts 72 photos | Hi Pete I have a Mk1 1957 vintage,if removing the the clutch the screw in the pulley is covering the adjusting screw for the clutch and when removed can be dropped as it is small. it takes a while to find,I know.I had my lathe reground at Myford and the cross slide.The needle roller bearings are noisy but that is my only gripe, as it is very accurate.All the best with your renovation. Frank
|
| Morty | 29/07/2020 11:12:29 |
94 forum posts 101 photos | Hi Eveyone! Thanks for the replies! Adrian:- PM sent! Ega:- Sound advice, it is worth doing while up to Your elbows in oil! Frank:- Thanks for the Heads-up about the clutch dismantling, I have received many drawings and advice on the Mk.1 clutch from very kind members of these forums, details on 'tinternet' are a bit lacking (same as the early QC gearbox), and all advice is greatly welcome! I got the cabinet, tray and raising blocks primed yesterday, turning the stand over to topcoat the undersides later,then away for a few days, finishing the topcoats when I get back, and will post some pics then. Thanks for following and Your patience, I'm geting there slowly! Take care all, Pete |
| Mark Gould 1 | 29/07/2020 18:27:44 |
| 231 forum posts 131 photos | Loving this thread as I suspect many are Pete, any chance of some new photo’s? Mark |
| Morty | 30/07/2020 09:00:04 |
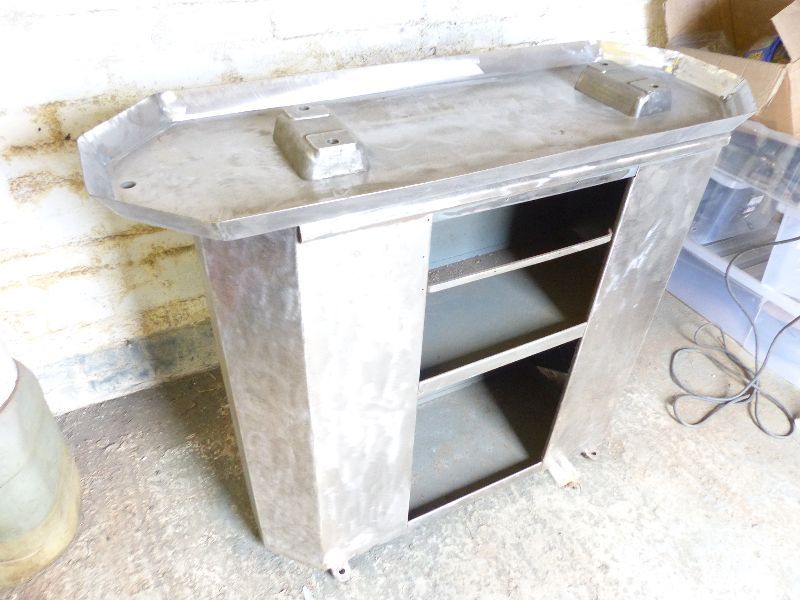
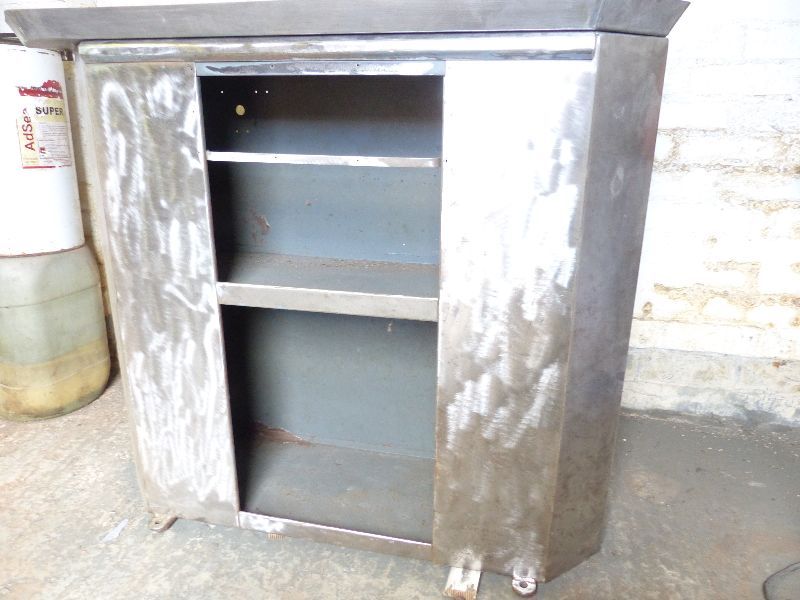
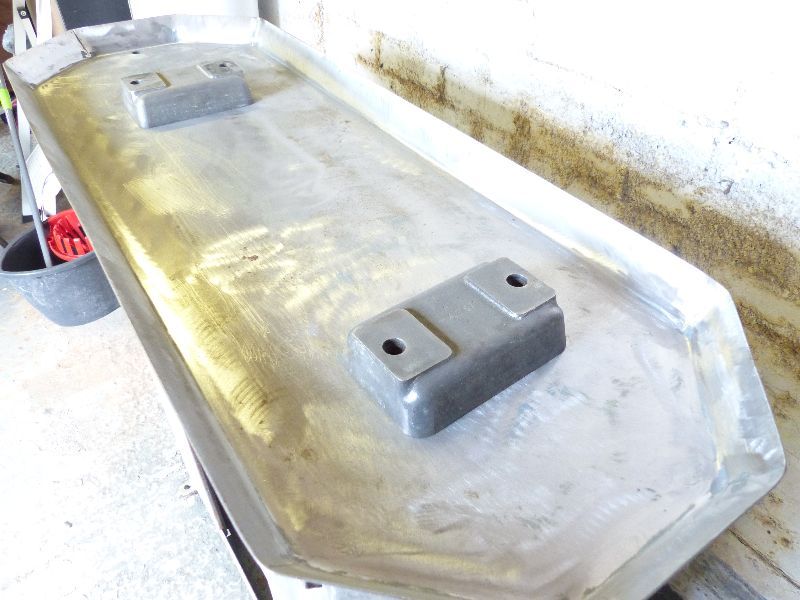
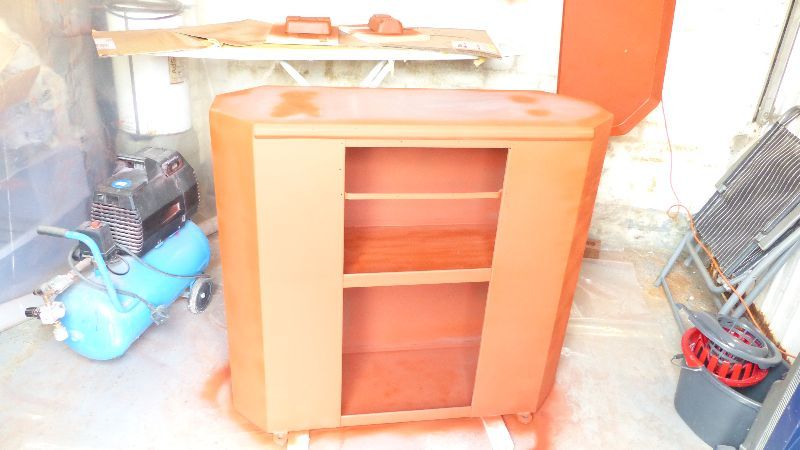
94 forum posts 101 photos | Hi there! A bit of progress, and a few pics:-
I am using Paragon synthetic enamel paint throughout,starting with anti corrosive Red Oxide. I found the paint easy to use, but had to thin with 25% off their PT8 thinners, they reccommend 10-15% but I could not get it to flow cleanly at that ratio. 5-10% seems to help with brush painting,which I did on hard to spray inside areas. Away for a few days now, topcoat when I get back, more pics then. Take care! Cheers, Pete Edited By Morty on 30/07/2020 09:01:54 |
| Morty | 17/10/2020 18:09:55 |
94 forum posts 101 photos | Hi there! I am so sorry I have not updated My thread for such a long time, a lot been going on. I have been back in hospital a couple of times in the last couple of months, they thought My heart was playing up again,but has been checked out OK, waiting for an appointment in general medicine to sort out breathlessness and associated pain. Also My back problems have been rearing up,so when I feel well enough to go out to the garage it is not for very long. Consequently, when the offer of early retirement came up, I decided it was the time, so I have been busy sorting out pensions etc, and paid My mortgage off (yesterday!!! So, I will have some more time on My hands for more constructive activities! Anyway, I managed to get a coat of paint on the stand etc., Hope to rub it down tomorrow and re-coat it so I can move on. I won't get the whole job done before the cold weather stops Me, but hope to get the bed sorted before then, and pick up the job in the spring. Will get some progress pics up in the week. Many thanks for Your patience! Keep safe and well, Regards, Pete |
| Phil H1 | 17/10/2020 18:37:12 |
| 467 forum posts 60 photos | Pete, Nice work on the cabinet - it looks really nice. I did almost exactly the same with my Super 7 cabinet in 2009. My Super 7 belonged to my dad who bought it in about 1975. Phil H |
| Neil Lickfold | 17/10/2020 20:17:05 |
| 1025 forum posts 204 photos | Great restoration project. Those marks on the bed are from people hack sawing something off and then sawing nothing striking the bed. Mine came with some saw marks from the previous owners. When using hand tools like a hack saw , or even just changing the chucks, I have a piece of wood I put down on the bed. Just incase for what ever reason there is a slip or a drop of something. |
| Morty | 17/10/2020 22:05:42 |
94 forum posts 101 photos | Hi there! Phil H1:- It took a bit of work getting there, but it looks a lot better with the primer on! It's always nice to have a Family connection to tools, My Dad was a carpenter and I inherited a few tools, one being a Record plane, which I am going to restore and use when I get the workshop sorted. Nick:- Yes, I am going to sort out a chuck board, handy when You are changing over chucks in case You slip and drop it on the bed! Doubles as a hacksaw guard as well! I am also going to make a cover board for the other end of the bed, to cover it when not in use, with the carriage and tailstock pushed to the left hand end of the bed. I am thinking of lining the underside of it with felt to hold some oil to protect the bed over winter. Thanks for looking in! Cheers, Pete |

Please login to post a reply.
Magazine Locator
Want the latest issue of Model Engineer or Model Engineers' Workshop? Use our magazine locator links to find your nearest stockist!
Sign up to our Newsletter
Sign up to our newsletter and get a free digital issue.
You can unsubscribe at anytime. View our privacy policy at www.mortons.co.uk/privacy
Latest Forum Posts
- *Oct 2023: FORUM MIGRATION TIMELINE*
05/10/2023 07:57:11 - Making ER11 collet chuck
05/10/2023 07:56:24 - What did you do today? 2023
05/10/2023 07:25:01 - Orrery
05/10/2023 06:00:41 - Wera hand-tools
05/10/2023 05:47:07 - New member
05/10/2023 04:40:11 - Problems with external pot on at1 vfd
05/10/2023 00:06:32 - Drain plug
04/10/2023 23:36:17 - digi phase converter for 10 machines.....
04/10/2023 23:13:48 - Winter Storage Of Locomotives
04/10/2023 21:02:11 - More Latest Posts...
- View All Topics
Support Our Partners


Shopping Partners
Subscription Offer

Latest "For Sale" Ads
- Reeves** - Rebuilt Royal Scot by Martin Evans
by John Broughton
£300.00 - BRITANNIA 5" GAUGE James Perrier
by Jon Seabright 1
£2,500.00 - Drill Grinder - for restoration
by Nigel Graham 2
£0.00 - WARCO WM18 MILLING MACHINE
by Alex Chudley
£1,200.00 - MYFORD SUPER 7 LATHE
by Alex Chudley
£2,000.00 - More "For Sale" Ads...
Latest "Wanted" Ads
- D1-3 backplate
by Michael Horley
Price Not Specified - fixed steady for a Colchester bantam mark1 800
by George Jervis
Price Not Specified - lbsc pansy
by JACK SIDEBOTHAM
Price Not Specified - Pratt Burnerd multifit chuck key.
by Tim Riome
Price Not Specified - BANDSAW BLADE WELDER
by HUGH
Price Not Specified - More "Wanted" Ads...
Get In Touch!
Do you want to contact the Model Engineer and Model Engineers' Workshop team?
You can contact us by phone, mail or email about the magazines including becoming a contributor, submitting reader's letters or making queries about articles. You can also get in touch about this website, advertising or other general issues.
Click THIS LINK for full contact details.
For subscription issues please see THIS LINK.
Digital Back Issues


Donate

 Register
 Log-in
Model Engineer Magazine
- Percival Marshall
- M.E. History
- LittleLEC
- M.E. Clock

ME Workshop
- An Adcock
- & Shipley
- Horizontal
- Mill

Subscribe Now
- Great savings
- Delivered to your door

Pre-order your copy!
- Delivered to your doorstep!
- Free UK delivery!
All Forum Topics > Manual machine tools > Myford Mk1 Super 7 restoration