Forum sponsored by:

Hemingway Hacksaw
| Mark Elen 1 | 31/10/2018 20:01:40 |
| 142 forum posts 356 photos | Not much more to do on this, then I can get back on topic. I managed to get the clamps blacked today, this is them, covered in slide way oil.
I’m really happy with how they have turned out. Cheers Mark
|
| Mark Elen 1 | 03/11/2018 15:53:49 |
| 142 forum posts 356 photos | I made a start today on the ‘rotary table sub-plate’, it’s a shame None of the table t-slots line up with 0 degrees. One of them is 4 degrees out. I made up 3 temporary M4 t-nuts and drilled out at 4, 124 and 244 degrees, and counterbored M4. The plan is now to turn over the plate, counterbore the fixing holes, fly cut the bottom, then the holes can be opened up to 8mm for the final fixings. Once the holes are opened up, I can bolt it down and mill out a spigot on the bottom to accept the MT2 blank arbour that will locate the table.
Cheers Mark
|
| Mark Elen 1 | 06/11/2018 09:18:20 |
| 142 forum posts 356 photos | A bit more done on the fixture plate and the first mistake. Somehow, I managed to get the centre of the plate misaligned with the centre of the rotary table by around .5mm. I drilled out the centre hole 6mm then set about creating a circular pocket to accept the stub of the MT2 arbour that will locate the plate. It was while milling this pocket that the misalignment showed up. I offset the table in the x axis and rotated the table to mill out the pocket. I was questioning why the pocket was ~1mm over calculated size until I noticed the pocket wasn't concentric with the 6 mm supposedly central hole. Not to worry, the pocket is concentric with the fixing holes, I'm going to open the central hole out to 10mm and make up some spigots for centralising parts I also shortened the blank arbour, made absolutely certain it was central and drilled and tapped it M6 for future workholding. The plate is a good sliding fit on the arbour.
Cheers Mark
|
| Mark Elen 1 | 09/11/2018 20:47:26 |
| 142 forum posts 356 photos | Still tap, tap, tapping away. 38 holes to tap M8, taper and plug. At least the square drives on the taps fit 2 different tap wrenches. Holes spotted
All holes drilled 6.7mm. Because the mill hasn’t got a depth stop, I raised the head so that full quill extension drilled the holes 25 mm. Another job to get around to is to make a depth stop. I marked up the holes that need tapping, all of the others will be drilled then reamed 10 mm to accept dowel pins for location.
More tapping
Nearly there. I’m looking forward to using this. Cheers Mark
|
| sean logie | 10/11/2018 17:28:32 |
 608 forum posts 7 photos | Excellent work there Mark 😊
Sean |
| Mark Elen 1 | 11/11/2018 00:58:51 |
| 142 forum posts 356 photos | Thanks Sean👍 Things all came to a grinding halt today. I finished tapping out all of the fixing holes, then I drilled out all of the ‘dowel holes’ to 9.7 mm and reamed out the first one to 10mm. Unfortunately, the 10mm dowel pins don’t fit. The shank of a 10mm drill fits perfectly, but when I checked with my callipers, it is 9.95mm, the dowel pins are 10.05mm. Now I have a 10.2mm drill, but I don’t want them being a sloppy fit, and, I’m not paying £40 for a 10.1mm reamer,so I’ve ordered a 10.1mm drill and it will ‘have to do’. I don’t want to tear down my setup to work on anything else and have to zero it all back in, so I’m stuck to waiting for the drill to turn up. Cheers Mark
Edited By Mark Elen 1 on 11/11/2018 00:59:39 |
| Vincent Cutajar | 11/11/2018 02:12:12 |
| 23 forum posts | Hi Mark I am following your hacksaw build with interest. Before you open up your 10mm reamed holes, can I suggest using 10mm round bar for the pins instead of the dowel pins. Regards Vince |
| Vincent Cutajar | 11/11/2018 05:58:08 |
| 23 forum posts | Use stainless steel round bar for the pins. I forgot to mention that in the above reply. Vince |
| sean logie | 11/11/2018 06:48:31 |
608 forum posts 7 photos | Posted by Mark Elen 1 on 11/11/2018 00:58:51:
Thanks Sean👍 Things all came to a grinding halt today. I finished tapping out all of the fixing holes, then I drilled out all of the ‘dowel holes’ to 9.7 mm and reamed out the first one to 10mm. Unfortunately, the 10mm dowel pins don’t fit. The shank of a 10mm drill fits perfectly, but when I checked with my callipers, it is 9.95mm, the dowel pins are 10.05mm. Now I have a 10.2mm drill, but I don’t want them being a sloppy fit, and, I’m not paying £40 for a 10.1mm reamer,so I’ve ordered a 10.1mm drill and it will ‘have to do’. I don’t want to tear down my setup to work on anything else and have to zero it all back in, so I’m stuck to waiting for the drill to turn up. Cheers Mark
Edited By Mark Elen 1 on 11/11/2018 00:59:39 Make your own dowl pins Mark .
Sean |
| not done it yet | 11/11/2018 07:18:50 |
| 7517 forum posts 20 photos | Re your drillings - I woud recommend drilling through the plate for all holes. The bottom part does not need to be the same diameter, but through holes will avoid swarf building up in blind holes.
|
| Speedy Builder5 | 11/11/2018 07:20:58 |
| 2878 forum posts 248 photos | Don't forget, reamers come in different nominal sizes, a 10mm E6 is 10mm + 0.043mm ( 10.043mm) whereas the R7 fit is 10mm - 0.034mm (9.966mm)Thus giving a hole anything between a clearance fit and a very tight swaged fit. |
| Mark Elen 1 | 11/11/2018 16:20:18 |
| 142 forum posts 356 photos | Thanks for your comments gents. I did try drilling the hole I reamed out with a 10mm end mill and it did produce a sliver of swarf, so that makes sense Speedy. I still don’t have a lathe, so making my own pins is a no go at the moment. I did consider making all of the holes through, but the vast majority seat on the rotary table top, so will fill with swarf in use anyway. I’ll see how it goes and may well mod it in the future if it gives me grief. Today I decided to give it a go on the latch plate slot while I’m awaiting tools. Apart from my stupid mistake of setting up with the radius of the end on centre, then trying to cut the slot and latch (which is 1/8 off centre) it didn’t go too bad. Another lesson learnt - I should of put the centre of the intersection of the slots on the centre of the table, not offset it like I did.
It’s not quite as per the drawing, but I’m sure it will still work. If not, it’s not the end of the world to make another. I bought a batch of offcut brass from eBay to use to protect the table. Cheers Mark
|
| Mark Elen 1 | 12/11/2018 18:21:05 |
| 142 forum posts 356 photos | I’ve decided I’m not happy with the plate I made yesterday:
This is what it should look like:
When I rotated the table, I had to go to 45 degrees to get the centre of the latch to line up with the cutter. I CADded up the offsets today (it’s easier than me trying to work it out) and got the following (dimensions in mm):
I’ve ordered a new piece of 3mm plate and I’m going to have another go at it. At least I know where the error crept in. Cheers Mark
|
| Mark Elen 1 | 13/11/2018 20:41:21 |
| 142 forum posts 356 photos | No progress today, as I'm still awaiting tools and materials. Progress has been made on a Lathe though, I called in to see the guys at ARC and came away with a SC4 and a load of tooling. - thanks for the coffee Ketan! Spent the rest of the day getting it onto the stand and got started cleaning it down. More tool making coming I can see. I've downloaded and printed out the supplement to the instruction manual that is on the internet by Robert Ackert here: **LINK** Loads of stuff in there to get me started. Cheers Mark |
| mechman48 | 16/11/2018 16:20:06 |
 2947 forum posts 468 photos | Continued on with my Boxer twin oscillator; soldered on the end blocks after re-tinning the frame & blocks, didn't want to redo... again! seems to have taken ok, got down to cleaning it up... plenty of elbow grease coming up !...
Edited By mechman48 on 16/11/2018 16:23:43 |
| Mark Elen 1 | 19/11/2018 19:01:44 |
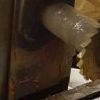
| 142 forum posts 356 photos | Still not much progress on the Hacksaw, but hopefully that is about to change. I’ve now got the lathe set up and after a bit of ‘fiddling’ got it to cut. I’ve been busy today So, after making a dogs dinner of the first thread, I watched Tubal Cains video on screw cutting on YouTube and managed to thread both ends. 2 different sizes, 2 different pitches, I’m getting some practice in changing the gearing of the lead screw.
Here’s my incorrect setup...on its side.
Just a bit of cleaning up to do, then I can get on properly. I forgot, I bought MEW at the weekend and noticed I’m famous😂. The bit about this build with no lathe is ‘fake news’😂😂 Cheers Mark
|
| Mark Elen 1 | 21/11/2018 22:03:05 |
| 142 forum posts 356 photos | To get my thread back ‘on topic’ I made a start tonight on the crank disc. I’m busy pondering how I’m going to hold it to machine the taper in the boss. As there is quite a lot of meat to get rid of, I thought it would be a good start to skim off the outside, then hold it on a faceplate to do all of the work on the boss side, then back into a Chuck to finish the front and rim. My first go at grinding a HSS tool bit for Ali seems to be reasonable, it is cutting. I’m still pondering making up a mandrel and the collet for final external turning as per the instructions.
The finished disc should be 12.7mm, at present it is nearer 19mm so loads to go at. Cheers Mark
|
| Marcus Bowman | 21/11/2018 23:24:08 |
| 196 forum posts 2 photos | Picking up on Neil's point about starting with a mill. I often use my mill for turning, using a tool held in the vice, the work in the chuck, and the Z axis moving the work past the tool. The too need to be centred on the work using the Y axis feed, whcih is then locked. X axis is the 'cut' depth. It's fine for short work. And if, like me, your mill is CNC, it's a joy to do repetition work that way. Longer work is difficult, of course, because you not only need the space for the work, but for the distance you will feed it downwards. Like Neil, I have sometimes reflected that the Maker community has a slightly different set of needs and priorities as far as workshop equipment is concerned. Marcus
|
| not done it yet | 22/11/2018 09:56:03 |
| 7517 forum posts 20 photos | The taper is for the saw drive pin? There are alternatives. A parallel drive pin with spigott and a shallow nut on the rear. Loctited to add the ‘belt’ to the ‘braces’. Even a bolt and washer in the back side to secure it. |
| not done it yet | 22/11/2018 17:30:20 |
| 7517 forum posts 20 photos | Hi Mark, Oops, wrong bit. The taper holding bit to affix disc to motor/gearbox output. Does the motor have a keyway? If so a keyway is the obvious modern day option? I’m guessing that Edgar T did it that way because it was easy to do on the lathe, with no other kit available (the ’ordinary tools’ comment on the first page of the 1964 ME write up). If you are making the collet, no problem with the angle of the taper - any angle close to design will do as long as you make both before changing the top slide angle setting. But I reckon a keyway should be a good alternative. It is only an aluminium boss. |


.jpg")
.jpg")


Please login to post a reply.
Magazine Locator
Want the latest issue of Model Engineer or Model Engineers' Workshop? Use our magazine locator links to find your nearest stockist!
Sign up to our Newsletter
Sign up to our newsletter and get a free digital issue.
You can unsubscribe at anytime. View our privacy policy at www.mortons.co.uk/privacy
Latest Forum Posts
- *Oct 2023: FORUM MIGRATION TIMELINE*
05/10/2023 07:57:11 - Making ER11 collet chuck
05/10/2023 07:56:24 - What did you do today? 2023
05/10/2023 07:25:01 - Orrery
05/10/2023 06:00:41 - Wera hand-tools
05/10/2023 05:47:07 - New member
05/10/2023 04:40:11 - Problems with external pot on at1 vfd
05/10/2023 00:06:32 - Drain plug
04/10/2023 23:36:17 - digi phase converter for 10 machines.....
04/10/2023 23:13:48 - Winter Storage Of Locomotives
04/10/2023 21:02:11 - More Latest Posts...
- View All Topics
Support Our Partners


Shopping Partners
Subscription Offer

Latest "For Sale" Ads
- Reeves** - Rebuilt Royal Scot by Martin Evans
by John Broughton
£300.00 - BRITANNIA 5" GAUGE James Perrier
by Jon Seabright 1
£2,500.00 - Drill Grinder - for restoration
by Nigel Graham 2
£0.00 - WARCO WM18 MILLING MACHINE
by Alex Chudley
£1,200.00 - MYFORD SUPER 7 LATHE
by Alex Chudley
£2,000.00 - More "For Sale" Ads...
Latest "Wanted" Ads
- D1-3 backplate
by Michael Horley
Price Not Specified - fixed steady for a Colchester bantam mark1 800
by George Jervis
Price Not Specified - lbsc pansy
by JACK SIDEBOTHAM
Price Not Specified - Pratt Burnerd multifit chuck key.
by Tim Riome
Price Not Specified - BANDSAW BLADE WELDER
by HUGH
Price Not Specified - More "Wanted" Ads...
Get In Touch!
Do you want to contact the Model Engineer and Model Engineers' Workshop team?
You can contact us by phone, mail or email about the magazines including becoming a contributor, submitting reader's letters or making queries about articles. You can also get in touch about this website, advertising or other general issues.
Click THIS LINK for full contact details.
For subscription issues please see THIS LINK.
Digital Back Issues


Donate

 Register
 Log-in
Model Engineer Magazine
- Percival Marshall
- M.E. History
- LittleLEC
- M.E. Clock

ME Workshop
- An Adcock
- & Shipley
- Horizontal
- Mill

Subscribe Now
- Great savings
- Delivered to your door

Pre-order your copy!
- Delivered to your doorstep!
- Free UK delivery!
All Forum Topics > Work In Progress and completed items > Hemingway Hacksaw