Forum sponsored by:

Making Tapered Castellations in Aluminium
| old mart | 11/08/2021 20:27:04 |
| 4655 forum posts 304 photos | I used the rorary table to produce a similar type of drive, but with 7 segments, 51 degrees 26 minutes, approximately for a long handle for the knee of the Tom senior mill when there was a heavy weight on the bed.
|
| Dr_GMJN | 11/08/2021 21:23:33 |
 1602 forum posts | Thanks all - I’ll digest that lot and in the meantime buy a 1.6mm end mill. I do like the idea of making a simple indexing/translating fixture, although I think the latter would be better achieved using the DROs on the mill. Looking at Jason’s method, and the huge number of dodgy looking rotary tables out there, I might postpone that purchase after all. Cheers. |
| JasonB | 12/08/2021 06:55:09 |
 25215 forum posts 3105 photos 1 articles | 1.6mm won't fit assuming you were measuring what will be the diagonal, you need a 1.5mm cutter
|
| Dr_GMJN | 12/08/2021 08:32:26 |
1602 forum posts | Posted by JasonB on 12/08/2021 06:55:09:
1.6mm won't fit assuming you were measuring what will be the diagonal, you need a 1.5mm cutter
Ah yes, thanks, I was still thinking without the rotation/centreline offset. Edited By Dr_GMJN on 12/08/2021 08:32:46 |
| Howard Lewis | 13/08/2021 15:52:38 |
| 7227 forum posts 21 photos | If using a 1.5 mm End mill, I'd buy several (lots? ) The thought did came of suggesting mounting the bar horizontally in the vice, and using a 1.5 mm slitting saw. In my hands the saw will last longer than small end mills. With regard to Rotary Tables, I have a Vertex HV6, and apart fro the original divisions chart containing errors (Spent over a day setting up a spreadsheet to check / correct the chart, after producing three scrap gears - thought I couldn't count ) have been quite satisfied. HTH Howard |
| larry phelan 1 | 14/08/2021 10:09:18 |
| 1346 forum posts 15 photos | Nice tidy workshop, Jason, mine used to be like that, many moons ago ! Now, it,s more like a tiphead, everything is there, it,s just a question of finding it ! Anyone else in the club ? Dont be shy ! |
| JasonB | 14/08/2021 10:27:26 |
25215 forum posts 3105 photos 1 articles | Not really practical for a slitting saw but if you did want to try it with one you would need to find one not more than 10mm diameter and mount it on a 5mm shaft, anything larger will cut into the tooth on the opposite side, plus a rotary table would be needed as you would need to make several cuts to clean up the bottom of the gaps
|
| Dr_GMJN | 15/08/2021 10:01:40 |
1602 forum posts | I bought a 1.5 mm diameter milling cutter. Yes Howard, I should have bought a few, but at least I can see how it goes with this one. Thanks all. |
| Tony Pratt 1 | 15/08/2021 10:03:18 |
| 2319 forum posts 13 photos | Good luck, let us know how it goes. Tony |
| Dr_GMJN | 15/08/2021 23:16:55 |
1602 forum posts | Posted by Tony Pratt 1 on 15/08/2021 10:03:18:
Good luck, let us know how it goes. Tony Thanks, will do. Apparently they’re very rare, especially the alloy versions.
Edited By Dr_GMJN on 15/08/2021 23:17:14 |
| Ron Laden | 16/08/2021 05:23:15 |
 2320 forum posts 452 photos | If you do eventually go for a rotary table for your SX2P then Jason's suggestion of a 5 inch version is a good one, I have a 5 inch Soba which I bought as a set. I also have a cheapie 4 inch rotary but it's just too small for a lot of work and 6 inch would be too big on a SX2. I think 5 inch tables are thin on the ground compared to 4 & 6 inch versions that's why I went with the Soba it came with a dividing set, 80mm 4 jaw and mounting plate plus a tailstock and it suited my pocket at the time. There are one or two small areas which are a bit rough around the edges but overall the quality is very good. Most importantly the operation is very smooth, no tight spots, no significant backlash or play and very good accuracy. You can no doubt find tables with top end quality but you will need very deep pockets and will they be significantly more accurate than the Soba 5 inch I have, I doubt that. Ron
Edited By Ron Laden on 16/08/2021 05:58:23 |
| Dr_GMJN | 19/08/2021 23:26:53 |
1602 forum posts | Posted by Ron Laden on 16/08/2021 05:23:15:
If you do eventually go for a rotary table for your SX2P then Jason's suggestion of a 5 inch version is a good one, I have a 5 inch Soba which I bought as a set. I also have a cheapie 4 inch rotary but it's just too small for a lot of work and 6 inch would be too big on a SX2. I think 5 inch tables are thin on the ground compared to 4 & 6 inch versions that's why I went with the Soba it came with a dividing set, 80mm 4 jaw and mounting plate plus a tailstock and it suited my pocket at the time. There are one or two small areas which are a bit rough around the edges but overall the quality is very good. Most importantly the operation is very smooth, no tight spots, no significant backlash or play and very good accuracy. You can no doubt find tables with top end quality but you will need very deep pockets and will they be significantly more accurate than the Soba 5 inch I have, I doubt that. Ron
Edited By Ron Laden on 16/08/2021 05:58:23 Thanks Ron - I just had a look at a video of the 5” Soba from Chronos. You seem to get a lot of stuff to play with for your cash - table, dividing plates, tailstock and a chuck. There was some fettling required in a mounting hole (milling a face flat so the nut didn’t slip off), but that’s par for the course at this level. Might even see how much I’ve got left this month and have a go at one. I’m not going to pretend I *need* it, but it would make certain things a bit easier. I’ve got a lot of PCD holes to drill soon, I wonder what the accuracy is compared with co-ordinate drilling with DROs? I’m thinking if in fact the DRO method is more accurate since there’s no mechanical errors with gears and bearings to consider? |
| JasonB | 20/08/2021 07:10:53 |
25215 forum posts 3105 photos 1 articles | Although I have a choice of rotary tables since I got the DRO I have not used a R/T once for PCD drilling. |
| duncan webster | 20/08/2021 23:55:12 |
| 5307 forum posts 83 photos | I have a 4" and a 6". The little one gets quite a bit of use rounding the ends of rods and valve gear bits, the big one very rare, but when you need it you need it. As Jason says for holes on a pcd coordinate drilling is quicker than setting up the rotary table, a pity the chinglish manual is incomprehensible, I use zeus and a calculator |
| Dr_GMJN | 21/08/2021 01:27:59 |
1602 forum posts | Yes, I used the DRO for the cylinder PCD holes on the 10V with no issue at all, and would probably use that method even if I had a rotary table. For things like this (castellation) job though, it would be handy, also would have been good for making my spot facing tool, and drilling the radial holes for the lathe hand threading wheel I made. Getting off-topic, but my current project requires barring teeth to be machined in a flywheel insert, and a pair of valve chest covers to have shallow pockets milled in the middle of their upper faces. I’m going to put oilers in the centres, and I’d like to leave circular raised bosses for them. I was thinking of milling the pocketed faces all over, then JB Welding small bosses in the middle to simulate a fully machined item. Once painted it would be difficult to tell. I think both features would be easy to fully machine using a rotary table. Sometimes with that project I think I’m using more JB Weld and filler than I’d like; almost feels like it’s cheating. Then again perhaps I’ve just started with the items that need it most. Guess it boils down to convenience and the line between creativity in overcoming machining issues vs. simply spending money on tooling. |
| JasonB | 21/08/2021 07:04:28 |
25215 forum posts 3105 photos 1 articles | The barring ring was probably done using a change wheel to index with but a rotary table will be nice for it. Same with the chest covers, ctr them up on the rotary table, use DRO to mill a round the outside of the recess and rotate table to form the boss then freehand any waste left between the two cuts. A corner radius cutter can be handy for this as it will leave a small fillet to give that cast look. As Duncan says they are good for rounding rod ends, though save a batch up as it takes a while to set up the R/T for one offs unless you have a second mill it can be left on, On the JBW issue you need to remember you are recreating castings that would have come from patters, quite likely the boss in the middle of that cover or your cylinder legs were separate pieces of wood fixed to the main part. Only difference is you are missing out the casting process. |
| Dr_GMJN | 21/08/2021 10:28:25 |
1602 forum posts | Thanks Jason. Yes I think the P.R. barring ring used a gear wheel for tooling in the instructions. I think we discussed laser-cutting the ring with its teeth, but again, for some reason I’d rather machine it in-situ. The issue with JB Weld wasn’t the end result or realism, just that *for me* it’s like a car body repair, or plastic model assembly technique than model engineering. And I don’t like car body repairs! I used to work in a foundry, and pattern fillet radii (minimum about 100 mm IIRC) were usually made of filler or filler backed up with wood, then radiussed with a plate exactly like I did with the P.R. Beds. There were always huge tubs of “patternmaket’s filler” in the pattern shop. Likewise, the “upgrading” process for the castings often involved weld repair, which is analogous to JB Welding any flaws I guess. I don’t know - the more I think about it the dafter my issue with it sounds. Difficult to explain. |
| John Reese | 23/08/2021 00:16:08 |
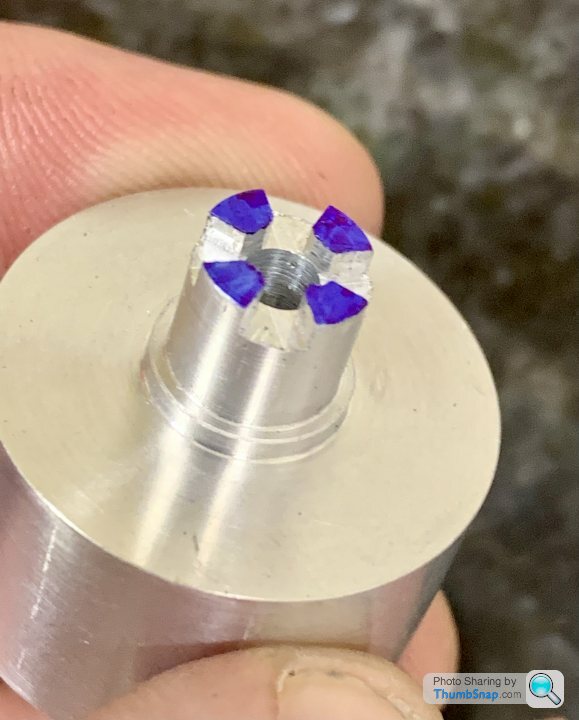
 1071 forum posts | The hand cut castellations in your photo look fine to me. A little cleanup with needle files and your part will be just as good as the milled version. |
| Dr_GMJN | 12/09/2021 21:59:08 |
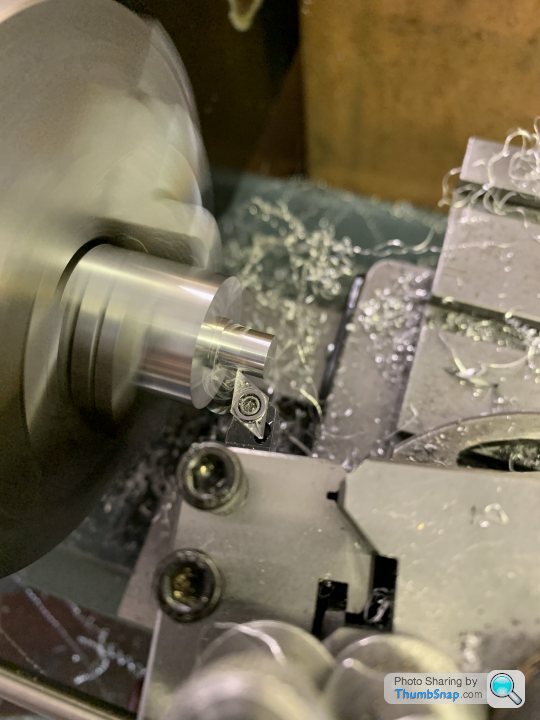
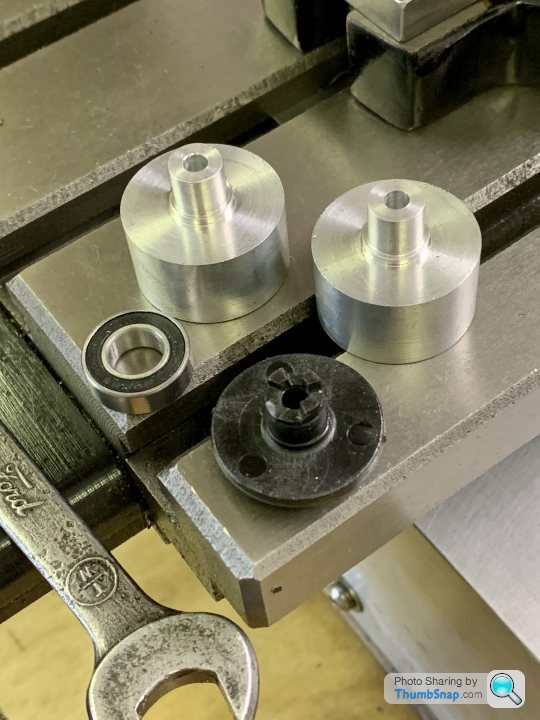
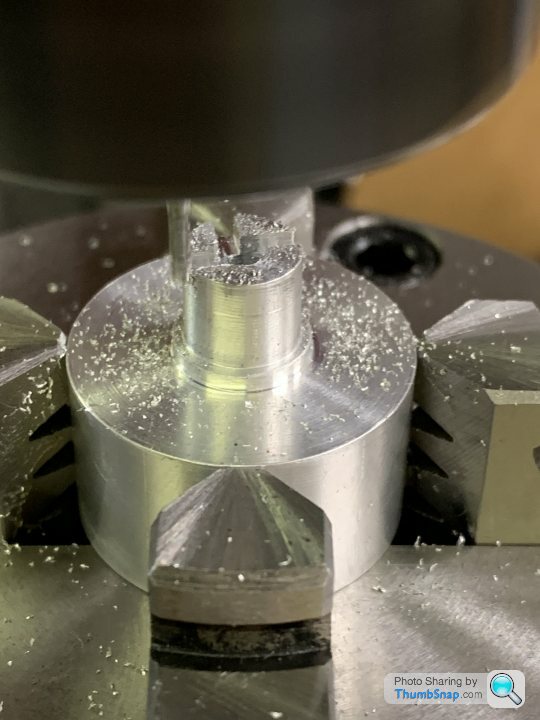
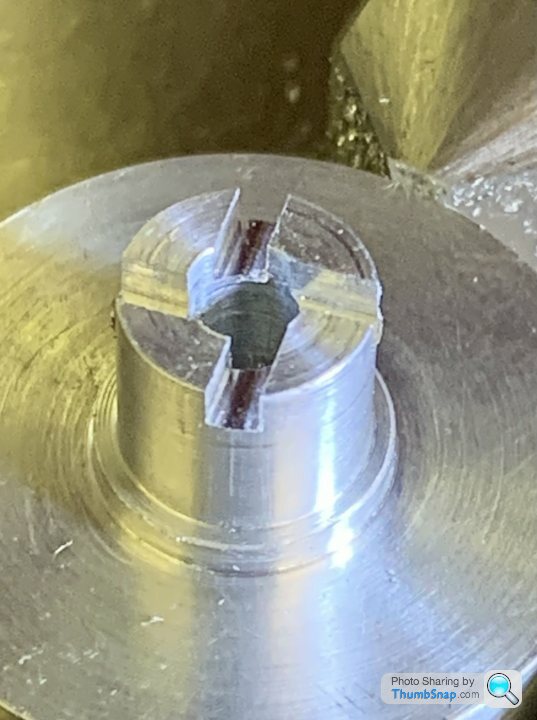
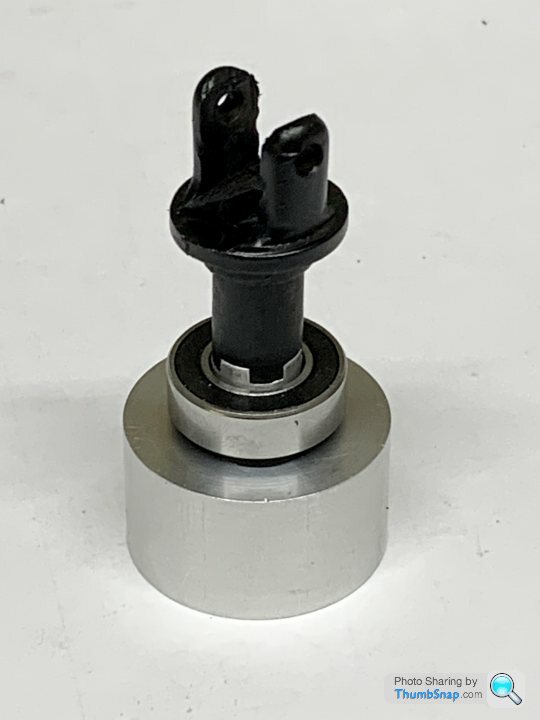
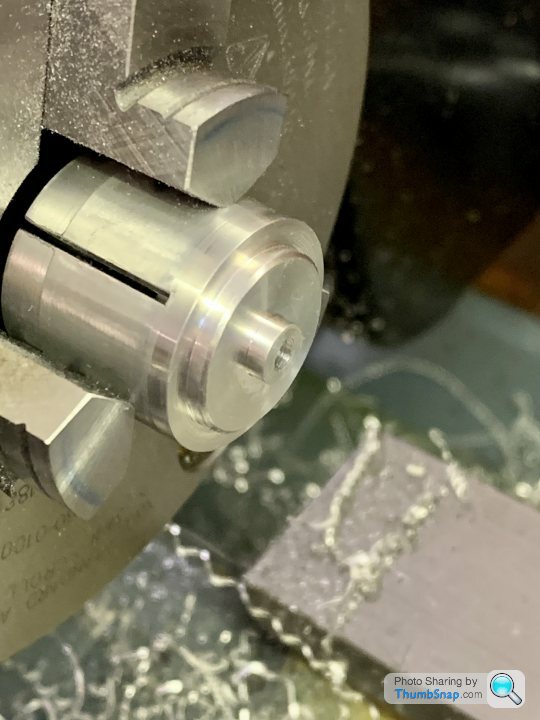
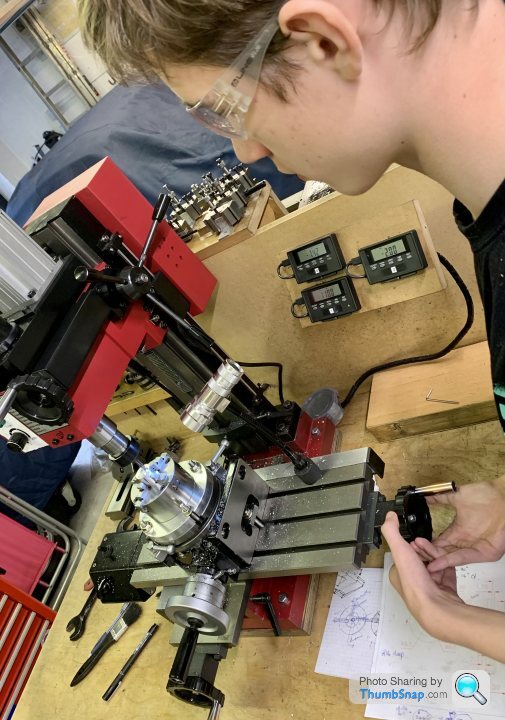
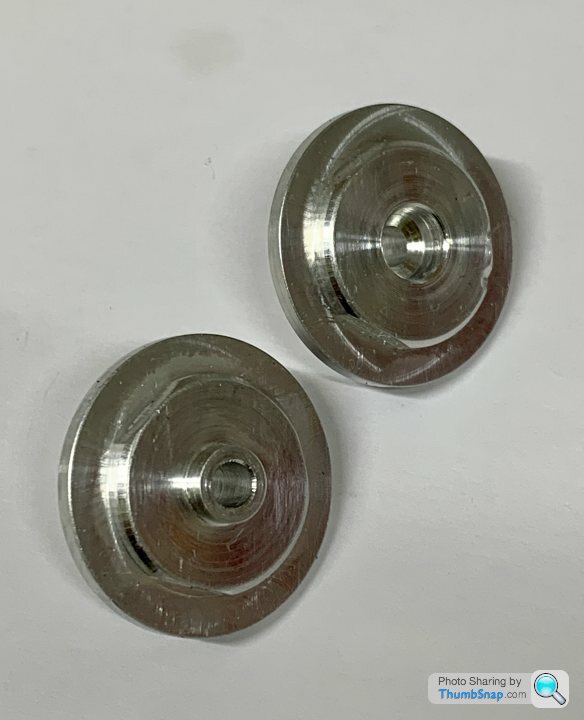
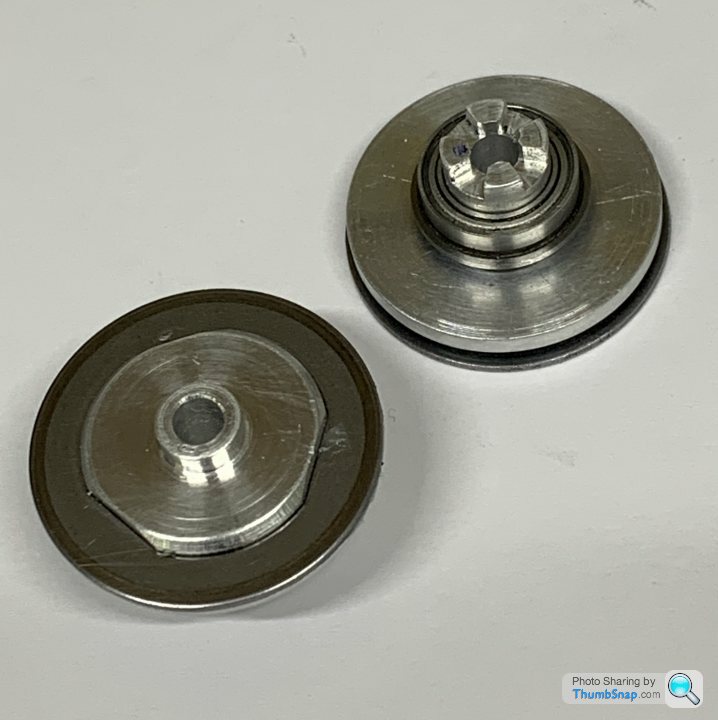
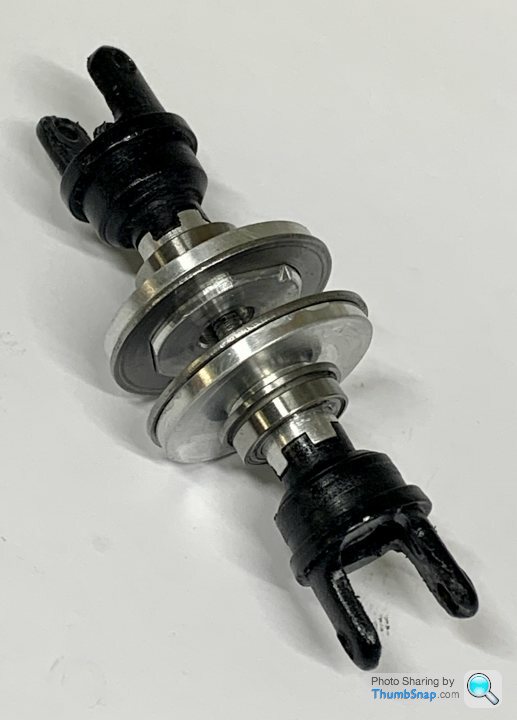
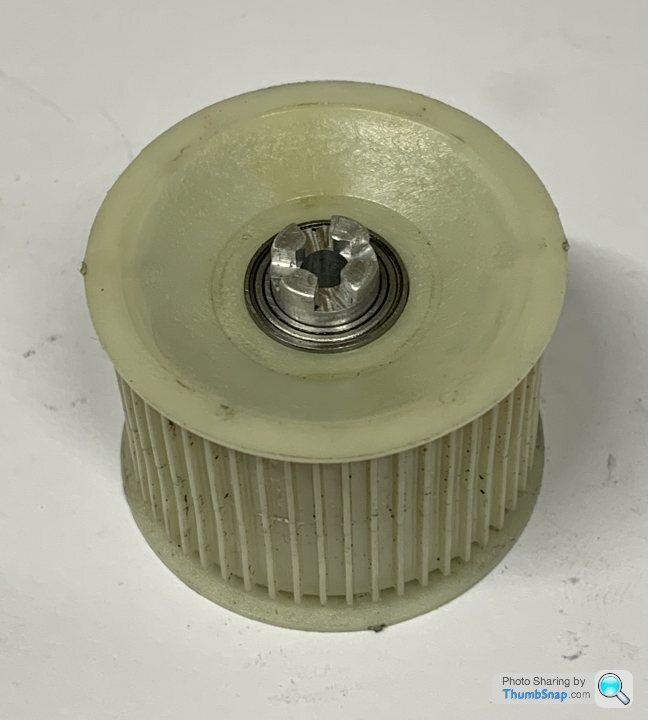
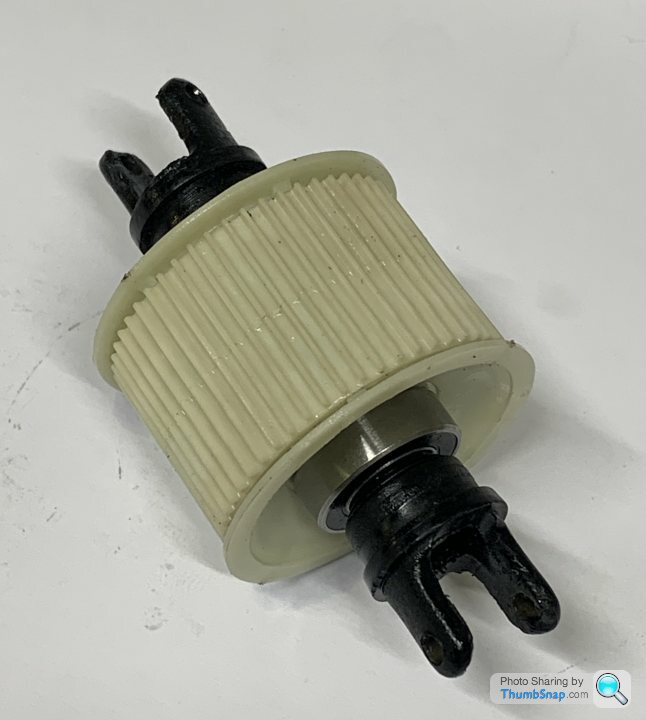
1602 forum posts | I finally got a rotary table, and so these were the first bits we (son and I) tried on it. Started by turning the spigots for the bearings and castellations: |
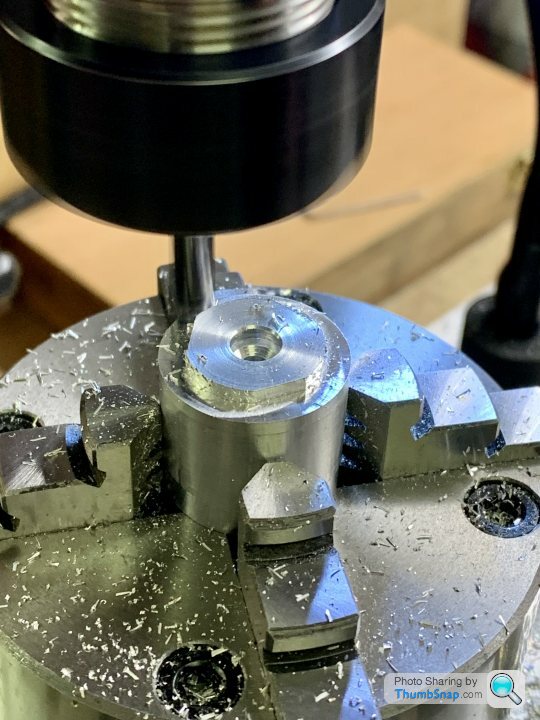
| Dr_GMJN | 12/09/2021 21:59:39 |
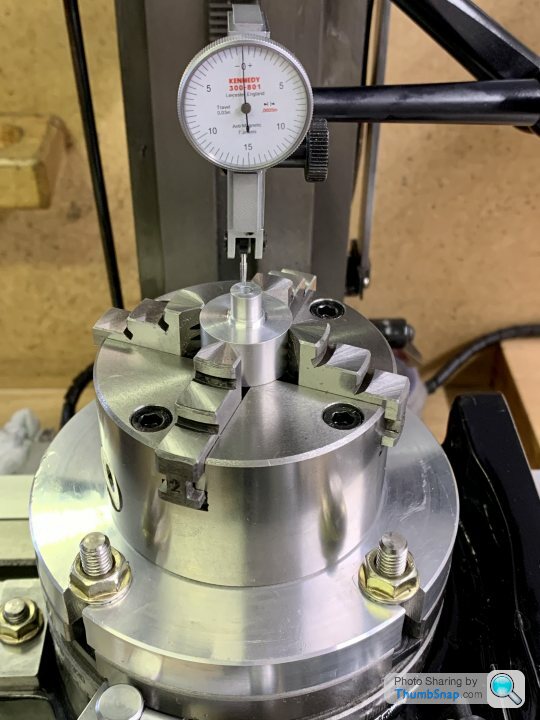
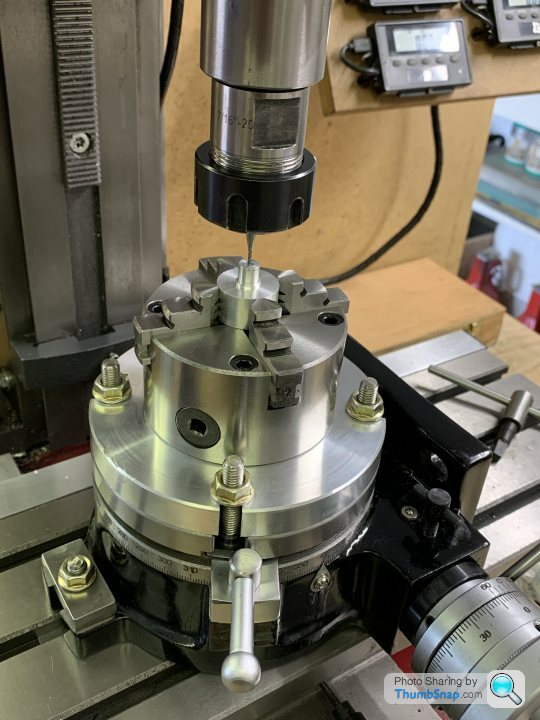
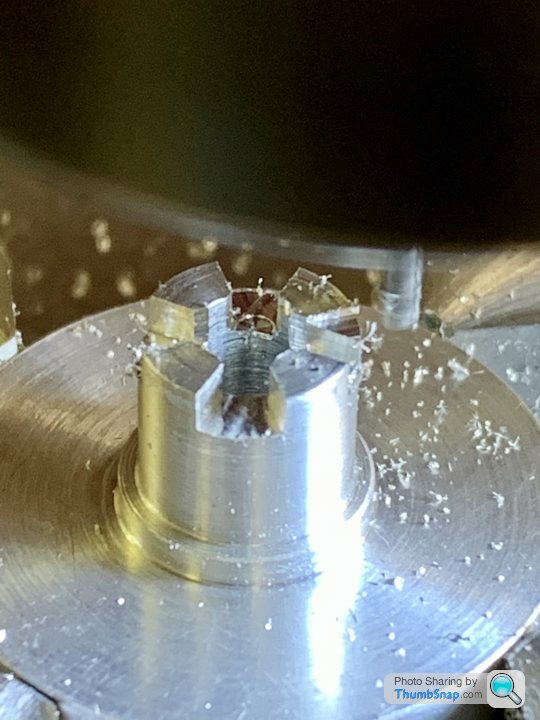
1602 forum posts | Started by turning the basic shapes, then transferred to the mill for the lobed features: Thanks for all the advice and comments. |


Please login to post a reply.
Magazine Locator
Want the latest issue of Model Engineer or Model Engineers' Workshop? Use our magazine locator links to find your nearest stockist!
Sign up to our Newsletter
Sign up to our newsletter and get a free digital issue.
You can unsubscribe at anytime. View our privacy policy at www.mortons.co.uk/privacy
Latest Forum Posts
- hemingway ball turner
04/07/2025 14:40:26 - *Oct 2023: FORUM MIGRATION TIMELINE*
05/10/2023 07:57:11 - Making ER11 collet chuck
05/10/2023 07:56:24 - What did you do today? 2023
05/10/2023 07:25:01 - Orrery
05/10/2023 06:00:41 - Wera hand-tools
05/10/2023 05:47:07 - New member
05/10/2023 04:40:11 - Problems with external pot on at1 vfd
05/10/2023 00:06:32 - Drain plug
04/10/2023 23:36:17 - digi phase converter for 10 machines.....
04/10/2023 23:13:48 - More Latest Posts...
- View All Topics
Support Our Partners


Shopping Partners
Subscription Offer

Latest "For Sale" Ads
- Reeves** - Rebuilt Royal Scot by Martin Evans
by John Broughton
£300.00 - BRITANNIA 5" GAUGE James Perrier
by Jon Seabright 1
£2,500.00 - Drill Grinder - for restoration
by Nigel Graham 2
£0.00 - WARCO WM18 MILLING MACHINE
by Alex Chudley
£1,200.00 - MYFORD SUPER 7 LATHE
by Alex Chudley
£2,000.00 - More "For Sale" Ads...
Latest "Wanted" Ads
- D1-3 backplate
by Michael Horley
Price Not Specified - fixed steady for a Colchester bantam mark1 800
by George Jervis
Price Not Specified - lbsc pansy
by JACK SIDEBOTHAM
Price Not Specified - Pratt Burnerd multifit chuck key.
by Tim Riome
Price Not Specified - BANDSAW BLADE WELDER
by HUGH
Price Not Specified - More "Wanted" Ads...
Get In Touch!
Do you want to contact the Model Engineer and Model Engineers' Workshop team?
You can contact us by phone, mail or email about the magazines including becoming a contributor, submitting reader's letters or making queries about articles. You can also get in touch about this website, advertising or other general issues.
Click THIS LINK for full contact details.
For subscription issues please see THIS LINK.
Digital Back Issues


Donate

 Register
 Log-in
Model Engineer Magazine
- Percival Marshall
- M.E. History
- LittleLEC
- M.E. Clock

ME Workshop
- An Adcock
- & Shipley
- Horizontal
- Mill

Subscribe Now
- Great savings
- Delivered to your door

Pre-order your copy!
- Delivered to your doorstep!
- Free UK delivery!
All Forum Topics > Workshop Techniques > Making Tapered Castellations in Aluminium