Member postings for Dave S
Here is a list of all the postings Dave S has made in our forums. Click on a thread name to jump to the thread.
| Thread: 180v motor not working on new control board |
| 14/01/2022 19:16:39 |
The spec sheet for the driver is fine for the motor, as SOD said. clear photos of all the wires would help. What fuse have you fitted? |
| Thread: Ways, rails and home building |
| 14/01/2022 18:08:32 |
Evening all, Further progression on my previous xy vs XZ question. I have engaged in some cardboard engineering to figure out sizes of machine, and come to the conclusion that xy and z is ok for what I want. So how to arrange the motion? Linear rails are home brew first choice, partially I suspect because they can be bought and bolted down without any requirements for super precision machining. They also run nicely, so CNC movements are smooth and fast. I think I’ll be using an old cast iron surface plate as the foundation for my new mill. I could bolt down linear rails to it, but equally I could use it as the basis for a box way. Advantage of that would be much better support for the Y saddle, but it would mean stick slip and possibly slower feed speeds. The saddle equally could be rails or box ways. I notice that Denford nova mills and Boxford VMCs seem to use traditional ways, and they seem to be popular. Thoughts from more experienced people gratefully received. Dave |
| Thread: How can I bond ABS (plastic) to NRL (rubber)? |
| 14/01/2022 17:52:14 |
Are you covering the abs with a layer of rubber, joining abs to rubber to something else? Geometry of the joint may make a difference to recommendations. Do you need the glue to be thin as possible, or is a thick glue line acceptable? Often rubber bits on plastic are 2 shot moulded - the plastic is molded the loaded into another mold and the rubber injected. The surface design of the plastic substrate and the heat assist in a bond. More info will help a better answer, but in the absence of it (cos it’s bound to be secret and “not relevant&rdquo
|
| Thread: Slowing lathe RPM |
| 11/01/2022 21:51:10 |
Also known as pie jaws, available for most sizes of chuck. Dave
|
| Thread: "Self-aligning spherical washers" for a 6in grinder with side-wobble? |
| 11/01/2022 21:36:09 |
I would probably root about and stack a number of M12 washers on it until I could get the nut to tighten. Cheap offhand grinders always have some wheel runout and wobble. The culprits are cheap pressed flanges and cheap slightly eccentric spindles mated with cheap wheels. Looks like you fixed the cheap wheels part... Screwfix sell washers, there is most likely one near you Alloy is in generic conversation usually taken to mean aluminium unless further qualified. Dave |
| Thread: That Strange Calculator Again |
| 11/01/2022 16:51:51 |
I missed the first thread - anyone got a link? |
| Thread: How are they made ? : Starrett 167 series Radius Gauges |
| 05/01/2022 19:41:44 |
Wood is generally cut with a CO2 laser, métal with an ND-YAG - massive difference in power but only slight difference in wavelength IIRC - both are IR ish - so basically super hot points of light. Dave |
| 05/01/2022 17:17:22 |
From memory something like 0.1 mm is pretty normal. They use fibres as the light delivery system. This might be interesting reading, although it is welding not cutting the tech is iirc the same I personally doubt that small radius gages are laser cut.
|
| Thread: What tool do I need? I need to measure the radius of a tiny fillet on a 90° edge. |
| 04/01/2022 20:31:59 |
Posted by John Smith 47 on 04/01/2022 18:28:24:
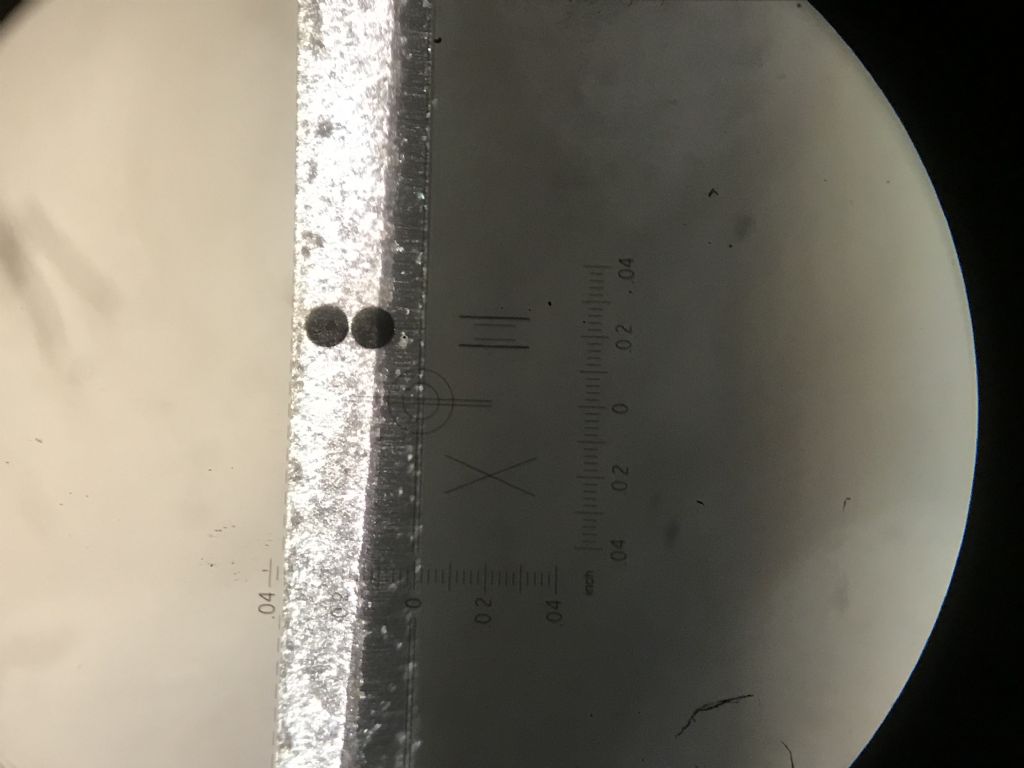
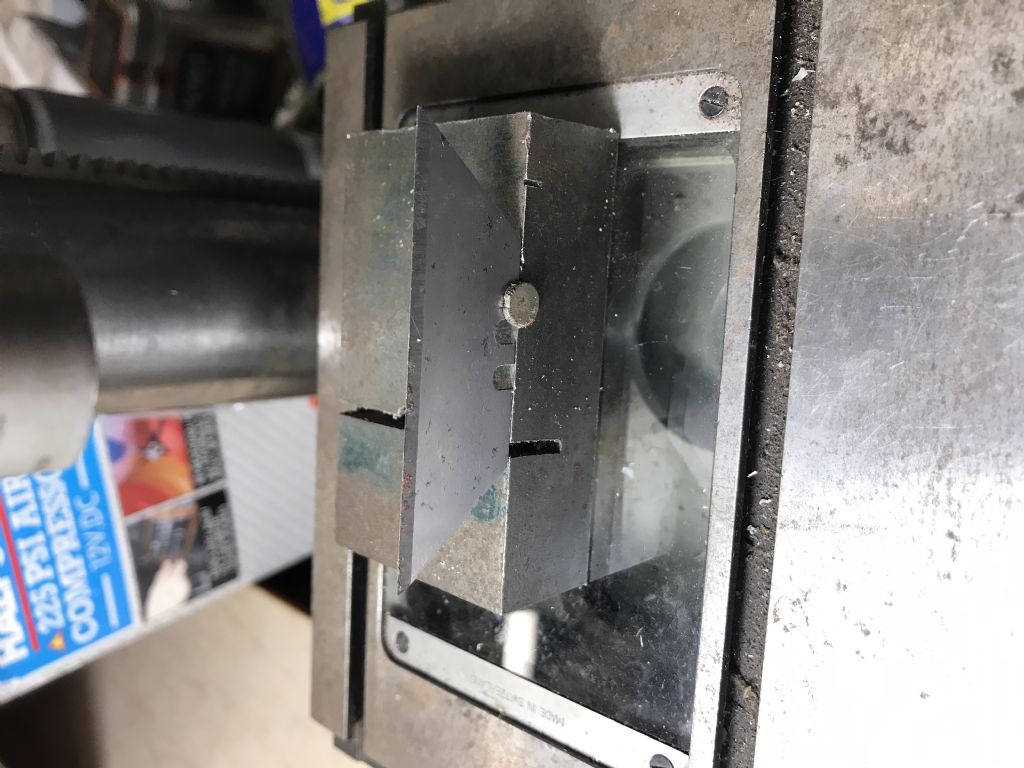
@Dave 2 Yes, interesting stuff... however to my point, is that not exactly what you would expect if errors are proportional to the distance travelled by the sensor, no? And if that is the case, then surely a smaller movement would imply smaller errors. Implicit maybe, but in the spec - not at all. I can legitimately sell you a long scale that is off by 0.05mm after the same move that a short scale would be out of spec at... Distance travelled is only one of the variables that a longer scale introduces. A longer scale is of course the most obvious one (thermal expansion). Time to move is another. There are others as well if you think about it. The main reason I tend to use my traditional Verynears is that, if Im honest, the digital ones nearly always have a flat battery However I also use them because Im not fooling myself that they are super accurate. 0.5mm is plenty for verynears, even if they do read to 0.1mm. Like most here I will often make one part and then make the mating part 'to fit'. For that as long as the first part is within 0.5mm of its nominal it very rarely matters.... In the interests of this thread I have wounded a Stanley Knife blade: I just boshed a 45ish degree 'radius' on the back edge with a diamond stone. This is the (quite poor) photo through an inspecion microscope: measurment of a radius on an edge is potentially doable in this manner, with the bonus that you can inspect the finish as well. Inspection microscopes, unlike dissection ones, have an x-y stage under them. This one is imperial - it does 1/10000" on its dials. I also have one with 0.001mm micrometers. Fixturing is not hard - there is no force. This would be adequate for instance (took it after, when I though a fixture photo would be useful, hence the upside downness of the blade): As you are planning on subbing out this work once a spec is figured out you need to also think about how you are going to inspect and reject sub standard parts. If a spec came to me saying 0.25mm radius I would look at it and think about: A: Quote high enough that the work buggered off, or paid a hansome profit for actually doing the job properly or B: just break the edge like we always do and hope no one notices... If its important enough to spec then its important enough to check. Dave
Edited By Dave S on 04/01/2022 20:32:21 Edited By Dave S on 04/01/2022 20:33:10 Edited By Dave S on 04/01/2022 20:33:51 |
| 04/01/2022 17:50:30 |
A high powered inspection microscope has a very thin field of focus. Mine is 40x IIRC, and you can 'zoom' up and down an edge and examine it in great detail by ignoring the out of focus parts. I got mine very cheap, mostly because the guy was moving to the USA and clearing out, but a similar one on ebay would probably not be that much. Ill grab soem pics later when I head out to the garage. Dave
|
| 04/01/2022 17:46:21 |
Second part to my excessivle long post;
The way *most* of these sort of devices work is based on a pair of printed circuit boards and some sensing electronics. The PCBs form a variable capacior, which is 'driven' to give an output that is proportional to the distance moved. There are many sources of errors in that system. Firstly if there is a clock used to drive things then it is probably a quartz crystal, and temperature senstive. There may be step and repeat errors in the PCB manufacture, as the battery discharges there may be an effect in the sensitivity. usually for an electronic linear measurement device (which the scale in a caliper is) there is a spec like accuracy 100 to 3000 mm -(5+5L/1000) µm
Your anacdotal assertion that your calipers, which are spec'd as +-0.02mm accurate 'seem accurate to +/- 0.01mm' is just that - a seems - unless you have actually checked it properly.
People get fooled by digital - its not any more accurate just becase the computer shows you a certain number of digits... Dave Who used to work in the field of very high precision metrology, and occasionally makes things in is garage |
| 04/01/2022 17:45:49 |
John wrote:
Yes, but in practice the accuracy of readings will entirely depend on where the inaccuracies are coming from. Whilst that may (or may not) be true without detailed knowledge of exactly how the thing works it is impossible to say where any inaccuracies start. John wrote:
In my experience, if I zero my current digital calipers, and move them to 10mm and back, I would still expect it to read either +0.01, 0.01 or -0.01. Yes, after a large number of measurements it is more likely to no longer still say 0.00, (albeit in my experience not by more than 0.01 or so). i.e. In my experience opening and closing the calipers enough times will eventually create new errors that become obvious when the device closed and no longer reads "0.00mm".
John wrote:
But if opening and closing the calipers multiple times since the last re-zeroing does NOT create new errors, I find that surprising. Either way, in this case are we seriously expecting that if I zero the device and move it by exactly 0.1mm that it will immediately read as much as "0.16mm" or as little as "0.04mm"? Not exactly. I am saying that the range of possible readings it could give and be within the spec is 0.04mm to 0.16mm. Decent calipers almost never need their zero resetting. It more likely to be reset because you are using it for some other purpose than absolute measurement - for instance I have a target sized shaft so I zero on that and now my digital caliper means I dont have to think about how much to take off (apart from the should I divide it by 2 for this lathe cross slide John wrote:
Personally my best guess is that error come from two effects
Guessing is a sure way to be wrong on average 50% of the time... It is very unlikely that total travel distance makes any difference to the accuracy.
Split post because apparently I typed to much...
Edited By Dave S on 04/01/2022 17:46:56 |
| 04/01/2022 12:47:36 |
To answer the question properly you need to do a gage r and r study. Typically an accuracy spec which doesn’t include a %of length term is an absolute spec - I.e. it will be within the range no matter the length moved. Accurcy and repeatability are not the same thing. So zero, move 0.1mm and move back 0.1mm would I expect report 0, but absent any spec for repeatability it could be +-0.06 and not be out of spec - so you would have no grounds for complaining if it did show 0.05 for instance
|
| 04/01/2022 12:14:15 |
0.1+-0.06 most likely
|
| Thread: Adjusting the horizontal mill |
| 03/01/2022 10:49:20 |
How is the feed taken off? Could you change the spindle pulley and a subsequent feed pulley to give a more appropriate ratio? Dave |
| Thread: XY Table, or XZ gantry? |
| 28/12/2021 13:10:25 |
I am planning ER16 direct in spindle. The 150 clearance I’m thinking is from the cutter end of a typical length cutter. I suspect I’ll usually be way less than that in actual stock height. Main reason I’m looking at this is I keep having a “just too small” moment with my Proxxon based machine. it has travels of 120X, 45 Y and 70 Z, and I keep running into the limits on Y travel. Having a spindle overhang for a 150 travel seems like a long cantilever, hence thinking about gantries. Ive learnt a ton since digging out the Proxxon, and think a slightly larger machine would be good. Will probably then sell the proxxon to make space for the new one. Not sure why I need 200mm clearance to machine a 100mm cube? Dave |
| 27/12/2021 20:41:41 |
Oops, forgot some fundamental basics… This is for a CNC milling machine. Small (relatively) parts, but in most metals, including stainless, aluminium, possibly some titanium, brass/ bronzes, “normal” steels. I think maximum metal stock size of 100mm cubes is all I’ll ever need for this machine, and may design it for that, but sizing to 150 at design time is a lot cheaper than building another machine in a bit. Spindle upto 10mm diameter cutters. I think the increase in footprint is not an issue for xy vs y only movements. I can make a z only gantry as rigid as a short XZ one - increased material cost but that’s ok. Dave
|
| 27/12/2021 19:43:16 |
Planers XZ gantry makes perfect sense, They only take a cut on the Y, so the X and Z can be locked during the cut. I think XY might make more sense for a mill, but it does cost in footprint and materials, so cheapest build would be XZ (just thinking why most cheap eBay specials are XZ)
Dave |
| 27/12/2021 18:32:37 |
Contemplating a small build. I think a fixed gantry over a 200 x 200 table feels like a good rough size. Question is: Option 1 - fix the Z in the middle of the gantry - so it moves up and down but not side to side. This means the gantry supports have to be wider apart, but the z is on a single slide and xy is fairly simple to arrange. Does mean the X motor has to move with the table. or: Option 2 - go XZ in the gantry, which means the table only moves in Y but the spindle is 2 slides away from the fixed gantry, and the z motor has to move. Option 1 increases the footprint of the machine, but for a small machine like this I think it should give a better result. Comments welcomed. Dave
|
| Thread: Blank Tee Nuts. |
| 24/12/2021 10:57:30 |
They don’t need to be t shaped. I would just get some hot rolled bar of appropriate width and lop a chunk off. Dave |
Want the latest issue of Model Engineer or Model Engineers' Workshop? Use our magazine locator links to find your nearest stockist!
Sign up to our newsletter and get a free digital issue.
You can unsubscribe at anytime. View our privacy policy at www.mortons.co.uk/privacy
- *Oct 2023: FORUM MIGRATION TIMELINE*
05/10/2023 07:57:11 - Making ER11 collet chuck
05/10/2023 07:56:24 - What did you do today? 2023
05/10/2023 07:25:01 - Orrery
05/10/2023 06:00:41 - Wera hand-tools
05/10/2023 05:47:07 - New member
05/10/2023 04:40:11 - Problems with external pot on at1 vfd
05/10/2023 00:06:32 - Drain plug
04/10/2023 23:36:17 - digi phase converter for 10 machines.....
04/10/2023 23:13:48 - Winter Storage Of Locomotives
04/10/2023 21:02:11 - More Latest Posts...
- View All Topics
- Reeves** - Rebuilt Royal Scot by Martin Evans
by John Broughton
£300.00 - BRITANNIA 5" GAUGE James Perrier
by Jon Seabright 1
£2,500.00 - Drill Grinder - for restoration
by Nigel Graham 2
£0.00 - WARCO WM18 MILLING MACHINE
by Alex Chudley
£1,200.00 - MYFORD SUPER 7 LATHE
by Alex Chudley
£2,000.00 - More "For Sale" Ads...
- D1-3 backplate
by Michael Horley
Price Not Specified - fixed steady for a Colchester bantam mark1 800
by George Jervis
Price Not Specified - lbsc pansy
by JACK SIDEBOTHAM
Price Not Specified - Pratt Burnerd multifit chuck key.
by Tim Riome
Price Not Specified - BANDSAW BLADE WELDER
by HUGH
Price Not Specified - More "Wanted" Ads...
Do you want to contact the Model Engineer and Model Engineers' Workshop team?
You can contact us by phone, mail or email about the magazines including becoming a contributor, submitting reader's letters or making queries about articles. You can also get in touch about this website, advertising or other general issues.
Click THIS LINK for full contact details.
For subscription issues please see THIS LINK.
Model Engineer Magazine
- Percival Marshall
- M.E. History
- LittleLEC
- M.E. Clock
ME Workshop
- An Adcock
- & Shipley
- Horizontal
- Mill
Subscribe Now
- Great savings
- Delivered to your door
Pre-order your copy!
- Delivered to your doorstep!
- Free UK delivery!
 I would look at a SikaFlex. Not going to set in 5mins tho. If quick set is actually required then an impact modified cyanoacrylate is where I’d start.


 Register
 Log-in


