Forum sponsored by:

Slide valve - which way?
| GaryM | 24/05/2014 16:32:51 |
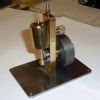 314 forum posts 44 photos | Hi guys, Finally managed to get my S50 running today (at long last they all say). However, I have a very basic question that I've tried to figure out myself without complete success. Which orientation should the slide valve have on the valve spindle. The first pic below is what I think is the correct orientation and the one that I used and it ran. Should it have been like the second pic? Just looking for confirmation. Most of you can probably answer this. Thanks Gary (now making swarf again)
|
| FMES | 24/05/2014 18:05:38 |
| 608 forum posts 2 photos | first is the correct way Gary, with the lands of the valve being machined to obtain the correct valve opening event. |
| Neil Wyatt | 24/05/2014 18:35:13 |
 19226 forum posts 749 photos 86 articles | Not immediately easy to answer, as it may run either way, as long as both admission ports aren't uncovered at the same time, but you will need a different setting of the eccentric. Probably the top one, but without knowing dimensions of ports and valve cavity I can't be sure. It will effect events even if the cavity is square, as in the top arrangement you will get much earlier cutoff and more expansive working. It may be that it runs better on air with the second arrangement, and on steam with the first If the cavity is rectangular, the answer is easy as I think Stuart usually make the valve cavity the same width as the ports. Can you show a picture showing both the port face and the valve cavity? Or give some measurements? Neil |
| GaryM | 24/05/2014 18:37:20 |
314 forum posts 44 photos | Thanks Lofty, I thought that was probably the case. It is odd that the drawings and even the text from ME that I've been following don't actually tell you which way is correct and it will fit both ways. I couldn't try it the other way to see if the engine would run unless I filed the slot in the valve, although I suspect that it wouldn't. Gary |
| GaryM | 24/05/2014 18:57:26 |
314 forum posts 44 photos | Hi Neil, You posted while I was replying to Lofty. Valve cavity is 9/32" x 9/32". Valve is 13/32" in one direction, 1/2" in other. Inlet ports are 7/16" to outer edges, 9/32" to inner edges. I would have posted a pic of the plans but camera battery has just died. I'll post one later for info. It might help other beginners to visualise it. Gary |
| Neil Wyatt | 24/05/2014 19:15:03 |
19226 forum posts 749 photos 86 articles | Hi Gary, As Lofty say, the top one, otherwise there will be a time when both inlet ports are open, rather than both closed. Neil
|
| GaryM | 24/05/2014 19:22:49 |
314 forum posts 44 photos | Yes Neil, they were both open with second option. Unfortunately this wasn't enough of a clue to a newbie. Gary |
| thomas oliver 2 | 24/05/2014 19:43:28 |
| 110 forum posts | Instructions from Stuarts -- First set valve for equal port opening. Place piston on top dead centre. Loosen eccentric on shaft and rotate in the direction the engine is to run until the port is just cracked open, then lock up grubscrew. |
| Neil Wyatt | 24/05/2014 20:05:58 |
19226 forum posts 749 photos 86 articles | > just cracked open By "the thickness of a tram ticket" - a bit hard on those constructors in Edinburgh. Neil |
| GaryM | 24/05/2014 20:13:26 |
314 forum posts 44 photos | Hi Thomas, Thanks for the reply. There is even more detail in the article from ME that I've been following, but you can follow those instructions with both orientations and still not know which is correct. I think Lofty and Neil have answered the question. For the sake of completeness for others who may read later here are the drawings. Gary
|
| JasonB | 24/05/2014 20:26:06 |
 25215 forum posts 3105 photos 1 articles | Its all explained here, the 1/2" is the critical dimension , so number 1 is correct. If you play with the PDF numbers you will get all 10 parts 1-10
Edited By JasonB on 24/05/2014 20:27:39 |
| GaryM | 24/05/2014 21:09:10 |
314 forum posts 44 photos | Thanks Jason. Those are the articles I've been using, obviously it wasn't clear enough for me Gary Edited By GaryM on 24/05/2014 21:09:49 |


Please login to post a reply.
Magazine Locator
Want the latest issue of Model Engineer or Model Engineers' Workshop? Use our magazine locator links to find your nearest stockist!
Sign up to our Newsletter
Sign up to our newsletter and get a free digital issue.
You can unsubscribe at anytime. View our privacy policy at www.mortons.co.uk/privacy
Latest Forum Posts
- *Oct 2023: FORUM MIGRATION TIMELINE*
05/10/2023 07:57:11 - Making ER11 collet chuck
05/10/2023 07:56:24 - What did you do today? 2023
05/10/2023 07:25:01 - Orrery
05/10/2023 06:00:41 - Wera hand-tools
05/10/2023 05:47:07 - New member
05/10/2023 04:40:11 - Problems with external pot on at1 vfd
05/10/2023 00:06:32 - Drain plug
04/10/2023 23:36:17 - digi phase converter for 10 machines.....
04/10/2023 23:13:48 - Winter Storage Of Locomotives
04/10/2023 21:02:11 - More Latest Posts...
- View All Topics
Support Our Partners


Shopping Partners
Subscription Offer

Latest "For Sale" Ads
- Reeves** - Rebuilt Royal Scot by Martin Evans
by John Broughton
£300.00 - BRITANNIA 5" GAUGE James Perrier
by Jon Seabright 1
£2,500.00 - Drill Grinder - for restoration
by Nigel Graham 2
£0.00 - WARCO WM18 MILLING MACHINE
by Alex Chudley
£1,200.00 - MYFORD SUPER 7 LATHE
by Alex Chudley
£2,000.00 - More "For Sale" Ads...
Latest "Wanted" Ads
- D1-3 backplate
by Michael Horley
Price Not Specified - fixed steady for a Colchester bantam mark1 800
by George Jervis
Price Not Specified - lbsc pansy
by JACK SIDEBOTHAM
Price Not Specified - Pratt Burnerd multifit chuck key.
by Tim Riome
Price Not Specified - BANDSAW BLADE WELDER
by HUGH
Price Not Specified - More "Wanted" Ads...
Get In Touch!
Do you want to contact the Model Engineer and Model Engineers' Workshop team?
You can contact us by phone, mail or email about the magazines including becoming a contributor, submitting reader's letters or making queries about articles. You can also get in touch about this website, advertising or other general issues.
Click THIS LINK for full contact details.
For subscription issues please see THIS LINK.
Digital Back Issues


Donate

 Register
 Log-in
Model Engineer Magazine
- Percival Marshall
- M.E. History
- LittleLEC
- M.E. Clock

ME Workshop
- An Adcock
- & Shipley
- Horizontal
- Mill

Subscribe Now
- Great savings
- Delivered to your door

Pre-order your copy!
- Delivered to your doorstep!
- Free UK delivery!
All Forum Topics > Beginners questions > Slide valve - which way?