Forum sponsored by:

Help! What is going on?
| John Gray 7 | 22/07/2022 22:06:54 |
| 12 forum posts | Woodturner taking a sideways step into metalwork. I have started a Stuart S50 to enjoy the journey and hopefully learn along the way. I have watched all the YouTube stuff and read the Tubal Cain write ups and all was going swimmingly well, my piston moves as it should when I feed air from my airbrush compressor to each port. I completed the steam chest and the cover without too much drama and then had a think about the drilling and tapping of these two components. I found this fiddly and tried bolting the cover to the chest through the steam inlet hole in the cover so as to drill both cover and chest at the same time. This didn’t work out well, so tried using toolmaker vices to achieve the same, but didn’t like that either. In the end I used an angle plate and a height gauge to mark the centres for drilling on the cover, then centre popped where the lines crossed. I used loctite to stick the cover onto the chest and left it overnight. On my return I was not happy with the position of the cover, it seemed to have moved whilst the glue did it’s thing, and so I thought I would remove it, reposition and glue it again. I used a small jewellery type soldering flame to apply heat to the castings and eventually knocked them apart. I re glued them and returned to it again tonight. It was in the right position this time and so I started to drill the 4 7BA clearance holes in the corners. That is when I found that the castings had gone “glass hard” and a drill bit wouldn’t touch them! In desperation I used some all carbide tiny burrs normally used for artistic carving in hard wood, to see if I could break the surface before drilling further. This worked to get a start in the metal, but I still broke 2 drills inside the castings which are now to all intents ruined, and I shall have to reorder new ones and start again. The castings were not hard and machined well in both lathe and mill prior to me using heat to break the loctite. What has happened here, and how can I avoid it in the future. Assuming I have somehow heat treated it, can it be annealed? Can loctite be undone without heat? Sorry to ramble on but I’m a bit gutted as I had invested quite a bit of time in machining the steam chest and it is now ruined with broken drill bits embedded in it. |
| noel shelley | 22/07/2022 22:25:02 |
| 2308 forum posts 33 photos | If the heating was done gently the loctite should have given up long before the castings went hard. IS it possible that the castings were already hard ? Spark erosion will remove the broken drills, if the castings were made by Bridport foundry, (stuarts ) then try contacting them for help or advice. Good Luck, Noel. |
| JasonB | 23/07/2022 07:08:34 |
 25215 forum posts 3105 photos 1 articles | Were you using carbide tool in the lathe as they will have coped with the hard spots easier than hss drill bits You would have to have got the cover red hot and cooled it quckly to make it hard which I doubt you got anywhere near |
| Joseph Noci 1 | 23/07/2022 08:00:55 |
| 1323 forum posts 1431 photos | Thursday I used my small cnc mill to do some tapping - many M3 tapped holes in Al. When done I used the mill in manual mode to drill some 2mm holes in mild steel plate - Like John, could not drill the holes - the mild steel was as hard as Hades...I snapped one 2mm drill in the process. Tried to drill the same hole in the Drill press and it worked a charm...The Mill spindle was left in reverse and I did not see it.. Joe |
| JA | 23/07/2022 09:34:24 |
 1605 forum posts 83 photos | John I am not sure what you are doing or what you have done. I would not try to remove the broken drill or anneal the casting. Buy a new casting from Stuarts. They are more than happy selling spares. The castings I have had from them have been good. The only problem may be the delivery time since bits may not be on the shelf. You do not say what machine tools you have but if you have a "half good" verticle mill I have would jig bored the holes in the cylinder, steam chest and cover instead of drilling through from an existing hole pattern in another part (others will disagree). JA |
| SillyOldDuffer | 23/07/2022 11:12:00 |
| 10668 forum posts 2415 photos | Always three factors to check:
Four, if Process is counted, but process is generally a combination of the first three. The material is cast-iron. It's famous for developing a hard outer skin if chilled rapidly, therefore a suspect. As pointed out, unlikely in this case because the iron would have to be heated close to red-heat and then rapidly chilled, perhaps by plunging into cold water. Most Loctites break at about 200°C, well below the temperature needed to chill cast-iron. Most metals work-harden to some extent but I'm not aware it's an issue with cast-iron The tool presumably a twist-drill. Drills that perform adequately in wood may not last long on metal. Tool-steel drills blunt rapidly if allowed to get too hot, and a cooling fluid is almost essential. Metalwork, and most woodwork, is done with HSS drills. They're tougher and have three to five times the heat performance of plain tool-steel; last longer and are harder to blunt by accidental abuse. The performance of a twist-drill also depends on the accuracy of the cutting edges. The drill has to be accurately ground to a symmetric geometry. Cheap drills are often poorly ground, and reliable brands sometimes drop the ball. Possibly an out-of-adjustment machine produces a number of inaccurately ground drills before the operator corrects the problem. Needing a few in a hurry I took a punt on a large but cheap box of assorted small drills. The accuracy of the cutting edges varies from good to awful, so they have to be inspected with a loupe before using them. Rejects are binned immediately. Better drills give longer service but cause nothing but trouble when blunt. They are likely to work-harden the material, or wander. At the first sign of poor cutting, stop and make sure the drill is still sharp (loupe), replacing if necessary. Be ruthless; twist drills are cheaper than ruined work! Performance drilling metal is usually improved by a cutting fluid, but not needed on cast-iron once the chilled skin is breached. Solid carbide drills are available for hard materials. Operator error includes things like drilling too tentatively or too aggressively, perhaps getting RPM and feed-rate wrong. Joe mentions running in reverse! Even if noticed quickly, this is an excellent way of blunting drills and work hardening the metal. It can ruin a good new drill in a few minutes. You can guess how I know, blush. Another cause of rapid blunting is not clearing swarf from the hole. Mincing previously cut soft metal rapidly blunts edges and particles of hard cast-iron skin are a brutal abrasive. More common I guess is persisting with a drill as it gradually grows blunt. Once the edge starts to go, drills blunt rapidly, especially cheaper ones. Misjudging when to use cutting fluid is another problem: lubricates and cools, and applied vigorously washes swarf away too. Often as not the difference between a beginner and an expert is the time taken to realise what's wrong. Beginners are inclined to plough on regardless, whilst experienced folk realise something is wrong, and, having seen it before, stop and adjust before trouble escalates. Beginners suffer more bad luck than most! I like Joe's suggestion. If not, I suspect not realising the drills are blunt, either because they were too cheap in the first place, or damaged by operator error. I'm self-trained and it was very noticeable how the 'quality' of my tools magically improved as I learned how to use them properly. I reckon I'm clumsier than average, and perhaps the effect is less obvious to talented people! Anyway, might explain why this job went wrong even though John's method sounds OK. Unless the cast-iron was blasted up to red-heat! Dave
|
| JA | 23/07/2022 11:37:52 |
1605 forum posts 83 photos | To re-iterate Dave. Buy the best drills you cannot afford. Just a thought about the hardness of the iron. It may have nothing to do with chilling but everything to to do with Loctite. Cast iron can be (I would say is but others may disagree) porous. If the liquid Loctite is drawn into the iron it will set hard. This could behave like a chilled area. Why are most "beginners' questions" so interesting. It beats the dreaded "tea room" JA |
| John Gray 7 | 23/07/2022 12:30:17 |
| 12 forum posts | Some excellent advice here I think, and I thank you all. Certainly the casting was not heated to any amount that was any where near glowing. It is true I think that up to that point, all tooling was carbide, although I do use HSS s9metimes. I’m sure 5hat I have persisted too long with a blunt drill, and will be mindful of this on the future. The drills that broke were HSS offerings from Drills UK, but I also tried Presto bits in a different size without result. All bits were brand new at 5he time of use. In the future I shall stop immediately and check the end with a loupe. Seems so obvious now and I have learned from this journey. I shall talk to Stuart’s next week and get replacement parts ordered. Spark Erosion eh? I googled it. Never heard of such a process before, looks to be an offering from the Hogwarts school of clever things! Thank you to all. |
| Howard Lewis | 23/07/2022 12:51:23 |
| 7227 forum posts 21 photos | Spark erosion is often used in indiustry to remove broken tooling from a casting. Who would want to scrap cylinder block because of a broken tap! It is a very effective process. Small home made spark erosion machines have been demonstrated at Model Engineering shows form time to time. Faced with a broken drill or tap that cannot be removed, I think what a useful device they are! Howard |
| JasonB | 23/07/2022 13:06:52 |
25215 forum posts 3105 photos 1 articles | Posted by John Gray 7 on 23/07/2022 12:30:17:
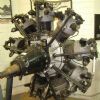
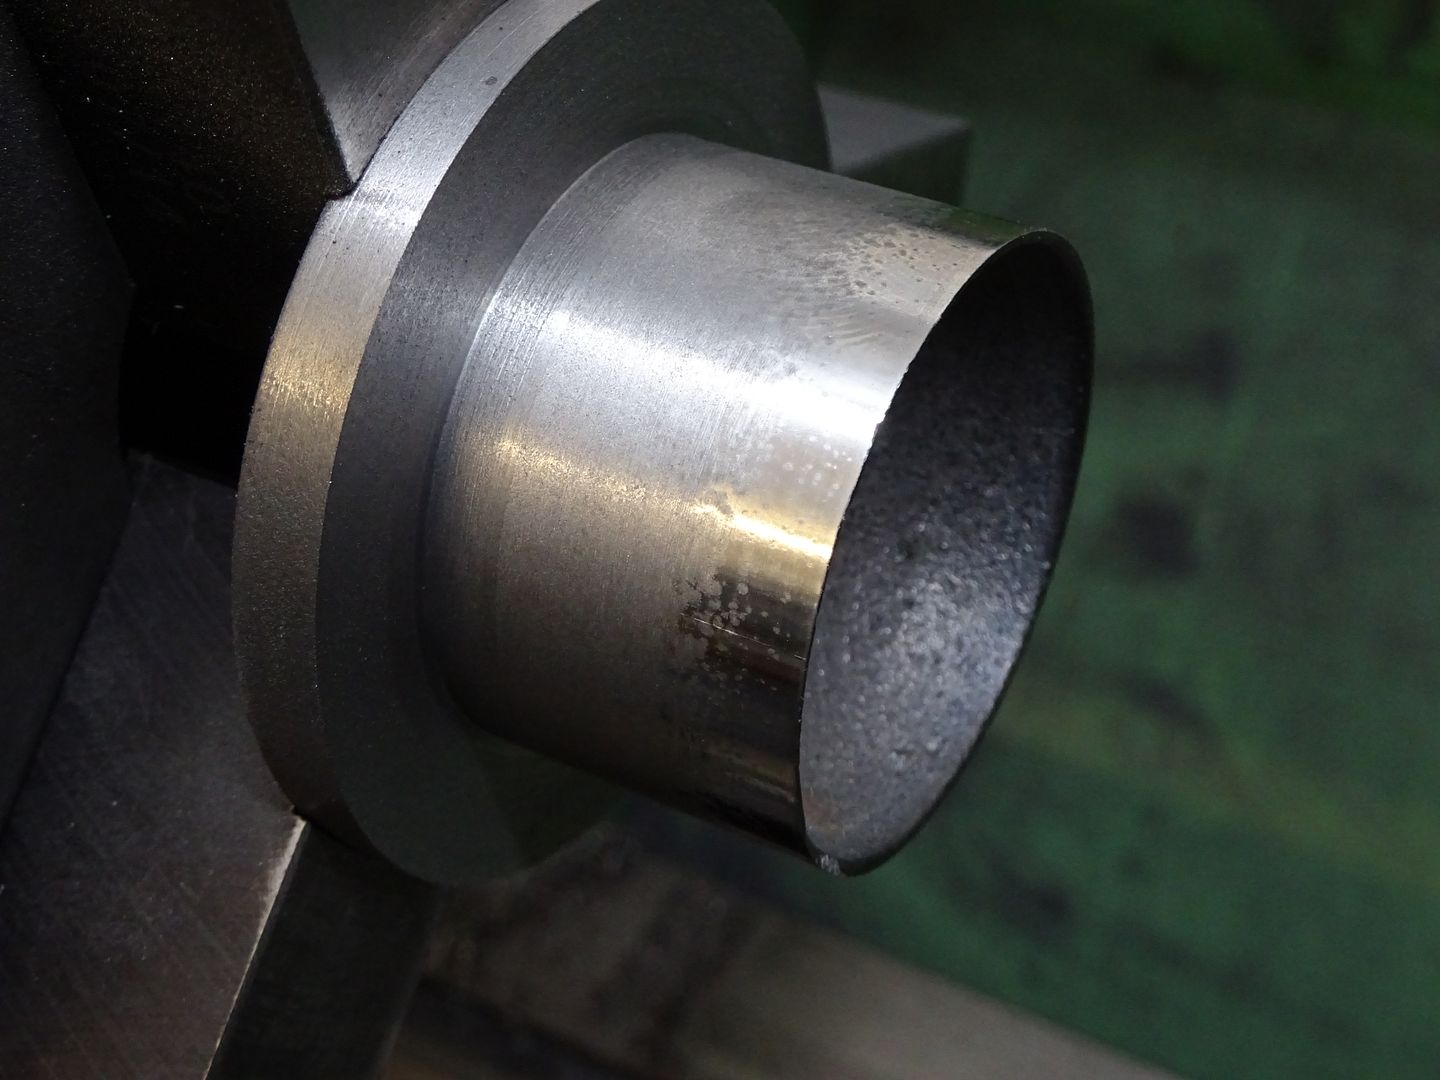
It is true I think that up to that point, all tooling was carbide, although I do use HSS s9metimes. That could well be it, you can often see the harder areas after machining with carbide as they have a much brighter look to them more like steel as can be seen in this picture where the thin edge of the piston has cooled quickly and chilled the iron casting.
|
| John Gray 7 | 23/07/2022 16:16:11 |
| 12 forum posts | Thank you JasonB, that is exactly the look my casting has. The surface is best described as “mottled”, in appearance , although the surface is flat. All surfaces of this casting were machined prior to this part of the task so there was not any scale remaining. Even the gland part was drilled and tapped with HSS without any drama, and also the 70 thou hole at the back that I had anticipated would be a problem, but in the event was not. Interestingly these of course were drilled at 90 deg to the problem surfaces. Don’t know if this is significant or not. I was struggling to understand why the iron was hard after it had been heated. Perhaps the answer is that it was hard before heating it! I shall talk to Stuart’s next week and have another go. Thank you again. |
| not done it yet | 23/07/2022 16:57:02 |
| 7517 forum posts 20 photos | If you are not sure if a casting is chilled (and also, if you are sure) heat to red heat and cool very slowly. Leaving in the embers of the fire/heating furnace to cool overnight would ensure softened castings by the next day. I have used my ‘lectric kiln for such duties in the past. Weights from sash windows (often very chilled items) are recoverable, for machining, in this way. As an aside, don’t expect drills, previously used on timber, to still be perfect for steel. They can become blunted sufficiently to make them a pain to cut steel - they don’t supply carbide tipped cutters for no good reason! Drilling chipboard or other man-made items soon dulls cutting edges because of the formaldehyde based glue used in its manufacture. Most timbers are not too bad - but that definitely excludes teak and iroko. |
| Jon Lawes | 23/07/2022 17:00:30 |
 1078 forum posts | Between my friends and I we have had quite a few chilled castings from Stuart. They have always been happy to replace, but at the moment they are very slow to respond, don't tell you when a casting is delayed (always blaming the foundry) and generally I avoid dealing with them. |
| noel shelley | 23/07/2022 17:34:09 |
| 2308 forum posts 33 photos | John, Howard has also mentioned spark erosion, I have one I made afew years ago, just the tool to fix your problem ! Jon, they can't blame the foundry, THEY are the foundry, Bridport Foundry ! Noel. |
| Ramon Wilson | 23/07/2022 18:28:54 |
 1655 forum posts 617 photos | Hello John I'm a bit late for the parade on this one but reading through your first and second posts leads me to thinking that possibly the drilling speeds were too fast for cast? If the steam chest/cover were machined beforehand - presumably with HSS - then the hard spots would have been quite noticeable at that point. Cast at the best of times, needs a slow cutting speed with HSS so it's easy to overdo this on a drill if you cannot get the revs down. It's a self exacerbating exercise - too higher speed (RPM) leads to friction, leads to heat build up, leads to cutting edge degrading requiring more downward pressure leading to the whole thing repeating to such an extent the material hardens and consequently repeating itself at a rapid rate That said obviously a hard surface will kick the whole thing off quite rapidly too. You may have the potential to save your pieces John - if it's possible to set the steam chest up in the mill and drill from the other side on the same coordinates. Sometimes doing this will loosen a broken drill and allow the hole to be reclaimed. I don't know what the bottom speed is on your drill if you were using a drill press but on my Fobco it's 400 RPM - usually way too fast in such a situation as you have. Starting a hole with much lower speed under control of a mill is definitely the way to approach this. Use one part as a drill guide to spot the other - drill separately. I've had the odd hard spot to deal with over the years - if it's really hard then it's a devil to get over but most times, though not all, reducing rotational speed - considerably - will get you over the issue Hope that helps some Good luck with it Tug |
| JasonB | 23/07/2022 18:34:17 |
25215 forum posts 3105 photos 1 articles | Ramon, you missed this bit about using carbide tooling to do all machining before drilling which is what I suspected in my first post "It is true I think that up to that point, all tooling was carbide, although I do use HSS s9metimes." Subsequent comments about bright areas on the machined cast surfaces would seem to confirm chilled castings |
| Ramon Wilson | 23/07/2022 22:55:48 |
1655 forum posts 617 photos | Ah yes I did Jason, but was mislead by Johns post that said ..... All surfaces of this casting were machined prior to this part of the task so there was not any scale remaining. Even the gland part was drilled and tapped with HSS without any drama, and also the 70 thou hole at the back that I had anticipated would be a problem, but in the event was not. I certainly agree that shiny, bright areas usually indicate hard spots but I would still have another go if possible using a newly ground drill at much - much - lower speed than would usually be considered. There's nothing to lose - if the casting has been spoiled so be it but it's worth trying to drill through at a slower pace just to try to establish if speed was the culprit or not - who knows it might be reclaimable. It's a personal view of course but I do think many machine cast iron at far to high cutting speeds, carbide or HSS - my 'little book' shows 50-60 FPM for HSS but I would say for the most part I'm machining around 40 FPM. One things for sure if it is chilled then its chilled - it could be annealed and retried from the back if so, depends if the wait time from Stuarts is too long to bear. I can't think of a better reason for making things from nice, homogenous, continuous cast iron material and getting the JBW out |
| JasonB | 24/07/2022 07:09:15 |
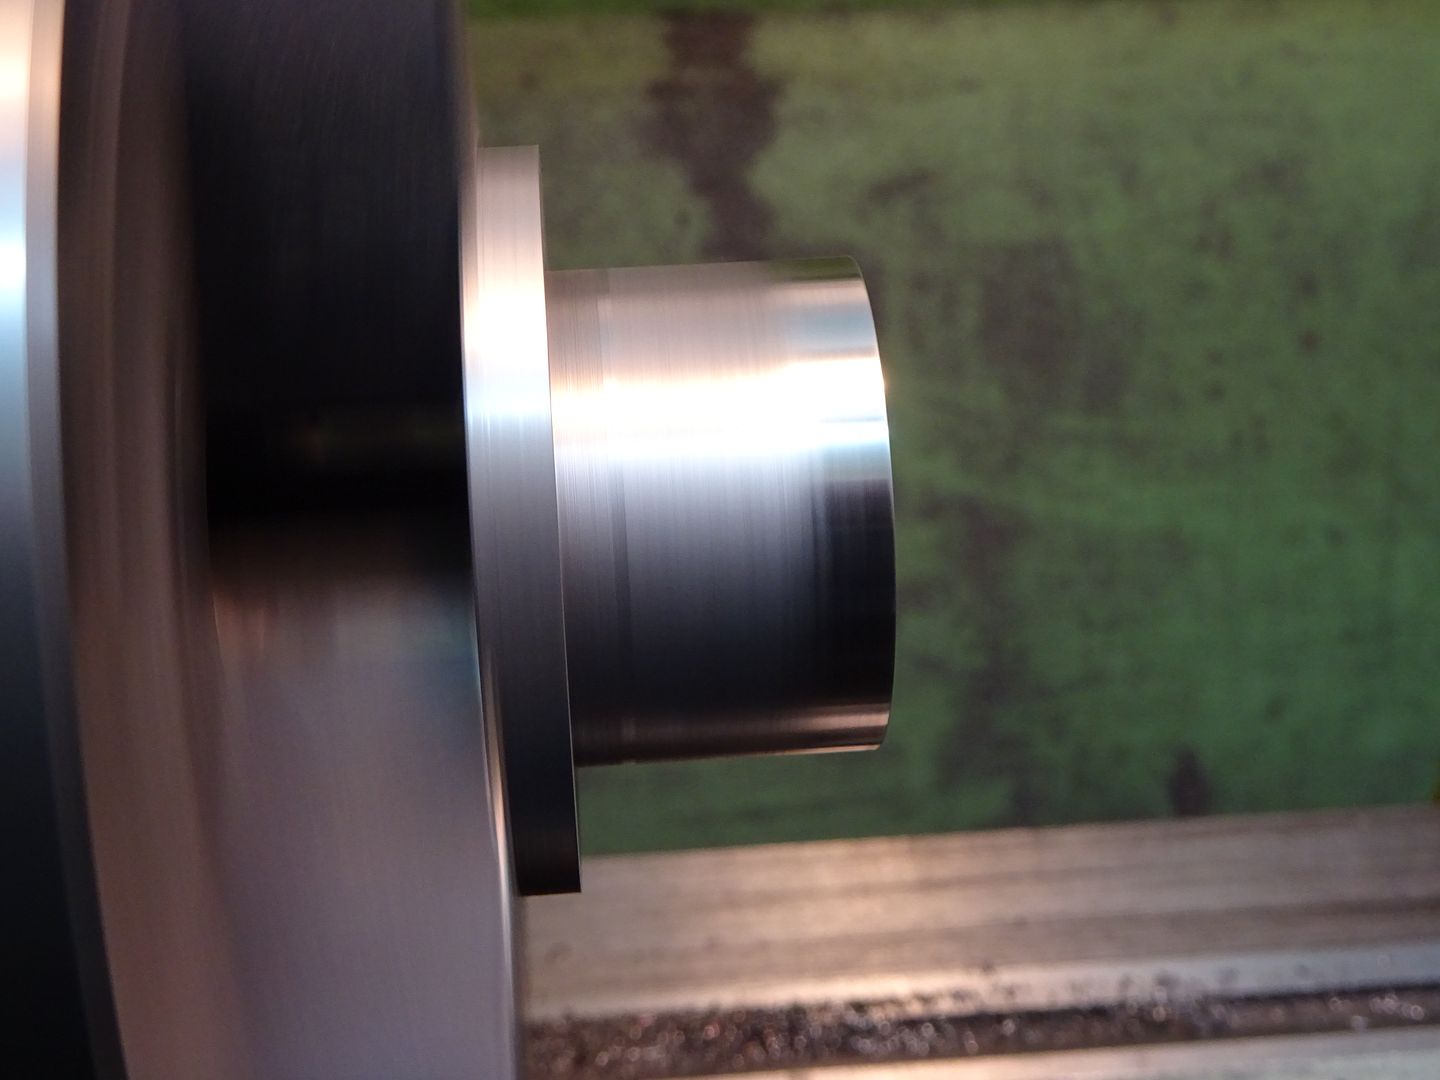
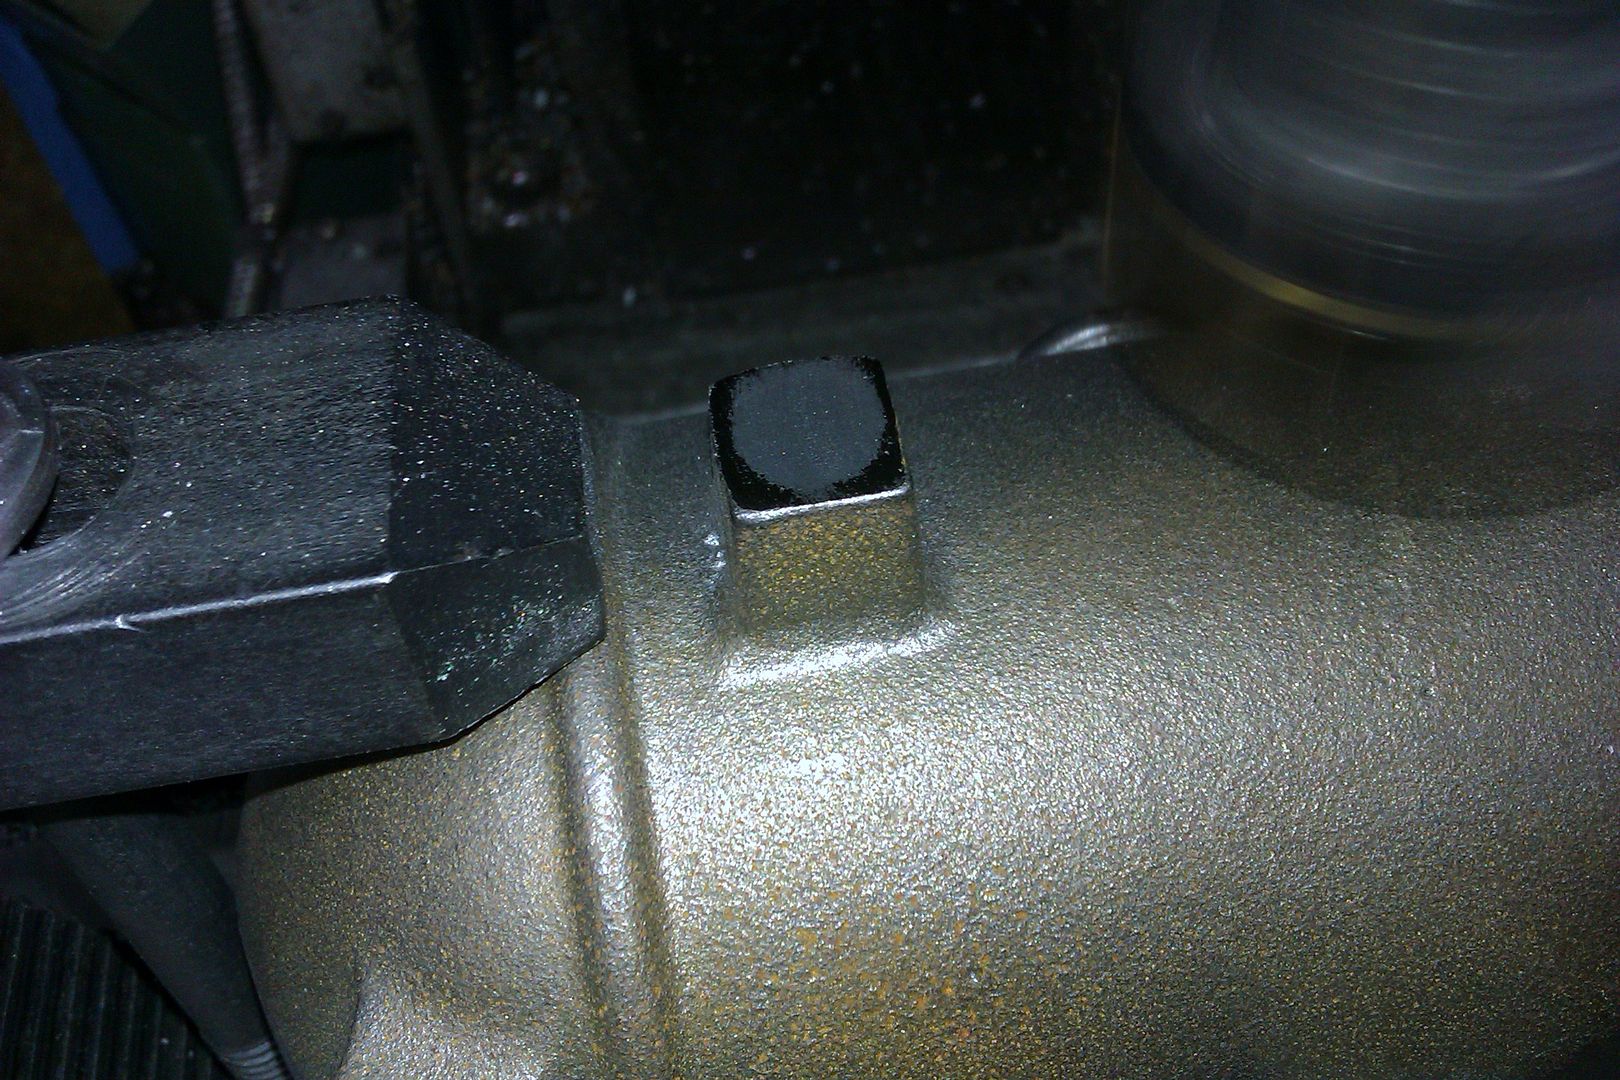
25215 forum posts 3105 photos 1 articles | Yes I saw that comment too but the usual way the chill pattern shows on a casting like that is around the corners, the areas with greater volume tend to hold the heat long enough not to chill. So that could well explain why the gland and guide holes went OK but the stud holes at the corners gave problems As the cover and chest were bonded together the drill would have had to go through the cover first which being much thinner than the chest was the most likely to be hard (and not previously drilled) which would have taken the edge off the drill which then failed to complete the hole in the chest. The covers are known to be the most troublesome for being hard, less so the chests due to being so thin there is no hard skin as the chill will go right through. Typical chilled corners on this part
|
| Howard Lewis | 24/07/2022 08:09:40 |
| 7227 forum posts 21 photos | A severely chilled casting will wreck even carbide tooling. I know of a cylinder block transfer line that was wrecked by a batch of heavily chilled castings! The foundry was having the wall cladding replaced, and knocked out the red hot castings where snow could blow in on them! Agonising to watch the castings progressing down th line, wrecking every cutter as they went! Have just machined what i thought was steel bar. Wasn't, cast iron which soon took the edge off HSS. Only way to get a decent finish was to use carbide.Shone nicely! The risk, as I see it, with carbide is things might get so hot locally that the casting then becomes chilled and resists any further operations, such as drilling. So follow the advice to use use low surface speeds to avoid heating. Howard |
| John Gray 7 | 24/07/2022 19:27:53 |
| 12 forum posts | The lowest speed on my micro sized mill (Proxxon BFW40/E) is 900rpm. I shall drill these small parts on my bench drill next time as I can operate this much slower than that. In fact I have an X-Y table on my bench drill so no drama at all if the coordinates are centre popped. I have not had any problems drilling with this mill/drill on other parts. The steam ports on the cylinder for instance were drilled on this device, but then that casting is indeed a much meatier piece than these small bits. In fact come to think of it, the steam inlet port was drilled and tapped on my mill/drill without any of this problem, but as has already been pointed out, this bit is on the centre of the cover, and it is the very edge of this piece that is causing me a problem. This has been a great learning curve for me. |
Please login to post a reply.
Magazine Locator
Want the latest issue of Model Engineer or Model Engineers' Workshop? Use our magazine locator links to find your nearest stockist!
Sign up to our Newsletter
Sign up to our newsletter and get a free digital issue.
You can unsubscribe at anytime. View our privacy policy at www.mortons.co.uk/privacy
Latest Forum Posts
- hemingway ball turner
04/07/2025 14:40:26 - *Oct 2023: FORUM MIGRATION TIMELINE*
05/10/2023 07:57:11 - Making ER11 collet chuck
05/10/2023 07:56:24 - What did you do today? 2023
05/10/2023 07:25:01 - Orrery
05/10/2023 06:00:41 - Wera hand-tools
05/10/2023 05:47:07 - New member
05/10/2023 04:40:11 - Problems with external pot on at1 vfd
05/10/2023 00:06:32 - Drain plug
04/10/2023 23:36:17 - digi phase converter for 10 machines.....
04/10/2023 23:13:48 - More Latest Posts...
- View All Topics
Support Our Partners


Shopping Partners
Subscription Offer

Latest "For Sale" Ads
- Reeves** - Rebuilt Royal Scot by Martin Evans
by John Broughton
£300.00 - BRITANNIA 5" GAUGE James Perrier
by Jon Seabright 1
£2,500.00 - Drill Grinder - for restoration
by Nigel Graham 2
£0.00 - WARCO WM18 MILLING MACHINE
by Alex Chudley
£1,200.00 - MYFORD SUPER 7 LATHE
by Alex Chudley
£2,000.00 - More "For Sale" Ads...
Latest "Wanted" Ads
- D1-3 backplate
by Michael Horley
Price Not Specified - fixed steady for a Colchester bantam mark1 800
by George Jervis
Price Not Specified - lbsc pansy
by JACK SIDEBOTHAM
Price Not Specified - Pratt Burnerd multifit chuck key.
by Tim Riome
Price Not Specified - BANDSAW BLADE WELDER
by HUGH
Price Not Specified - More "Wanted" Ads...
Get In Touch!
Do you want to contact the Model Engineer and Model Engineers' Workshop team?
You can contact us by phone, mail or email about the magazines including becoming a contributor, submitting reader's letters or making queries about articles. You can also get in touch about this website, advertising or other general issues.
Click THIS LINK for full contact details.
For subscription issues please see THIS LINK.
Digital Back Issues


Donate

 Register
 Log-in
Model Engineer Magazine
- Percival Marshall
- M.E. History
- LittleLEC
- M.E. Clock

ME Workshop
- An Adcock
- & Shipley
- Horizontal
- Mill

Subscribe Now
- Great savings
- Delivered to your door

Pre-order your copy!
- Delivered to your doorstep!
- Free UK delivery!
All Forum Topics > Beginners questions > Help! What is going on?