Another CAD challenge
Assembly problem
| Versaboss | 06/05/2022 13:18:41 |
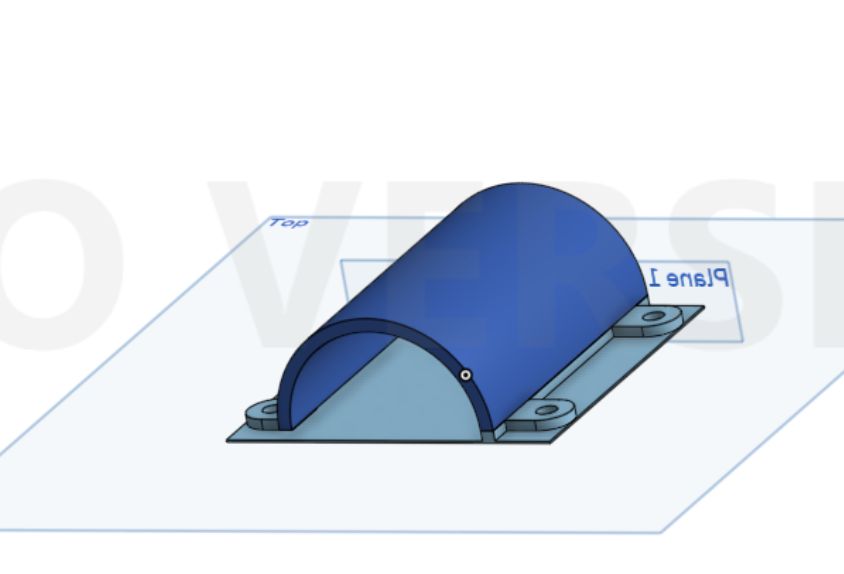
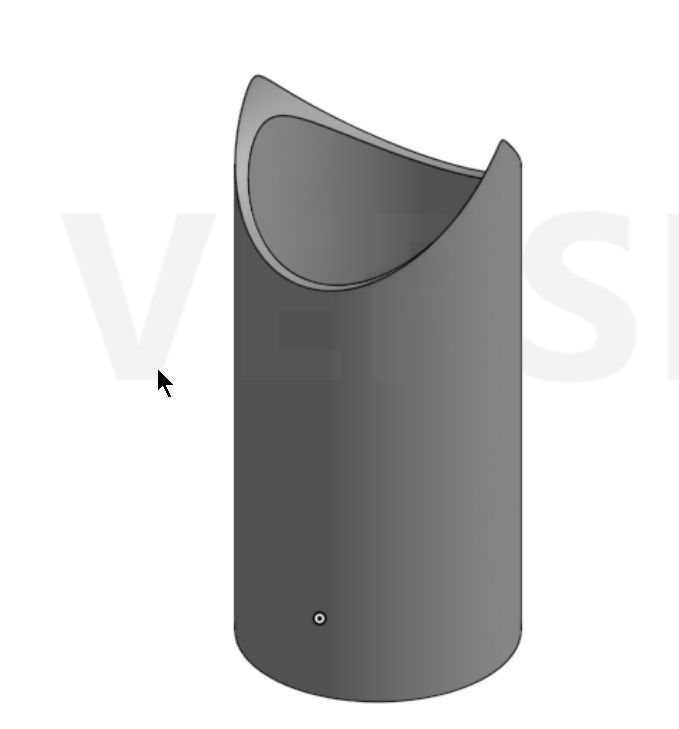
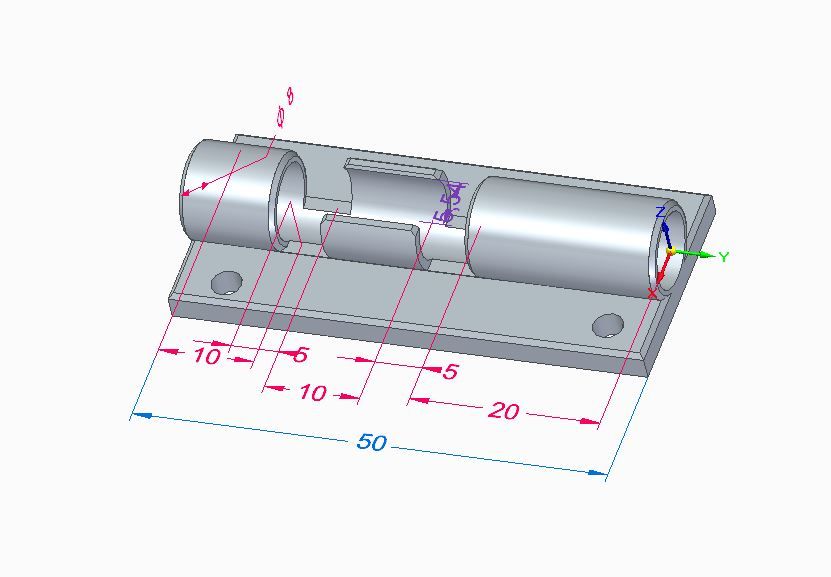
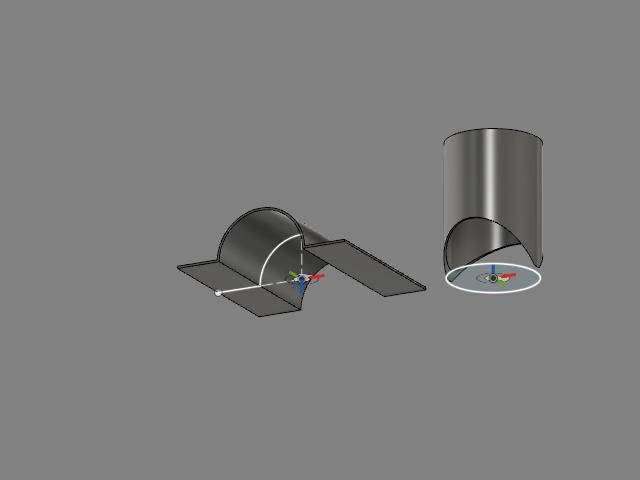
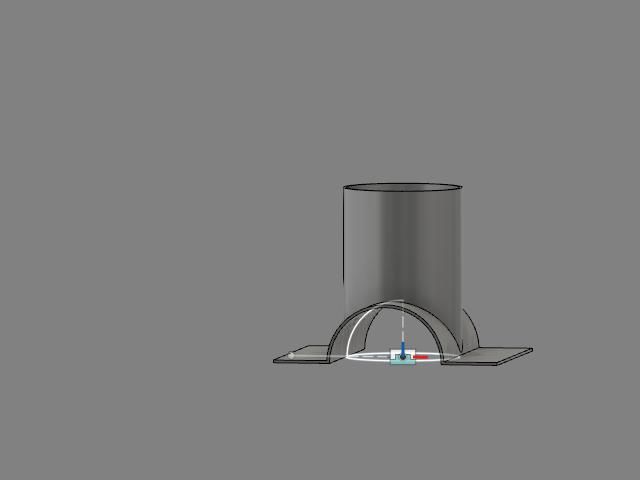
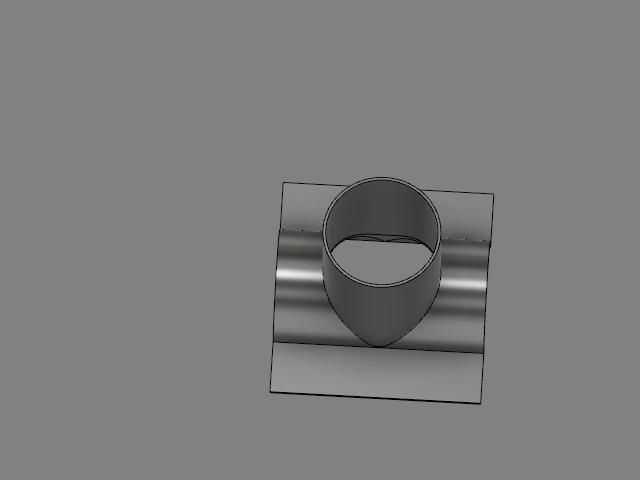
| 512 forum posts 77 photos | Hi all, I was drawing two parts, as follows: Part 1: Part 2:
The problem is the following: assemble part 2 on the surface of part 1, centrally, forming a Tee (hope I explain that good enough). Like a steam dome on a locomotive should make it clear. With my program I found not out how to do that, so I printed both parts separately and used epoxy glue to join them. The diameters of the two parts are the same. How can it be done in Freecad, Solid Edge or Fusion? Kind regards, |
| Nigel Bennett | 06/05/2022 15:04:32 |
500 forum posts 31 photos | In SolidWorks, I would simply add a concentric mate of the curved surface on the Part 2 grey tube to the curved surface of part 1. I would then align a plane on both parts to ensure it was vertical and then create a distance mate between a plane on Part 2 and some feature - perhaps the face with a dot on it - to another plane on Part 2. |
| SillyOldDuffer | 06/05/2022 15:16:39 |
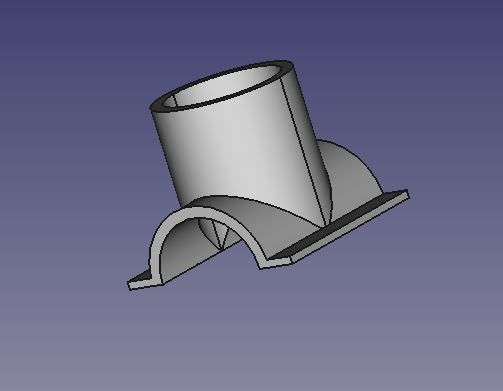
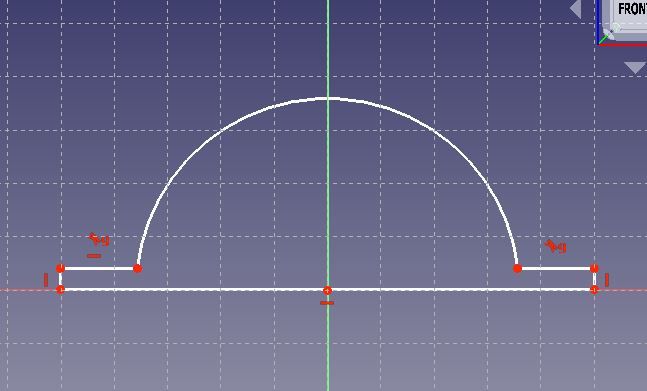
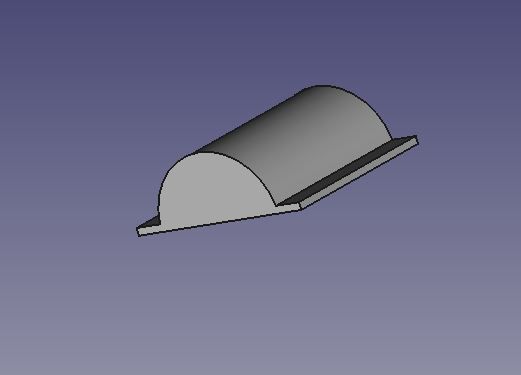
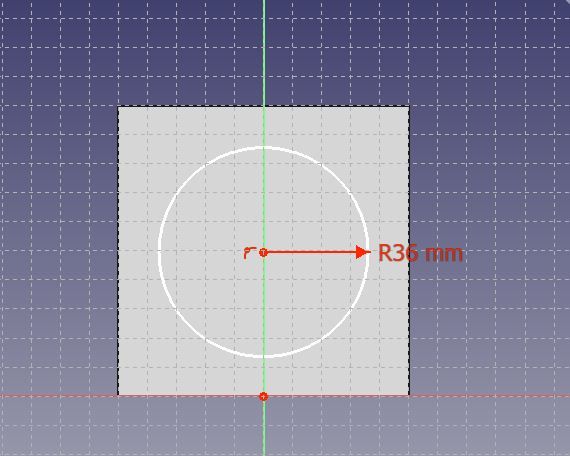
| 10668 forum posts 2415 photos | Apologies for not following the instructions exactly, but this is FreeCAD: Done this way. First sketch the base section. And pad (extrude) it: Then flip the object over, and sketch a circle representing the riser pipe one the base.
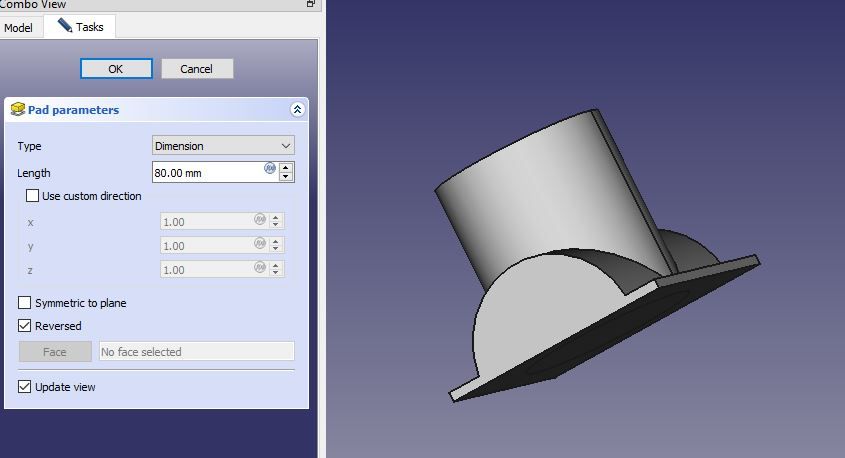
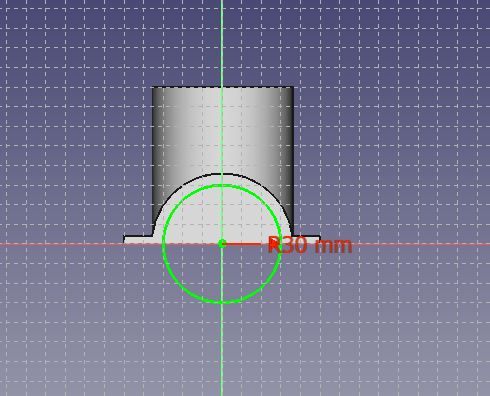
Pad this circle in Reverse so it comes out the top giving: Lastly, draw circles on the top face, and the lower semi-circle and pocket both to create the hollow pipes: There's also a thickness tool which can do the last two steps without sketching. Solid Edge and Fusion can make the part in much the same way: sketch on plane or face, then pad (extrude) or pocket( cut). Dave
|
| JasonB | 06/05/2022 15:47:47 |
25215 forum posts 3105 photos 1 articles | I'd do the same as Nigel in Alibre to assemble the two Though if it was going to be 3D printed as a single part I would have drawn it as one to start with |
| HOWARDT | 06/05/2022 16:13:30 |
| 1081 forum posts 39 photos | With Autodesk Fusion or Inventor it is simply a case of aligning and offsetting planes created in the individual parts. It is really a case of how you want to create the thing as other one part or two. Probably one part of you are 3D printing it and two if machining from solid, although you could machine in one on a CNC mill. |
| JasonB | 06/05/2022 16:24:34 |
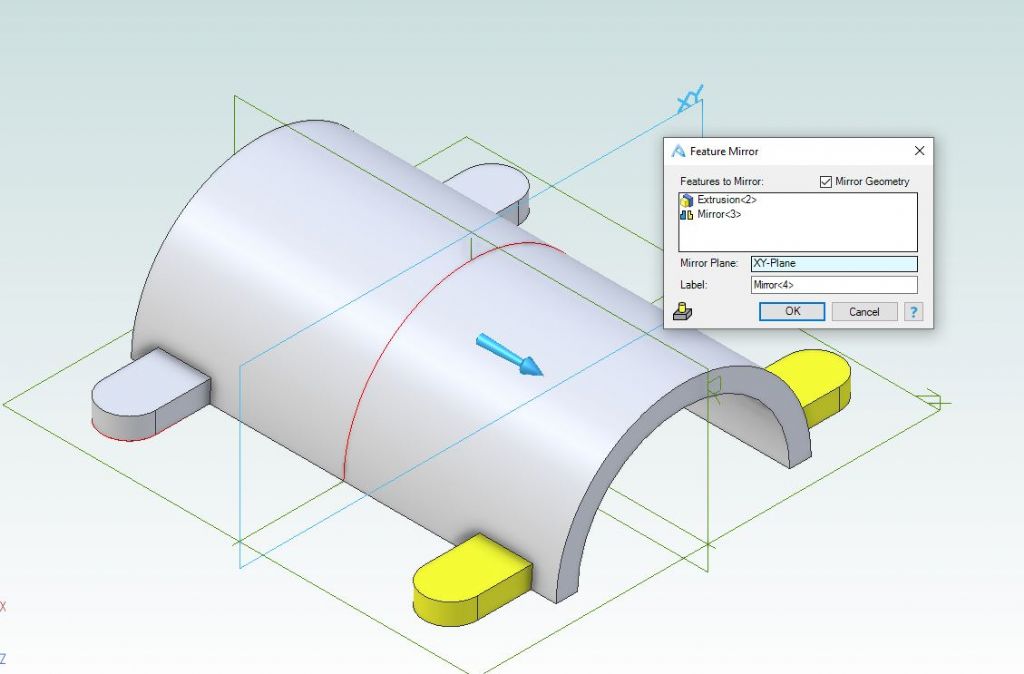
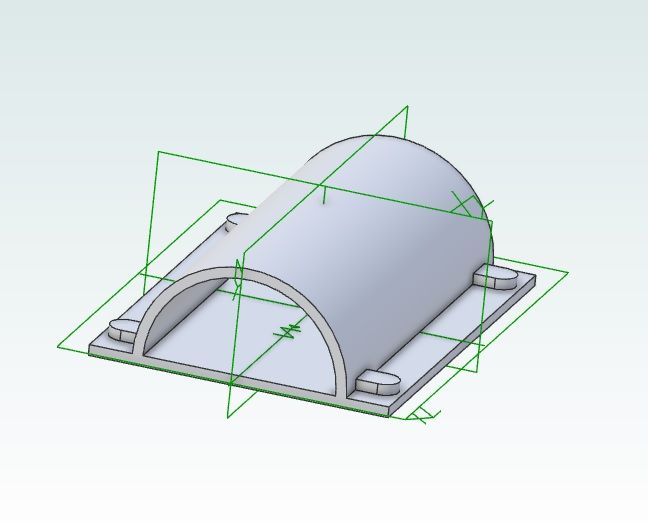
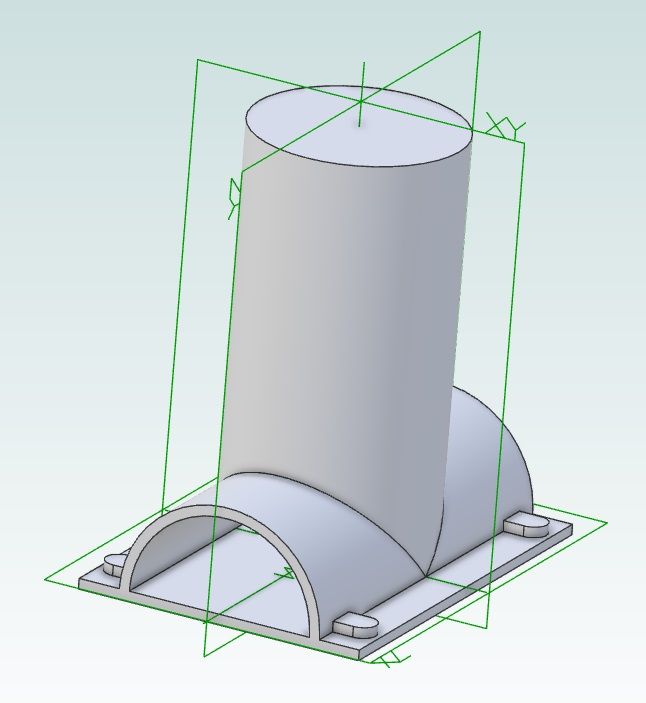
25215 forum posts 3105 photos 1 articles | Looking again at your firs part, the half round. If that had been extruded equally about plane 1 rather than all to one side you should then have been able to use that plane to line up the two parts provided the circular part was central to two axis. The added bonus would be that you could also have mirrored the tabs about the central axis too.
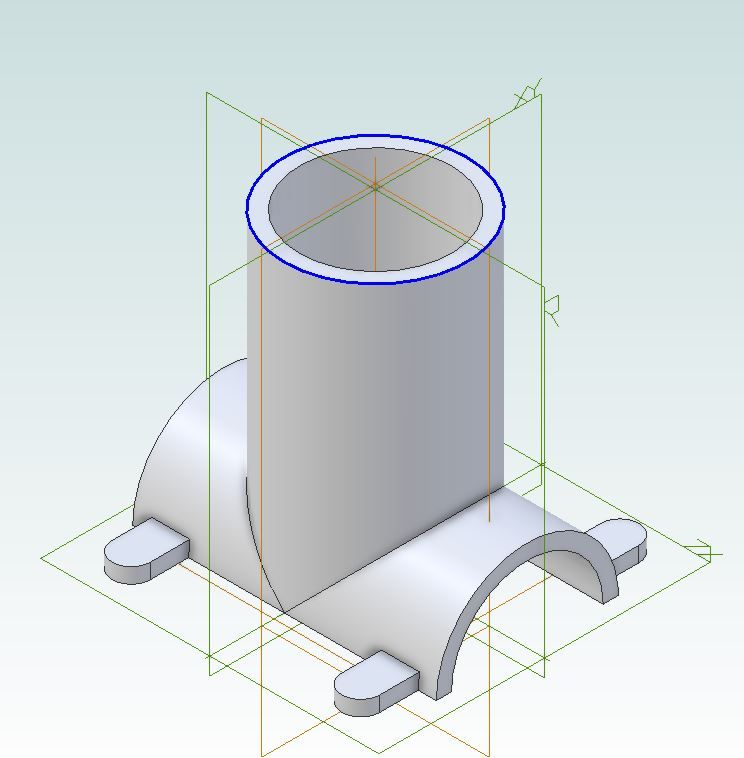
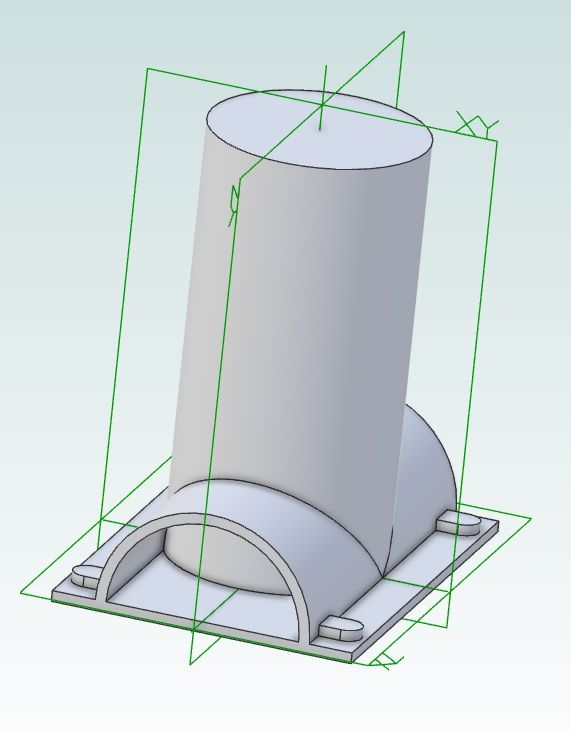
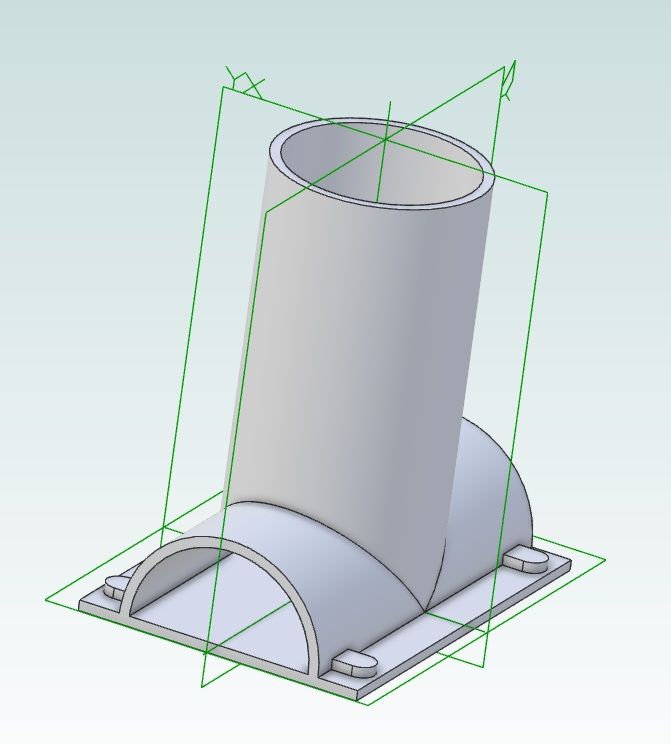
Extruded centrally and tabs mirrored Then align the two vertical axis and then the horizontal planes and they all sit in the correct position but it does need some thought at the sketching stage to make assembly this easy.
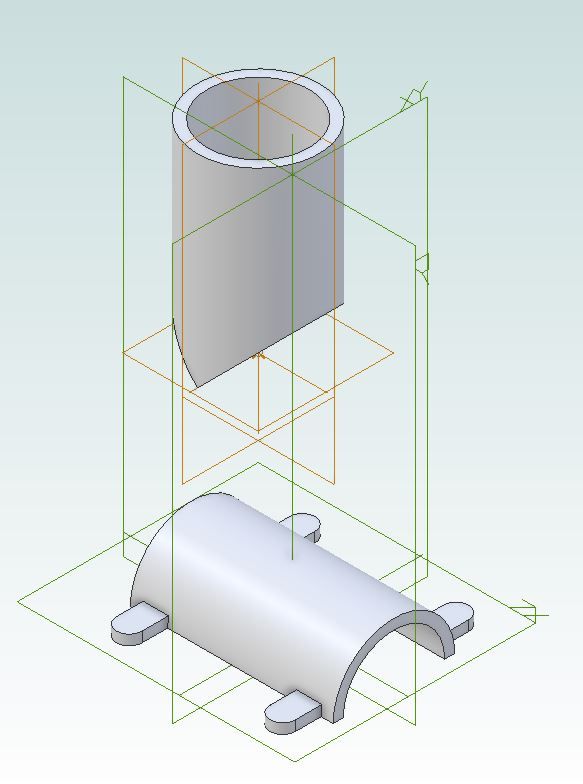
Assembly screen showing half round lined up in XY&Z (green) and the geometry of the tube in brown Edited By JasonB on 06/05/2022 18:13:52 |
| Bazyle | 06/05/2022 17:34:28 |
6956 forum posts 229 photos | Why don't these tools just let you 'pick up' item one, twiddle it round to be upside down, and push it down onto roughly the right place on item two. Then press a special button "use your megadoodles of computing power that cost me and arm and a leg and join these bits". Like a drag and drop editing in Word manages to put the words into the sentence with spaces not splodge them on top of each other. |
| SillyOldDuffer | 06/05/2022 18:54:40 |
| 10668 forum posts 2415 photos | Posted by Bazyle on 06/05/2022 17:34:28:
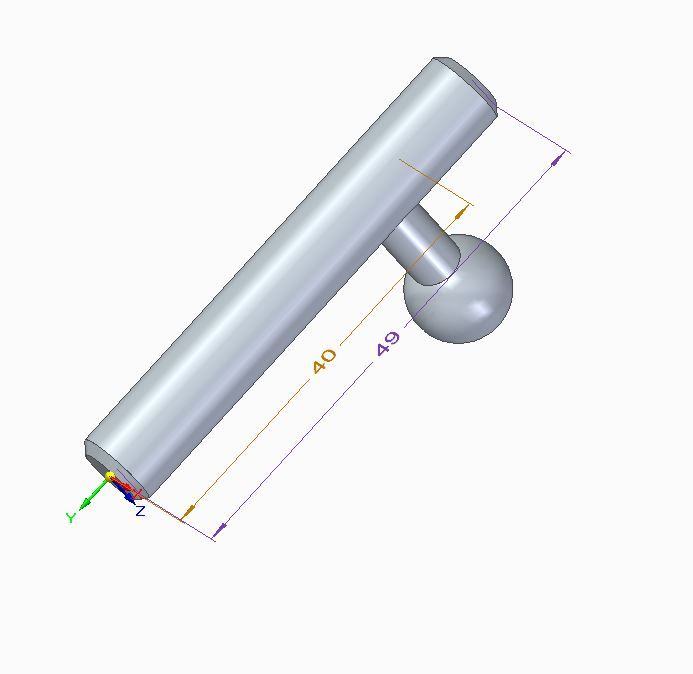
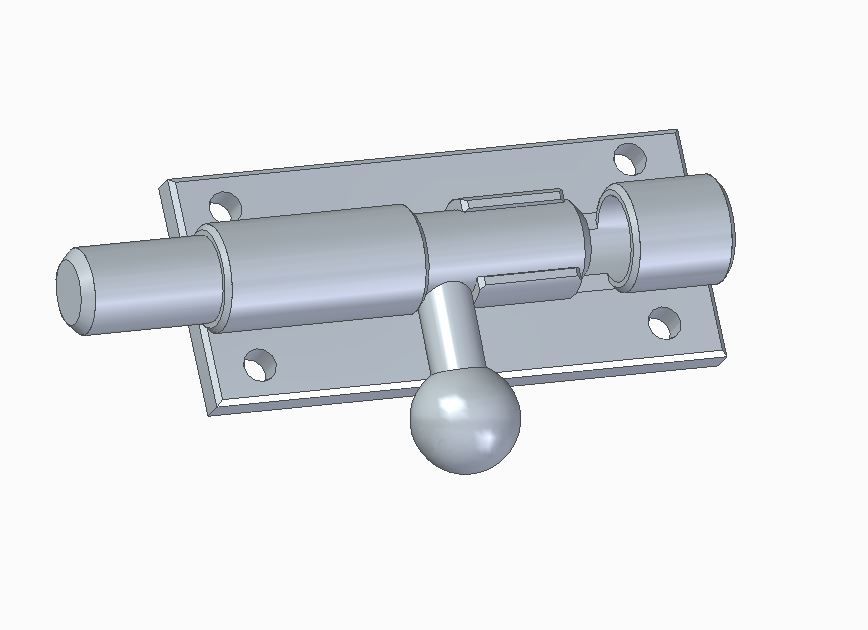
Why don't these tools just let you 'pick up' item one, twiddle it round to be upside down, and push it down onto roughly the right place on item two. Then press a special button "use your megadoodles of computing power that cost me and arm and a leg and join these bits". Like a drag and drop ... Fusion360 and SE both work like that. FreeCAD is still primitive in this department, but getting better. This example is Solid Edge. I designed a door bolt, which although based on the domestic item, is original : my dimensions, not a copy. First part is the bolt body: Created separately is the bolt. It has to fit into the body, correct diameter, length, handle to fit the slots etc. SE (and similar CAD packages) allow two or more parts to be combined as an Assembly, which achieved by drag and drop plus intents - axial, rotation allowed or not etc. The result is two parts working together.
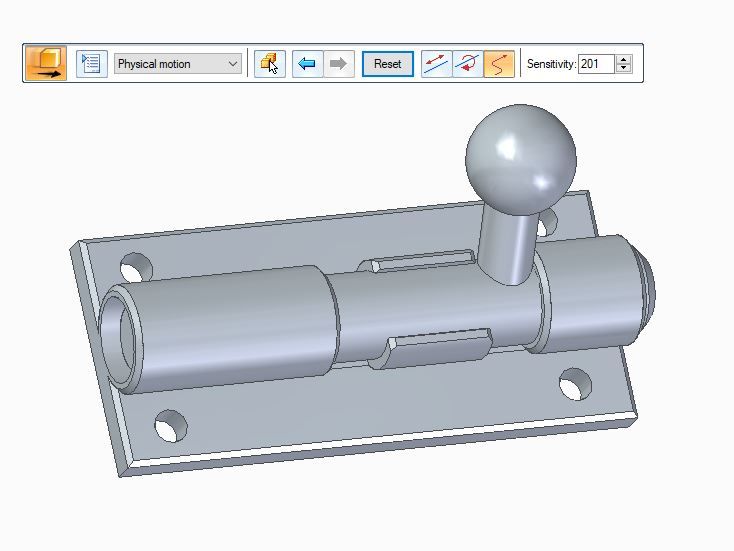
The software understands the bolt slides in the body, and detects collisions and interferences. When the design is correct, the bolt can be moved realistically on screen to prove all is well: Mildly useful for designing a simple door bolt, but highly valuable when developing a multi-part object like an engine, where pistons must fit into cylinders without smacking into the head or valves, whilst the conrods turn the crankshaft without jambing. At the same time, the valve gear is driven from the crankshaft by a chain, and valve events delivered with cams. Saves an enormous amount of time when fits of all these different parts can be confirmed in a model, rather than painfully made for real, only to find they crunch expensively together inside the prototype! Challenging enough to build an engine from someone else's plan, but much harder to reverse engineer an old engine from pictures or to develop a working engine from scratch. These tools are primarily for creating original work, not copying what went before. Dave
|
| Nick Wheeler | 06/05/2022 19:39:53 |
| 1227 forum posts 101 photos | Fusion allows you to pick where you join parts, or to place Joint Origins at known places. It then gives you the option to offset and/or rotate the parts when you actually join them: Parts, the multi coloured features are the Joint Origins: Rigidly joined together using those origins:
And you didn't ask for this, but cut the centre of the joint using the tube's inner profile:
The original sketches show in some of those pics, and you'll see they aren't closed profiles. Instead I used the Thin Extrude command which saves a lot of time. Also, only half the clamp body was drawn and extruded, then it was mirrored about its central face which also saves time and simplifies the sketch
|
| Versaboss | 06/05/2022 19:46:57 |
| 512 forum posts 77 photos | Many thanks for some eye-opening comments. I think (now) that the way to do it is drawing the parts massive (as SOD did) and then hollowing it out. To be honest, once in my trials I could arrange the two parts correctly, but during the printout my 3D printer died a silent death. Later I could not repeat that. The program has the so-called mates, which are shown as small coordinate systems with colored axes. Unfortunately, I could nor arrange them in the correct relationship. There are only two operations possible: flip the primary axis (but which is that?), and reorient the secondary axis. IF they would be oriented correctly, then the "megadoodles of computing power" would mate the two parts as intended. It might be that later I will find that the parts are not strong enough, So I will then use SOD's method to construct them more massively. Btw, I use a program called languagetool, which shows me a lot of my errors when writing this text. Even missing commas... Kind regards,
|
| Nick Wheeler | 06/05/2022 19:47:08 |
| 1227 forum posts 101 photos | As for Dave's door bolt, I would have modelled the bolt inside the body, using projections of its axis, diameters and notch positions. That removes the need to figure out where the new features need to be, and makes creating the joint and its limits much simpler. As a design approach, the notches in the body could be left until last and placed by sliding the bolt to and fro in its bore. |
| John Hinkley | 06/05/2022 20:53:30 |
1545 forum posts 484 photos | Did I mention that I don't watch "Coronation Street" No? Well it's on TV now, so while my wife gets her Friday fix, I thought I'd do it my way. I sort of combined some of the previous ideas but latched onto Jason's idea to do it all in one drawing. So, I thought, how about treating it as if it were a solid casting and "machining away the unwanted bits? First, sketch the basic profile and extrude from a mid-plane, With lugs drawn once in a separate sketch and mirrored around two planes: Then add the side extension as a solid : Followed by removing the semi-circular section : Then "hollow out" the side pipe section: Just one 3D drawing in Alibre and for export to a STEP or STL file for printing. John |
| Gary Wooding | 07/05/2022 12:09:23 |
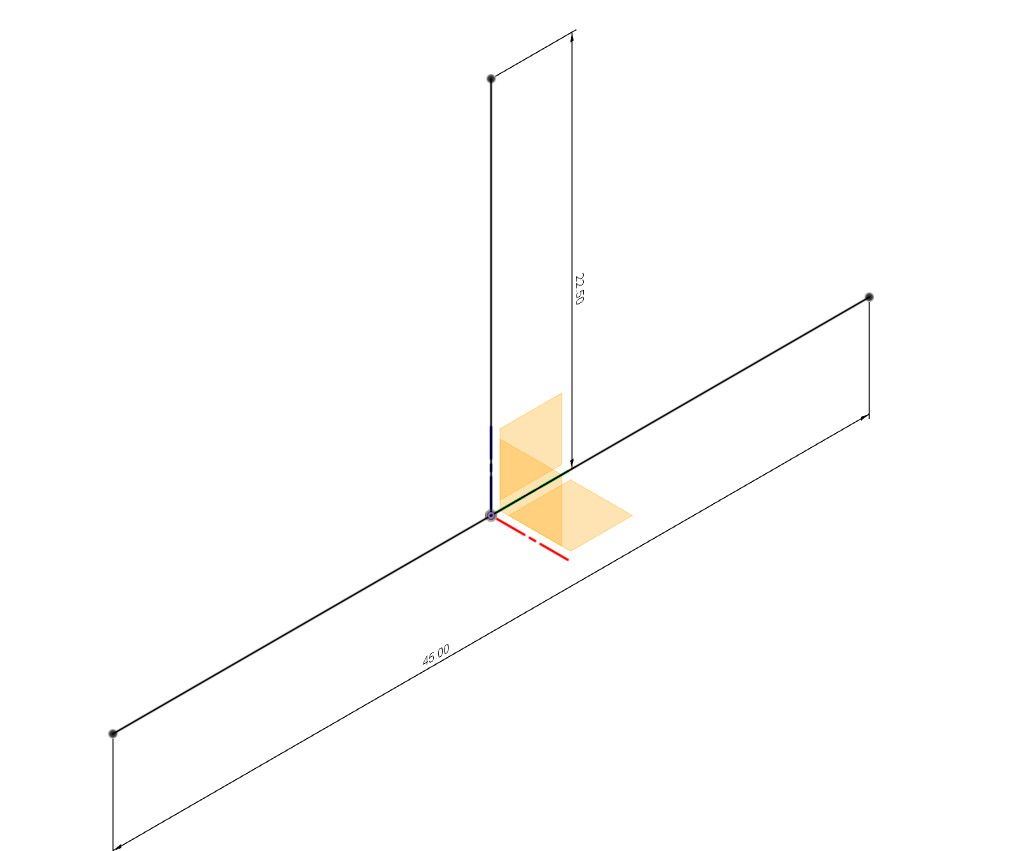
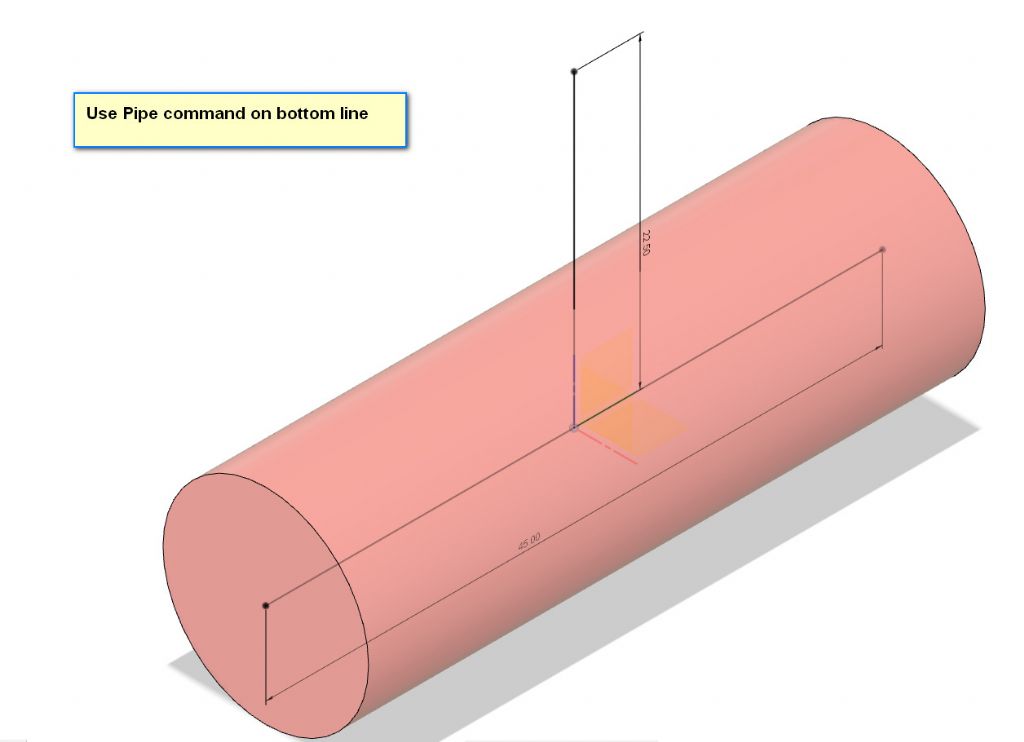
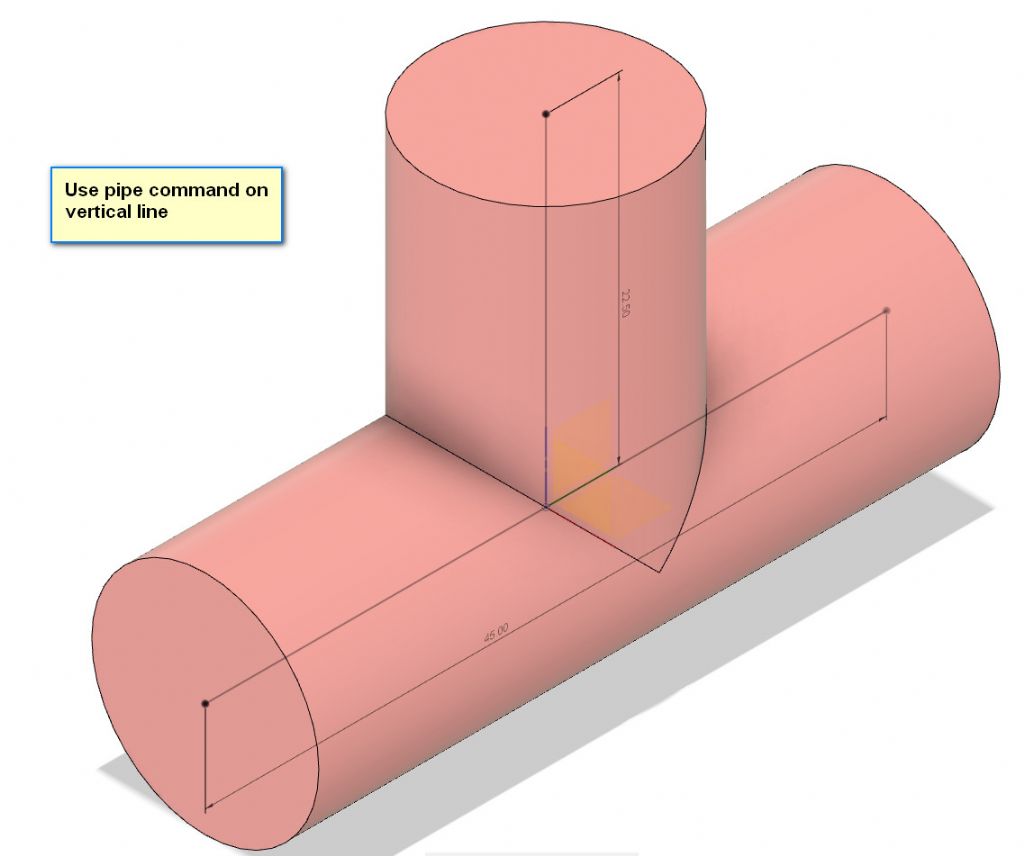
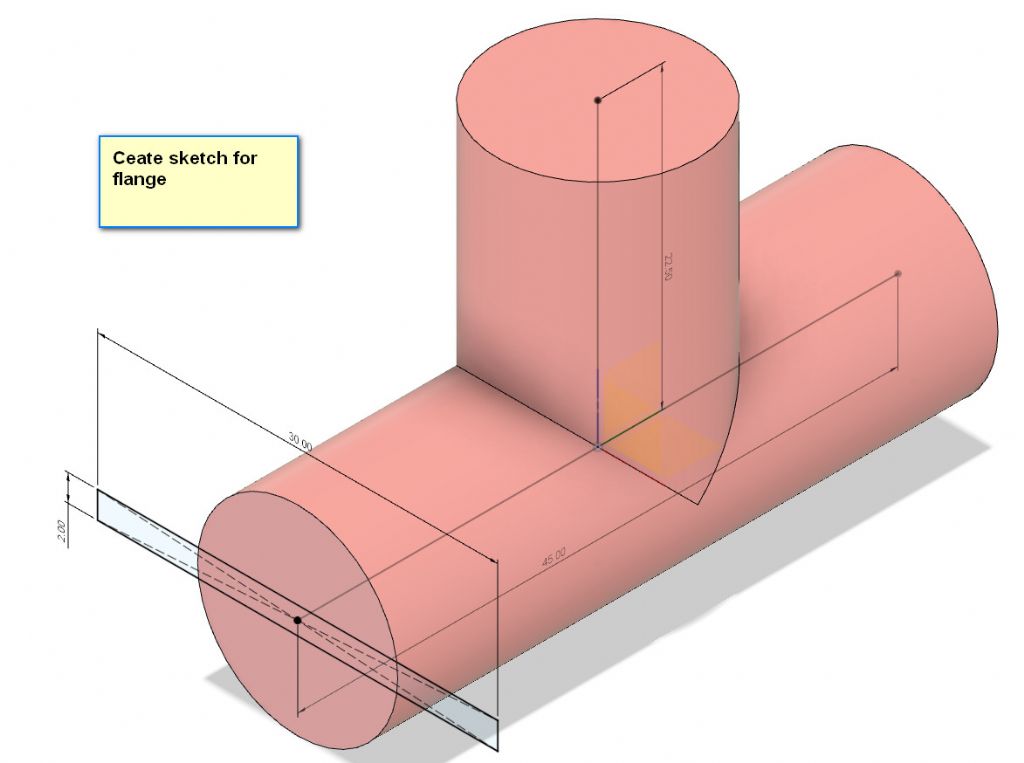
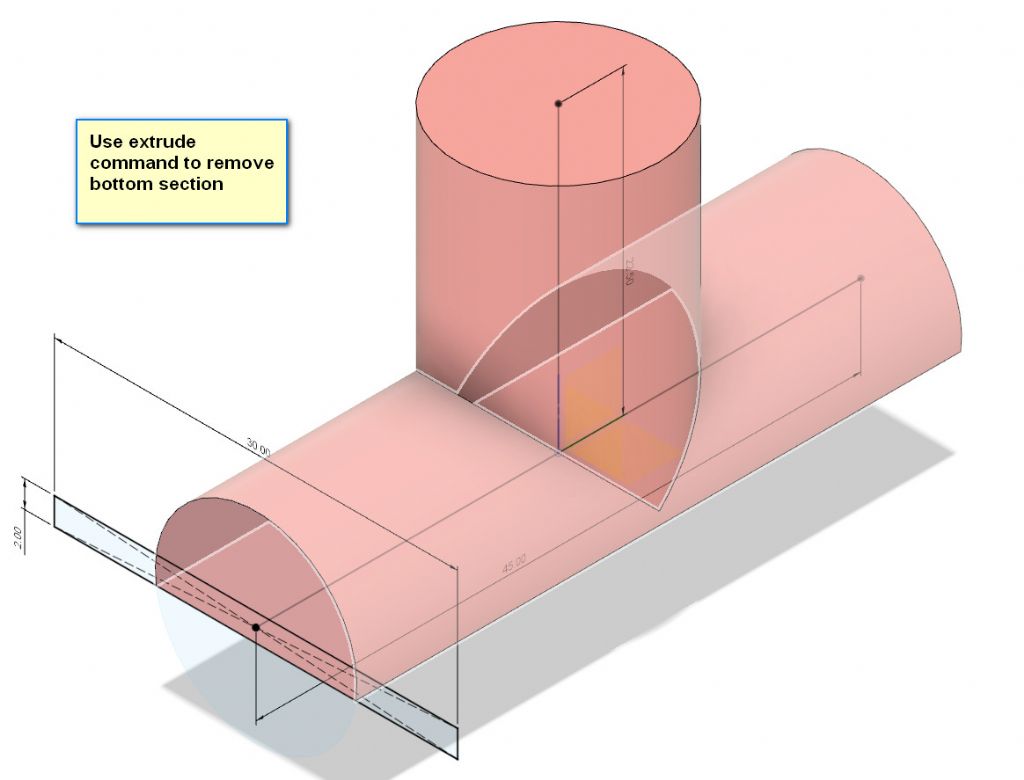
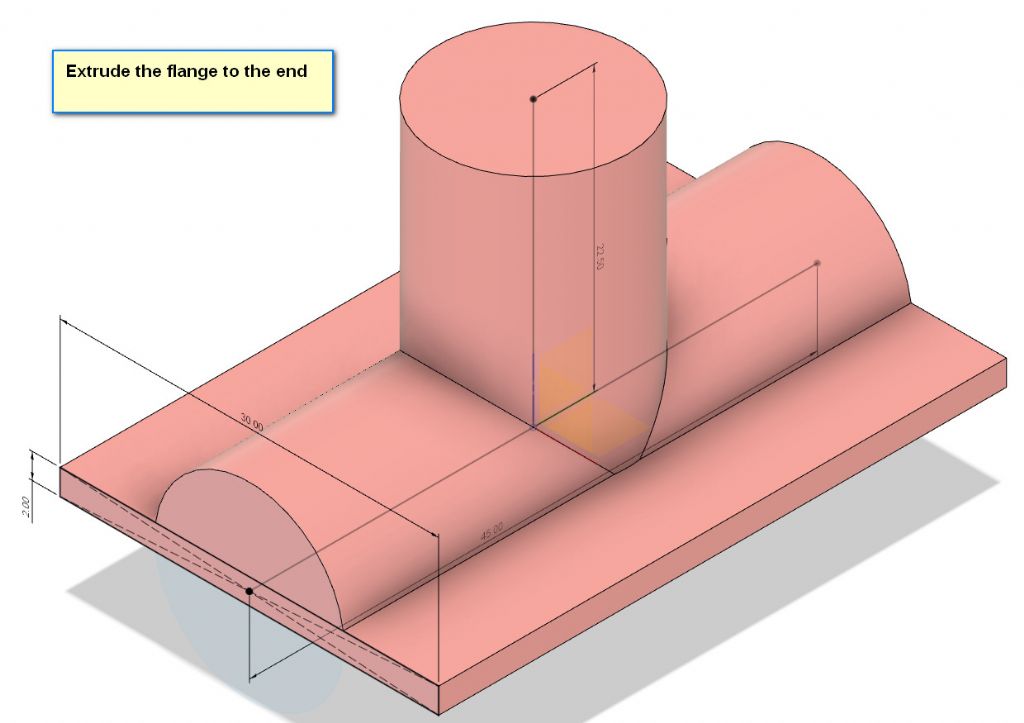
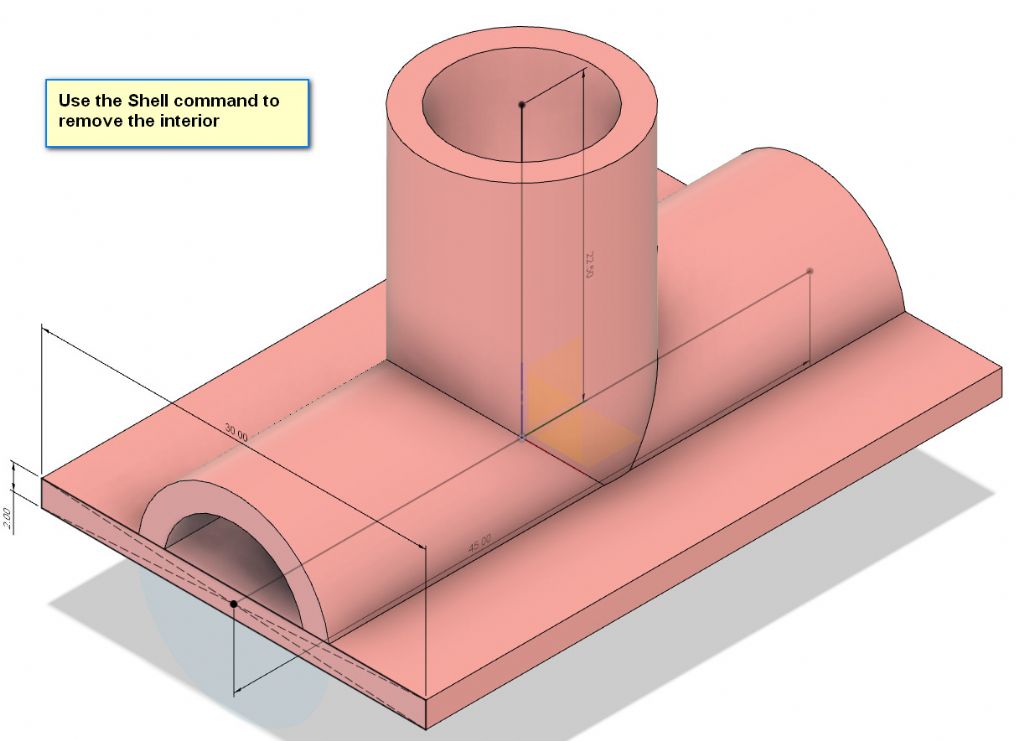
| 1074 forum posts 290 photos | In case anyone is interested in using Fusion for it... First draw a sketch of the centrelines of the intersecting pipes. Next, use the Pipe command to create a solid cylinder along the horizontal line. Then use the same command to create the vertical cylinder joined to the first one. Now draw a sketch of the flange X-section on the end of the horizontal cylinder. Now extrude lower section be low the flange profile to remove the bottom part of the horizontal cylinder. Then extrude the flange profile. The last step is to use the Shell command to remove the unwanted interior to leave a wall thickness equal to the thickness of the flange. |
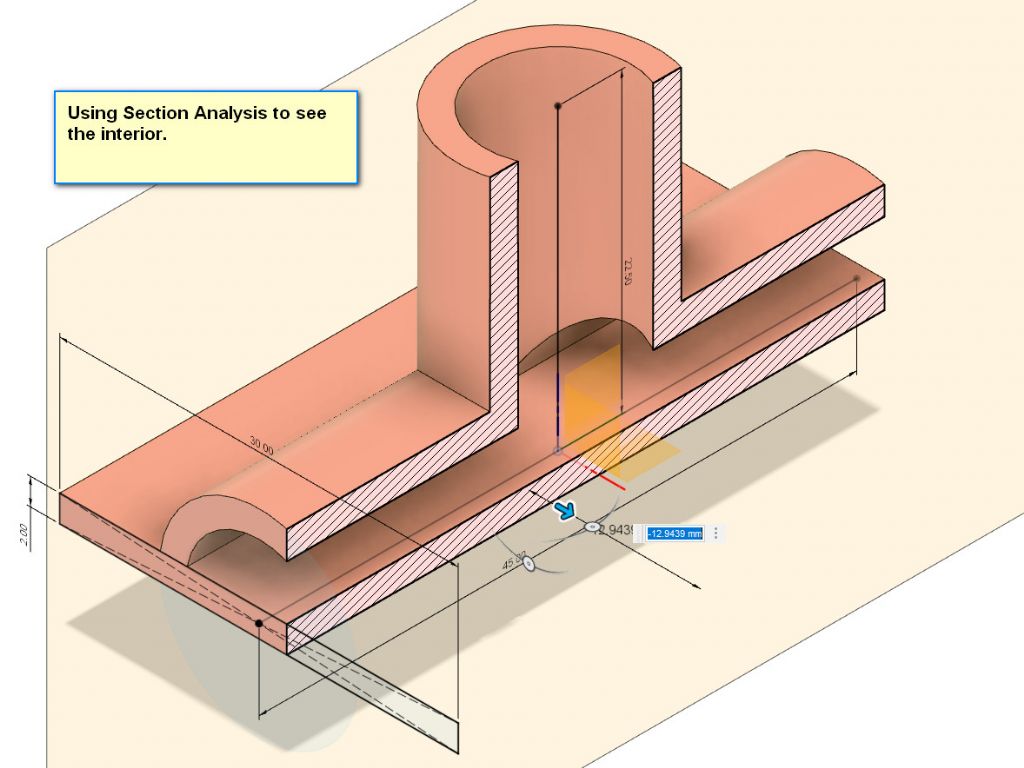
| Gary Wooding | 07/05/2022 12:12:41 |
| 1074 forum posts 290 photos | You can then use the Section Analysis tool to show the interior. |
Please login to post a reply.
Want the latest issue of Model Engineer or Model Engineers' Workshop? Use our magazine locator links to find your nearest stockist!
Sign up to our newsletter and get a free digital issue.
You can unsubscribe at anytime. View our privacy policy at www.mortons.co.uk/privacy
- *Oct 2023: FORUM MIGRATION TIMELINE*
05/10/2023 07:57:11 - Making ER11 collet chuck
05/10/2023 07:56:24 - What did you do today? 2023
05/10/2023 07:25:01 - Orrery
05/10/2023 06:00:41 - Wera hand-tools
05/10/2023 05:47:07 - New member
05/10/2023 04:40:11 - Problems with external pot on at1 vfd
05/10/2023 00:06:32 - Drain plug
04/10/2023 23:36:17 - digi phase converter for 10 machines.....
04/10/2023 23:13:48 - Winter Storage Of Locomotives
04/10/2023 21:02:11 - More Latest Posts...
- View All Topics
- Reeves** - Rebuilt Royal Scot by Martin Evans
by John Broughton
£300.00 - BRITANNIA 5" GAUGE James Perrier
by Jon Seabright 1
£2,500.00 - Drill Grinder - for restoration
by Nigel Graham 2
£0.00 - WARCO WM18 MILLING MACHINE
by Alex Chudley
£1,200.00 - MYFORD SUPER 7 LATHE
by Alex Chudley
£2,000.00 - More "For Sale" Ads...
- D1-3 backplate
by Michael Horley
Price Not Specified - fixed steady for a Colchester bantam mark1 800
by George Jervis
Price Not Specified - lbsc pansy
by JACK SIDEBOTHAM
Price Not Specified - Pratt Burnerd multifit chuck key.
by Tim Riome
Price Not Specified - BANDSAW BLADE WELDER
by HUGH
Price Not Specified - More "Wanted" Ads...
Do you want to contact the Model Engineer and Model Engineers' Workshop team?
You can contact us by phone, mail or email about the magazines including becoming a contributor, submitting reader's letters or making queries about articles. You can also get in touch about this website, advertising or other general issues.
Click THIS LINK for full contact details.
For subscription issues please see THIS LINK.
Model Engineer Magazine
- Percival Marshall
- M.E. History
- LittleLEC
- M.E. Clock
ME Workshop
- An Adcock
- & Shipley
- Horizontal
- Mill
Subscribe Now
- Great savings
- Delivered to your door
Pre-order your copy!
- Delivered to your doorstep!
- Free UK delivery!




 Register
 Log-in


