Forum sponsored by:

Murad Cadet Restoration Project
| Xed | 21/03/2022 19:14:51 |
| 19 forum posts 80 photos | Hello! I recently acquired a Murad Cadet benchtop lathe that will eventually take over from my unbranded Chinese minilathe for general tinkering. I couldn't find a huge amount of information online about them other than the lathes.co.uk page so I thought I'd document my attempts at a restoration project here. It's also my first attempt at trying to restore something that isn't just a small hand tool, so I'm looking forward to getting stuck in.
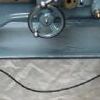
It's my first time dealing with a machine this substantial, but the seller kindly helped unload it onto the rolling bench. As you can see it arrived with a coat of rust on the machine surfaces.
A look under the headstock cover and all the gearing seems in good condition from what I can tell - I might just leave it at changing the oil for the headstock internals but we'll cross that bridge when we come to it.
Obligatory nameplate shot.
Some of the tooling that came with the lathe - a full set of change gears and an interesting dividing/indexing attachment as well as what I'm presuming is a milling attachment. There was also a huge amount of drills and cutter (not picture) that sadly look like they've spent a couple of years sat in a tin full of water.
A quick look at the motor it came with - whether it's original or not I'm not certain - it's branded Hoover.
Breaking down the larger parts - I've removed everything from the bed and individual assemblies are bagged so I can take it a chunk at a time.
After getting off most of the surface rust with WD-40 and some 0000 steel wool, I switched to Evaporust soaked paper towels under clingfilm for the really stubborn stuff.
24 hours later, and with the Evaporust coating scrubbed off and there's a decent improvement. There's some marks and pitting remaining, but the surface is smooth at least.
I also dismantled and soaked the chuck in Evaporust, after which a gentle session with a scotchbrite wheel gave a decent finish. |
| Phil Whitley | 22/03/2022 18:43:25 |
 1533 forum posts 147 photos | Very nice machine, and quite a rarity! I shall be watching with interest! I will be starting on my little holbrook soon, which is about the same size! Phil
|
| old mart | 22/03/2022 20:12:49 |
| 4655 forum posts 304 photos | That could turn out to be a very nice machine. I'm glad to hear of your approach to removing the rust, there will be some imperfections and some people would ruin the bed by insisting on removing them, which looks pretty, but not recommended. Keep us up to date with your progress. We have a Hoover three phase motor on the Fobco drill press, made in Scotland. And welcome to the forum. Edited By old mart on 22/03/2022 20:14:13 Edited By old mart on 22/03/2022 20:15:34 |
| Nigel Graham 2 | 22/03/2022 22:16:12 |
| 3293 forum posts 112 photos | Good to see it receiving lots of sympathetic TLC. It looks to have been well cared for then simply lay unused for a long time in a damp workshop. The bed has cleaned up well - those pits won't affect it seriously. The chuck has cleaned up with a nice patina, and shows no sign of abuse or accidental collisions. Another good sign: the chuck key's not been bashed about either. 'Evaporust'... I'll have to keep that name in mind! I'd be a bit wary of using that motor though, at least not without having it PA-tested first. Simply replacing more-or-less with similar, sticking with 1-phase, should be easy enough as the larger power-tool suppliers like Machine Mart* stock suitable motors. You may need modify the existing mountings for it a little, or make an intervening adaptor-plate. (I did that for my BCA jig-borer.) --- * I write as a customer, when the motor on my generic band-sawing machine went "POP!" in mid-cut. |
| Ady1 | 22/03/2022 22:58:27 |
 6137 forum posts 893 photos | Looks like a great project with real potential, that hoover motor could be a real asset too Don't go mad cleaning the ways, using the machine regularly for moderate work will wear the ways relatively quickly anyway so only the worst of it needs to be removed Good luck |
| Hopper | 22/03/2022 23:40:58 |
 7881 forum posts 397 photos | Interesting. Do keep us posted. The son of Mr Murad used to post on this forum a few years back in relation to the Murad Bormilathe. |
| Xed | 24/03/2022 17:50:02 |
| 19 forum posts 80 photos | Thanks for the warm welcome everyone! I am leaning towards motor replacement at the moment, purely as it'll be one less thing to worry about I'll see how I feel when I have a poke around that area. Currently the plan is to clean/strip/paint the stand and the bed casting, then move them into more or less final position. After that I can just restore and bolt on an assembly at a time as I do them - not the most efficient maybe but helps keep track of things.
Speaking of paint, I stripped down the wiring box from the back of the machine to use as a guinea pig for the new paint job. It's not super clear what the original colour was, so I've gone with something similar to what's on the lathe now: a kind of blue-grey with red highlights. Paints are on order from Paragon.
Cleaned up pretty well with generic paint stripper gel - this part (as well as the headstock cover) appear to be aluminium so will be etch-primed. I've got some red oxide primer for the main castings.
The lead screw has also been taking a bath in my unspeakably high-tech derusting apparatus...
...and has turned up a treat. A rinse, a gentle wire brushing to get off residue and a light coating of 3-in-1 oil for protection was applied. |
| noel shelley | 24/03/2022 21:11:15 |
| 2308 forum posts 33 photos | Welcome to the party ! You do not indicate where you are UK ? I would put the motor in the airing cupboard for a few days then wire it up to a plug and run it. Make sure the earth is attached. If your near me I will tast it for you. The hoover motor was a good unit. If you need help in wiring it up come back to me/the forum and well help. Best wishes Noel. |
| Hopper | 25/03/2022 06:06:01 |
7881 forum posts 397 photos | Looks like a good substantial machine. And looks like that Evaporust does a great job. Might have to try it. You have the right idea not to tear down every nut and bolt at once, but do the bed and then do each sub assembly and put it back in place. Much easier to keep track of what's what that way. I've seen many old motorbikes torn down to ridiculous smallest parts, then the owner throws them all in a box and gets overwhelmed by it all and reassembly never progresses. Much better to take small bites at a time, and much more satisfying to get on thing done after another. |
| Mike Hurley | 25/03/2022 09:10:27 |
| 530 forum posts 89 photos | Looks a cracking good project, and its nice to see you are approaching it in a methodical, careful way. I very much agree with Hopper & others that avoiding the 'bull at the gate' approach will pay dividends in the long run. Do keep us updated as you progress - things like this allways make interesting reading. all the best, Mike |
| John Hall 11 | 26/03/2022 01:16:44 |
 1 forum posts 10 photos | I Hi Iv just bought a murad cadet aswell, mine has been sat in a garage for over 40 years |
| Xed | 29/03/2022 22:55:50 |
| 19 forum posts 80 photos | This last few days have been busy - who knew so much of the time taking on a project like this involved waiting for paint to dry? While the enamel hardens on the stand and bed casting, I thought I'd do some preliminary poking around the wiring. I've buzzed out the switch configuration with a meter and got plenty of pictures to document what was already on the lathe when I got it. An important note however, it was already partially disassembled and wiring to the motor was cut, and the starter wiring completely removed so I can't vouch for this as a working configuration, I'm just documenting what was there. I was assured that it did run on single phase.
The barrel switch that mounts in the bed casting – I did strip the paint because I'm like a magpie with shiny brass objects.
This was how things looked with a multimeter in continuity – there's a third set of internal terminals that I've marked with an I for completeness. I do appreciate the previous owner marking things up
This is the switch side of the terminal board that lived in the little electrics box on the back of the lathe. I'd documented this corresponding with John before I buzzed out the switch so unfortunately don't have the mapping back to the switch terminals. I do know that G1 and G2 were ganged together onto L1, with G3 on Z1
And this is the other side with power input and motor output.
And finally the motor wiring side, with bonus appearance from the starter. I'm still in two minds about reusing the Hoover motor, but the starter I do want to replace with something more modern that has a nice big E-Stop. I'd also like to be able to use the main barrel switch for control without switching the main motor load through it – I don't know enough about that kind of thing yet to see if that's a thing. More research required! Edited By Xed on 29/03/2022 22:57:27 |
| noel shelley | 29/03/2022 23:52:59 |
| 2308 forum posts 33 photos | Mostly it makes sense, but not at this time of night I will sort it out in the morning ! may have to ask a few questions. Noel. |
| Lee Rogers | 30/03/2022 00:21:57 |
 203 forum posts | I like your gentle approach to the job. I wouldn't be gentle with that motor though, lose it . Hoover motors are nasty noisy things and the Murad is rigid enough to take a 1hp motor easily.
|
| John Olsen | 30/03/2022 07:00:24 |
| 1294 forum posts 108 photos 1 articles | If you are going to change the motor anyway, put on a three phase with a VFD. Well worth any extra cost. John |
| noel shelley | 30/03/2022 09:38:46 |
| 2308 forum posts 33 photos | L1 and L2 are the mains live and neutral. Z1 and Z2 are the start windings A1 and A2 are the run windings. To reverse swap Z1and Z2. I will give more detail later if needed ! Noel. |
| noel shelley | 30/03/2022 16:31:19 |
| 2308 forum posts 33 photos | Check the coil voltage on the contactor coil, should be 220V and also the trip current which will be in the region of 1.5 - 4Amps. The MEM DOL starter is easy to wire, check out ME 4643 mid july 2020. Your wish for a BIG RED panic button is easy as you wire it into the DOL stop circuit in series with the stop button on the DOL as a normally closed switch. You then take Live and neutral to the drum reverser. Now we need the letters or numbers on the motor terminal plate to assertain the various connections. there were numerous letters and numbers used by various maker. what do you have ? wire colours coming from inside the motor may be helpful. Over to you ! Noel. |
| Phil Whitley | 30/03/2022 18:38:17 |
1533 forum posts 147 photos | Personally I would stick with the motor for now, and the starter, far better quality than you can buy nowadays! I have never come across a hoover motor that was noisy unless it was faulty! You can easily change it later if it proves to be underpowered. Why bother with the expense of a three phase motor and a VFD on a lathe that was not designed to run at high speeds anyway. By all means get the motor tested, but I doubt there will be much wrong with it, they were very rugged and reliable, as were the MEM starters, but I always recomend fitting the starter to the wall rather than the machine to prevent arcing at the overload contacts. Noel knows the game! Phil Edited By Phil Whitley on 30/03/2022 19:59:42 |
| Xed | 30/03/2022 20:53:17 |
| 19 forum posts 80 photos | That's fantastic info Noel, thanks so much! I've done more poking around on the back of the motor and drawn out the diagram with the cable colours. The terminal numbers match the back of the motor:
This is how it looks with the external wiring to the switch removed - insulation is a bit sketchy on the red wire and seems to have completely disintegrated on the capacitor wiring. I'm guessing finding a replacement cap would be a good idea? Edited By Xed on 30/03/2022 20:53:41 Edited By Xed on 30/03/2022 20:54:21 |
| noel shelley | 30/03/2022 22:42:21 |
| 2308 forum posts 33 photos | The way the wires have deteriorated would indicate the motor is oldish may be 60s, but still a good motor. I would expect 4 wires yet I can only see 3, I think ? he cap wires and the motor wires need to be sleeved to maintain insulation. Your diagram only shows 3 motor wires ? If you undo the small roundhead screws are there connections on the rear of 2 and 6 ? One wire will go to the cap from the cap to the centrifugal switch and then on to the start winding, the other end of the start winding will be a terminal. The run windings will be the straight to terminals. this gives you 4 terminals that should be taken to the reverser. In a effort to check the whole motor it would be a good idea to remove the 4 through bolts and strip. You can check the cent switch and it will be much easier to sleeve the wires and check which 2 are run and which are start based on the above. I will send a PM. Noel |


 ways")


Please login to post a reply.
Magazine Locator
Want the latest issue of Model Engineer or Model Engineers' Workshop? Use our magazine locator links to find your nearest stockist!
Sign up to our Newsletter
Sign up to our newsletter and get a free digital issue.
You can unsubscribe at anytime. View our privacy policy at www.mortons.co.uk/privacy
Latest Forum Posts
- *Oct 2023: FORUM MIGRATION TIMELINE*
05/10/2023 07:57:11 - Making ER11 collet chuck
05/10/2023 07:56:24 - What did you do today? 2023
05/10/2023 07:25:01 - Orrery
05/10/2023 06:00:41 - Wera hand-tools
05/10/2023 05:47:07 - New member
05/10/2023 04:40:11 - Problems with external pot on at1 vfd
05/10/2023 00:06:32 - Drain plug
04/10/2023 23:36:17 - digi phase converter for 10 machines.....
04/10/2023 23:13:48 - Winter Storage Of Locomotives
04/10/2023 21:02:11 - More Latest Posts...
- View All Topics
Support Our Partners


Shopping Partners
Subscription Offer

Latest "For Sale" Ads
- Reeves** - Rebuilt Royal Scot by Martin Evans
by John Broughton
£300.00 - BRITANNIA 5" GAUGE James Perrier
by Jon Seabright 1
£2,500.00 - Drill Grinder - for restoration
by Nigel Graham 2
£0.00 - WARCO WM18 MILLING MACHINE
by Alex Chudley
£1,200.00 - MYFORD SUPER 7 LATHE
by Alex Chudley
£2,000.00 - More "For Sale" Ads...
Latest "Wanted" Ads
- D1-3 backplate
by Michael Horley
Price Not Specified - fixed steady for a Colchester bantam mark1 800
by George Jervis
Price Not Specified - lbsc pansy
by JACK SIDEBOTHAM
Price Not Specified - Pratt Burnerd multifit chuck key.
by Tim Riome
Price Not Specified - BANDSAW BLADE WELDER
by HUGH
Price Not Specified - More "Wanted" Ads...
Get In Touch!
Do you want to contact the Model Engineer and Model Engineers' Workshop team?
You can contact us by phone, mail or email about the magazines including becoming a contributor, submitting reader's letters or making queries about articles. You can also get in touch about this website, advertising or other general issues.
Click THIS LINK for full contact details.
For subscription issues please see THIS LINK.
Digital Back Issues


Donate

 Register
 Log-in
Model Engineer Magazine
- Percival Marshall
- M.E. History
- LittleLEC
- M.E. Clock

ME Workshop
- An Adcock
- & Shipley
- Horizontal
- Mill

Subscribe Now
- Great savings
- Delivered to your door

Pre-order your copy!
- Delivered to your doorstep!
- Free UK delivery!
All Forum Topics > Manual machine tools > Murad Cadet Restoration Project