OMT microscope - restored
| gerry madden | 25/07/2021 20:26:41 |
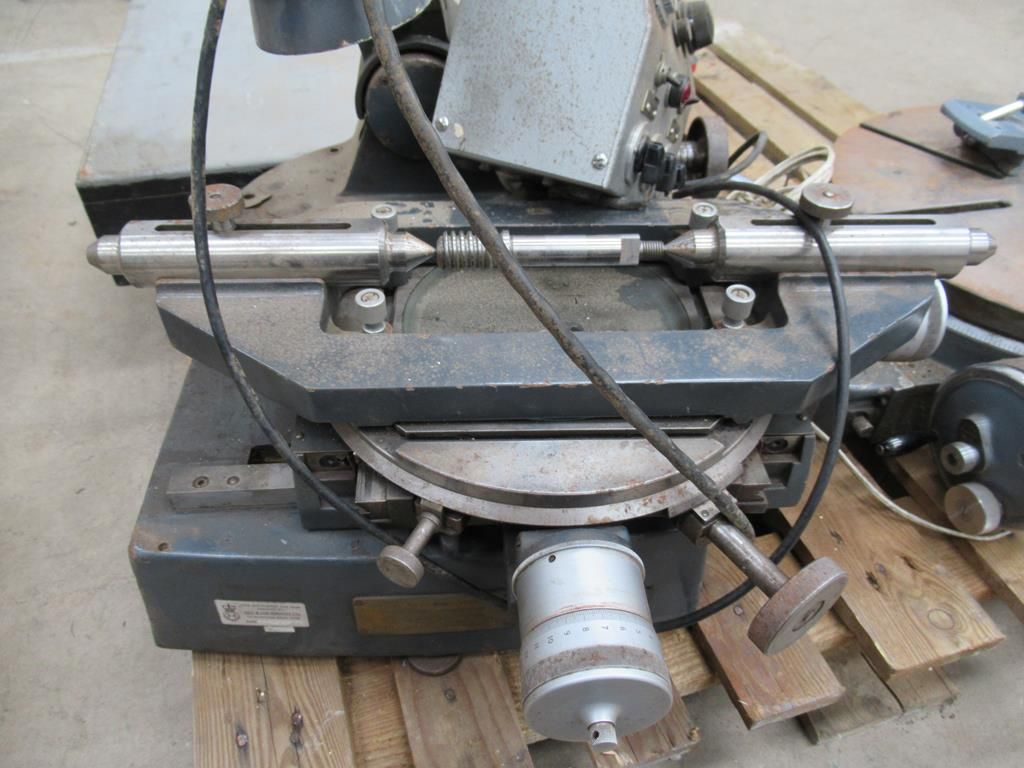
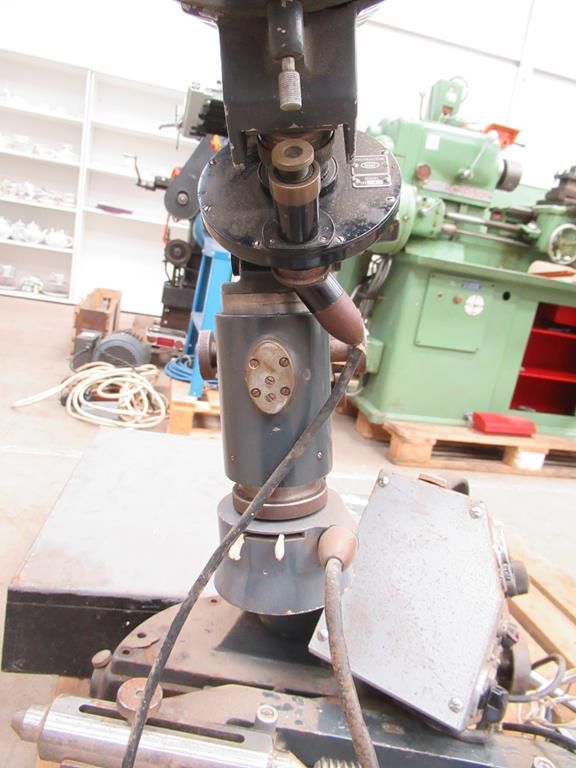
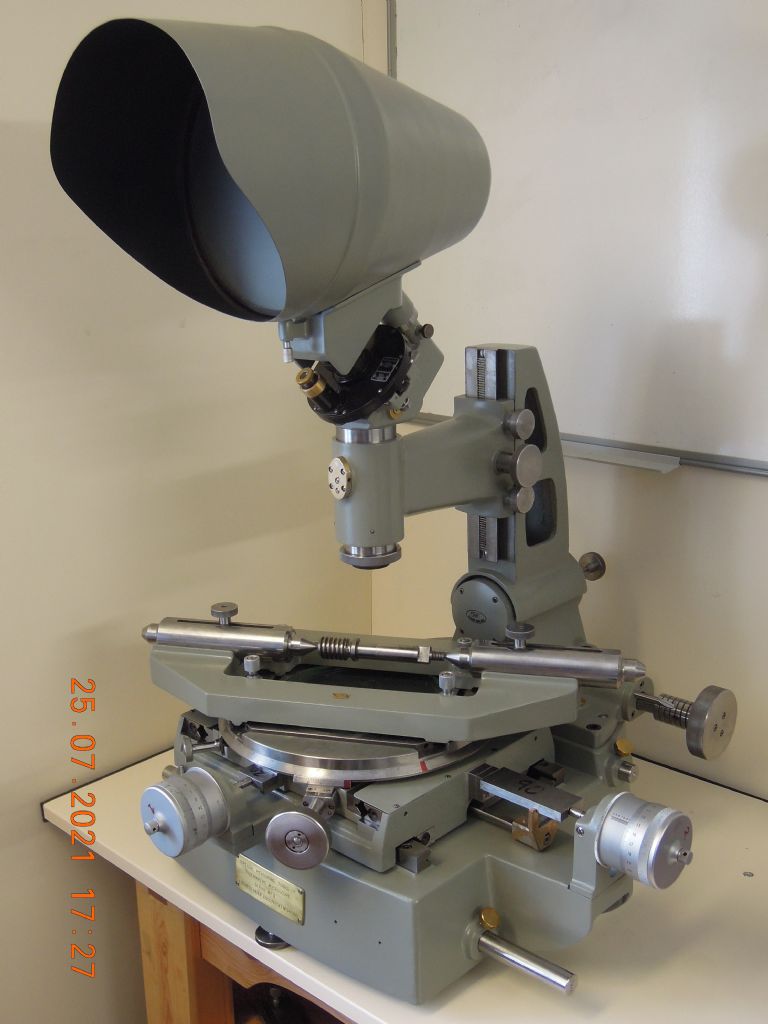
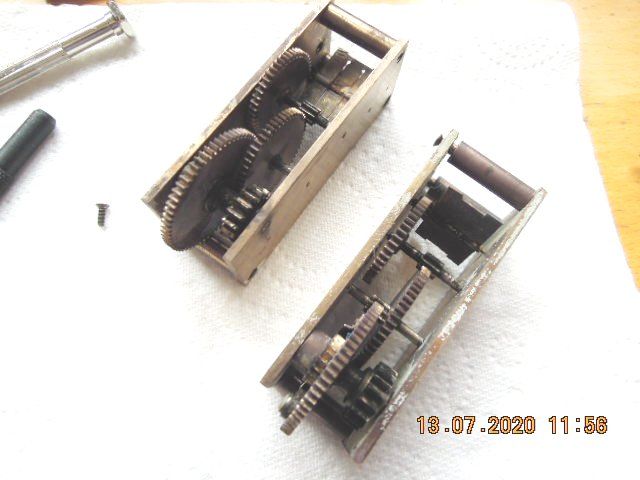
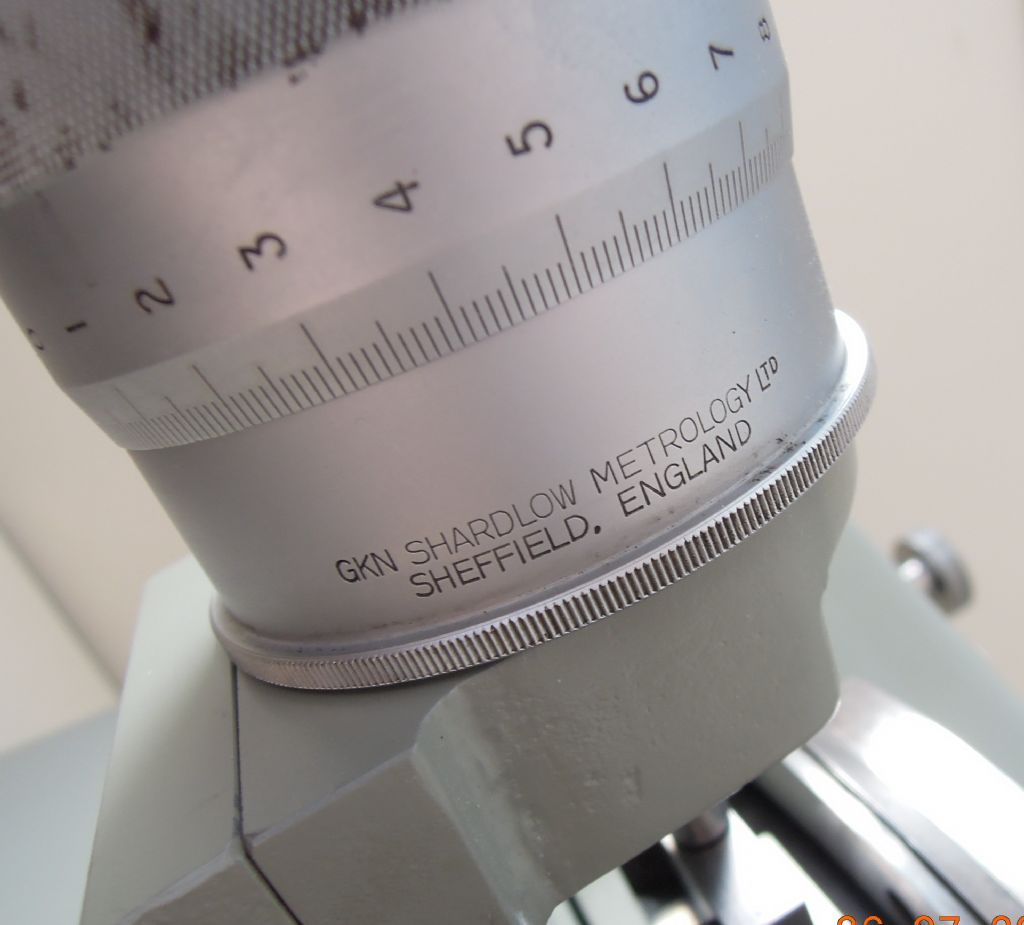
| 331 forum posts 156 photos | From a canibalised, abused and uncared-for rusty wreck purchased 18 months ago for £65 I now have a rather elegant and useful OMT microscope. Its been a challenging project at times but always a rewarding one. I only lost one small component, a mirror clip which was easily re-made. I have leant about painting, threads, mechanical and optical construction in the post war years and some interesting industrial history too. Good value for money, I think anyway. Here's the microscope when I bought it..... ....and now fully operational clean and shiney..... This particular microscope is serial no. 9. Sales literature for this product shows machines with serial numbers in the 20s so this is certainly an early one made in Slough as opposed to Maidenhead where the bulk of production took place. Technically many changes were made in subsequent models and serial numbers go up into the 700s. Whether these changes were made for cost reduction purposes as opposed to enhancement, I'm not sure, but I can only criticise this model in a few ways if I'm honest One feature I really don't like is the clock-work air-brakes to reduce shock loads on the micrometer heads if the spring-loaded slides are released accidentally against them. These things rattle, buzz and chatter regardless of what you do to them. Later machines I believe had hydraulic dampers which would I'm sure be much smoother and quieter. I'm not so impressed by the optics quality either. My 1970s elcheapo desk stereo microscope with Japanese optics is much sharper. I won't be too hard on the OMT yet though until I have completed the optics clean-up. Some lenses and mirrors are probably permanently damaged though as they have succumbed to the dreaded glass-etching fungus discussed on here previously. One component this machine didn't come with was the back-light unit. I need to do some trials and investigate what I might needed here so I may be back to the forum for some guidance on this later. In terms of accuracy I did expect the machine would have lost some of this in its 70 year life due to imperfect ball guide surfaces giving stick-slip, and wear and impact damage to the micrometer heads. But all seems to be ok. Using the opto-mechanical bore measuring probe I have calibrated the X and Y heads in approximate 2mm increments over the 1" travel using slip blocks. Provided I take a mean of five measurements the head figures will never deviate from the slip-block values by more than a couple of microns anywhere along the full scale. In fact when making these precision measurements its always me that's the problem. The micro-heads on the finest circumferential scales can be interpolated to 0.000 03" Unfortunately its the 0.025" increments on the axial scale that keep catching me out. I have to use an eyeglass to be sure which side of the line I'm on. And if these things don't catch me out, the adding up and converting to mm usually does ! You also need to make sure the parts are properly secured to the table too. Its so easy to loose microns here! Generally this is not a machine to measure with when you are tired or want to do something quickly. But its good fun nevertheless and satisfying to have saved another lovely bit of engineering from the scrapheap. Gerry
|
| Michael Gilligan | 25/07/2021 20:32:49 |
23121 forum posts 1360 photos | Very nice job, Gerry !! Thanks for showing us MichaelG. |
| Howard Lewis | 25/07/2021 21:41:28 |
| 7227 forum posts 21 photos | When you are trying to check to those levels of accuracy, the instrument and the gauge block need to be left to soak to ambient temperature, without touching for several hours. 24 hours was the minimum when I was at work. Those levels of precision are for temperature and humidity controlled Calibration Room conditions. Rather than checking the instrument with Gauge Blocks, it would have been used to check that the Gauge Blocks were within calibration! For £65 and your time and effort, you now have a measuring instrument which probably cost four figures or more when new! OMT were high precision Industrial quality instruments, used in our Standards Room and Calibration Room You have done very well to restore it such good condition! Howard Edited By Howard Lewis on 25/07/2021 21:43:28 |
| Pete Rimmer | 25/07/2021 21:57:17 |
| 1486 forum posts 105 photos | Nice work Gerry. Are those Shardlow micrometer heads? They look identical to the ones I have on my Hilger & Watts microscope. |
| Kiwi Bloke | 26/07/2021 01:35:47 |
| 912 forum posts 3 photos | Beautiful job! Did you have to restore any plated components? Any details of methods used would be appreciated. |
| Ady1 | 26/07/2021 09:01:59 |
6137 forum posts 893 photos | Looks brand new, lovely |
| gerry madden | 26/07/2021 17:05:08 |
| 331 forum posts 156 photos | Thanks all for your comments. Howard - I think I would only need to worry about temperature if the components I measure are not the same material as the structure of the 'scope and its key measuring elements. When everything in the 'system' is steel, it all grows or shrinks together. I have actually attempted to prove this using the accurate opto-mechanical bore measuring device. In an afternoon when my 'workshop' got up to 28C I set it up to measure something and aligned all the cross-hairs in the eyepiece. The following morning when the room and its contents had cooled to about 18C I switched on the lighting, peered through the eyepiece to find that the cross-hairs had not deviated at all and were still perfectly aligned. This wouldn't have been the case if I'd had a lump of aluminium or plastic on the table. I could still measure it of course but would have to make allowance for the differential expansion when ambient temperatures are above or below standards room temperatures. Pete - Yes they are indeed, with big 65mm barrels. I think later machines used smaller ones for some strange reason. I did think they might be worn out and I would ditch them for some metrics but couldn't find any of that size for at a sensible price. However, now I know they are still good I will keep them and have a go at removing the rust in the knurling at the top of the picture. I think I will surround a small patch of it in plasticine and drown it in citric acid. If that seems to improve the appearance I do it some more! One aspect I'm not sure about on these mics is the proper/correct way to set the thread-adjustment nut. Should they for example be tightened to give a certain 'free-play' value in the shaft or perhaps tightened to give a specific friction torque value ? Kiwi - you caught me out. That's one little task still to do. There are a number of minor parts including the nameplate that have been made in brass. All of these were originally nickel plated to match the steel parts but much of it had worn off. I haven't decided yet whether to let someone else do this for me or faff around myself for another 6 months. I'll let you know Gerry
|
| Pete Rimmer | 28/07/2021 21:30:46 |
| 1486 forum posts 105 photos | Posted by gerry madden on 26/07/2021 17:05:08:
One aspect I'm not sure about on these mics is the proper/correct way to set the thread-adjustment nut. Should they for example be tightened to give a certain 'free-play' value in the shaft or perhaps tightened to give a specific friction torque value ? Gerry I have no idea Gerry I just tightened mine until I was happy with the sticktion. The stages on mine are spring-loaded so I rely on that to remove any backlash, not that I can detect any. |
| Howard Lewis | 29/07/2021 11:56:24 |
| 7227 forum posts 21 photos | If you are measuring, and with large diameter mic drums, you are looking for precision, NO "free play" can be acceptable. There should be no free play (Backlash ) nor excessive friction, for fear of causing wear, so any free play should be eliminated to give just a slight frictional drag. The idea is that a small rotation produces a small linear movement, but the large drum means that each graduation is wider, so that interpolation is easier, allowing more accurate measurement. Don't, anyone, start a discussion on the semantics or "Accuracy" vs "Precision", please Howard. |
| V8Eng | 29/07/2021 13:57:27 |
| 1826 forum posts 1 photos | Always good to see nice equipment well restored and brought back to life like this Possibly the OP is already aware of this online brochure but I thought it worth linking to & page 20 is relevant.
Edited By V8Eng on 29/07/2021 14:01:01 |
| Michael Gilligan | 29/07/2021 15:41:17 |
23121 forum posts 1360 photos | Posted by Howard Lewis on 29/07/2021 11:56:24:
[…] Don't, anyone, start a discussion on the semantics or "Accuracy" vs "Precision", please Howard. . There’s no need for a discussion, Howard … the distinction is clear MichaelG. |
Please login to post a reply.
Want the latest issue of Model Engineer or Model Engineers' Workshop? Use our magazine locator links to find your nearest stockist!
Sign up to our newsletter and get a free digital issue.
You can unsubscribe at anytime. View our privacy policy at www.mortons.co.uk/privacy
- *Oct 2023: FORUM MIGRATION TIMELINE*
05/10/2023 07:57:11 - Making ER11 collet chuck
05/10/2023 07:56:24 - What did you do today? 2023
05/10/2023 07:25:01 - Orrery
05/10/2023 06:00:41 - Wera hand-tools
05/10/2023 05:47:07 - New member
05/10/2023 04:40:11 - Problems with external pot on at1 vfd
05/10/2023 00:06:32 - Drain plug
04/10/2023 23:36:17 - digi phase converter for 10 machines.....
04/10/2023 23:13:48 - Winter Storage Of Locomotives
04/10/2023 21:02:11 - More Latest Posts...
- View All Topics
- Reeves** - Rebuilt Royal Scot by Martin Evans
by John Broughton
£300.00 - BRITANNIA 5" GAUGE James Perrier
by Jon Seabright 1
£2,500.00 - Drill Grinder - for restoration
by Nigel Graham 2
£0.00 - WARCO WM18 MILLING MACHINE
by Alex Chudley
£1,200.00 - MYFORD SUPER 7 LATHE
by Alex Chudley
£2,000.00 - More "For Sale" Ads...
- D1-3 backplate
by Michael Horley
Price Not Specified - fixed steady for a Colchester bantam mark1 800
by George Jervis
Price Not Specified - lbsc pansy
by JACK SIDEBOTHAM
Price Not Specified - Pratt Burnerd multifit chuck key.
by Tim Riome
Price Not Specified - BANDSAW BLADE WELDER
by HUGH
Price Not Specified - More "Wanted" Ads...
Do you want to contact the Model Engineer and Model Engineers' Workshop team?
You can contact us by phone, mail or email about the magazines including becoming a contributor, submitting reader's letters or making queries about articles. You can also get in touch about this website, advertising or other general issues.
Click THIS LINK for full contact details.
For subscription issues please see THIS LINK.
Model Engineer Magazine
- Percival Marshall
- M.E. History
- LittleLEC
- M.E. Clock
ME Workshop
- An Adcock
- & Shipley
- Horizontal
- Mill
Subscribe Now
- Great savings
- Delivered to your door
Pre-order your copy!
- Delivered to your doorstep!
- Free UK delivery!



 Register
 Log-in


