Forum sponsored by:

Loco Cylinder Casting Pattern Advice
| Buffer | 20/04/2021 14:31:51 |
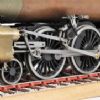
| 430 forum posts 171 photos | H Having seen so many casting articles in ME lately I have been doing a bit myself and below is a photo of the end of my CAD model for a Black 5. I was going to make a split pattern for sand casting with bosses where the bores are for core prints. Question is as the cylinder and valve bores are not inline I can't split the pattern through either bore so where do I split it to get it out of the sand? Please ignore the bit at the top as this will also be re shaped to aid removal. Anyone got any ideas? Many Thanks.
Edited By Buffer on 20/04/2021 14:34:49 |
| Jon Lawes | 20/04/2021 15:26:02 |
 1078 forum posts | Do you need to cast the bores in? Could you leave one or both out of the casting process? |
| Luker | 20/04/2021 15:40:29 |
 230 forum posts 172 photos | HI Buffer, you need both cores if you don't want large risers to prevent draw. You can use a staggered split line. When ramming patterns with a non-uniform split line you place a little casting sand on the moulding board, dust then push the pattern into the sand and ram normally. Then with the other side of the pattern you remove the bottom sand and continue as normal (normally it just drops off when you lift the box). You going to need casting radii to prevent corner draw on those webs as well as a decent draft to get proper (tight) ramming in those pockets, otherwise you are going to get burn-on. Hope this helped! |
| JasonB | 20/04/2021 16:09:11 |
 25215 forum posts 3105 photos 1 articles | Put the two coreprints on the same split line but make up a core box which has the core(s) offset from the part that goes into the print. I would do large cylinder with a parallel core and offset the smaller one. Should be cheaper this way if you are paying to have them done. Edited By JasonB on 20/04/2021 16:10:59 |
| Luker | 20/04/2021 16:09:26 |
230 forum posts 172 photos | Picture worth 1000 words...
|
| JasonB | 20/04/2021 16:25:26 |
25215 forum posts 3105 photos 1 articles | As Luker says pictures help, this is my method. One straight split line through middle of larger cylinder, rectangular print for small cylinder so core goes in the right way round
|
| Buffer | 20/04/2021 21:02:11 |
| 430 forum posts 171 photos | Thanks for the advice chaps. Having read this I do have a couple more questions now. I think I can understand Lukers idea, part of the pattern is being propped up on sand which makes sense. Jason, I sort of get your idea after an awful lot of looking at this wondering but I might not be fully there yet. It's really hard to try and imagine that model being a hole in a box of sand! So the boss on the end of the valve part of the cylinder has a rectangle on it to avoid the undercuts that would be at the 1 and 5 o'clock positions (top drawing where the red circle cuts the green line)? Luker, can you tell me what sort of radius I should put on the corners and what sort of draft angle do you use, that's dead easy to change on the model? Do you increase your patterns for shrinkage? I was thinking of just giving myself an ample machining allowance all over. Where would you put the in and out gates or does it not matter too much? And lastly I was going to dig out your old article (always a good read by the way) on metal composition because the cylinders are available as iron or gunmetal at a whopping £395 for gunmetal. I think you're in South Africa so that's R7800 hence my interest in having a go myself. I have lots of scrap brass and I didn't know if brass cylinders would be any good or if not what's the chance of making a sort of gunmetal from my brass. Anyway thanks again its all very much appreciated. I cast my smoke box rings recently from brass and they look superb now they're all machined up. I think it's fair to say that all the recent casting articles from Luker and others over the last couple of years are what got me to try this and the silly grin lasted for ages when this lump came out of the sand.
|
| noel shelley | 20/04/2021 21:33:54 |
| 2308 forum posts 33 photos | Gun metal from brass is not a good idea as you have the Zinc content. Old marine water pump castings are a good supply. Shrinkage 3/16" to the foot in all directions, you may also need a machining allowance as well. A Draft angle 3* or more depends on the item. Radius, you just want to avoid sharp corner so what looks right, is right. I would aim to feed from the top inside face if possible with a good runner and take a riser from the opposite end. Where you have a chunky casting like this it may be worth thinking of using an insulated sleeve to keep the runner fluid for long enough to feed the casting if shrinkage is a problem. whilst ceramic fibre tube is best a tube of plaster of paris will work. You can't beat opening the box to see what is inside ! Noel. Edited By noel shelley on 20/04/2021 21:47:19 |
| Buffer | 20/04/2021 22:00:02 |
| 430 forum posts 171 photos | Noel The way I do it I think most of the Zinc goes up in smoke! I'm not sure where I could find any old water pumps, I see online silicon bronze is easy to get but it apparently doesn't machine too well. |
| noel shelley | 20/04/2021 22:13:28 |
| 2308 forum posts 33 photos | Papal smoke ! You need a K type thermocouple, inconel sheathed and I would suggest 3mm dia 500mm long. plug this into a hand held readout and keep the temp between 1000* and NEVER more than 1050* this will reduce zinc loss to a minimum. Where are you located ? A boat yard or boat repair company is a good place to look for bronze. Noel |
| Luker | 21/04/2021 06:49:51 |
230 forum posts 172 photos | I was hoping Noel would join in on this one, Noels castings are exceptional! You only prop the pattern on the sand when ramming the bottom part of the pattern. This is to keep the draft angles correct relative to the split lines. When you flip the box and fit the top part of the pattern it all works out. I can't comment on casting brass cylinders as I've never done that, but I expect they won't last as long as the bearing alloys or cast iron. I have mixed Gunmetal from brass but the amount of brass used is relatively small to get the required amount of Zink, you still need to add Tin and copper. I have made Alumina bronze, tin bronze, gunmetal and cast iron cylinders and all have worked really well. The cheapest is the cast iron and alumina bronze but you need to add silicone to the alumina bronze to improve machinability. Incidentally all my alloys are mixed from scrap, and when I had a few tested they were surprisingly within spec. As Noel says the shrinkage and radii depend on the material and size of casting. If that's a ¬2kg (5 gauge cylinder more or less) I would use 3mm in that pocket and 1.5-2mm radius everywhere else. 5Deg draft in the pocket will help with removing the pattern without knocking the sides, as Noels says 3Deg everywhere else (from your pic it looks like you're using green sand). As for the risers and ingates I wrote a program to work this out, if you send me the surface area, volume, alloy you intend to use and weight of the end casting I'll plug it into my solver and post a screen grab. If you give me an indication of what alloy you intend using I can give some guidance on dusting and what to add to the facing sand to improve finish. Other than the health issues with fuming zink the actual mass loss is very small unless you really cooking the melt for long periods. I did post a capping inoculant on one of the forums that will help with this. The cost of this hobby gets me down a little, its not what its about. All my articles are geared to help the guy with limited recourses, using commonly available items. The smokebox ring looks really good! Cylinders will be a breeze! |
| Buffer | 21/04/2021 20:51:29 |
| 430 forum posts 171 photos | Noel thanks for that I will probably get one as I'm hoping to do quite a bit of casting. I'm about as far as you can get from the sea in the UK. Luker thanks for the offer of sorting out the the gates etc, I'll take you up on that offer. I will probably go for the gunmetal that you listed in backyard foundry part four (85%Cu 10%SN 5% Brass) as I have plenty of scrap copper form my boiler build and I'm pretty sure I can get more quite easily. Unless you think there might be something better that is. When I've finished the model I'll be back in touch. Regards
|
| Luker | 22/04/2021 06:39:05 |
230 forum posts 172 photos | There's always something better but I've used that mix for cylinders and it works well. This of course depends on the piston width, rings etc. etc. I've also used that mix for eccentric straps and axel boxes so it has good bearing characteristics. It melts easily and it doesn't slag too much, but it does skin a little. Generally the skin sticks to the crucible so it doesn't end up going down the sprue. BTW you melt the scrap brass and tin first then add the copper, the other way round the brass freezes the copper and melts on the top. This will start fuming long before the copper has re-melted. To improve the surface quality you can add cake flour to the facing sand. I've submitted an article on riser and ingate design with a smaller version of my program. The idea was to upload the program to this site as a guide for the backyard guys. |


Please login to post a reply.
Magazine Locator
Want the latest issue of Model Engineer or Model Engineers' Workshop? Use our magazine locator links to find your nearest stockist!
Sign up to our Newsletter
Sign up to our newsletter and get a free digital issue.
You can unsubscribe at anytime. View our privacy policy at www.mortons.co.uk/privacy
Latest Forum Posts
- *Oct 2023: FORUM MIGRATION TIMELINE*
05/10/2023 07:57:11 - Making ER11 collet chuck
05/10/2023 07:56:24 - What did you do today? 2023
05/10/2023 07:25:01 - Orrery
05/10/2023 06:00:41 - Wera hand-tools
05/10/2023 05:47:07 - New member
05/10/2023 04:40:11 - Problems with external pot on at1 vfd
05/10/2023 00:06:32 - Drain plug
04/10/2023 23:36:17 - digi phase converter for 10 machines.....
04/10/2023 23:13:48 - Winter Storage Of Locomotives
04/10/2023 21:02:11 - More Latest Posts...
- View All Topics
Support Our Partners


Shopping Partners
Subscription Offer

Latest "For Sale" Ads
- Reeves** - Rebuilt Royal Scot by Martin Evans
by John Broughton
£300.00 - BRITANNIA 5" GAUGE James Perrier
by Jon Seabright 1
£2,500.00 - Drill Grinder - for restoration
by Nigel Graham 2
£0.00 - WARCO WM18 MILLING MACHINE
by Alex Chudley
£1,200.00 - MYFORD SUPER 7 LATHE
by Alex Chudley
£2,000.00 - More "For Sale" Ads...
Latest "Wanted" Ads
- D1-3 backplate
by Michael Horley
Price Not Specified - fixed steady for a Colchester bantam mark1 800
by George Jervis
Price Not Specified - lbsc pansy
by JACK SIDEBOTHAM
Price Not Specified - Pratt Burnerd multifit chuck key.
by Tim Riome
Price Not Specified - BANDSAW BLADE WELDER
by HUGH
Price Not Specified - More "Wanted" Ads...
Get In Touch!
Do you want to contact the Model Engineer and Model Engineers' Workshop team?
You can contact us by phone, mail or email about the magazines including becoming a contributor, submitting reader's letters or making queries about articles. You can also get in touch about this website, advertising or other general issues.
Click THIS LINK for full contact details.
For subscription issues please see THIS LINK.
Digital Back Issues


Donate

 Register
 Log-in
Model Engineer Magazine
- Percival Marshall
- M.E. History
- LittleLEC
- M.E. Clock

ME Workshop
- An Adcock
- & Shipley
- Horizontal
- Mill

Subscribe Now
- Great savings
- Delivered to your door

Pre-order your copy!
- Delivered to your doorstep!
- Free UK delivery!
All Forum Topics > General Questions > Loco Cylinder Casting Pattern Advice