watchmakers lathe accuracy
| Henry Rancourt | 16/03/2021 02:31:01 |
| 20 forum posts 47 photos |
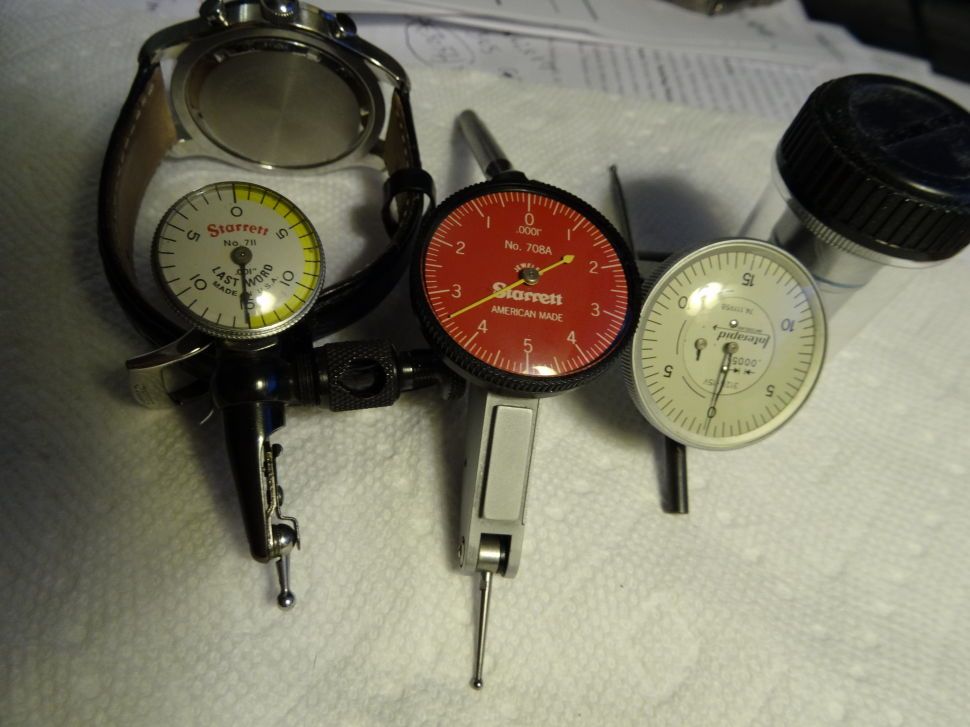
About 5 five years ago I measured the spindle runout, starting with a last word indicator with .001 divisions and the indicator never moved. I switched to a .0005 division dial indicator and again no movement. So I switched to a .0001 division indicator and saw very slight hard to see movement.
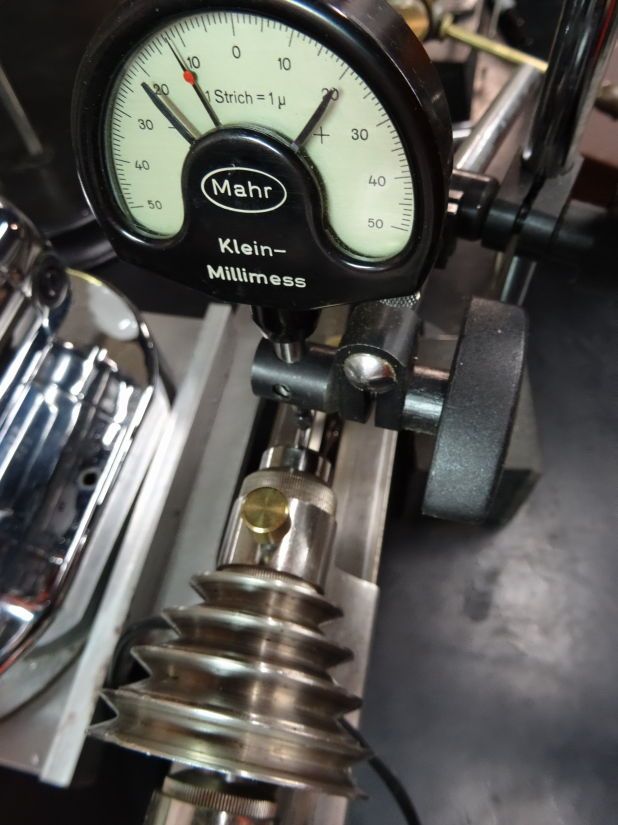
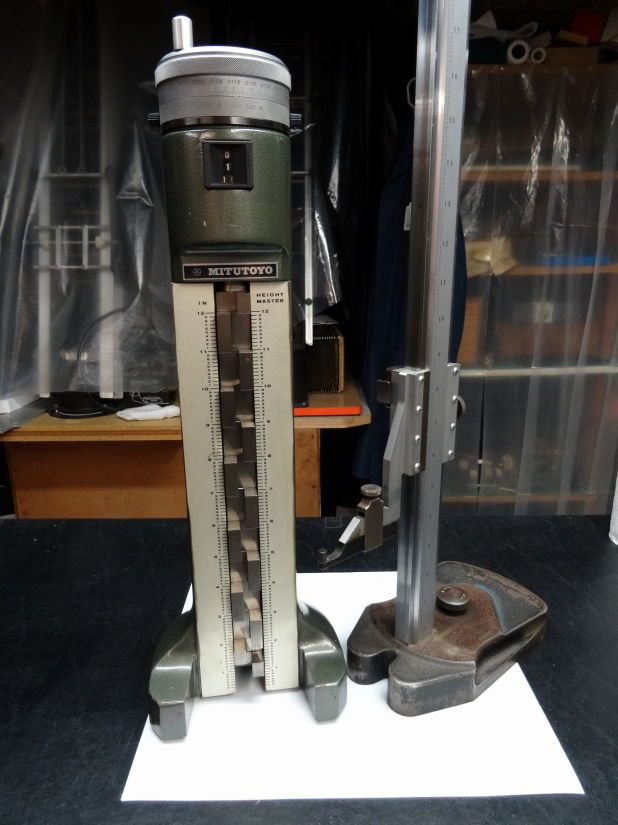
Since then I’ve acquired a Mahr Klein Millimess 9129 and last night I went through the .001 to .0001 indicators again and got the same results. So I set up the Mahr indicator and the pointer moved about 1um which is equal to .00004 (1um actual vale is .00003937…..). This is amazing to me or is it normal for watchmakers lathes? All my indicators are calibrated using my Mitutoyu height gage.
|
| Hopper | 16/03/2021 02:50:28 |
7881 forum posts 397 photos | It's quite possible. But that very tall magnetic stand anchored to the bench next to the bed with the flexible fine adjustment joint in the middle of the second arm could be flexing all over the place by several thou too. A more stable set up might be to mount the clamp that holds the dial indicator gauge directly on the first upright bar of the magnetic base and then clamp the magnetic base to the lathe bed. The more direct the better. Whatever you do, get that fine adjsutment joint out of the equation. They have no place in precision measurement. And I can't see exactly what you are measuring from there -- the spindle itself or a piece of bar held in the collets, or something else. An overall view picture would help. Edited By Hopper on 16/03/2021 03:17:42 |
| Henry Rancourt | 16/03/2021 04:04:38 |
| 20 forum posts 47 photos | Thanks for the reply. I was an inspector in a state of the art metrology lab in one of the largest aerospace companies from 1969 to 1974. I was just curious about accuracy of these old lathes. |
| Hopper | 16/03/2021 04:18:55 |
7881 forum posts 397 photos | Well if you are happy with your measuring process -- I still have some mistrust of those flexible joints based on experience -- then the answer is yes these lathes can have that little runout. Enjoy.
Edited By Hopper on 16/03/2021 04:51:44 |
| Howard Lewis | 16/03/2021 06:56:13 |
| 7227 forum posts 21 photos | Superb accuracy! I would be proud to own a machine of such quality. But probably frightened to use it for fear of causing wear! But you won't find many folk with Height Mics, outside of industry, unless they have been involved in quality, inspection and metrology. If only we could measure in such conditions of cleanliness and controlled temperature and humidity. I second Hopper's comments about flexibility in measuring set ups. You can't measure, reliably, to a tenth of a thou if the measuring device is supported by something which can move that much of itself. A bit like measuring with a tape measure when your hand is shaking! But, in practical terms, often, we are making a one off part to fit another one off part, under whatever the ambient conditions happen to be at the time, so the absolute dimension is of lesser importance. Howard |
| John MC | 16/03/2021 08:33:38 |
464 forum posts 72 photos | Could the OP edit his first post so we know what the units are please, (2nd paragraph). I presume the the lathe spindle is supported on plain bearings? If that is so then there will be some clearance so the bearing can be lubricated properly. How where the measurements taken? Just by rotating the spindle, if so I would expect the results quoted. What about up and down/side to side movement? Try measuring with the DTI on top of the spindle and then gently lift the spindle, (simulating a cut) . I would suggest that the necessary clearance in the bearing would show if the measuring equipment is a s good as you suggest. Also, some measurements after the the machines been running would be interesting. John
|
| Michael Gilligan | 16/03/2021 14:55:54 |
23121 forum posts 1360 photos | To better appreciate the expected performance of a watchmakers’ lathe ... I recommend reading this: . . MichaelG. |
| Tom Sheppard | 16/03/2021 17:08:43 |
| 47 forum posts | It is good enough to make watches with. It doesn't need to be any better than tha so it simply doesn't matter what its absolute accuracy is. The quality is in the hands that use it. Edited By Tom Sheppard on 16/03/2021 17:09:28 |
| Henry Rancourt | 16/03/2021 19:40:53 |
| 20 forum posts 47 photos | Posted by John MC on 16/03/2021 08:33:38:
Could the OP edit his first post so we know what the units are please, (2nd paragraph). If you are asking what the value of each division is, it equals .00003937". |
| Tom Sheppard | 16/03/2021 20:32:40 |
| 47 forum posts |
To a watchmaker it measures 0.00004432951''' but one such will be sensible enough to use microns which are a proper measurement and coincidentally, what the dial is calibrated to. |
| Andrew Johnston | 16/03/2021 20:57:12 |
7061 forum posts 719 photos | Where does 0.00004432951" come from? Incidentally the official designation for a millionth of a metre is micrometre although, of course, micron is in common usage. Andrew |
| Tom Sheppard | 16/03/2021 21:13:36 |
| 47 forum posts | 0.00004432951''', not 0.00004432951''. That is something completely different! |
| Michael Gilligan | 16/03/2021 21:33:03 |
23121 forum posts 1360 photos | Ooohh ...Tom’s playing “What’s My Ligne ?“ MichaelG. |
| Hopper | 17/03/2021 04:36:38 |
7881 forum posts 397 photos | Posted by Tom Sheppard on 16/03/2021 21:13:36:
0.00004432951''', not 0.00004432951''. That is something completely different! Is it the diameter of the head of a pin? |
| Andrew Johnston | 17/03/2021 09:05:07 |
7061 forum posts 719 photos | Posted by Michael Gilligan on 16/03/2021 21:33:03:
...Tom’s playing “What’s My Ligne ?“ Actually he's playing AITA, and the answer is yes. As a result of his unhelpful response to my honest question he has been promoted to a very exclusive club. Andrew |
| Roger B | 17/03/2021 09:58:41 |
244 forum posts 105 photos | Having read the OP I thought I would see what runout my lathes would show. Here are a couple of shakey handheld videos. As I had a setup in the chuck of the Hobbymat I made the measurement on the chuck mounting flange. This is not very smoothly machined and as I realised afterwards it has an 0 stamped in it to position the chuck. The mearurements were made with a 1 micrometer resolution TESA indicator mounted on a Mitutoyo magentic stand. The runout is around 10 micrometers and I was not able to see any deflection with hand presure on the chuck. I repeated this with my Proxxon FD150, this time measuring on the chuck register. It was difficult to get the indicator in place. The runout here was around 5 micrometers and I got a couple of micrometers deflection when pressing on the spindle nose.
|
| Michael Gilligan | 17/03/2021 10:07:06 |
23121 forum posts 1360 photos | Posted by Andrew Johnston on 17/03/2021 09:05:07:
Posted by Michael Gilligan on 16/03/2021 21:33:03:
...Tom’s playing “What’s My Ligne ?“ Actually he's playing AITA, and the answer is yes. As a result of his unhelpful response to my honest question he has been promoted to a very exclusive club. Andrew . Sorry, Andrew ... in my innocence, I had to look-up AITA I was intending to leave it for a while before responding to Hopper; but it’s probably better to do so now “What’s My Ligne ?“ was an intentional pun, not a typo ... If I could work out Tom’s “clever” responses, I’m surprised you didn’t. MichaelG. . Edit: __ to avoid labouring this any further: https://en.wikipedia.org/wiki/What%27s_My_Line%3F https://en.wikipedia.org/wiki/Ligne Edited By Michael Gilligan on 17/03/2021 10:12:28 |
| Hopper | 17/03/2021 10:23:49 |
7881 forum posts 397 photos | Hoho. A watchmaking joke. Very droll. Interesting link. 1 ligne = a round wick folded over and measured. Whole different world those button makers live in. |
| Meunier | 17/03/2021 13:47:19 |
| 448 forum posts 8 photos | Slightly different, 'what's my line' and wonder if there are any remaining "sagger-makers bottom-knockers" still working in the Potteries ? Ligne also = French/Swiss measure of diameter of watch movements, also 'French Inch' DaveD |
| Bezzer | 17/03/2021 17:02:17 |
| 203 forum posts 16 photos | Posted by Meunier on 17/03/2021 13:47:19:
Slightly different, 'what's my line' and wonder if there are any remaining "sagger-makers bottom-knockers" still working in the Potteries ? DaveD Nope unless the Gladstone Pottery Museum has a pretend one, doubt any real ones are still living the way pneumoconiosis used to wipe out the old time potters. |
Please login to post a reply.
Want the latest issue of Model Engineer or Model Engineers' Workshop? Use our magazine locator links to find your nearest stockist!
Sign up to our newsletter and get a free digital issue.
You can unsubscribe at anytime. View our privacy policy at www.mortons.co.uk/privacy
- hemingway ball turner
04/07/2025 14:40:26 - *Oct 2023: FORUM MIGRATION TIMELINE*
05/10/2023 07:57:11 - Making ER11 collet chuck
05/10/2023 07:56:24 - What did you do today? 2023
05/10/2023 07:25:01 - Orrery
05/10/2023 06:00:41 - Wera hand-tools
05/10/2023 05:47:07 - New member
05/10/2023 04:40:11 - Problems with external pot on at1 vfd
05/10/2023 00:06:32 - Drain plug
04/10/2023 23:36:17 - digi phase converter for 10 machines.....
04/10/2023 23:13:48 - More Latest Posts...
- View All Topics
- Reeves** - Rebuilt Royal Scot by Martin Evans
by John Broughton
£300.00 - BRITANNIA 5" GAUGE James Perrier
by Jon Seabright 1
£2,500.00 - Drill Grinder - for restoration
by Nigel Graham 2
£0.00 - WARCO WM18 MILLING MACHINE
by Alex Chudley
£1,200.00 - MYFORD SUPER 7 LATHE
by Alex Chudley
£2,000.00 - More "For Sale" Ads...
- D1-3 backplate
by Michael Horley
Price Not Specified - fixed steady for a Colchester bantam mark1 800
by George Jervis
Price Not Specified - lbsc pansy
by JACK SIDEBOTHAM
Price Not Specified - Pratt Burnerd multifit chuck key.
by Tim Riome
Price Not Specified - BANDSAW BLADE WELDER
by HUGH
Price Not Specified - More "Wanted" Ads...
Do you want to contact the Model Engineer and Model Engineers' Workshop team?
You can contact us by phone, mail or email about the magazines including becoming a contributor, submitting reader's letters or making queries about articles. You can also get in touch about this website, advertising or other general issues.
Click THIS LINK for full contact details.
For subscription issues please see THIS LINK.
Model Engineer Magazine
- Percival Marshall
- M.E. History
- LittleLEC
- M.E. Clock
ME Workshop
- An Adcock
- & Shipley
- Horizontal
- Mill
Subscribe Now
- Great savings
- Delivered to your door
Pre-order your copy!
- Delivered to your doorstep!
- Free UK delivery!


 Register
 Log-in


