Forum sponsored by:

Tom Senior
Support Bar
| Bob Astill | 24/10/2020 14:08:48 |
 114 forum posts 20 photos | Hi all the main support bar has started to move when milling both the locking bolts are tight anyone had this happen? is there a way to stop it? and am i right in asuming that the locking bolts will need to be replaced if so where can i get some Many thanks Bob |
| Jeff Dayman | 24/10/2020 14:46:10 |
| 2356 forum posts 47 photos | You could try shims of drinks can metal between bar and housing to take up some clearance and hopefully restore clamping - no risk of machine damage with this try, and virtually no cost. |
| Bob Astill | 25/10/2020 06:39:08 |
114 forum posts 20 photos | Posted by Jeff Dayman on 24/10/2020 14:46:10:
You could try shims of drinks can metal between bar and housing to take up some clearance and hopefully restore clamping - no risk of machine damage with this try, and virtually no cost. Thats a great idea i have some steel shim stock will give it a go many thanks.
Bob |
| Clive Foster | 25/10/2020 09:10:43 |
| 3630 forum posts 128 photos | First step is to pull it all out and give the bar and clamp a really good clean. Not just wiping but appropriate solvents too. Counterintuitively roughing up the surface to "key" things doesn't help. Smooth with maximum mating surface area does the trick. Might be worth applying a very thin layer of blue or, probably better, a solvent based felt tip pen mark or two to verify that you have good contact everywhere. Best to investigate and sort things properly rather than resorting to quick'n dirty shims to fill the gap. Once shimmed you can never go back. When used in an environment with oils floating around occasionally moved cast iron components seem to get a bit slippy so clamps loose the holding power. Doesn't matter how careful you are to clean the mating components. If the Gremlins so decree it does happen. Takes a fair few years but if you are on the list they will get you. For me the major disadvantage of synthetic coolants is that this sort of thing happens much faster and much more frequently! Clive |
| old mart | 25/10/2020 15:56:23 |
| 4655 forum posts 304 photos | Sorry, I am not sure what you mean by "main support bar", is it the part that supports the vertical head? Which model of TS is it? Edited By old mart on 25/10/2020 15:57:10 |
| Steviegtr | 25/10/2020 17:00:21 |
 2668 forum posts 352 photos | Posted by old mart on 25/10/2020 15:56:23:
Sorry, I am not sure what you mean by "main support bar", is it the part that supports the vertical head? Which model of TS is it? Edited By old mart on 25/10/2020 15:57:10 Equally confused. picture would help. Steve. |
| Dave Halford | 25/10/2020 21:00:35 |
| 2536 forum posts 24 photos | I suspect it's the round horizontal arbour support |
| Dave Halford | 26/10/2020 11:27:35 |
| 2536 forum posts 24 photos | I've done some sleuthing. This is a Tom Senior "Light Vertical" where the head is mounted on the end of a round bar. Bob, I would be checking either of the two clamps aren't cracked if it was lifted by the support when you bought it. Don't shim anything, that type of clamp relies on everything being the 'right' size, levering the slot open to get a shim in might crack it. If the clamps are undamaged hopefully it's just oil in the wrong place. |
| Simon Williams 3 | 26/10/2020 12:23:11 |
| 728 forum posts 90 photos | If Dave's sleuthing instincts are true to form, and it is the TS Light Vertical, failure to clamp that top bar only has a couple of explanations. - Studs or casting are damaged, so the clamp nuts are not closing the split clamp. - Summat in the split gap stopping it closing Adding shim etc isn't tackling the problem, its creating another. So remove the two studs (1/2 whit) and pass a feeler gauge through the split to check for clearance. While checking make sure the clamps haven't cracked through the heel, they're only cast iron. Check the nuts on their respective studs that they run freely. Clean the bar off so it is free of surface rust and grubbage. The clamps on mine are a very close fit on the bar, the clamp nuts only need nipping up lightly to stop any movement of the head. Do let us know how it resolves Rgds Simon
|
| old mart | 26/10/2020 14:21:43 |
| 4655 forum posts 304 photos | I would be wary of just removing the studs on a light vertical, the motor makes it top heavy and it could rotate unexpectedly with bad results. I would put a bar in the spindle and raise the knee until blocks could be secured to the bed each side of the bar to restrict any rotation. The clamps on the LV at the museum only require tightening about 12 ftlbs to fully secure the top end. There should be a gap of about 1/16" in the clamps where the bolts go through, it should be obvious if the casting is fractured at either, or both clamping points. Also, the two SHCS which secure the head to the bar should be checked for tightness, if loose the head can move about slightly. Edited By old mart on 26/10/2020 14:24:16 |
| Clive Foster | 26/10/2020 14:44:49 |
| 3630 forum posts 128 photos | Head removal can be a bit tricky, especially if working on your own. I made a substantial foot with a vertically mounted R8 arbor to assist removal and reinstallation of the head on my Bridgeport. Well worth making something similar for the Senior using the appropriate taper to match the spindle. Although intial fitting needs a touch of care to get the foot securely mounted flat to the table the positive, repatable support makes life so much easier. Especially as table feeds can be used to align the head and studs on refitting. Extra support for the motor is probably desirable. Some sort of simple bridge should do. Clive |
| Simon Williams 3 | 26/10/2020 16:32:59 |
| 728 forum posts 90 photos | Old Mart and Clive - thank you for pointing out my over-simplification. You are indeed right to point out that the top is top (edit - I meant too heavy, but the typo is appropriate!) heavy for a one man lift at that height and reach. . My defense is that I thought it self-evident not to undo both clamps together. Even that's not as simple to do as say - if the clamps aren't holding! I like the idea of sticking something suitable in the taper and restraining the other end laterally! My contribution is to caution against trying to withdraw the top bar out of the two clamps without having the clamp bolts in position, and just snugged up to stop the split clamp opening. It would be all too easy to allow the overhanging weight etc to crowbar the nearer clamp open as you bring the bar etc. forward out of the rear clamp. Ping! I'm looking forward to hearing how this pans out. Rgds to all our Senior citizens. Simon edit for typo Edited By Simon Williams 3 on 26/10/2020 16:35:15 |
| Steviegtr | 26/10/2020 21:36:57 |
2668 forum posts 352 photos | I have the same Mill. I t took me quite a while to get the tram right. The problem with the light is it only has the bolts at one side. When i nipped the bolts down it rotated the head. Eventually by taking the head one particular way round by a few thou too far & then nipping up i got it spot on. It has never moved since. Hope you sort out the problem Bob. Steve. |
| Bob Astill | 28/10/2020 08:32:51 |
114 forum posts 20 photos | hi all thank you for the replies i am using it in the horizontal not vertical the bar goes right through the casting so i would be suprised to find any cracks and there is nowhere to measure what it clamps on. |
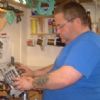
| Brian Wood | 28/10/2020 08:55:12 |
| 2742 forum posts 39 photos | Hello Bob, Thank you for the photo, it makes all the difference to understanding what the problem is. The overarm, to give it it's proper name, is clamped by two pinch bolts, the other is behind the motor at the rear of the body that close shaped blocks onto the bar when tightened. I suspect the gap between the two clamps is non existent and they close on each other. To put that right, slacken the two bolts, pull out the whole bar and then lift the clamps from the bores they live in. Machine off a little, only a little, of the face where the scallops face each other to increase the gap again, refit and insert the bar again. They should now clamp with no further difficulty. Lathe tailstocks often use the same method to grip the barrel rather than squeeze a slot. I hope that helps you Regards Brian |
| Bob Astill | 28/10/2020 09:15:39 |
114 forum posts 20 photos | Posted by Brian Wood on 28/10/2020 08:55:12:
Hello Bob, Thank you for the photo, it makes all the difference to understanding what the problem is. The overarm, to give it it's proper name, is clamped by two pinch bolts, the other is behind the motor at the rear of the body that close shaped blocks onto the bar when tightened. I suspect the gap between the two clamps is non existent and they close on each other. To put that right, slacken the two bolts, pull out the whole bar and then lift the clamps from the bores they live in. Machine off a little, only a little, of the face where the scallops face each other to increase the gap again, refit and insert the bar again. They should now clamp with no further difficulty. Lathe tailstocks often use the same method to grip the barrel rather than squeeze a slot. I hope that helps you Regards Brian Thank you for this Brian i will take a look at that.
Bob |
| Emgee | 28/10/2020 09:59:57 |
| 2610 forum posts 312 photos | An excellent method of locking a shaft from movement, instant release of shaft when nut/screw loosened. First time I used the method was on a Dore Westbury. Emgee |
| old mart | 28/10/2020 17:25:01 |
| 4655 forum posts 304 photos | Ah, a picture which explains everything. The pairs of clamps touching are the prime suspects, strange that both sets should fail to clamp at the same time. This type of clamp is featured on the Light Vertical quill, the drill mill quill, the drill press and the lathe tailstock, all four of the machines at the museum lock perfectly. |
| Bob Astill | 20/11/2020 11:27:57 |
114 forum posts 20 photos | Just a quick update i found time today to sort the Tom out i relised i could pull he shaf out without undoing the 2 lock nut so i did as sugested and removed the locking bolts and i took 0.3mm off each end of the brass shoes where they meet refitted everything and it is now rock solid and does not move when cutting so thank you for all the comments i now have a fully working Tom Senior Bob |
| Steviegtr | 20/11/2020 16:39:37 |
2668 forum posts 352 photos |
Steve. |


Please login to post a reply.
Magazine Locator
Want the latest issue of Model Engineer or Model Engineers' Workshop? Use our magazine locator links to find your nearest stockist!
Sign up to our Newsletter
Sign up to our newsletter and get a free digital issue.
You can unsubscribe at anytime. View our privacy policy at www.mortons.co.uk/privacy
Latest Forum Posts
- hemingway ball turner
04/07/2025 14:40:26 - *Oct 2023: FORUM MIGRATION TIMELINE*
05/10/2023 07:57:11 - Making ER11 collet chuck
05/10/2023 07:56:24 - What did you do today? 2023
05/10/2023 07:25:01 - Orrery
05/10/2023 06:00:41 - Wera hand-tools
05/10/2023 05:47:07 - New member
05/10/2023 04:40:11 - Problems with external pot on at1 vfd
05/10/2023 00:06:32 - Drain plug
04/10/2023 23:36:17 - digi phase converter for 10 machines.....
04/10/2023 23:13:48 - More Latest Posts...
- View All Topics
Support Our Partners


Shopping Partners
Subscription Offer

Latest "For Sale" Ads
- Reeves** - Rebuilt Royal Scot by Martin Evans
by John Broughton
£300.00 - BRITANNIA 5" GAUGE James Perrier
by Jon Seabright 1
£2,500.00 - Drill Grinder - for restoration
by Nigel Graham 2
£0.00 - WARCO WM18 MILLING MACHINE
by Alex Chudley
£1,200.00 - MYFORD SUPER 7 LATHE
by Alex Chudley
£2,000.00 - More "For Sale" Ads...
Latest "Wanted" Ads
- D1-3 backplate
by Michael Horley
Price Not Specified - fixed steady for a Colchester bantam mark1 800
by George Jervis
Price Not Specified - lbsc pansy
by JACK SIDEBOTHAM
Price Not Specified - Pratt Burnerd multifit chuck key.
by Tim Riome
Price Not Specified - BANDSAW BLADE WELDER
by HUGH
Price Not Specified - More "Wanted" Ads...
Get In Touch!
Do you want to contact the Model Engineer and Model Engineers' Workshop team?
You can contact us by phone, mail or email about the magazines including becoming a contributor, submitting reader's letters or making queries about articles. You can also get in touch about this website, advertising or other general issues.
Click THIS LINK for full contact details.
For subscription issues please see THIS LINK.
Digital Back Issues


Donate

 Register
 Log-in
Model Engineer Magazine
- Percival Marshall
- M.E. History
- LittleLEC
- M.E. Clock

ME Workshop
- An Adcock
- & Shipley
- Horizontal
- Mill

Subscribe Now
- Great savings
- Delivered to your door

Pre-order your copy!
- Delivered to your doorstep!
- Free UK delivery!
All Forum Topics > Workshop Tools and Tooling > Tom Senior