Forum sponsored by:

Brian's Horizontal Stirling Engine
This is not a "how to do", its a "how I did it"
| Brian Rutter | 24/06/2020 15:03:51 |
 25 forum posts 24 photos | OK here goes! I would love to build a steam engine, but no money, time or facilities has made that highly improbable. A couple of years ago I came across a couple of videos on youtube which I thought were steam engines but subsequently turned out to be Hot Air Engines. A bit of research and I was hooked. Cheap, no expensive tools required, no high pressure steam - with many examples being made out of recycled paint cans and the like and can be made on the kitchen table. When I started out I did not have any stainless steel paint cans, but I did have a few feet of 2.1/2" copper pipe. Stirling engines have a sealed cylinder, one end of which is heated, the other end is cooled. I chose to build my cylinder in copper but with a thermal break between them to prevent the heat transferring quickly from one end to the other. To join the two ends of the cylinder together I used a clamped / flange connection that I developed for a previous project. The former for making the flanges I made in a hotel bedroom in Abu Dhabi cut from a nylon chopping board using an electric drill, coping saw and a file. No work bench just a glass topped coffee table. It was done to pass the time away on a boring contract.
Edited By Brian Rutter on 24/06/2020 15:05:09 |
| Brian Rutter | 24/06/2020 15:34:32 |
25 forum posts 24 photos |
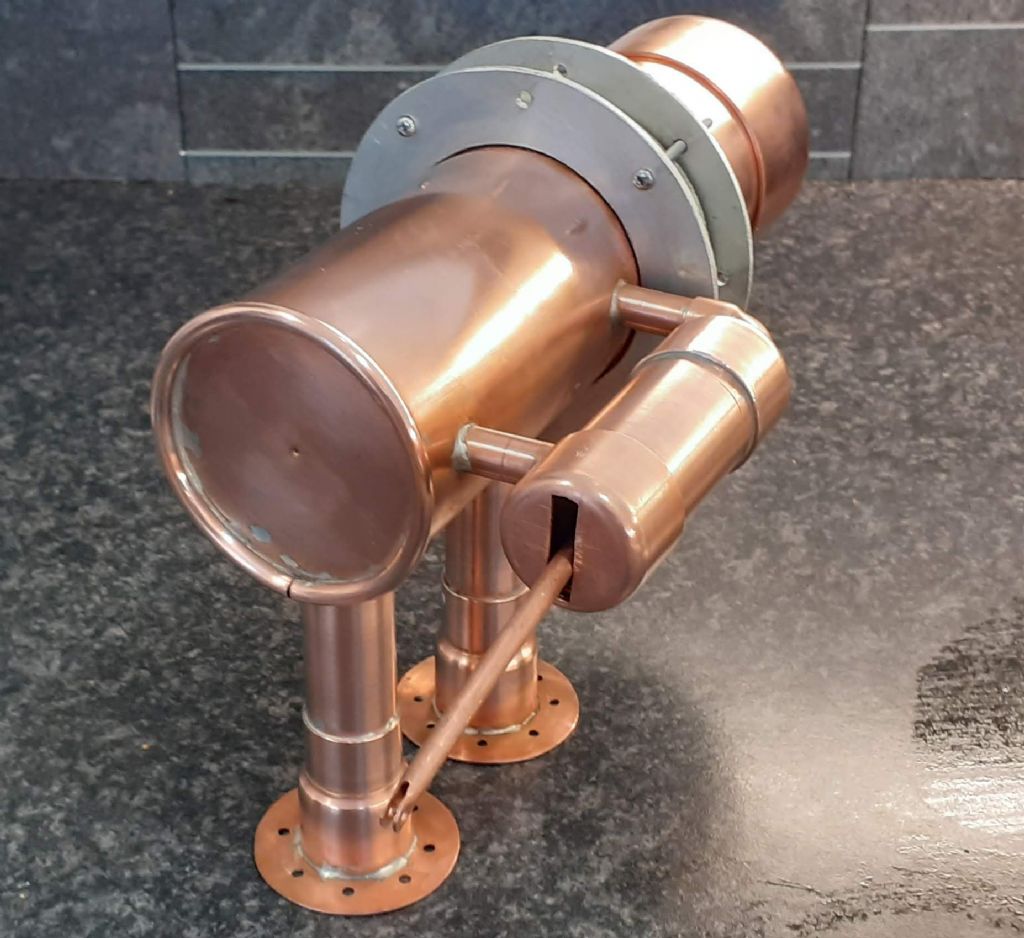
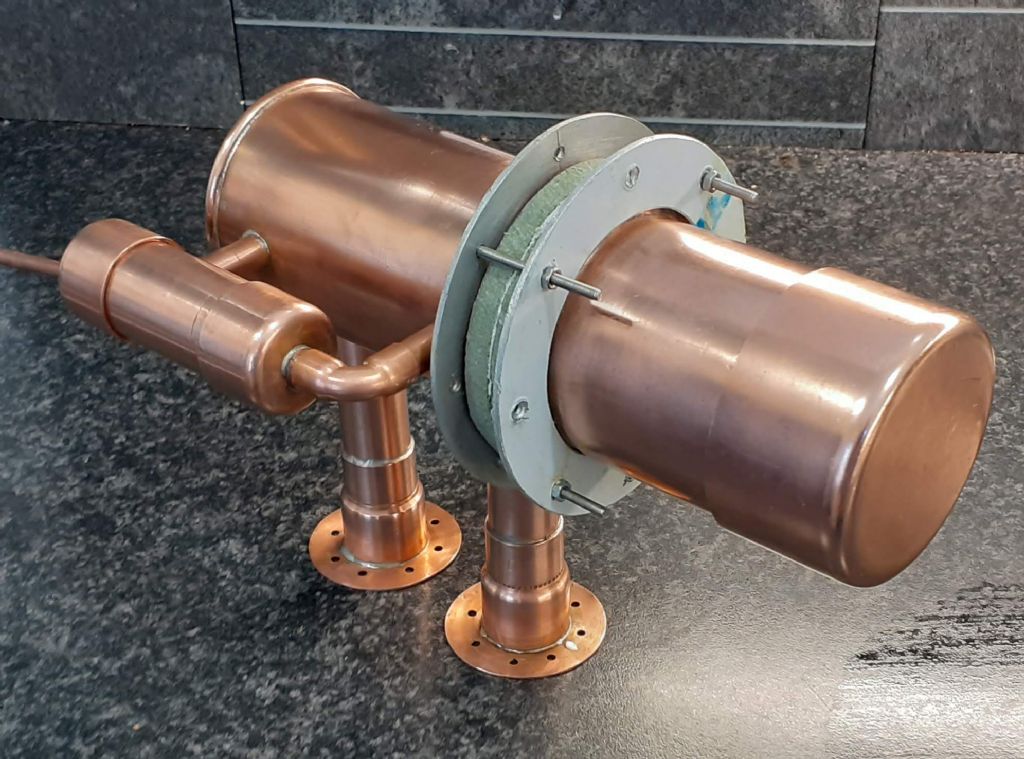
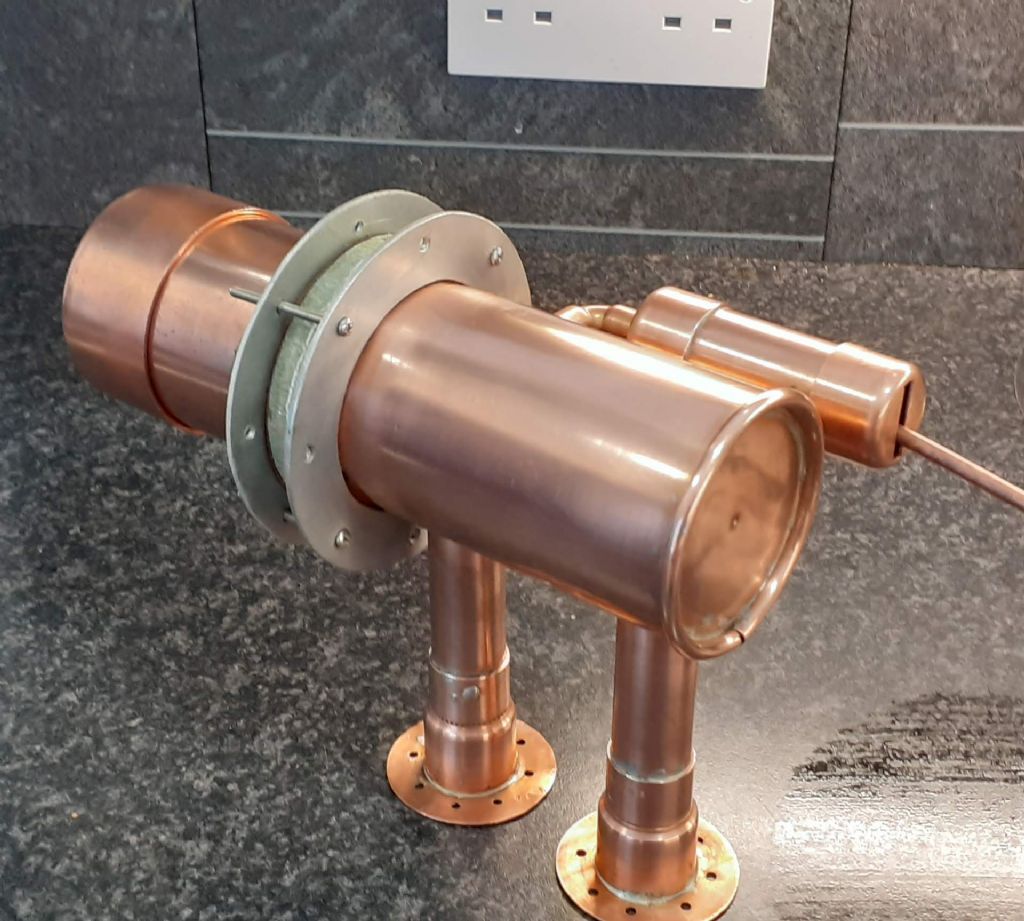
The thermal joint flanges are out of 3mm Aluminium Sheet
The thermal break is nothing more than a couple of layers of HDF laminate flooring.
Up until this point everything came out of the "really useful box of stuff" the exeption being the 2.1\2" end cap on the hot end. Everything here is soft soldered apart from the end cap which is fixed with Gun Gum exhaust repair paste.
|
| Brian Rutter | 24/06/2020 16:05:49 |
25 forum posts 24 photos |
When Mum is not looking, cut about 20mm off the bottom of her steradent tube. This will be a nice fit into aa piece of 28mm copper pipe. Fill the tube with two part epoxy glue, forming a recess for the connection to the con-rod.
The piston should be a good fit in the cylinder, if you close the outlet from the cylinder with your hand the piston should not move. When you open the outlet of the cylinder the piston should slowly slide down the cylinder under its own weieght. |
| David Noble | 24/06/2020 16:06:36 |
 402 forum posts 37 photos | Brilliant David |
| Brian Rutter | 25/06/2020 10:49:39 |
25 forum posts 24 photos | Of course I would like to build a steel flywheel but I can't. So I had to make do with a wooden one.
For reference it is a 200mm (8"
THe wheel runs on two 8mm bearings from fidgit spinner and the conrod is 4mm diameter bamboo. |
| Ro | 25/06/2020 11:36:13 |
| 31 forum posts 35 photos | Wow, that is fantastic. Can't wait to see it run! ro |
| Brian Rutter | 25/06/2020 15:31:21 |
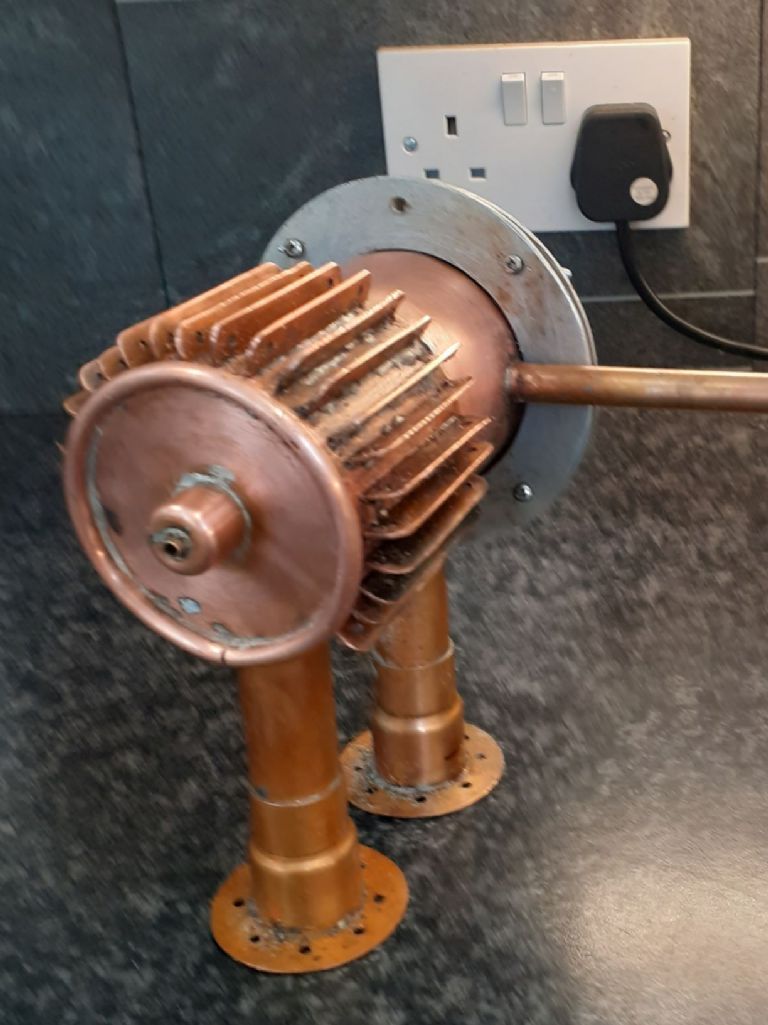
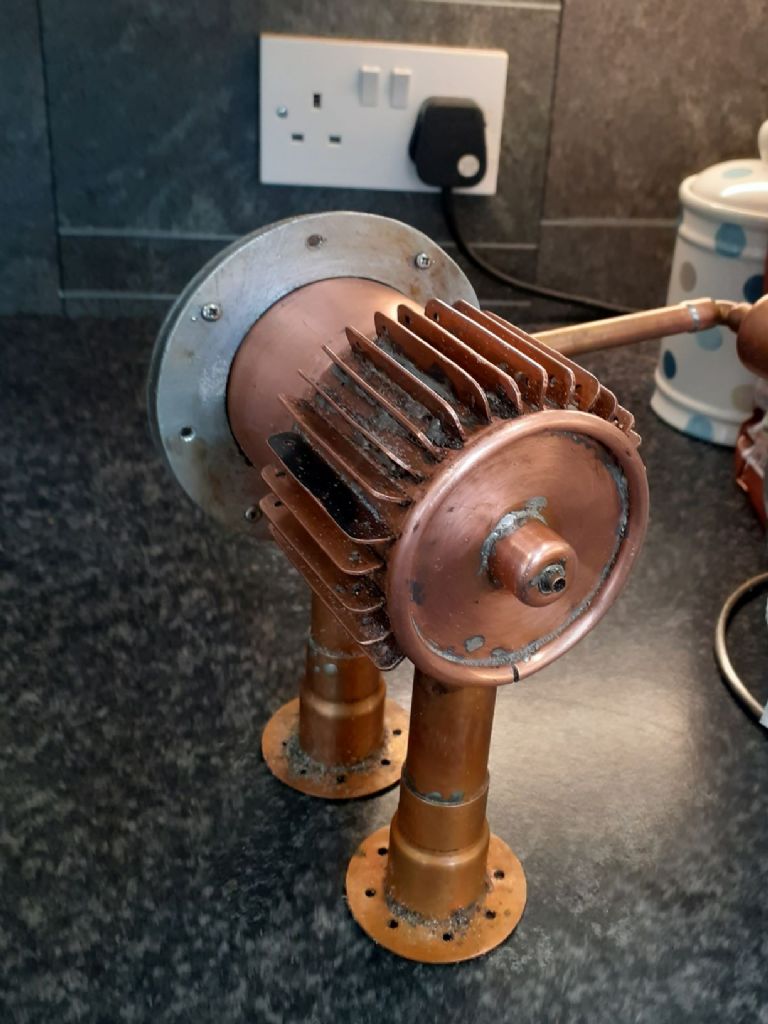
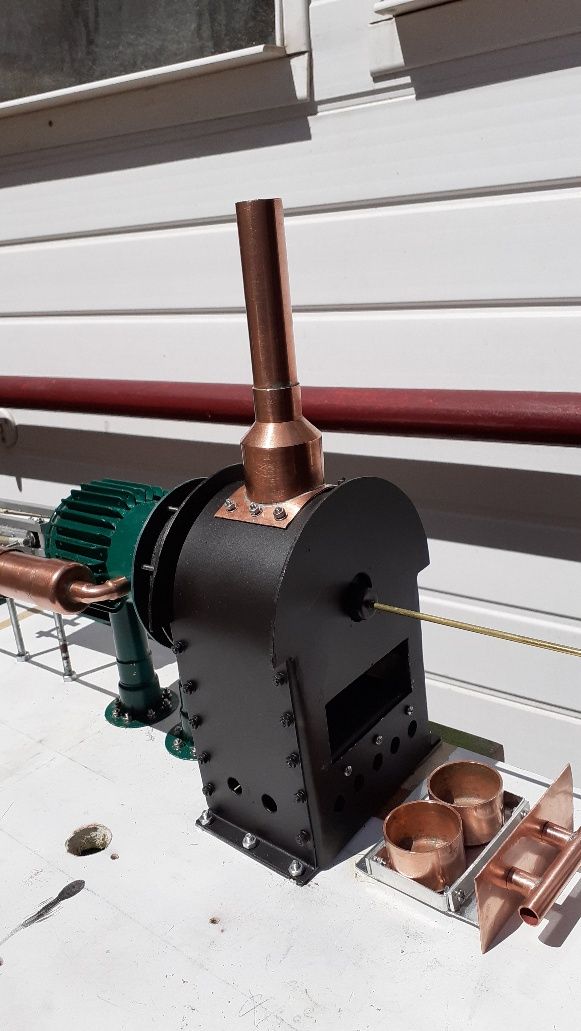
25 forum posts 24 photos | It was at this point I had to chose either water cooled or air cooled. Mistake Number 1 I went for the air cooled variety. Mistake Number 2 Circumferential fins are very wasteful of materials so I chose longitudinal fins that I could cut from scraps of copper pipe. Trying to solder these fins on was a bit of a nightmare way beyond my skill sets. The first few were OK but with the later ones, every one I tried to solder the previous few desoldered and fell off. It took forever and turned out to be the worst soldering I have done for a long time. Up until this point I was intending to have a nice shiny copper engine, the gronky soldering made change my mind to a painted model.
|
| Brian Rutter | 26/06/2020 09:00:51 |
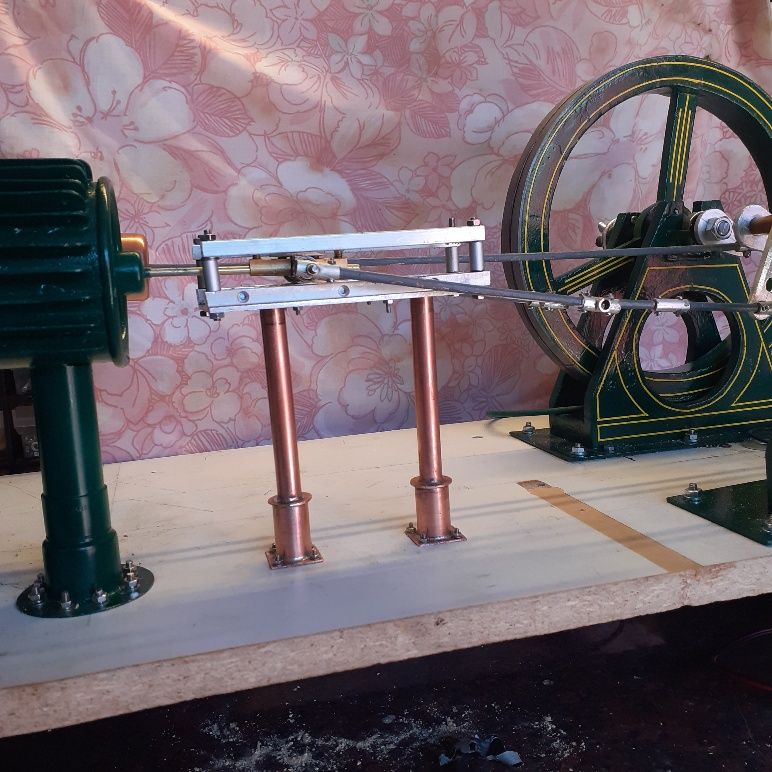
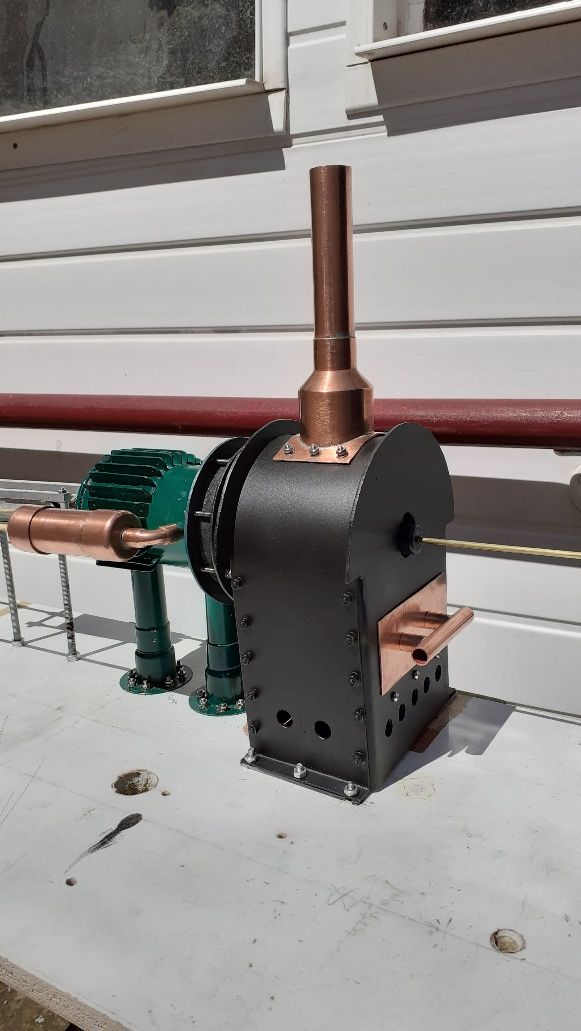
25 forum posts 24 photos | Due to the coronovirus lock down, I was limited to materials in my shed. The displacer conrod is 1/8" brass. This is fine for vertical enginess but in the horizontal configuration it is not too clever. I added a slider to limit the vertical movement
Edited By Brian Rutter on 26/06/2020 09:27:54 Edited By Brian Rutter on 26/06/2020 09:28:41 |
| Brian Rutter | 26/06/2020 09:08:41 |
25 forum posts 24 photos | Then added a firebox
Edited By Brian Rutter on 26/06/2020 09:12:56 |
| Brian Rutter | 26/06/2020 10:38:08 |
25 forum posts 24 photos |
Edited By Brian Rutter on 26/06/2020 10:38:37 |
| Roderick Jenkins | 26/06/2020 10:49:30 |
 2376 forum posts 800 photos | Excellent! Rod |
| Michael Gilligan | 26/06/2020 10:54:38 |
 23121 forum posts 1360 photos | An amazing project, Brian ... reminded me [in the best possible way] of those ‘escape from Colditz’ stories. MichaelG. |
| Paul Kemp | 26/06/2020 20:57:03 |
| 798 forum posts 27 photos | Excellent job. Posts like this where people get on and do something with no drawings and limited facilities I really enjoy. A bit of determination and inginuity goes a long way. Love it. Paul. |


 diameter wheel made from HDF laminate flooring with 3mm of lead on the outside of the rim.
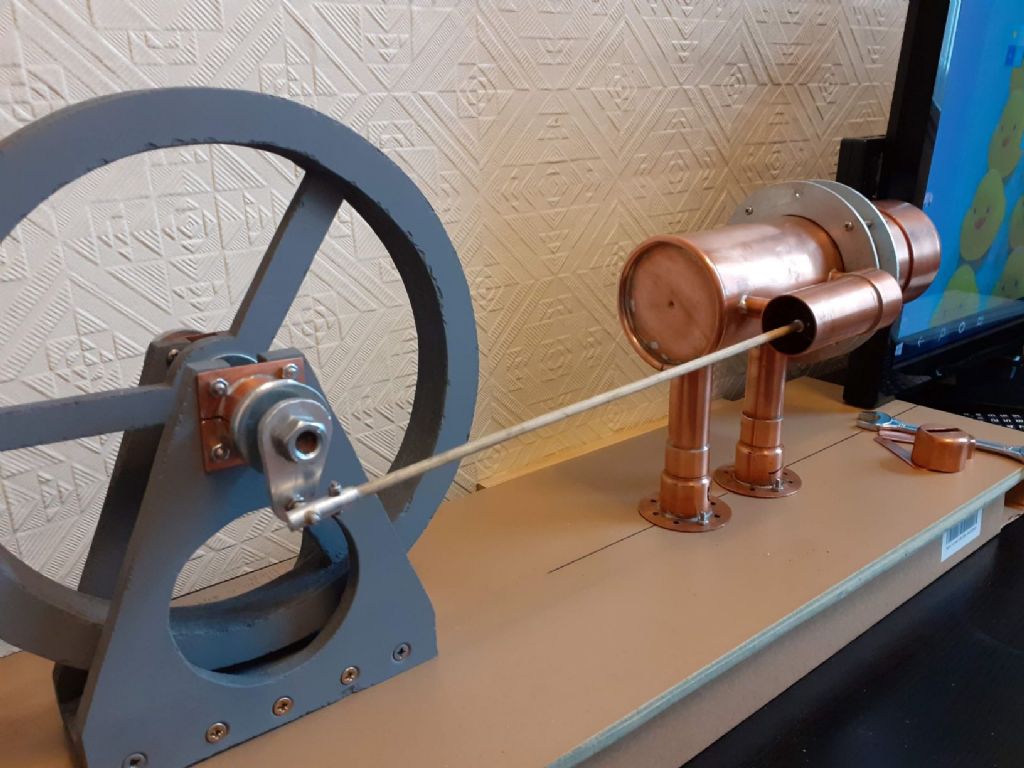

Please login to post a reply.
Magazine Locator
Want the latest issue of Model Engineer or Model Engineers' Workshop? Use our magazine locator links to find your nearest stockist!
Sign up to our Newsletter
Sign up to our newsletter and get a free digital issue.
You can unsubscribe at anytime. View our privacy policy at www.mortons.co.uk/privacy
Latest Forum Posts
- *Oct 2023: FORUM MIGRATION TIMELINE*
05/10/2023 07:57:11 - Making ER11 collet chuck
05/10/2023 07:56:24 - What did you do today? 2023
05/10/2023 07:25:01 - Orrery
05/10/2023 06:00:41 - Wera hand-tools
05/10/2023 05:47:07 - New member
05/10/2023 04:40:11 - Problems with external pot on at1 vfd
05/10/2023 00:06:32 - Drain plug
04/10/2023 23:36:17 - digi phase converter for 10 machines.....
04/10/2023 23:13:48 - Winter Storage Of Locomotives
04/10/2023 21:02:11 - More Latest Posts...
- View All Topics
Support Our Partners


Shopping Partners
Subscription Offer

Latest "For Sale" Ads
- Reeves** - Rebuilt Royal Scot by Martin Evans
by John Broughton
£300.00 - BRITANNIA 5" GAUGE James Perrier
by Jon Seabright 1
£2,500.00 - Drill Grinder - for restoration
by Nigel Graham 2
£0.00 - WARCO WM18 MILLING MACHINE
by Alex Chudley
£1,200.00 - MYFORD SUPER 7 LATHE
by Alex Chudley
£2,000.00 - More "For Sale" Ads...
Latest "Wanted" Ads
- D1-3 backplate
by Michael Horley
Price Not Specified - fixed steady for a Colchester bantam mark1 800
by George Jervis
Price Not Specified - lbsc pansy
by JACK SIDEBOTHAM
Price Not Specified - Pratt Burnerd multifit chuck key.
by Tim Riome
Price Not Specified - BANDSAW BLADE WELDER
by HUGH
Price Not Specified - More "Wanted" Ads...
Get In Touch!
Do you want to contact the Model Engineer and Model Engineers' Workshop team?
You can contact us by phone, mail or email about the magazines including becoming a contributor, submitting reader's letters or making queries about articles. You can also get in touch about this website, advertising or other general issues.
Click THIS LINK for full contact details.
For subscription issues please see THIS LINK.
Digital Back Issues


Donate

 Register
 Log-in
Model Engineer Magazine
- Percival Marshall
- M.E. History
- LittleLEC
- M.E. Clock

ME Workshop
- An Adcock
- & Shipley
- Horizontal
- Mill

Subscribe Now
- Great savings
- Delivered to your door

Pre-order your copy!
- Delivered to your doorstep!
- Free UK delivery!
All Forum Topics > Work In Progress and completed items > Brian's Horizontal Stirling Engine